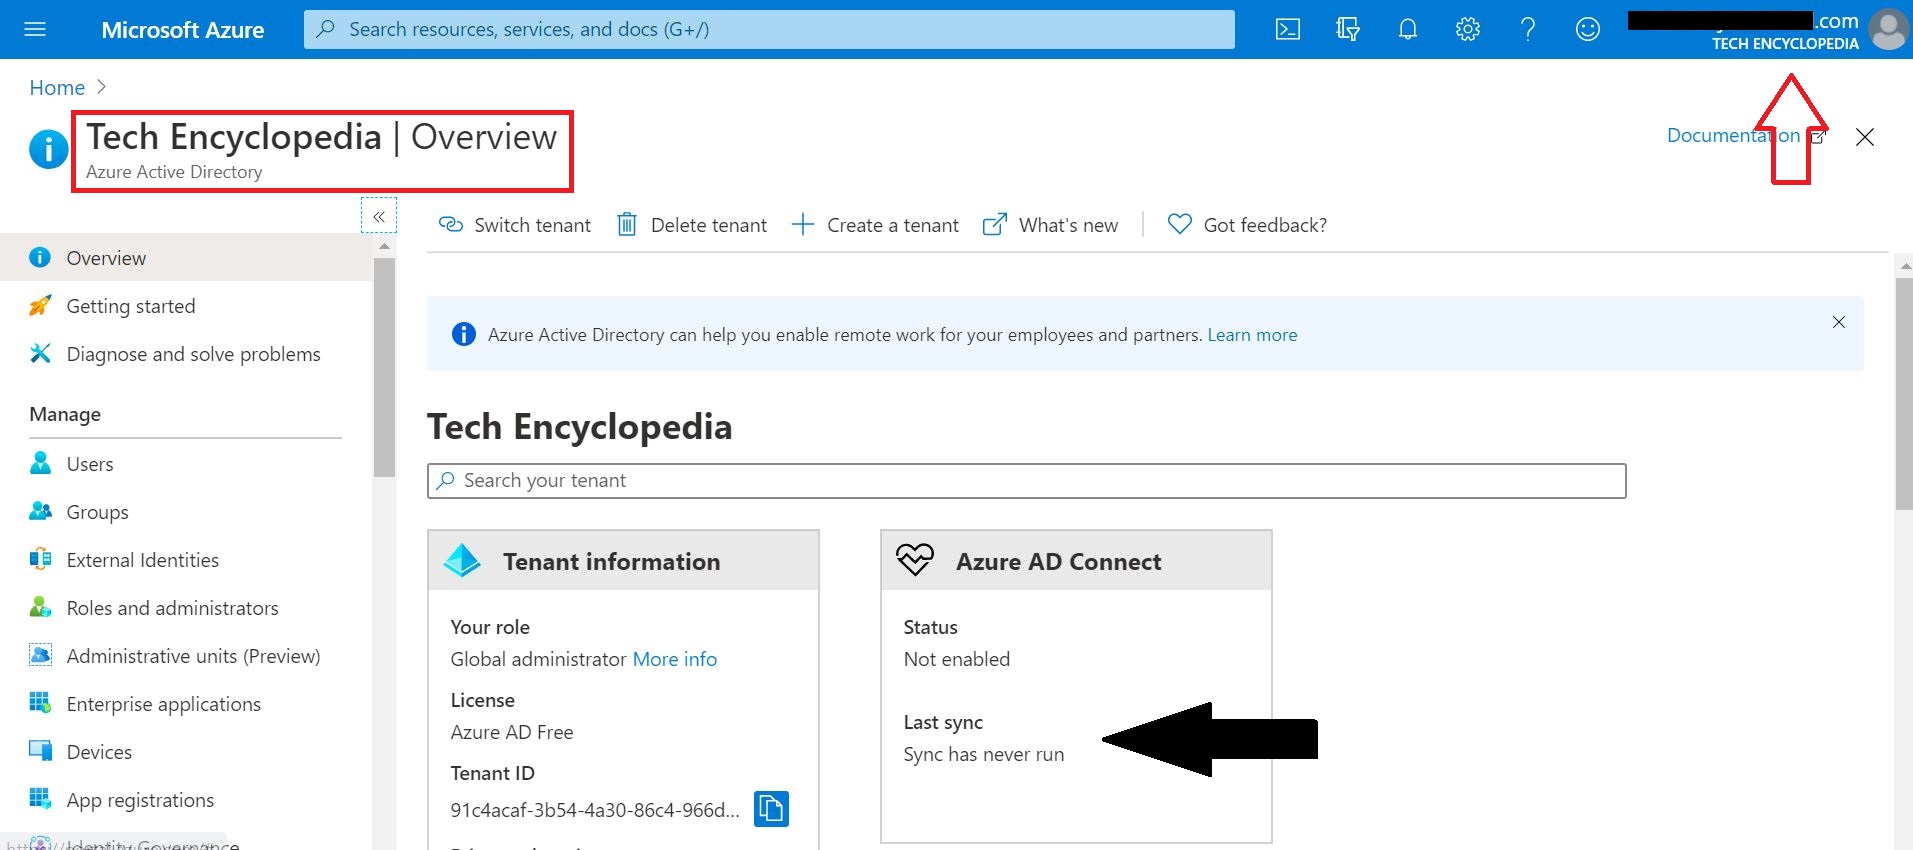
This tutorial depicts how to migrate emails from G Suite, Gmail app to office 365. In this scenario, ‘G Suite migration’ is used which allows to migrate contacts, calendars information along with emails. And it allows to migrate batches of users and can be executed in stages.
TEST ENVIRONMENT
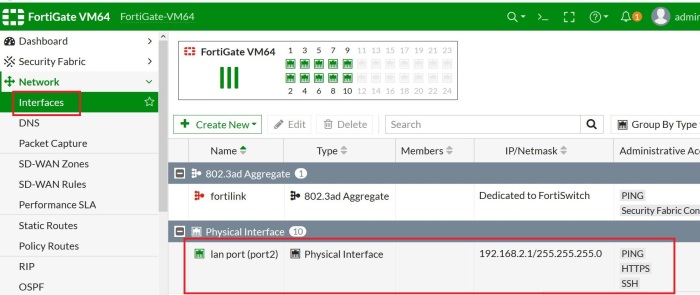
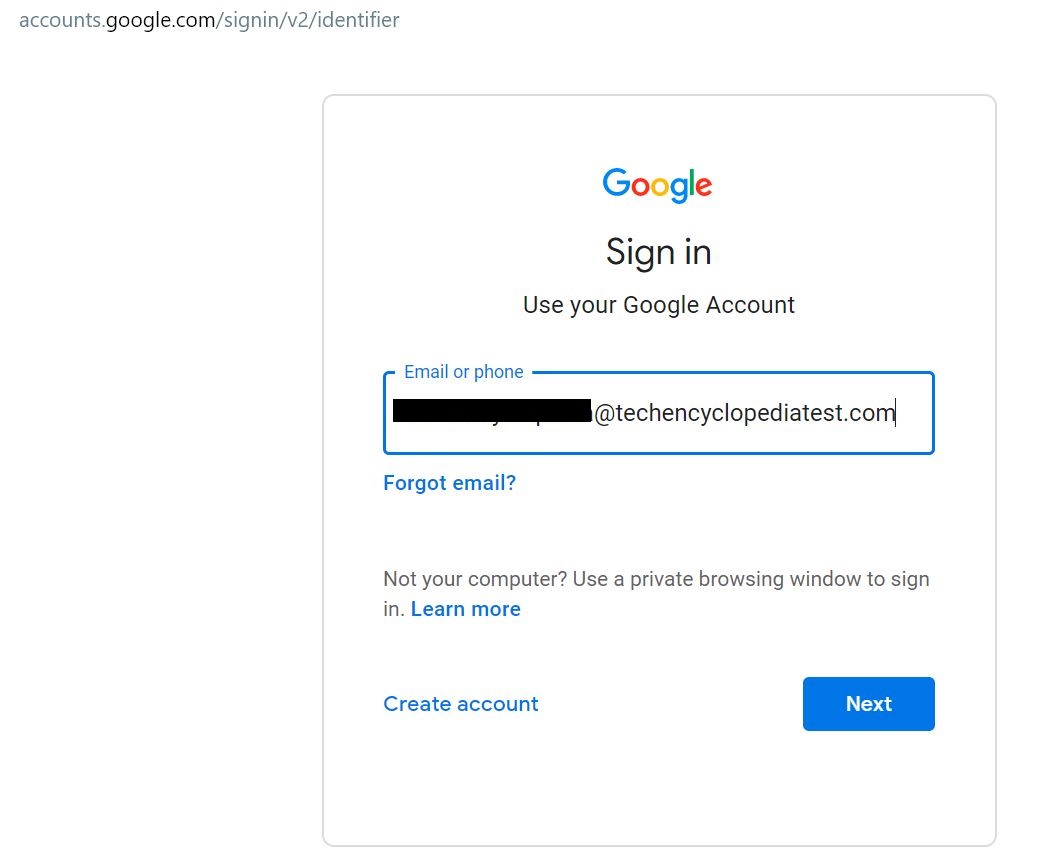
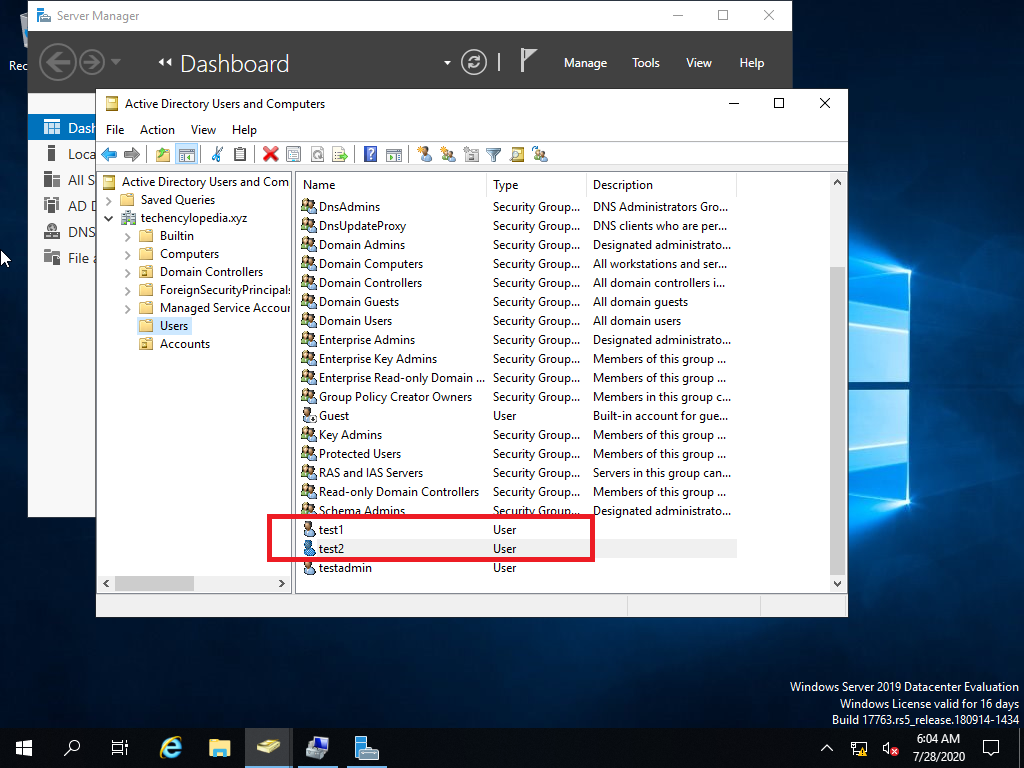
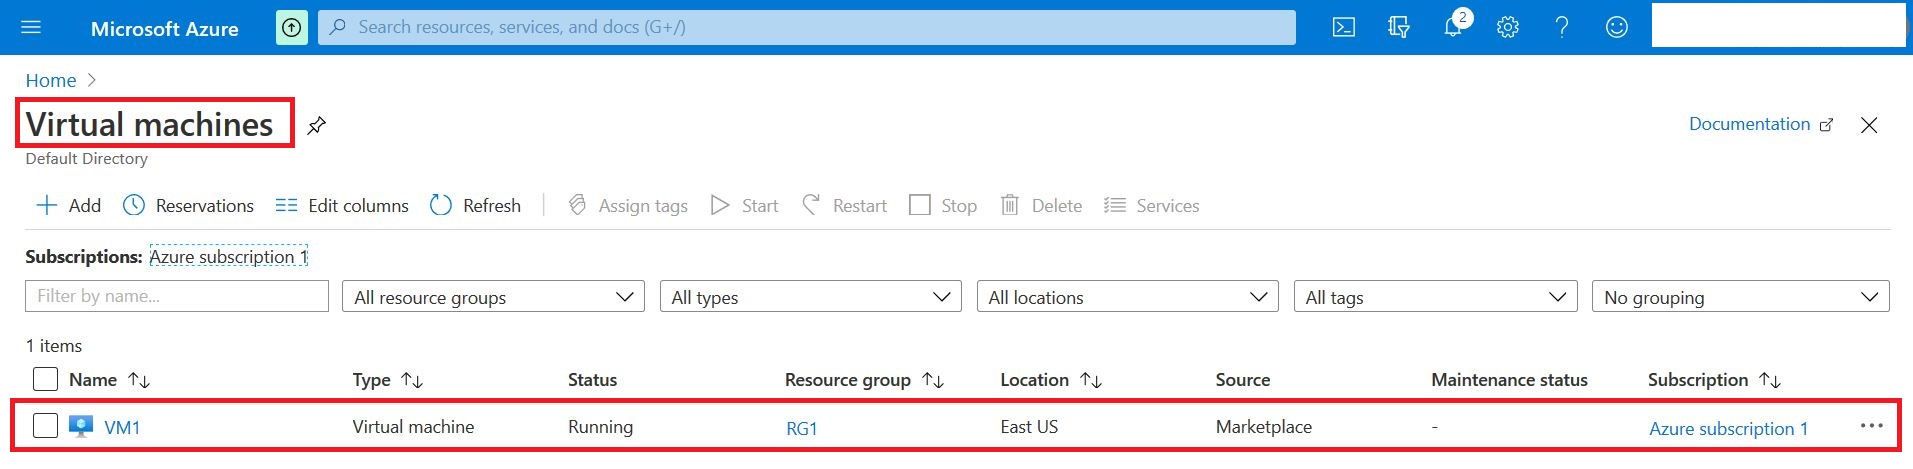
Test Gmail email account is created in G Suite with emails for migration
INTRODUCTION
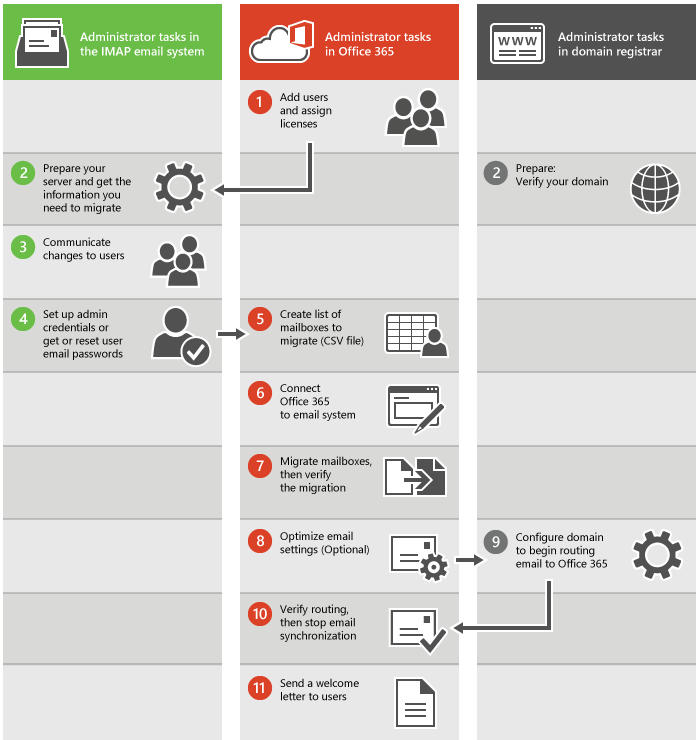
IMAP migration vs G Suite migration
IMAP migration
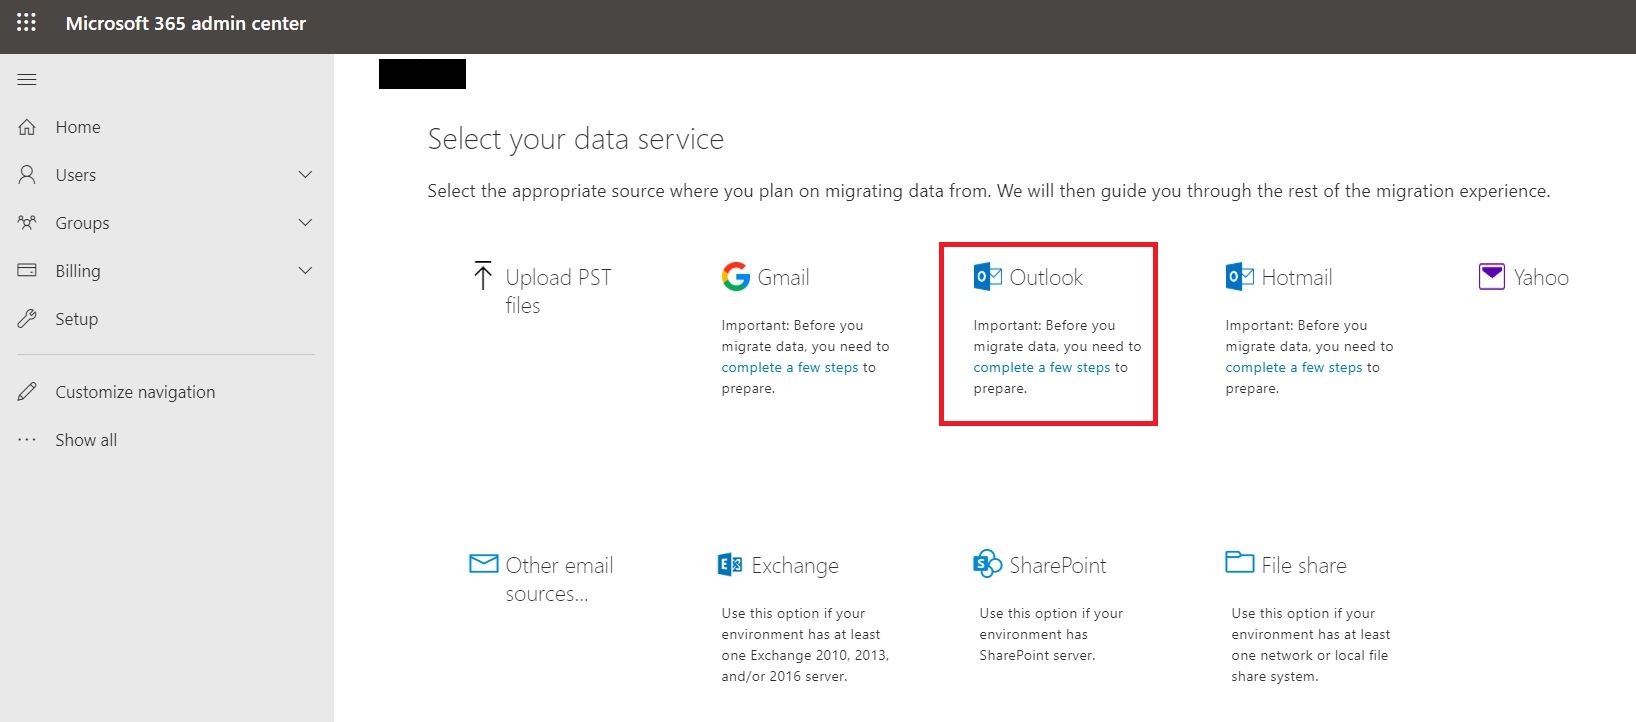
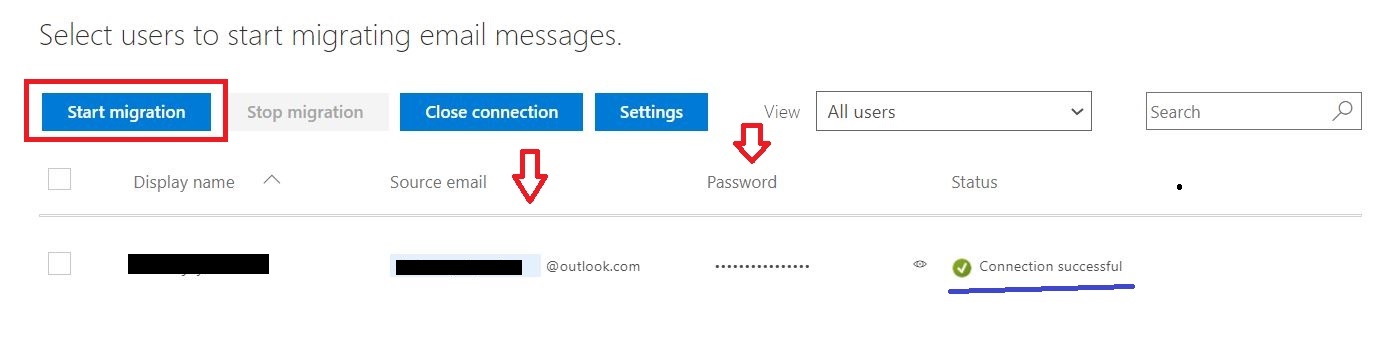
Migration from G Suite mailboxes using the Microsoft 365 admin center. You can use the setup wizard in the Microsoft 365 admin center for an IMAP migration. IMPORTANT: IMAP migration will only migrate emails, not calendar and contact information.
Link: IMAP migration in the Microsoft 365 admin center
Link: Migrate consumer G Suite mailboxes to Microsoft 365 or Office 365
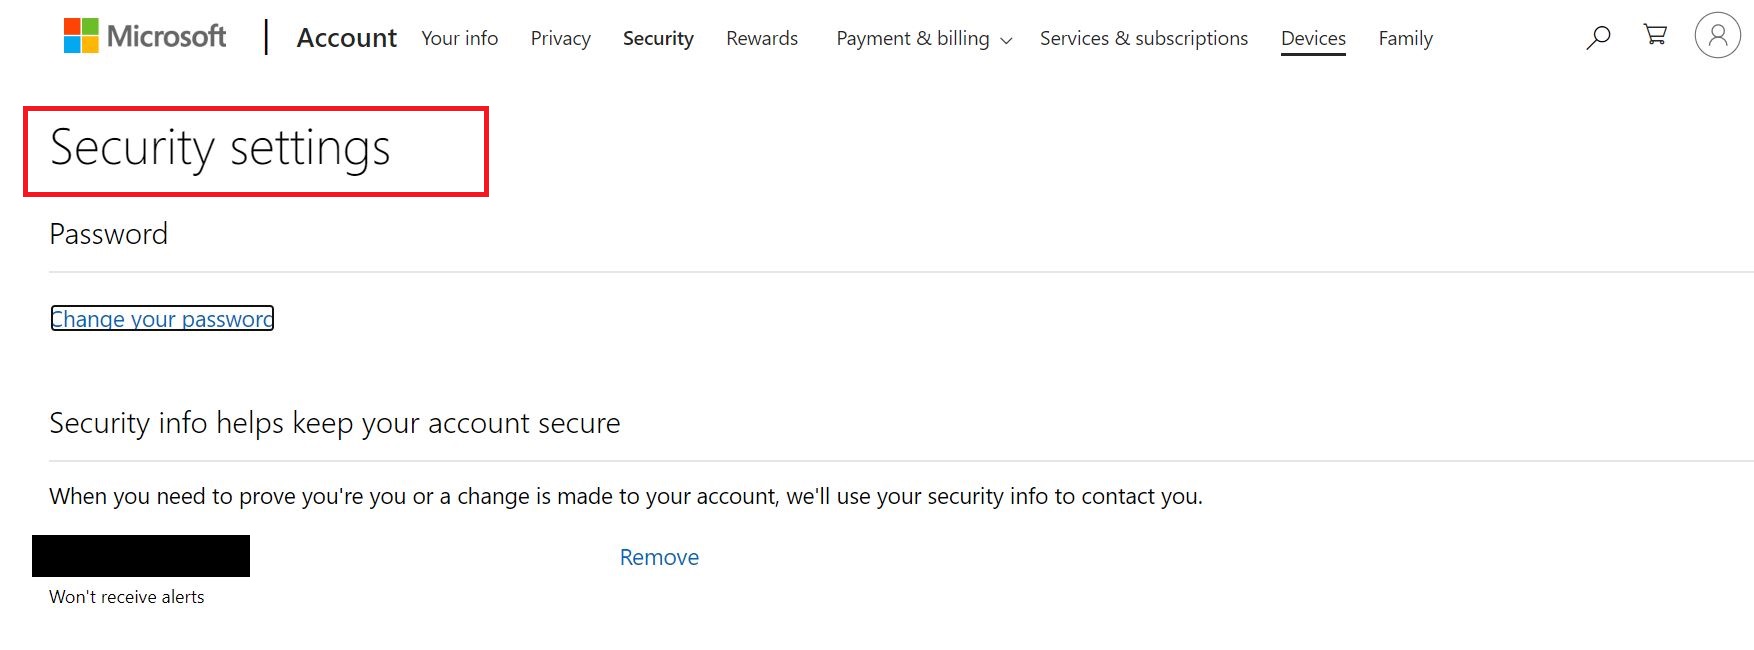
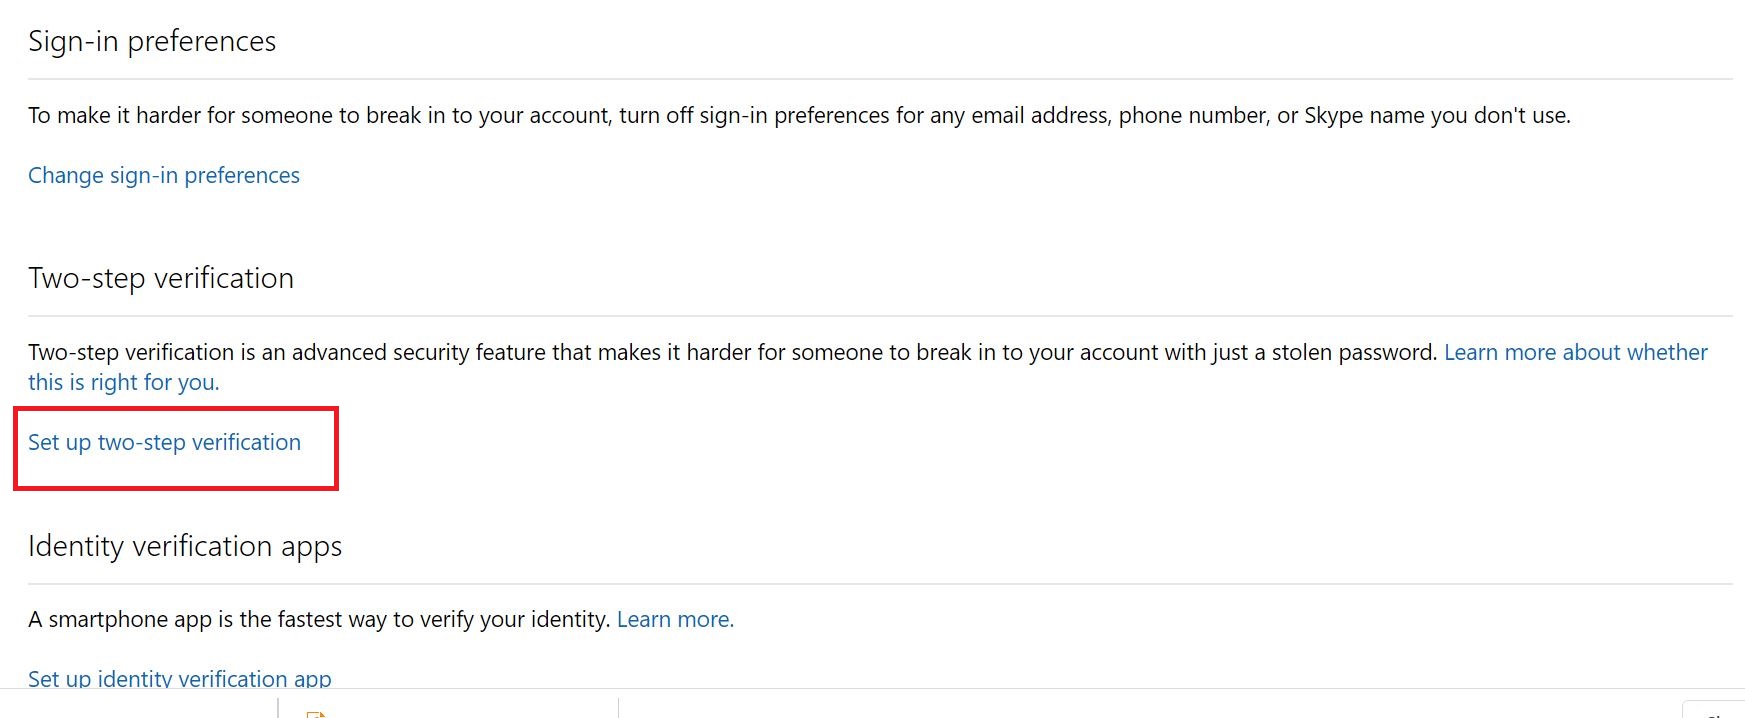
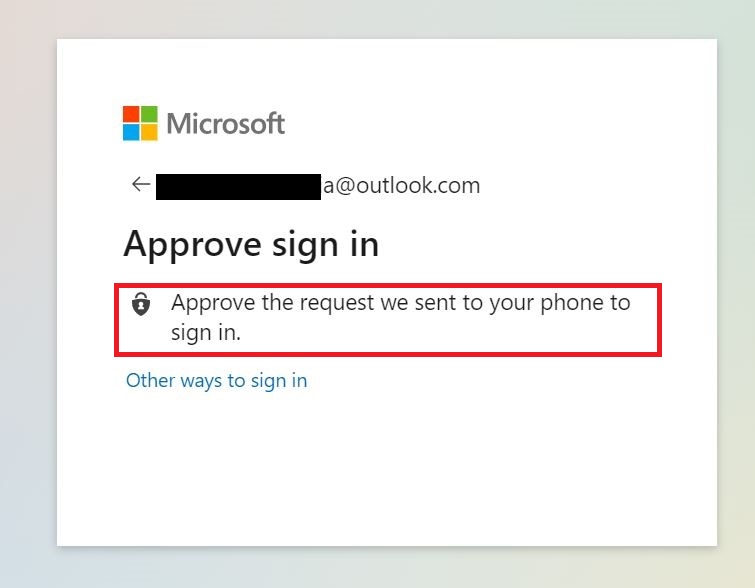
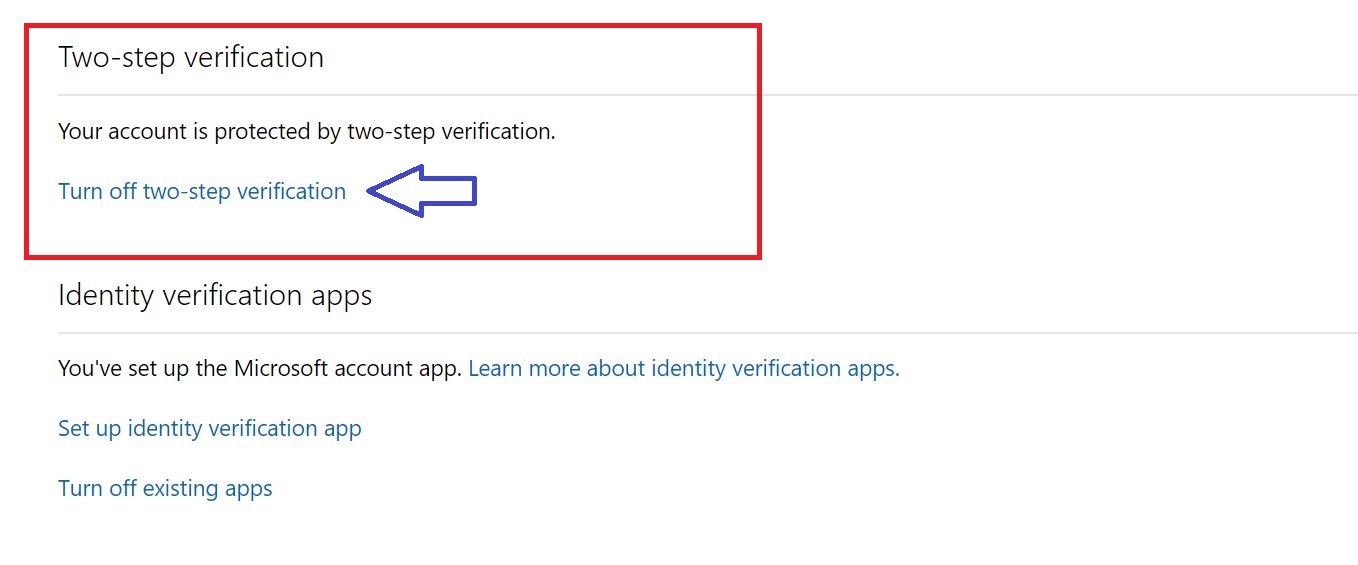
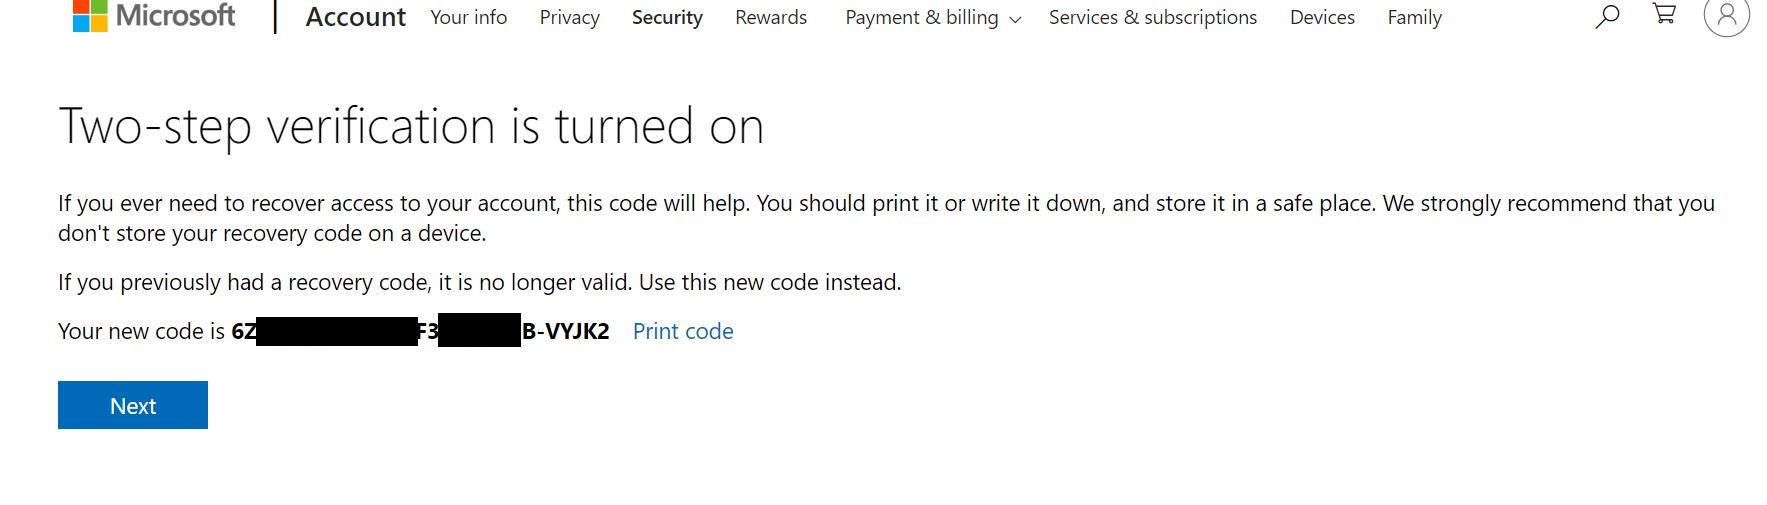
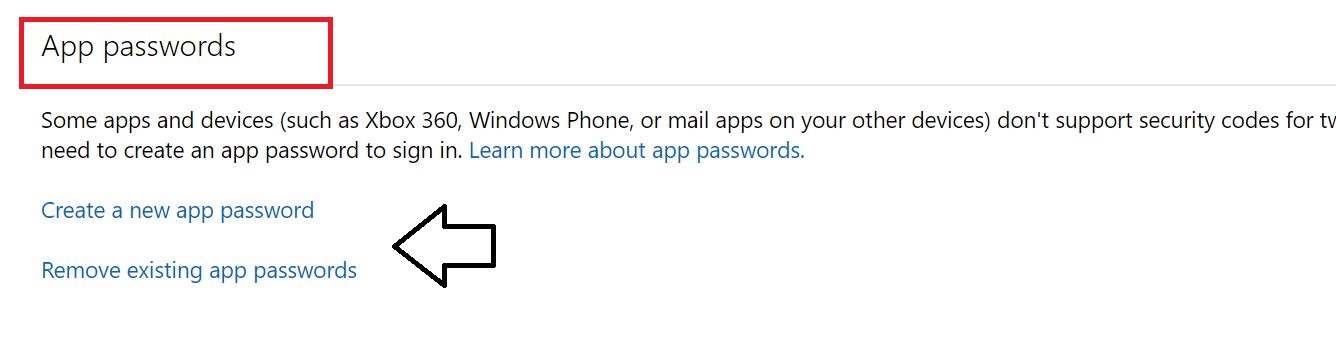
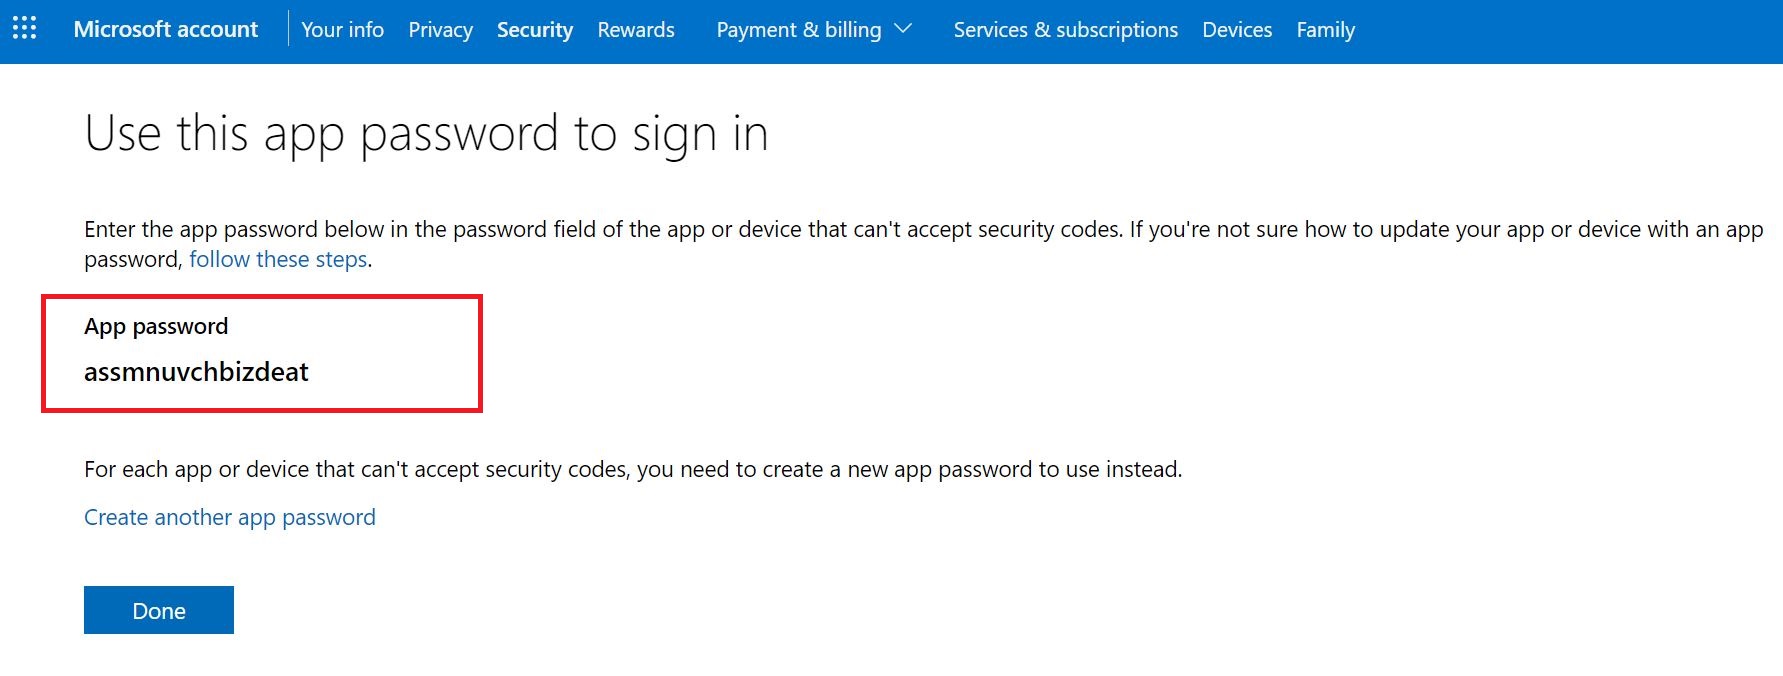
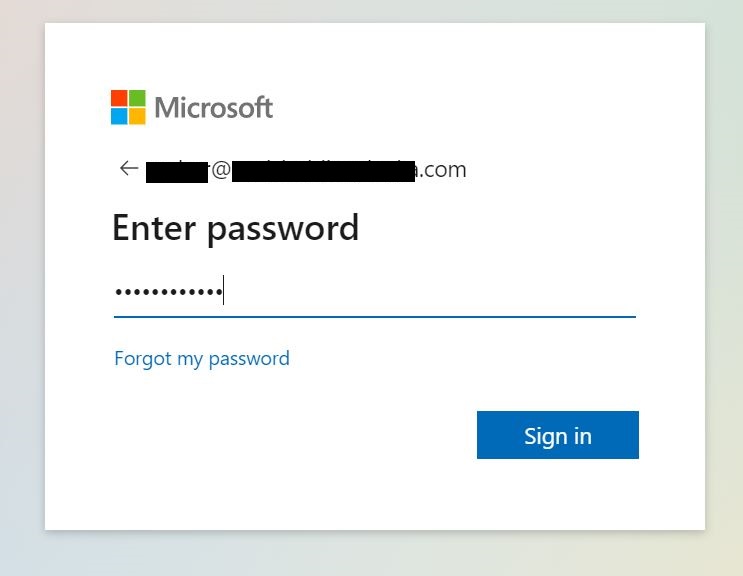
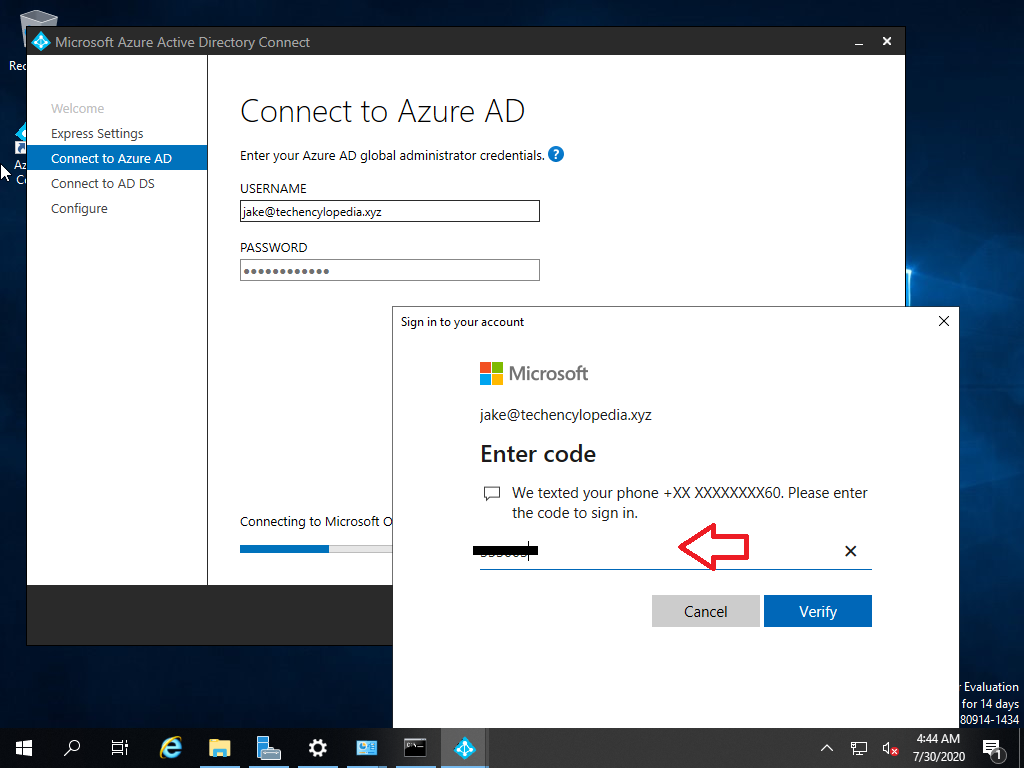
Before Microsoft 365 or Office 365 can connect to Gmail or G Suites, all account owners must create an app password to access their account. This is because Google considers Outlook to be a less secure app and will not allow a connection to it with a password alone.
Link: Prepare your Gmail or G Suite account for connecting to Outlook and Microsoft 365 or Office 365.
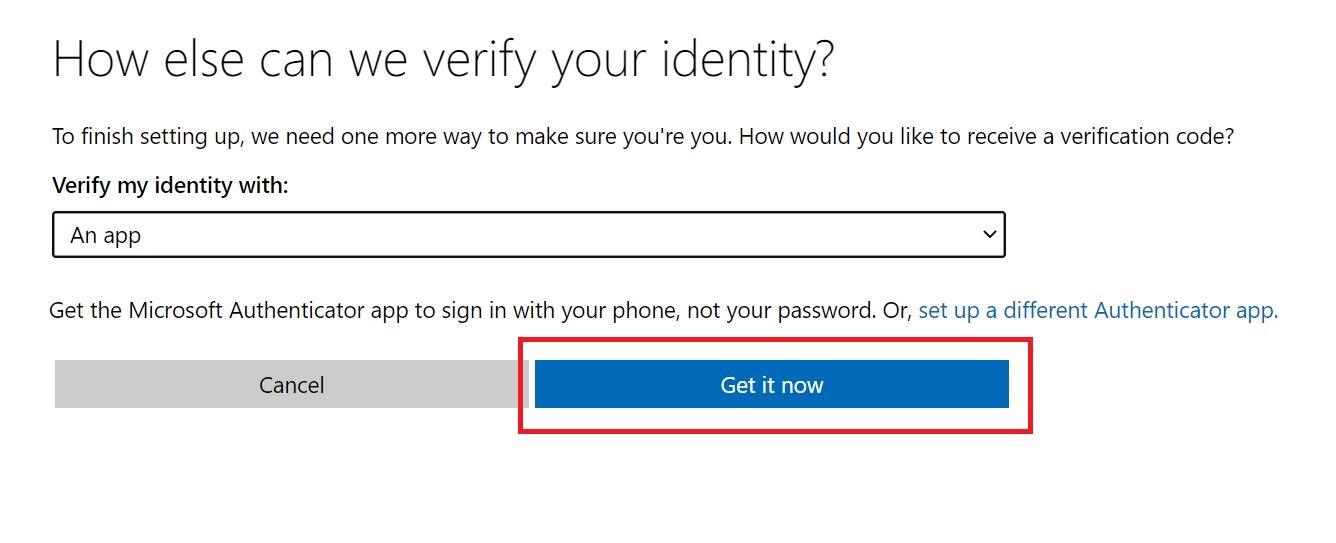
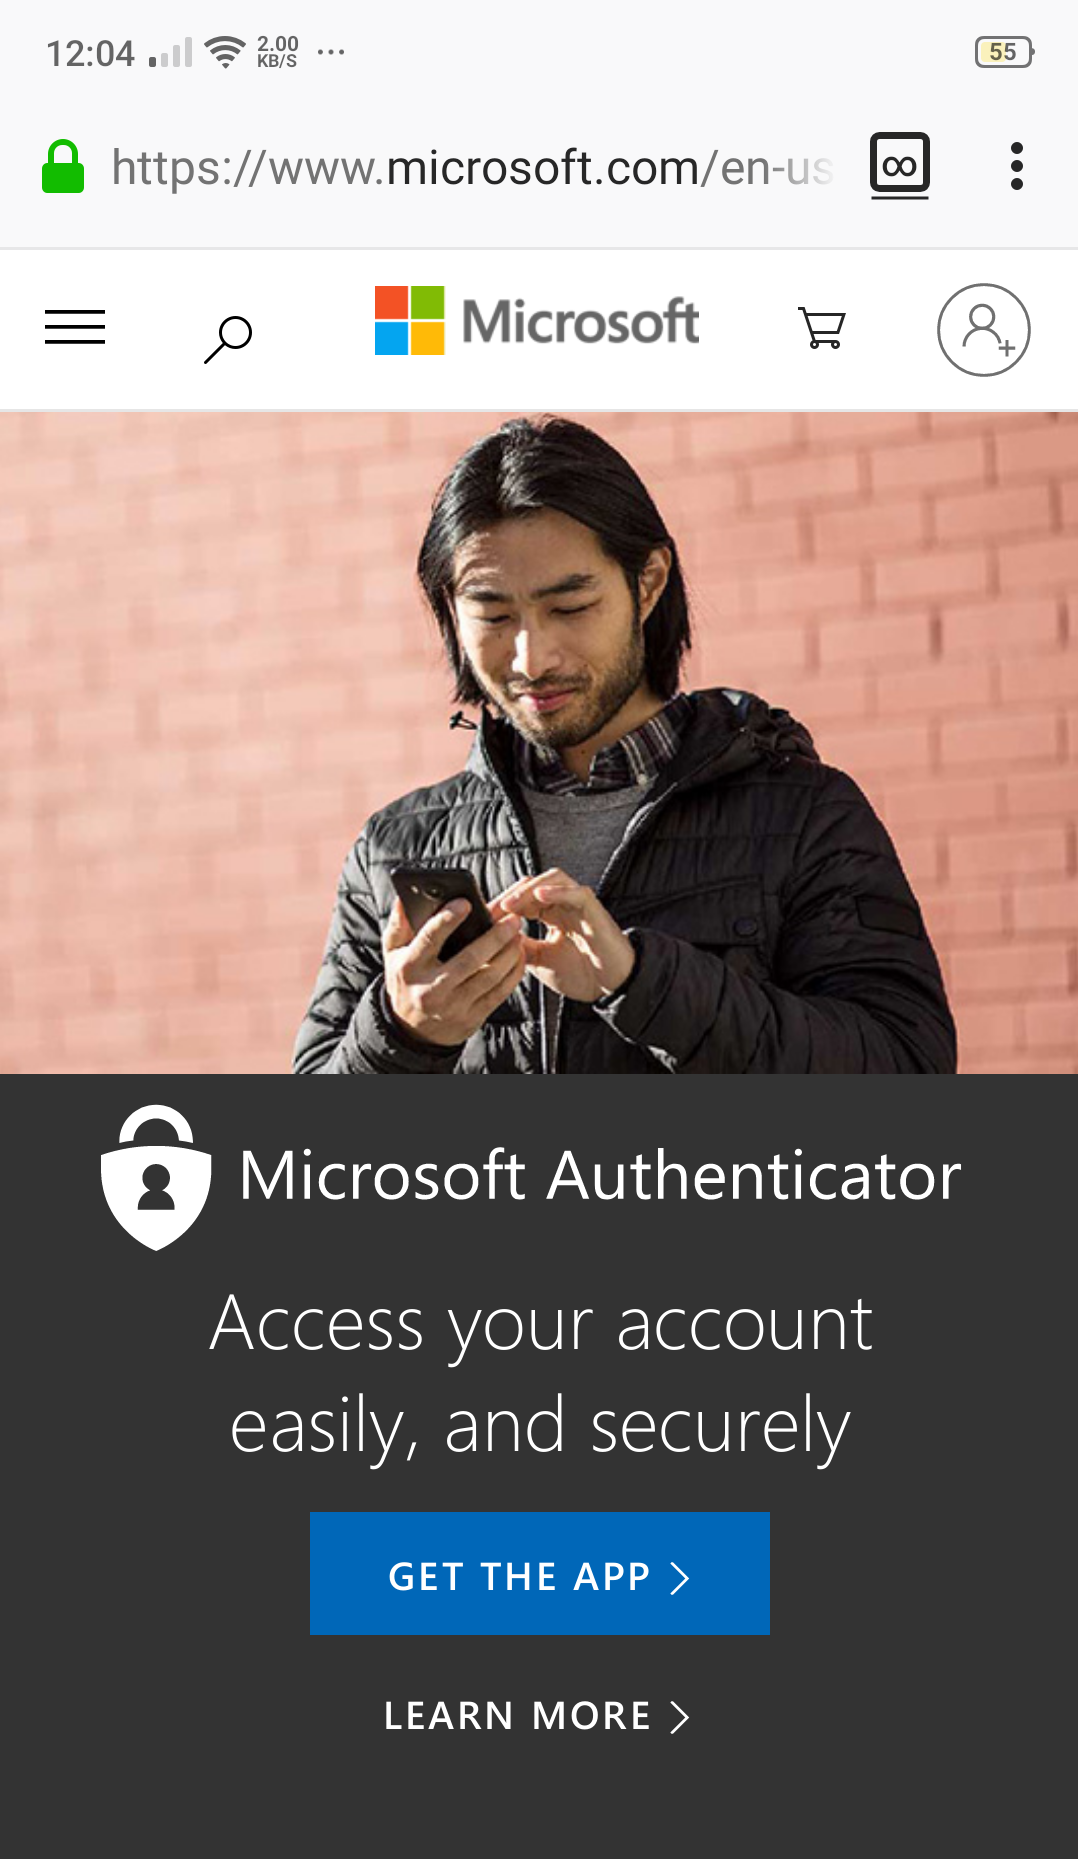
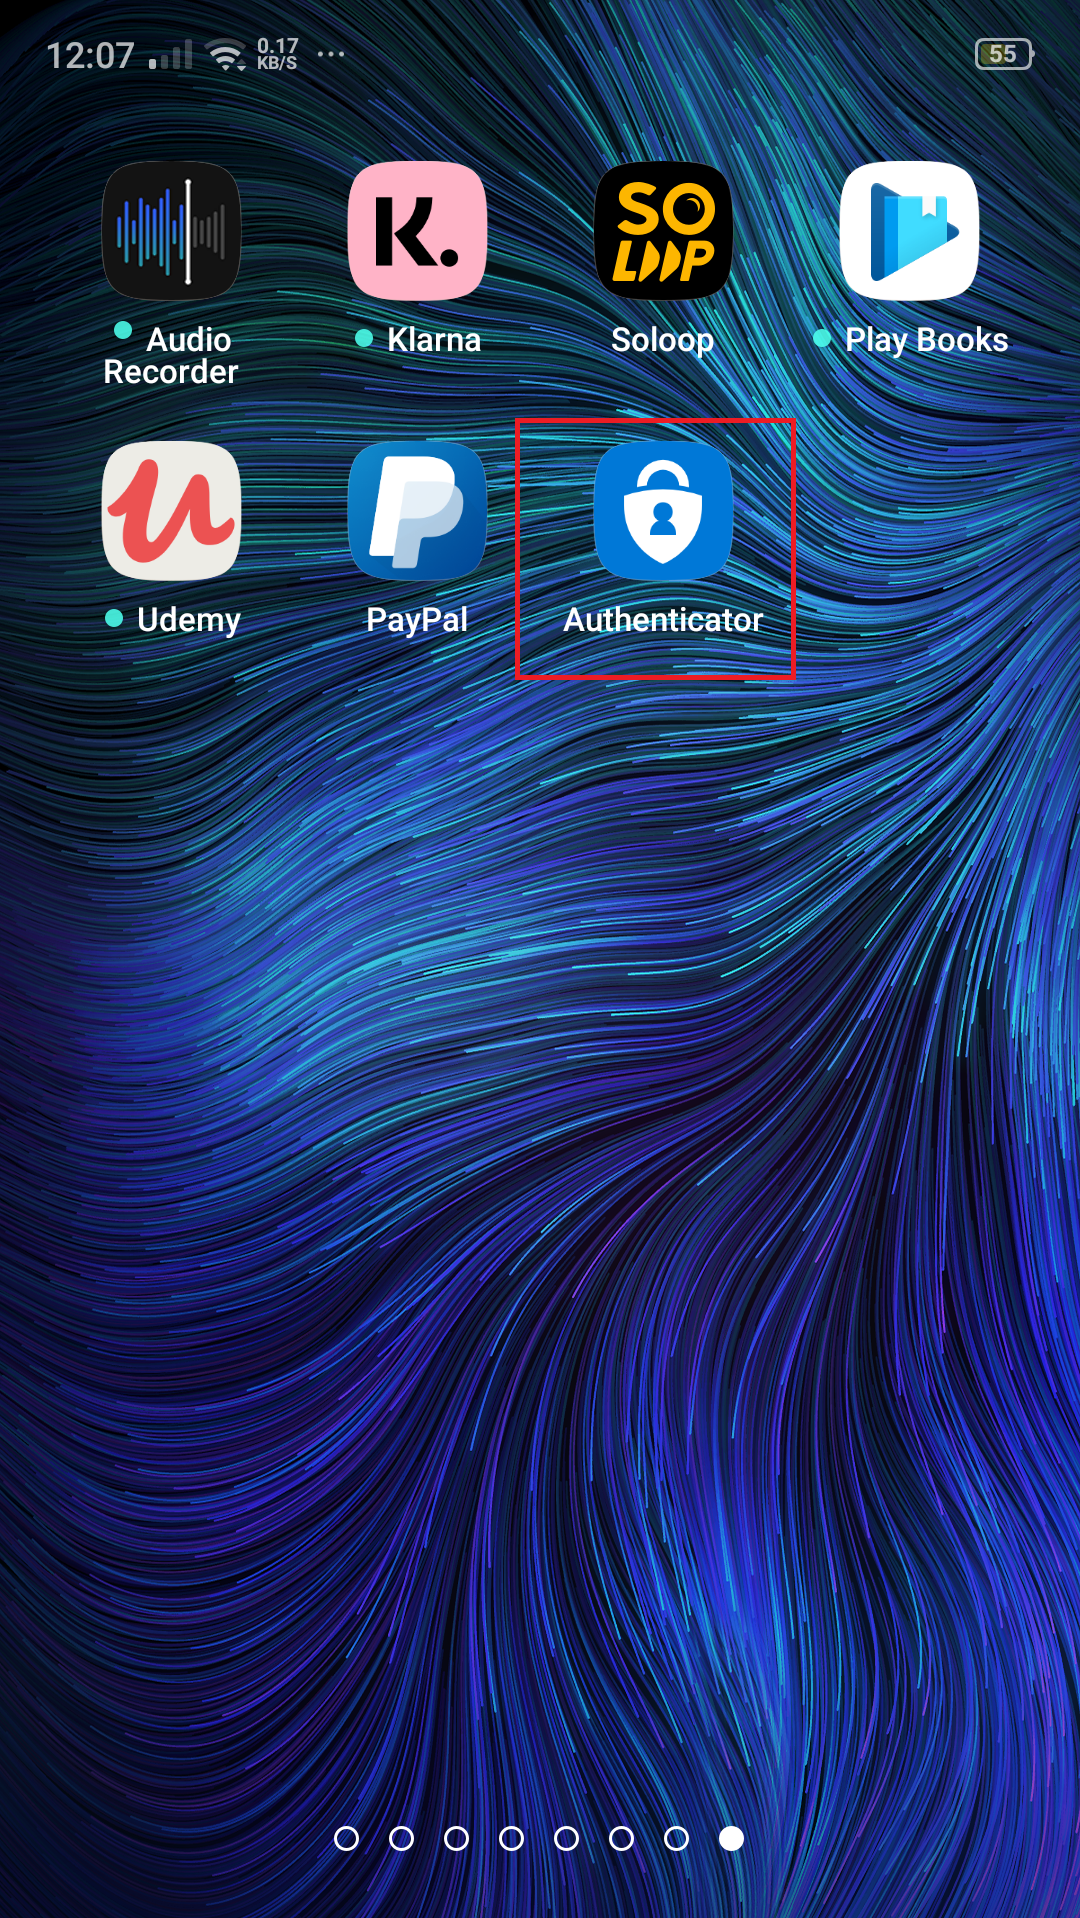
Link: Enable 2-step verification for your Google apps users
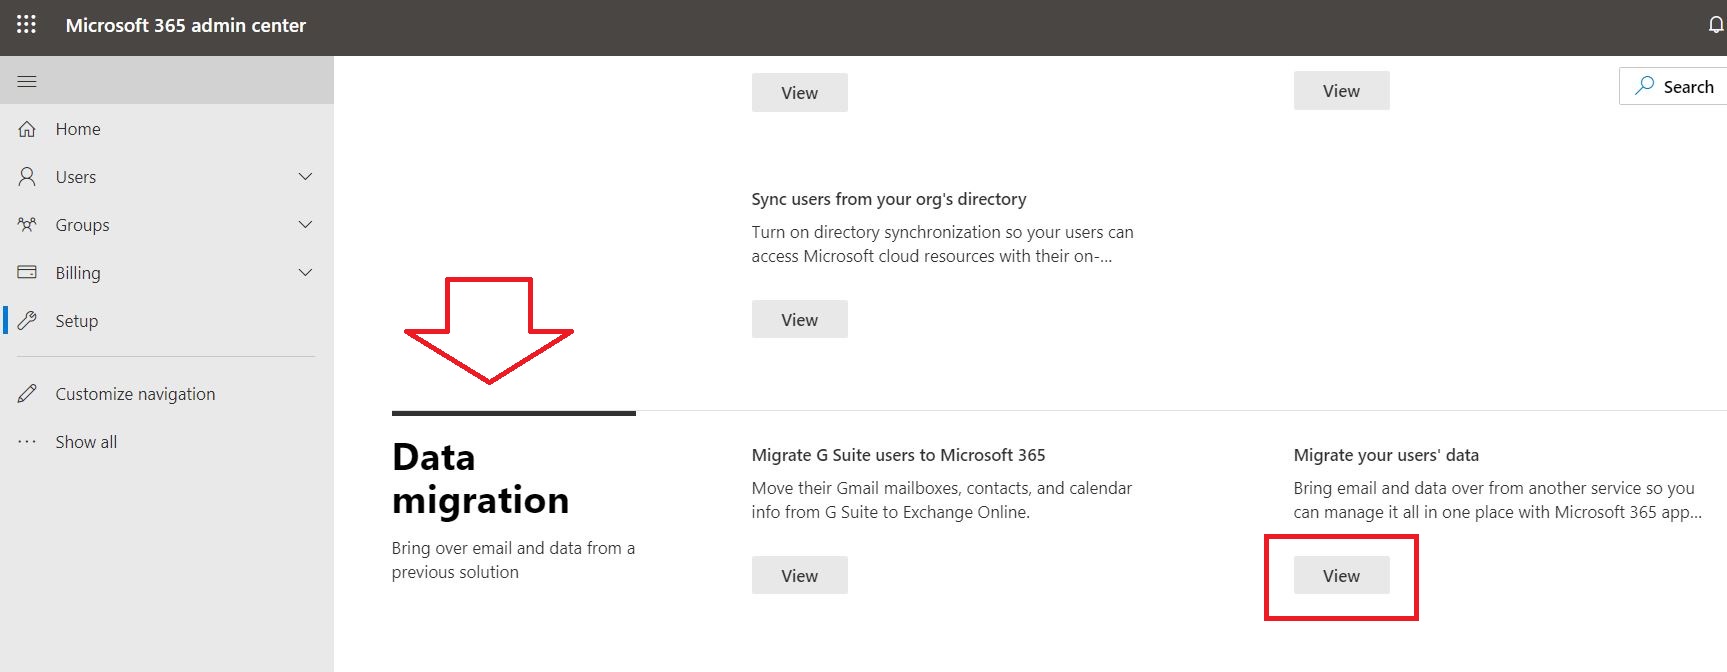
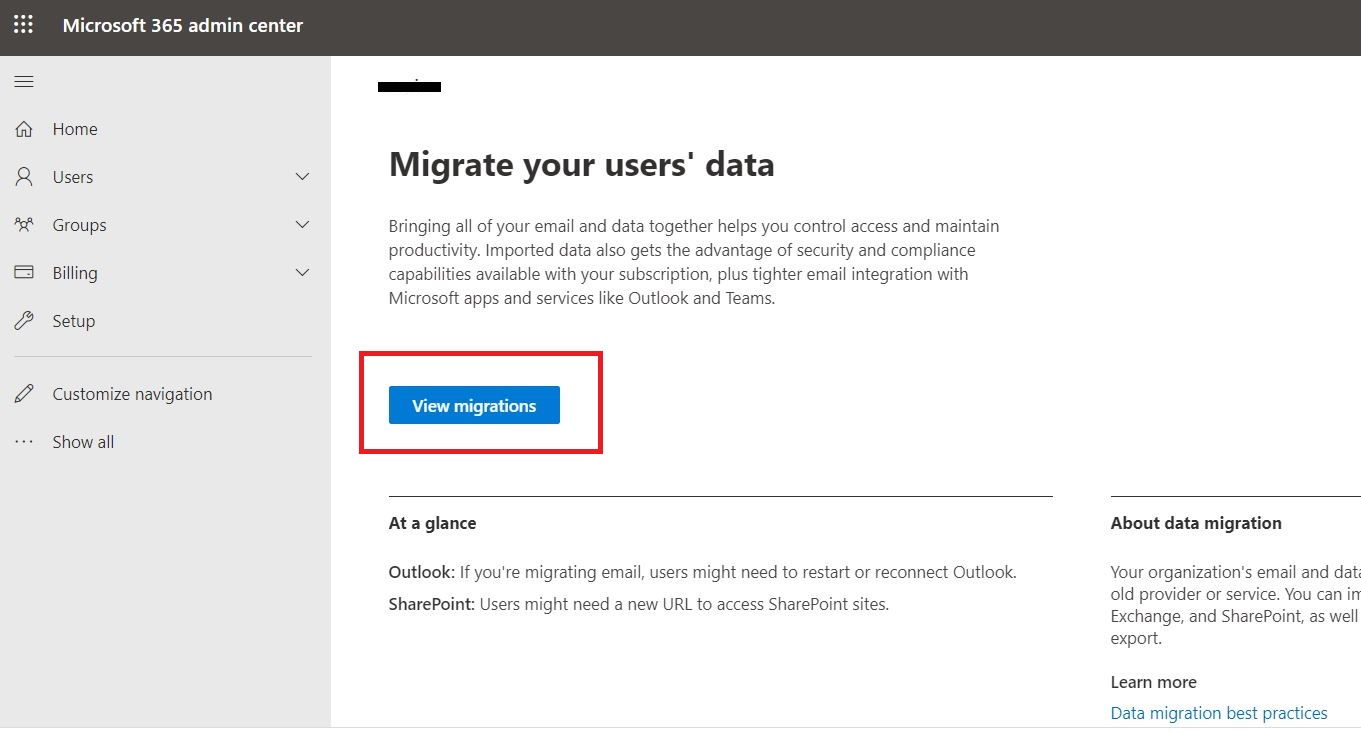
G Suite migration (In this tutorial)
For organizations and enterprises interested in migrating G Suite content, including calendar and contacts information in addition to mailbox data. You can migrate batches of users from G Suite to Microsoft 365 or Office 365, allowing a migration project to be done in stages.
Link: Overview of the process
Link: Perform a G Suite migration
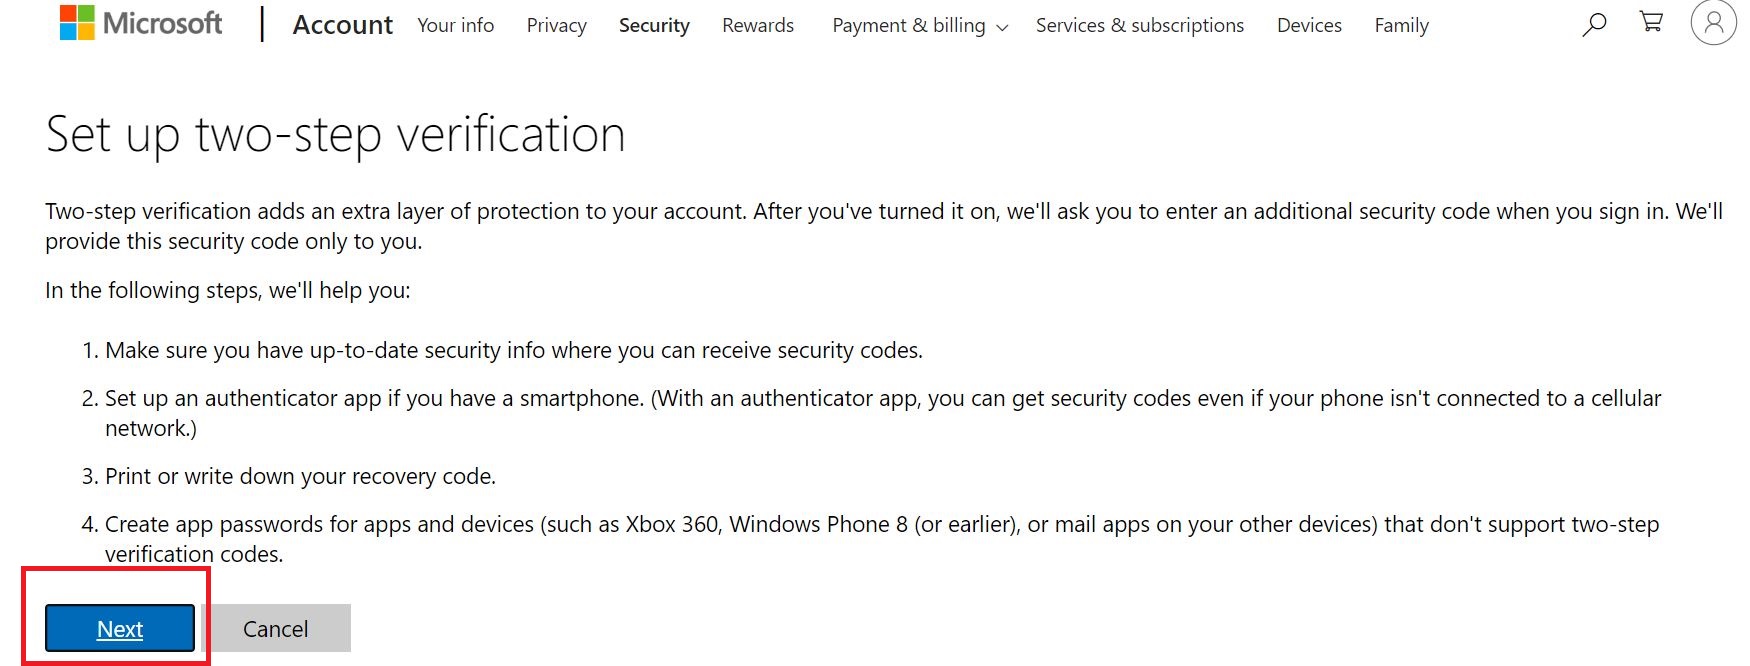
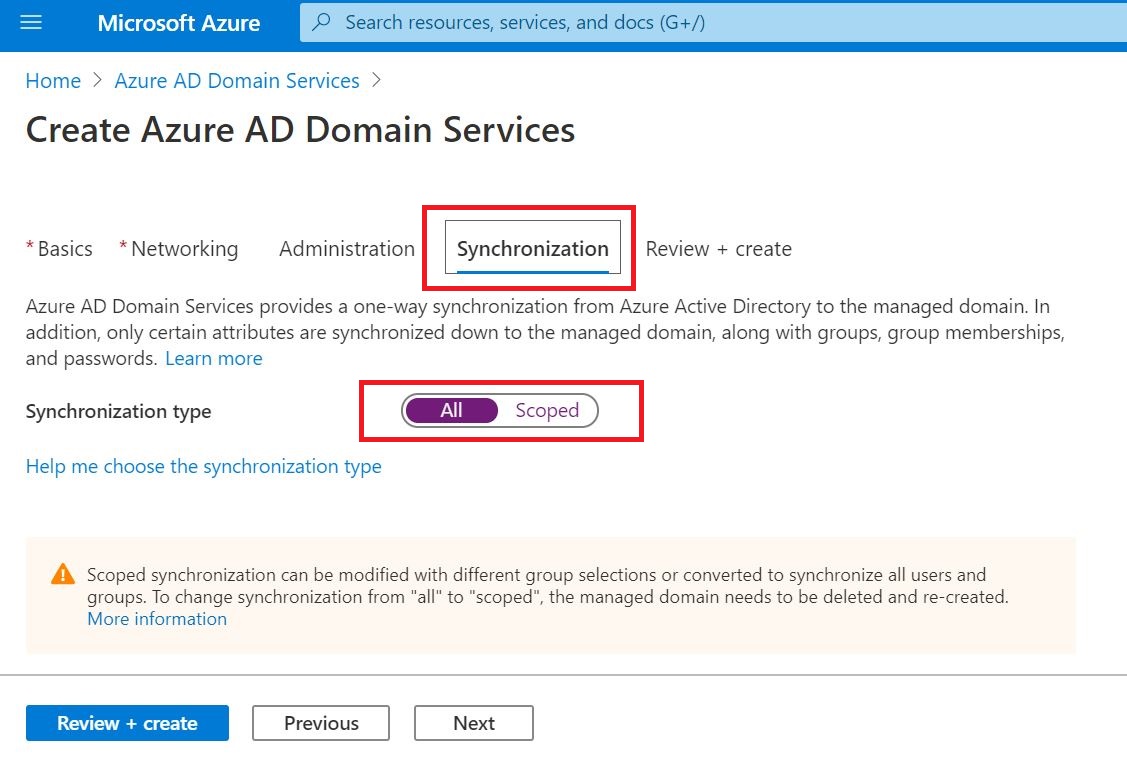
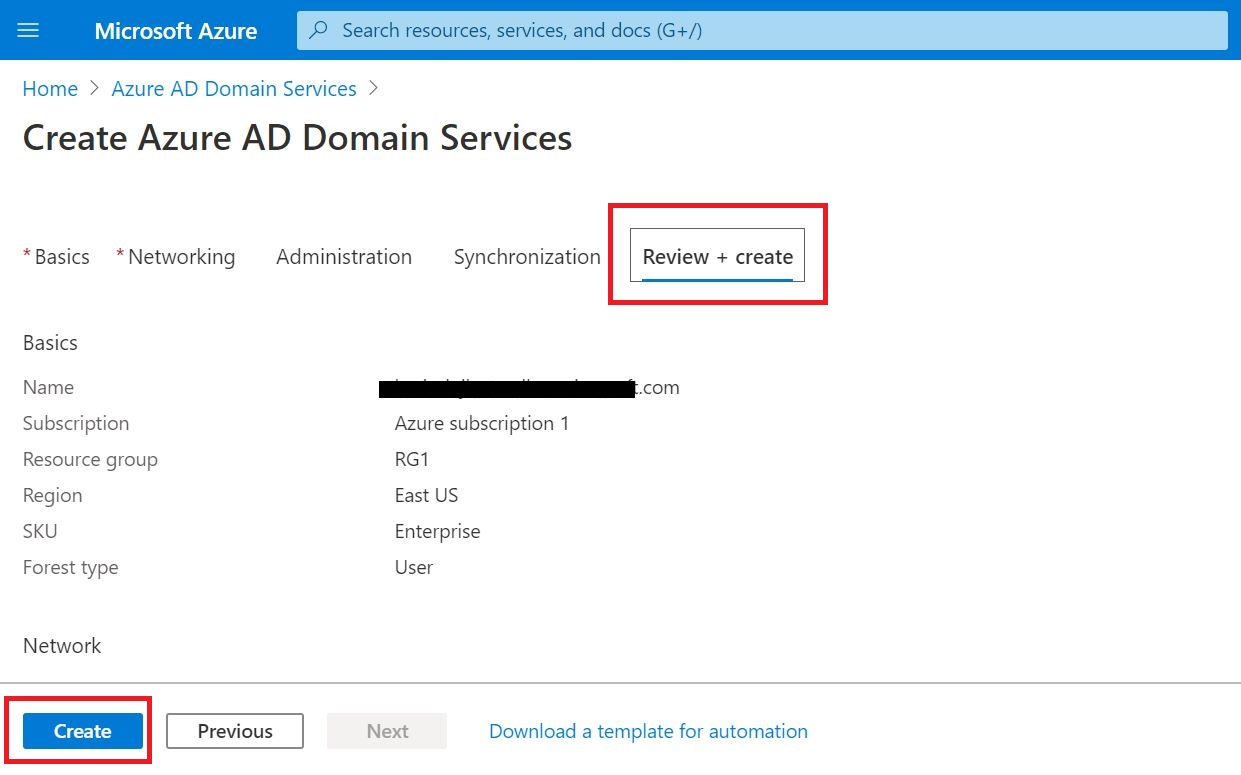
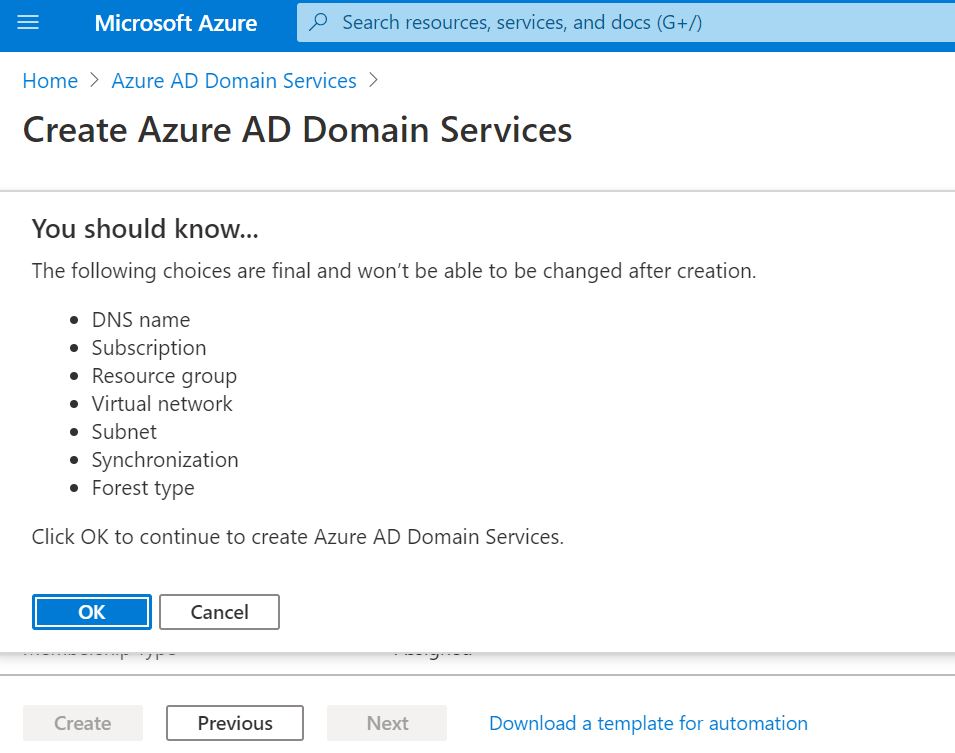
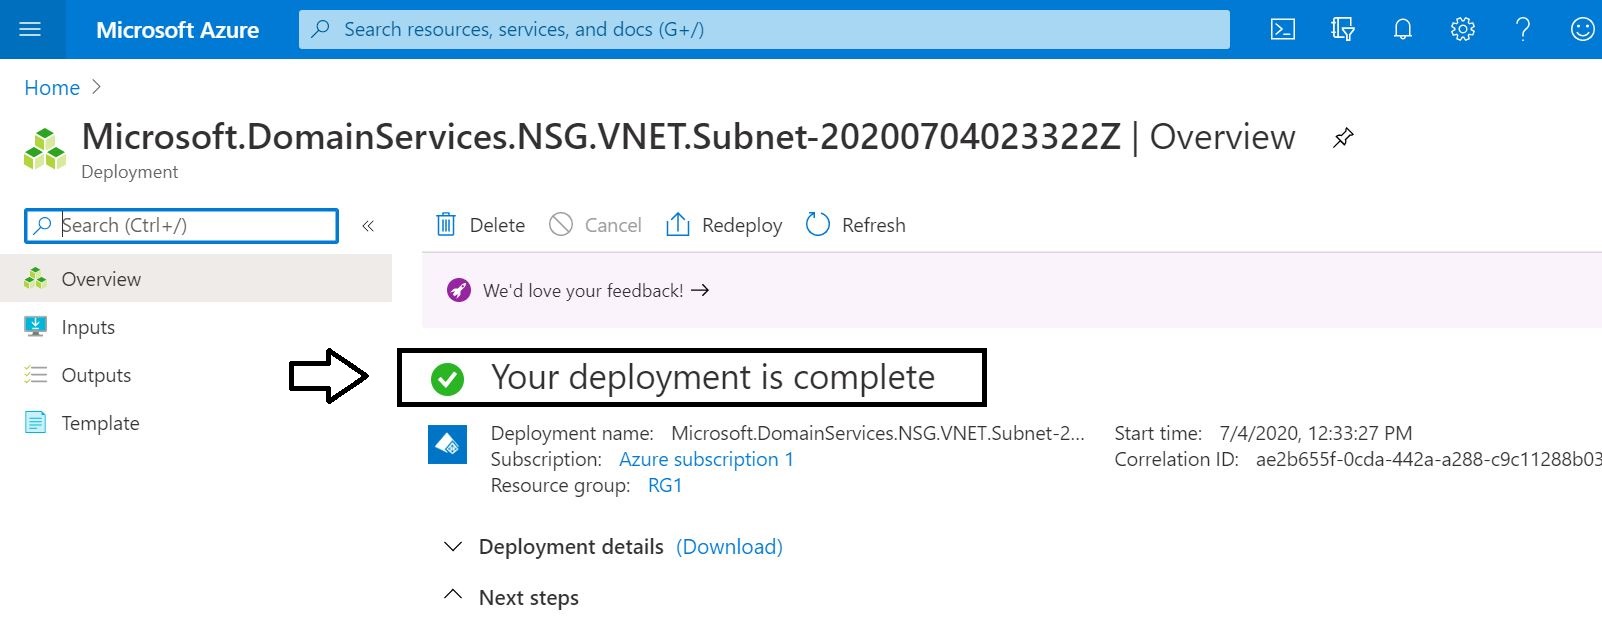
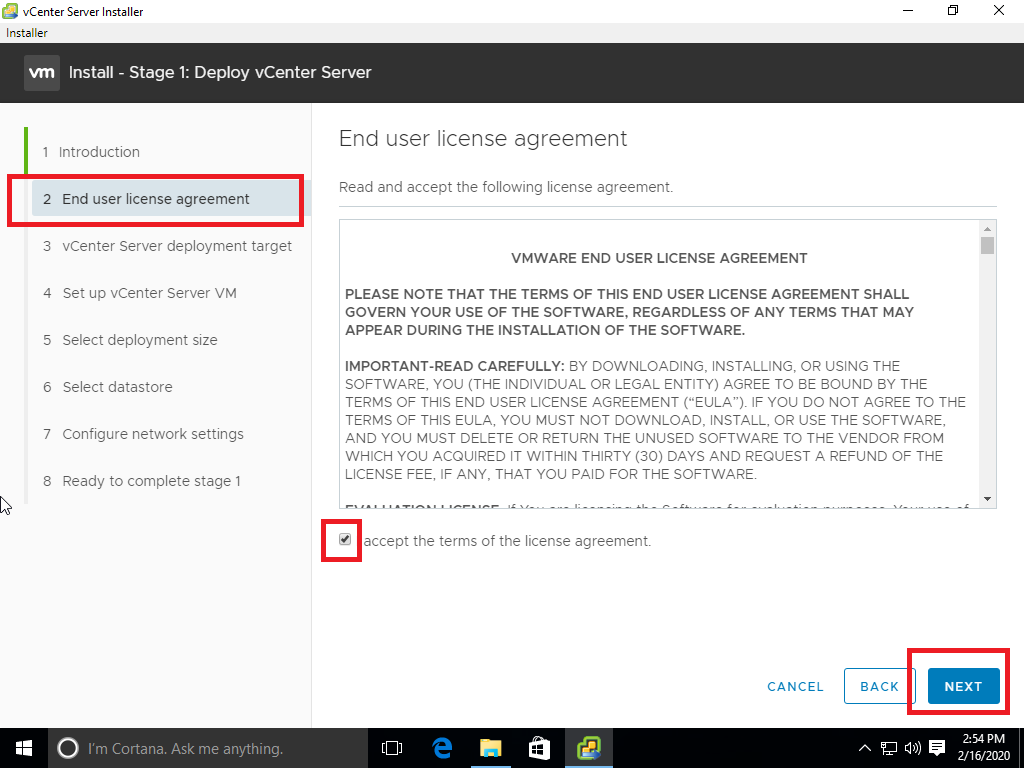
KEEP IN MIND
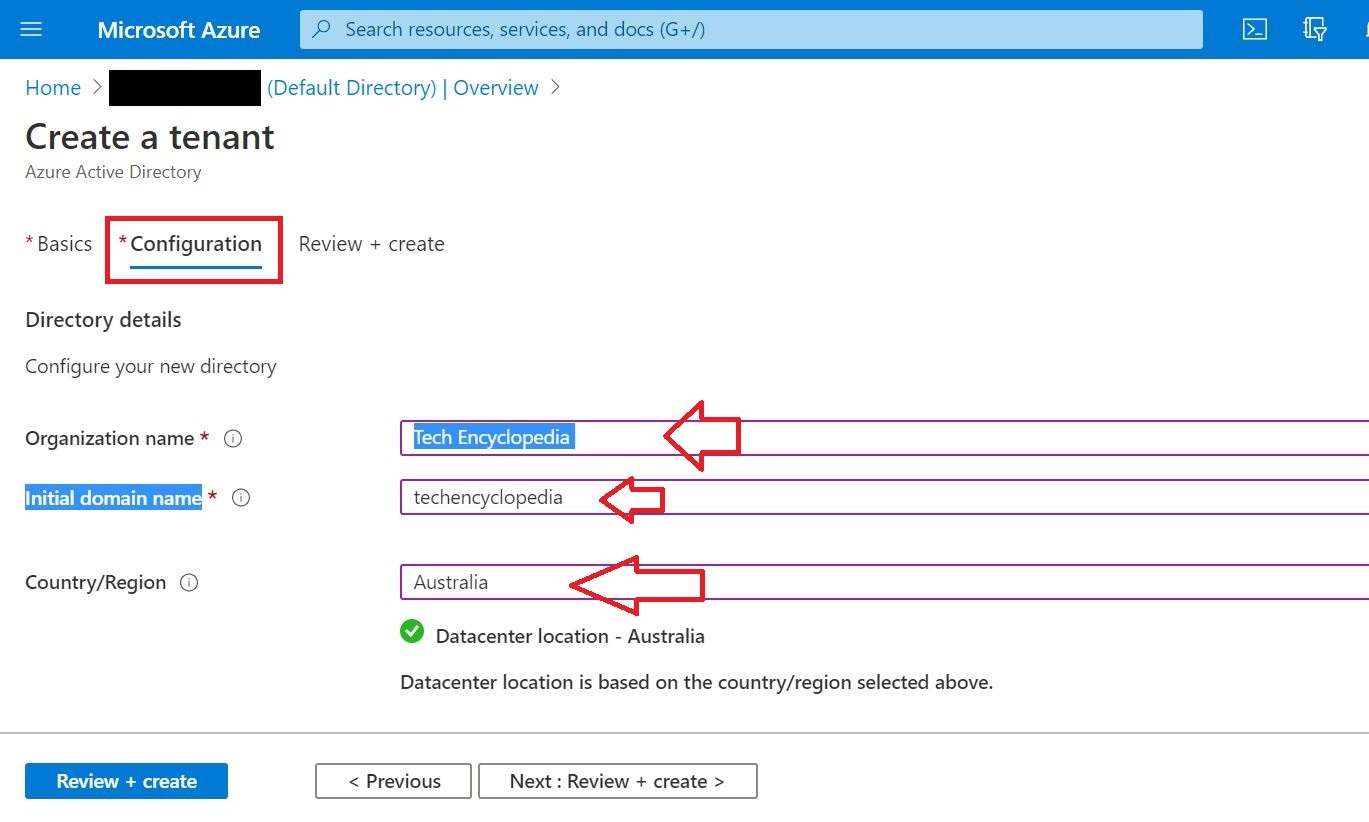
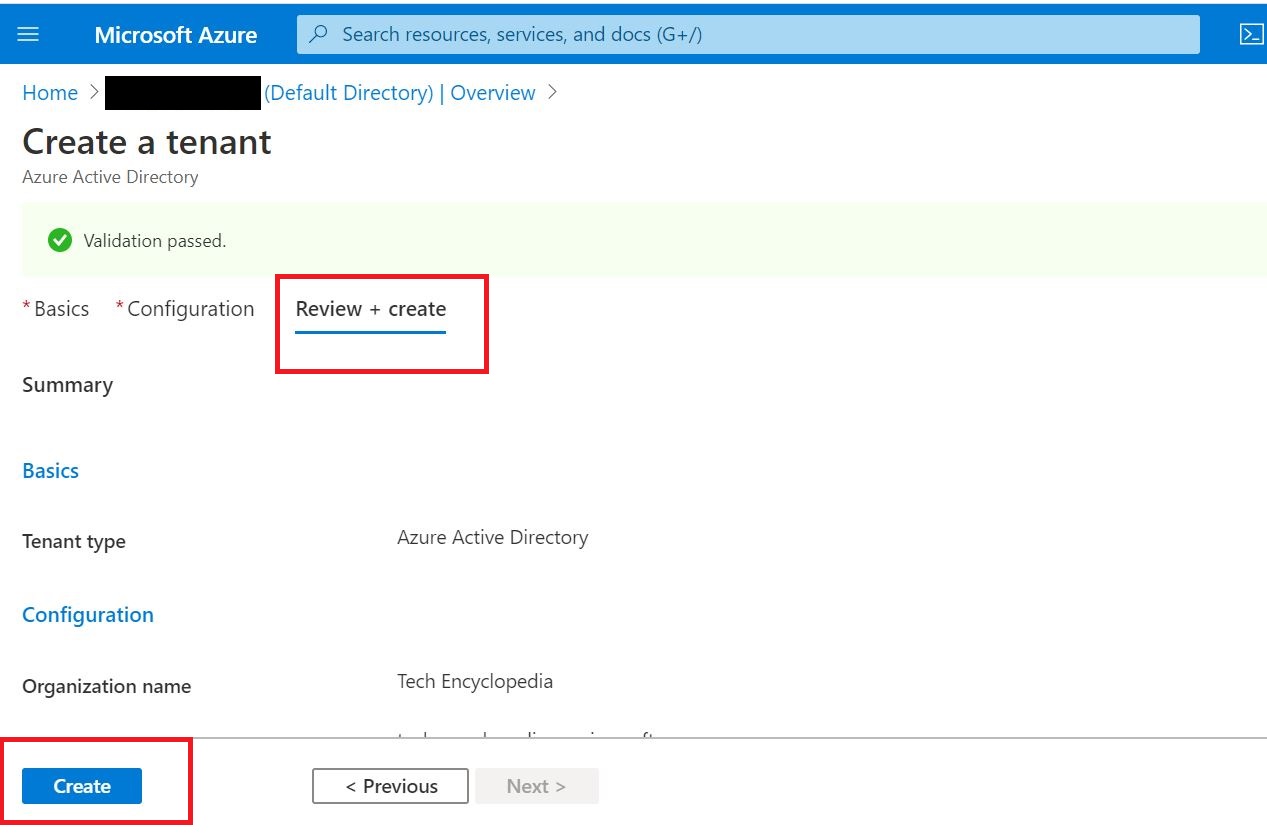
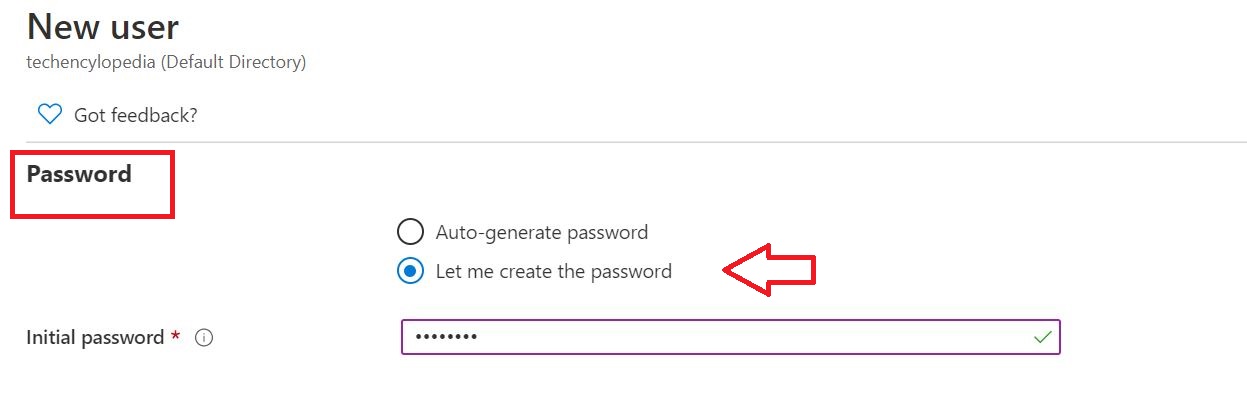
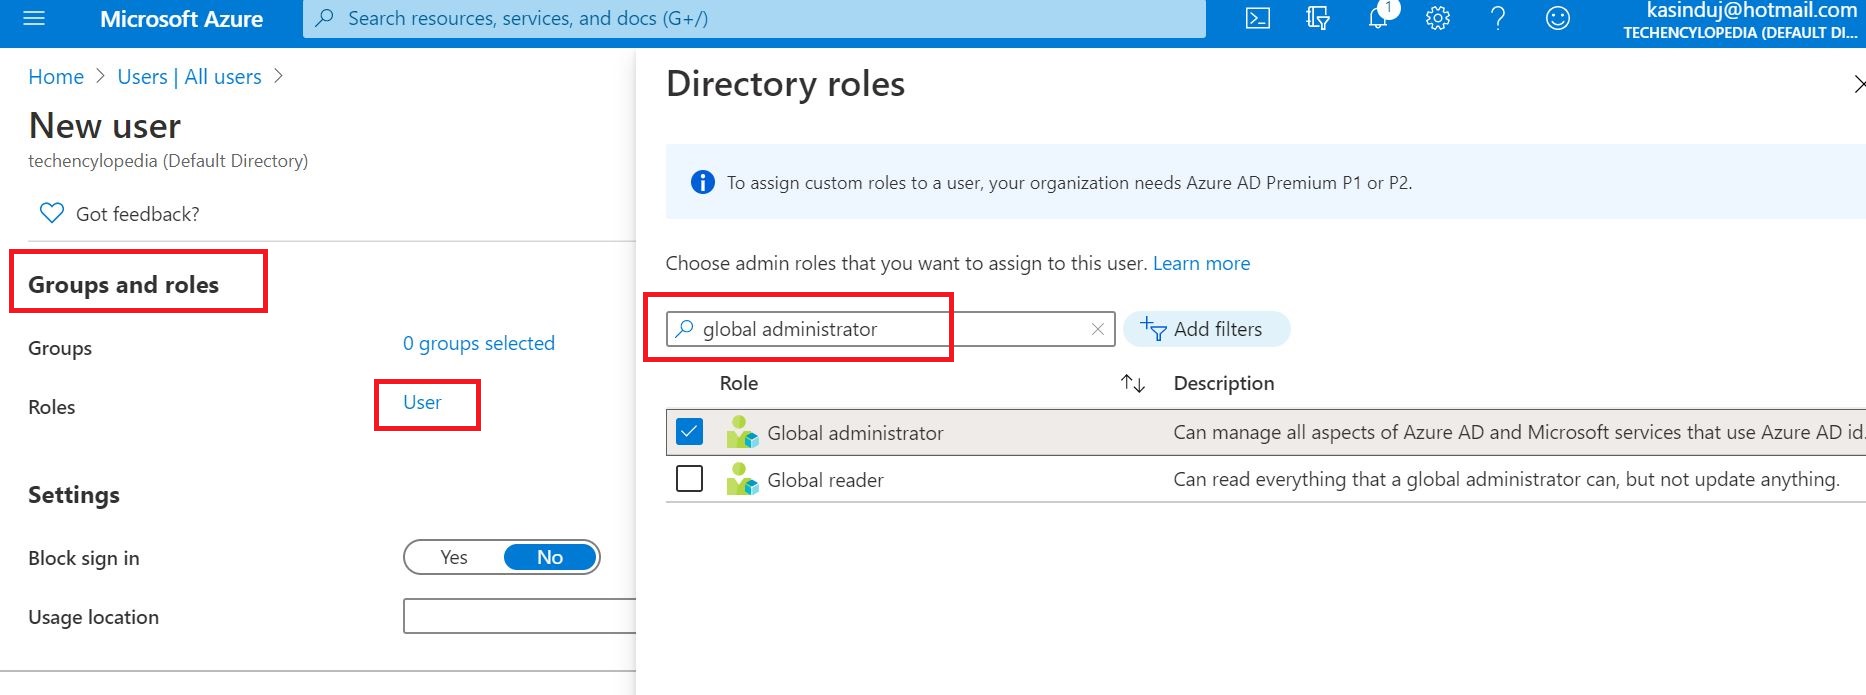
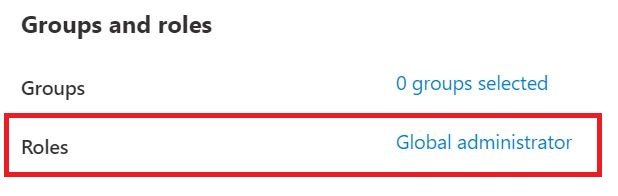
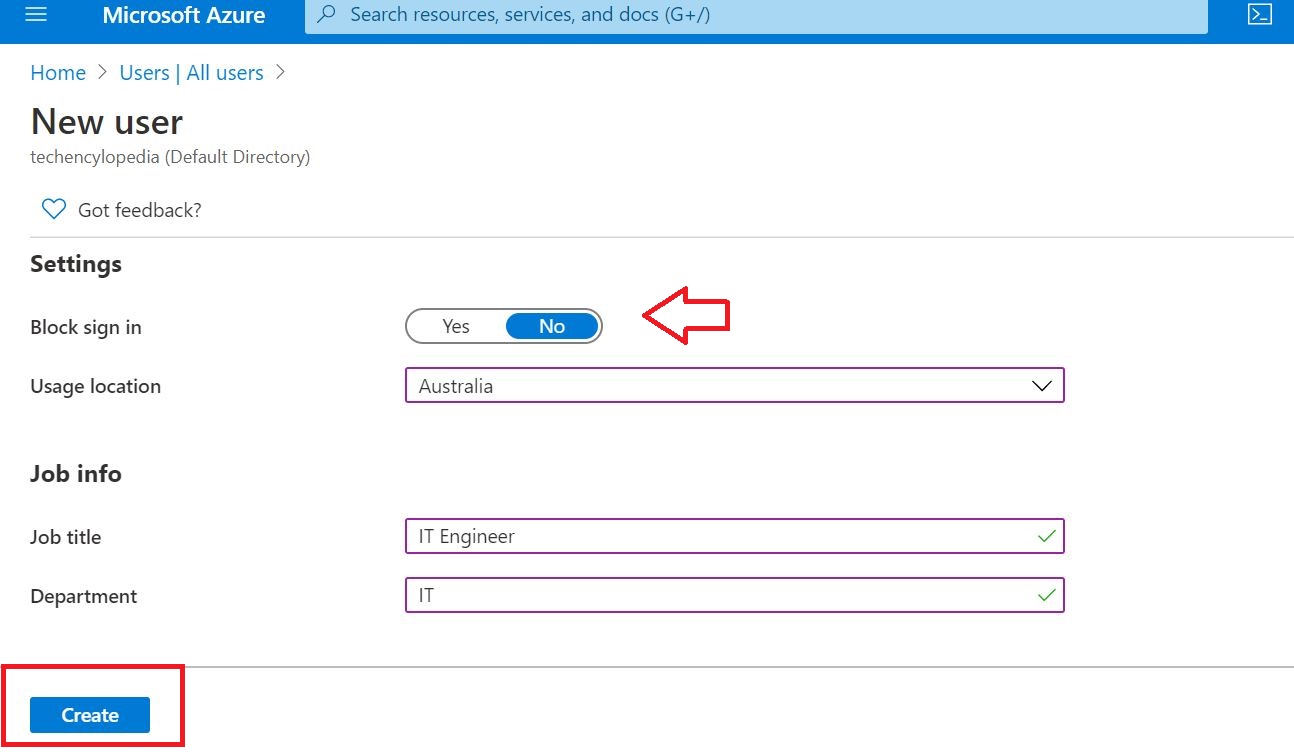
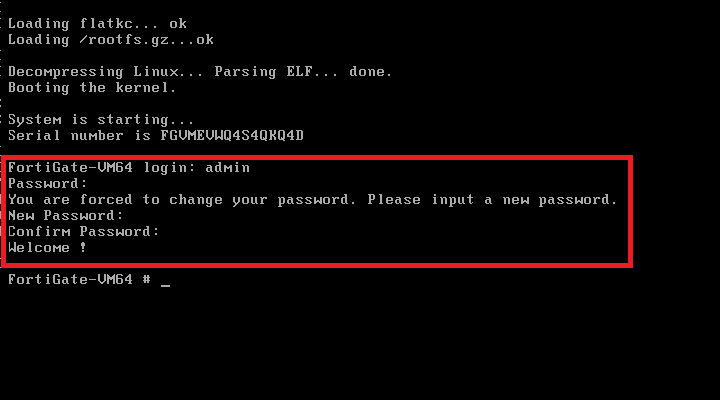
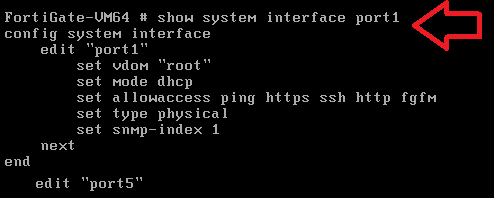
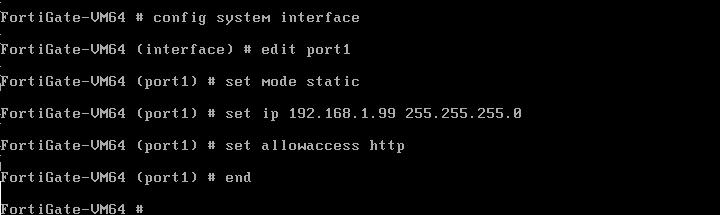
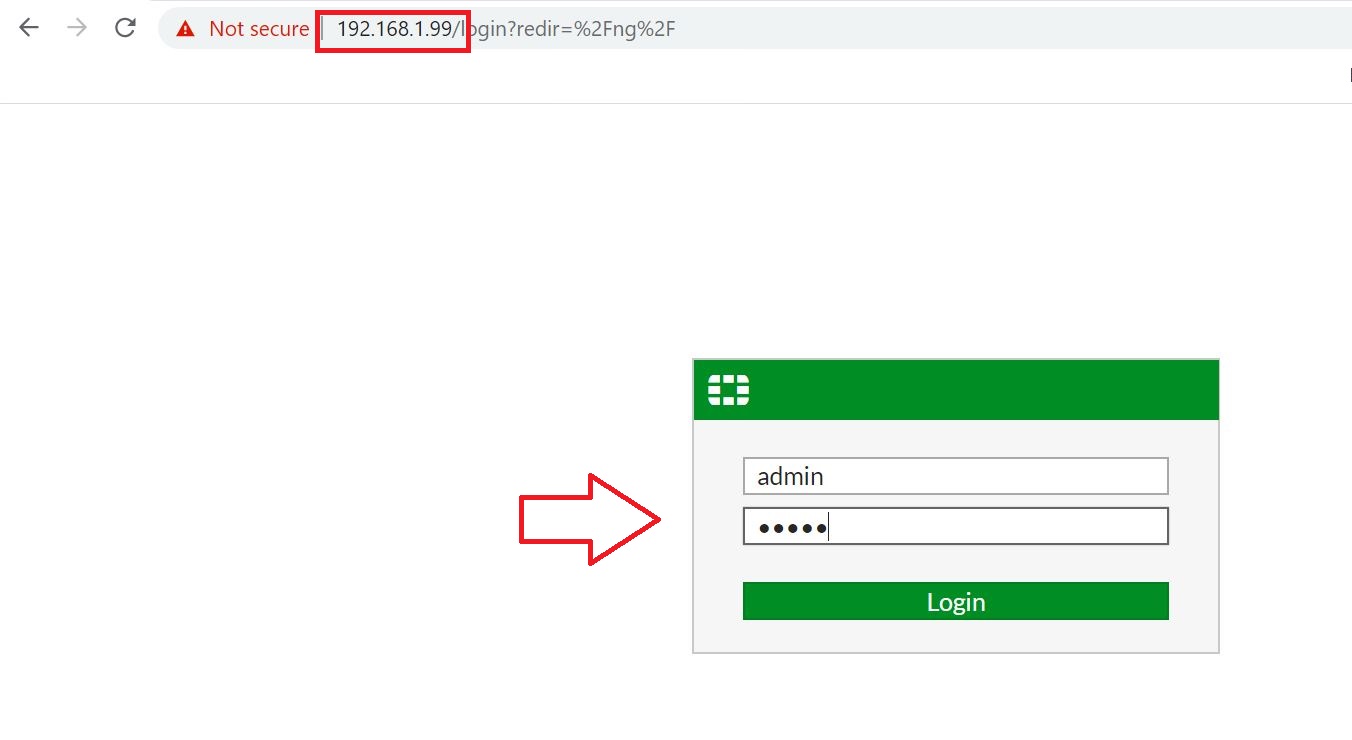
For this tutorial,
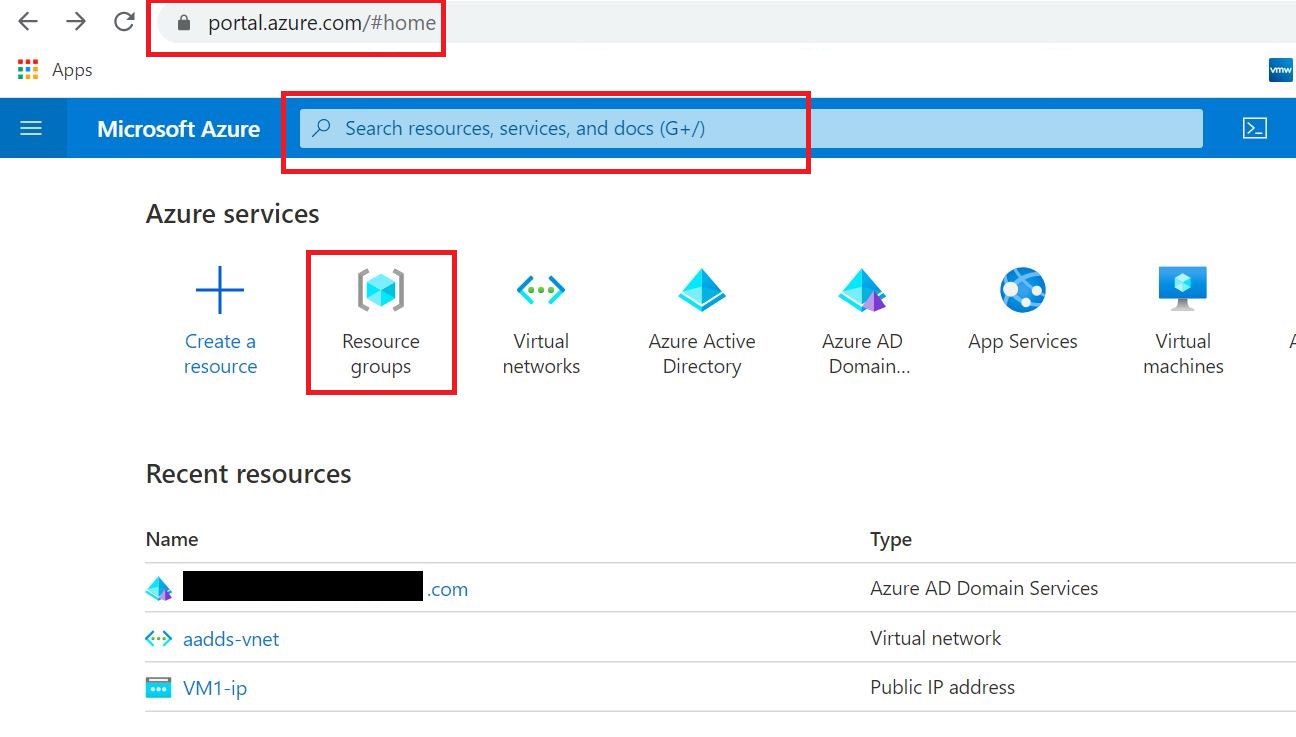
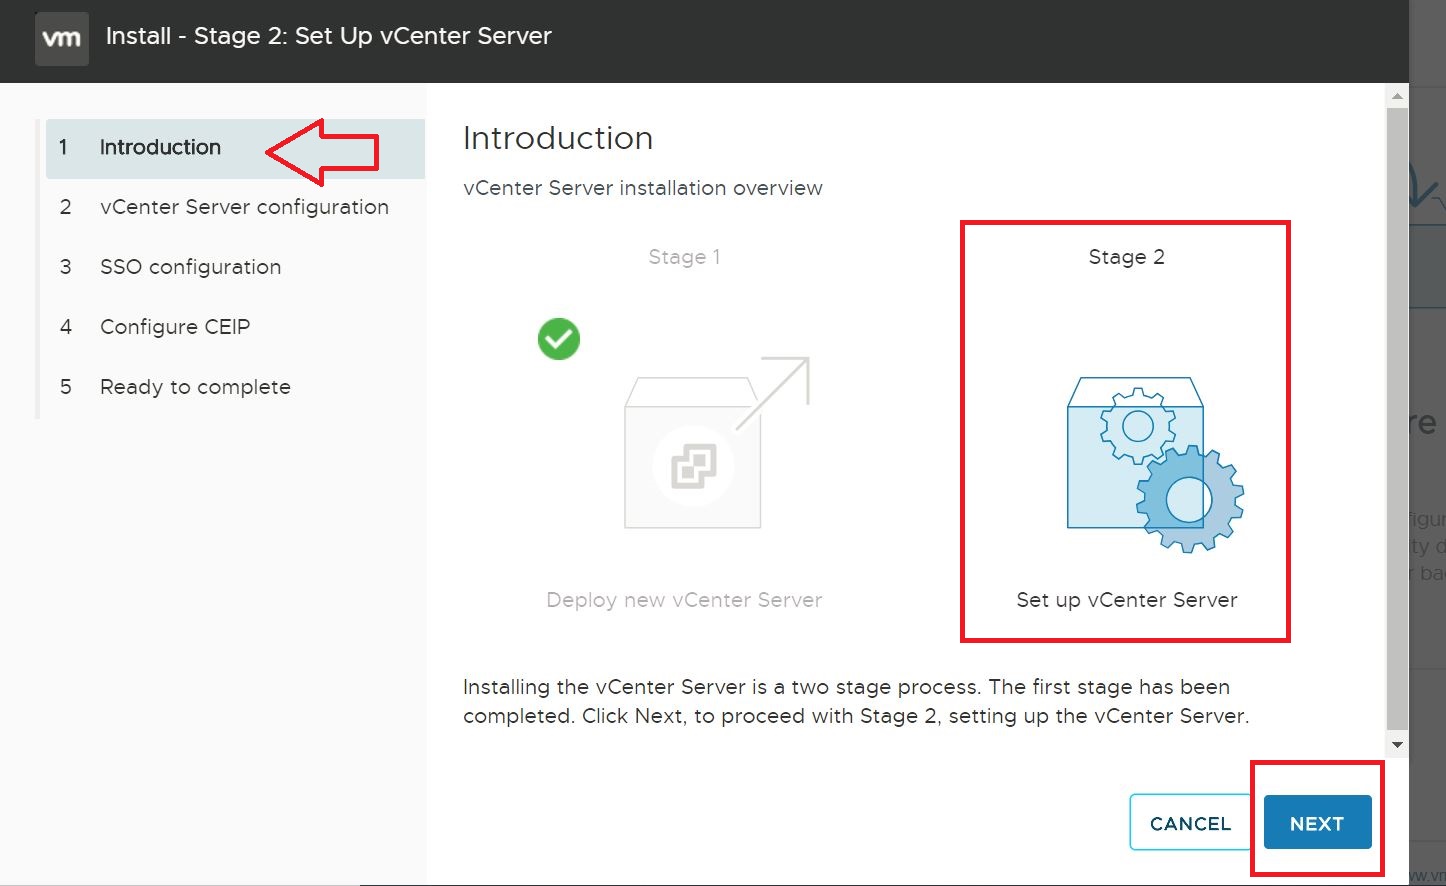
TUTORIAL (PERFORM G SUITE MIGRATION)
The entire migration process is divided into 09 steps
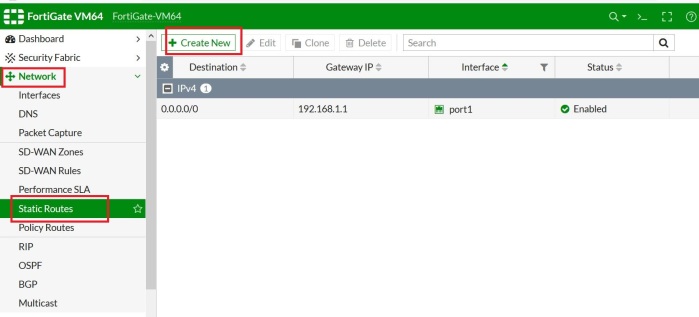
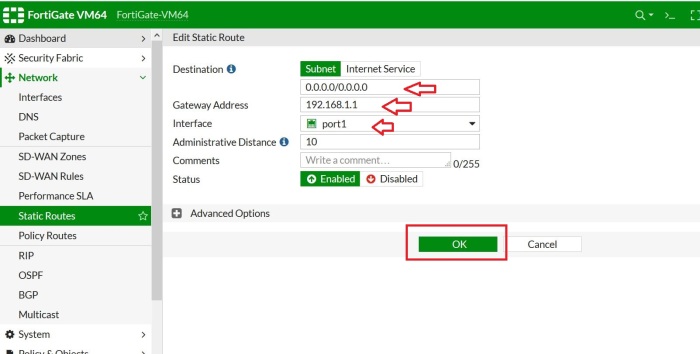
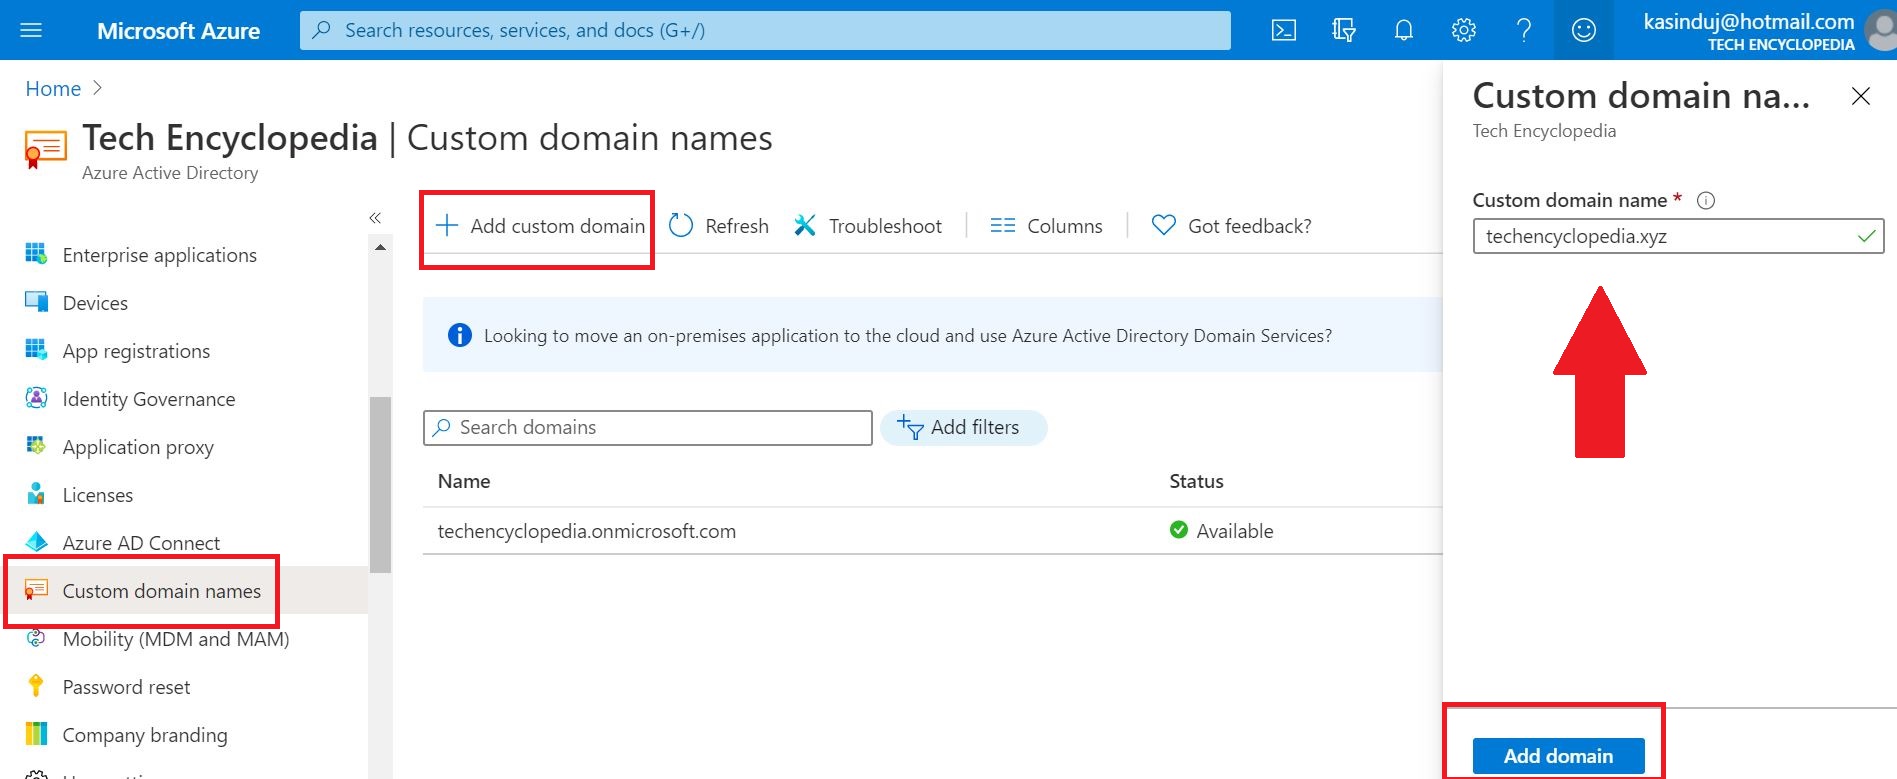
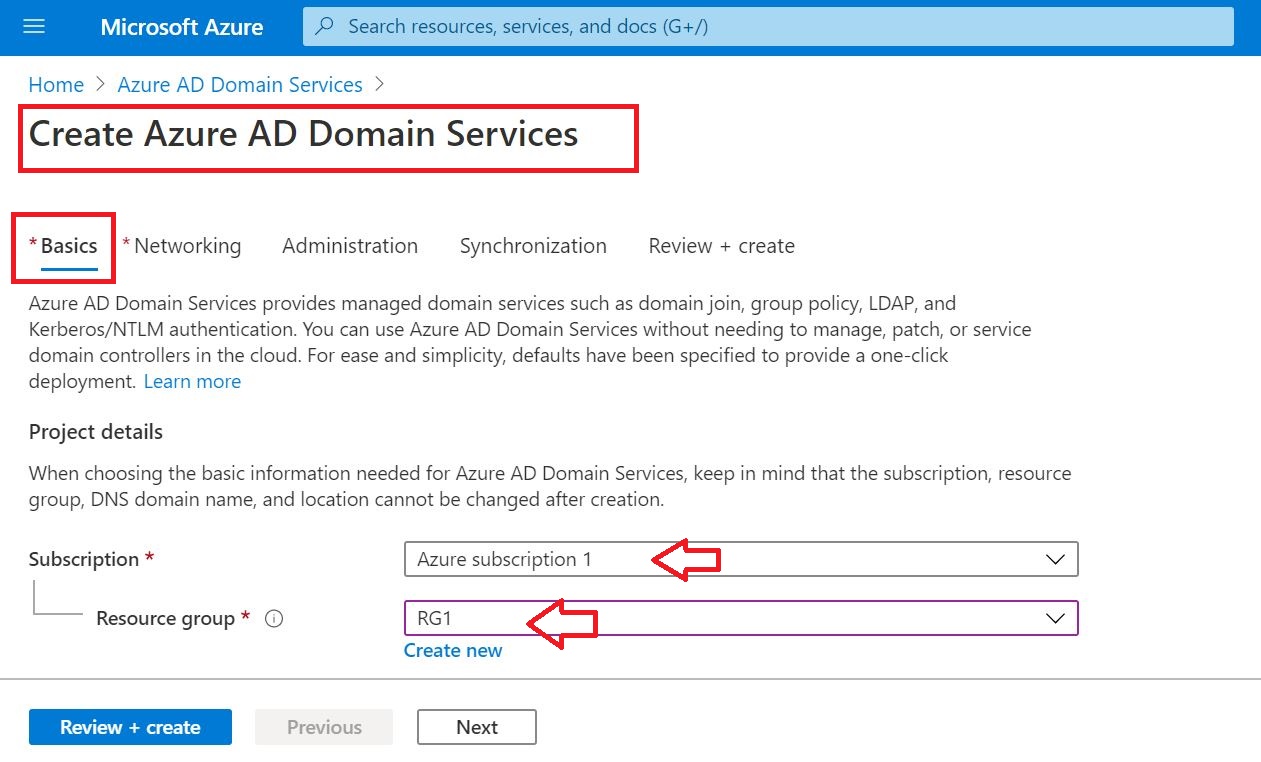
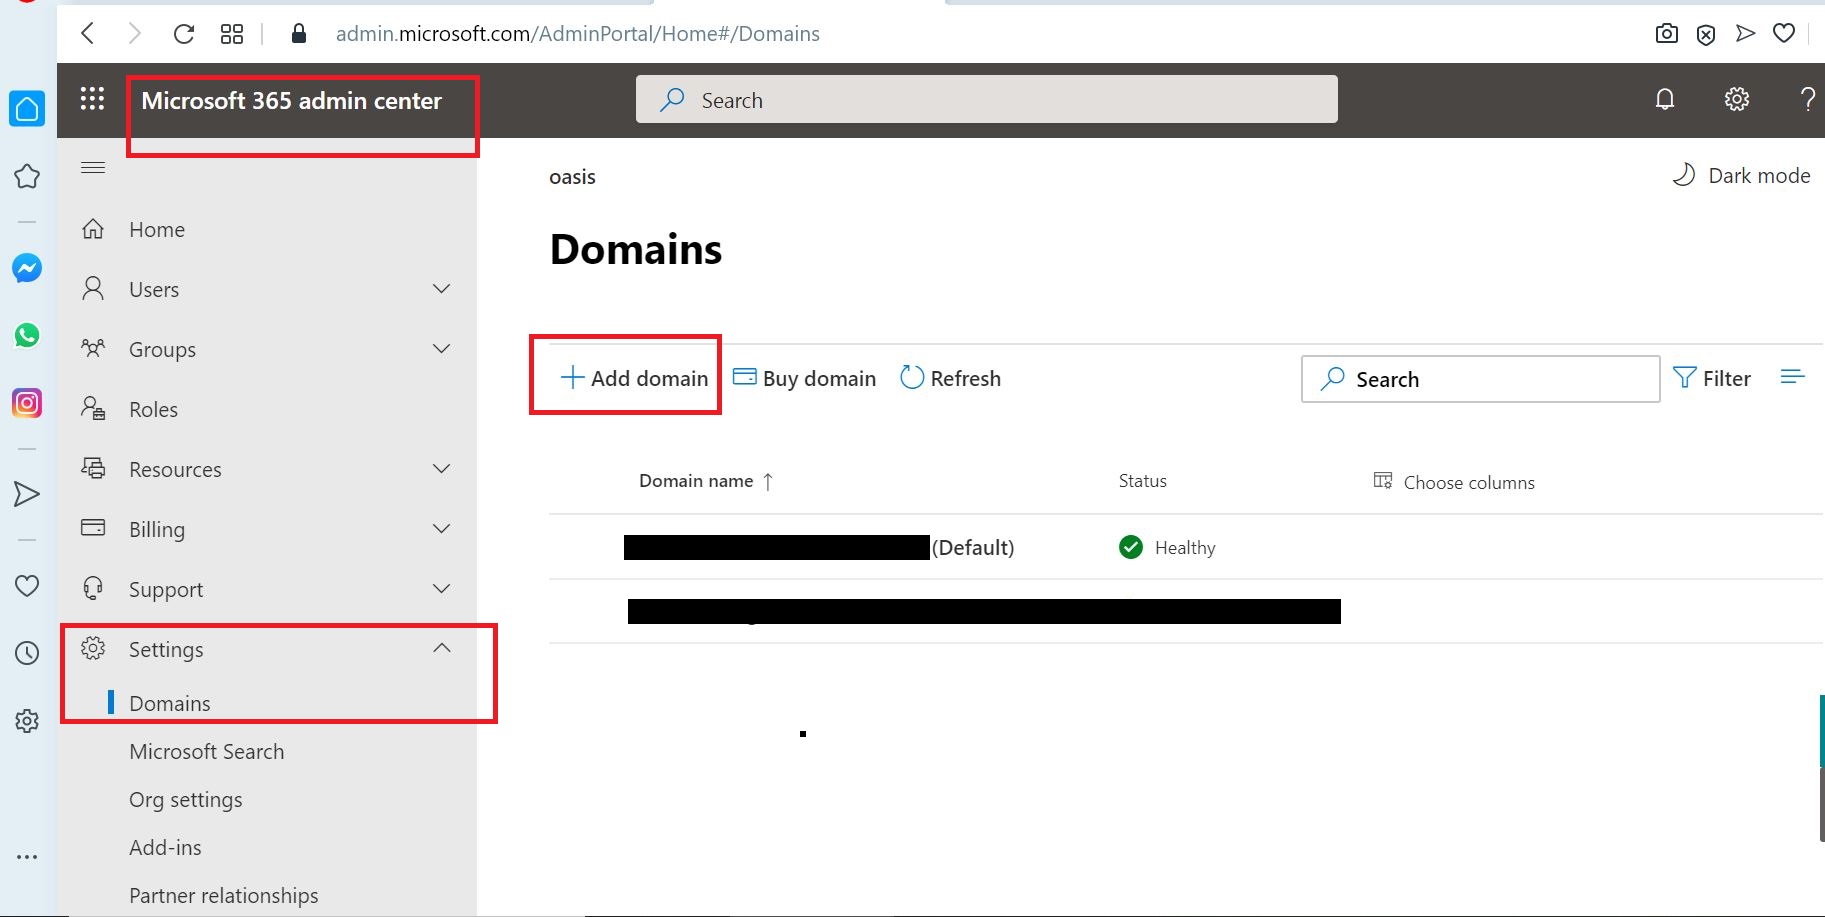
(01) Add the Domain to Office 365
(02) Create a Google Service Account
(03) Enable API usage in your project
(04) Grant access to the service account for your Google tenant
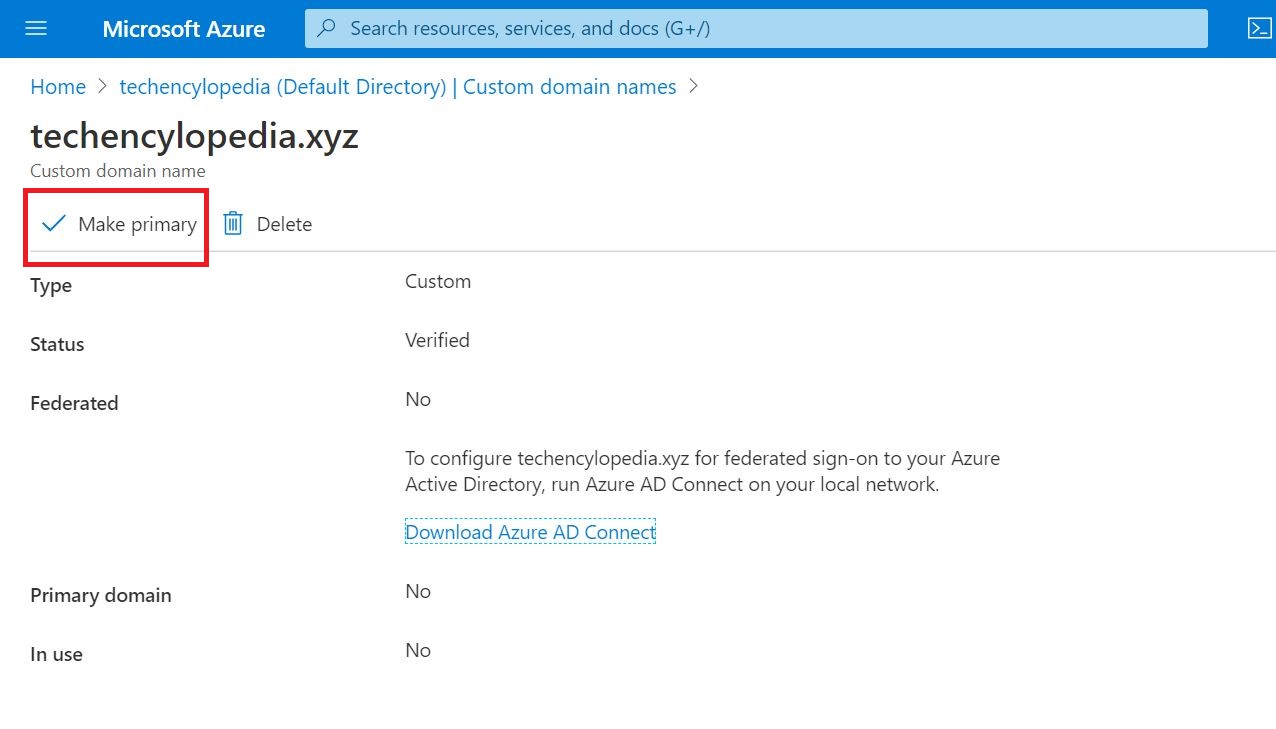
(05) Create a sub-domain for mail routing to Microsoft 365 or Office 365
(06) Create a sub-domain for mail routing to your G Suite domain
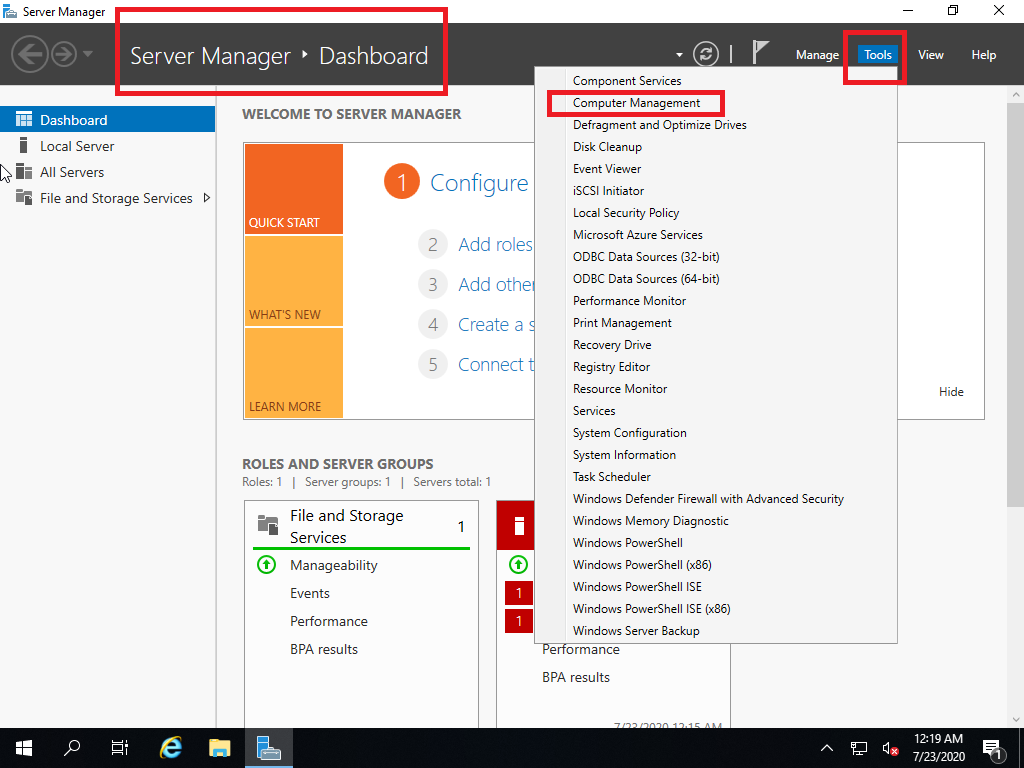
(07) Provision users in Microsoft 365 or Office 365
(08) Start a G Suite migration batch with the Exchange admin center (EAC
(09) Finalizing your migration
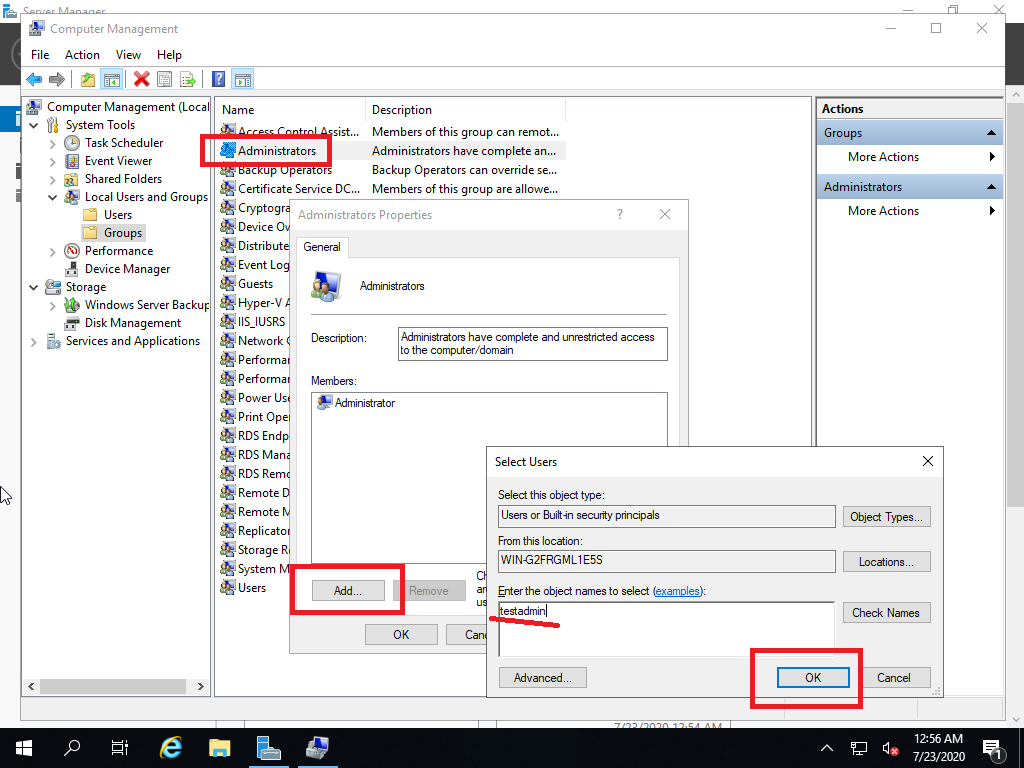
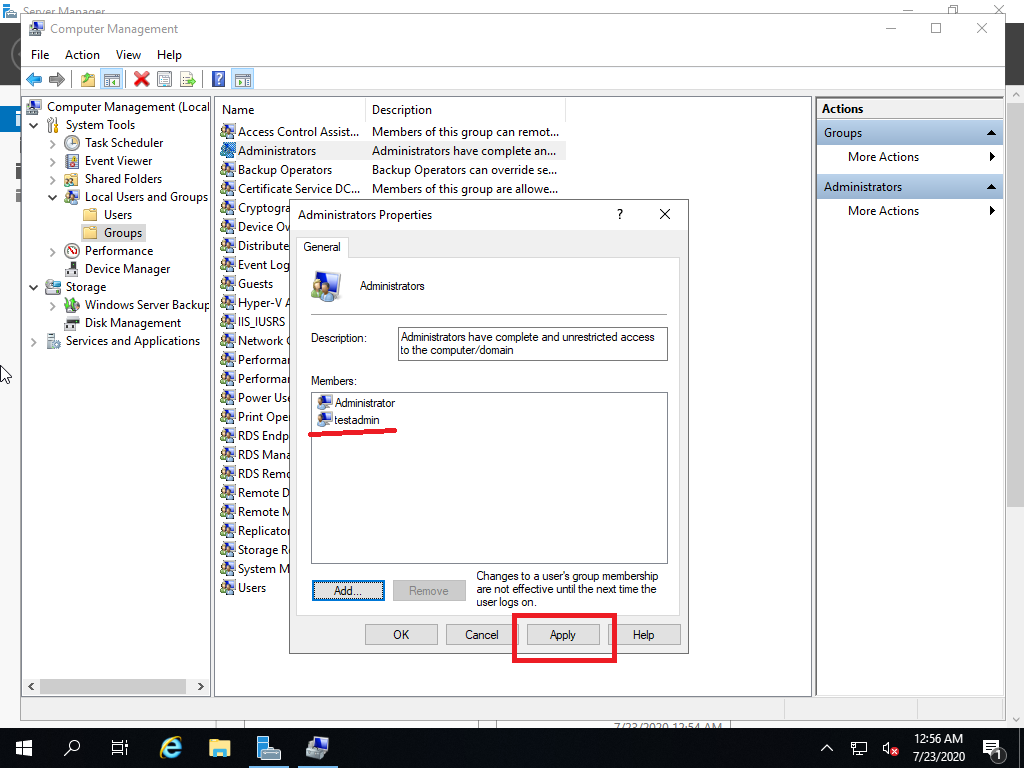
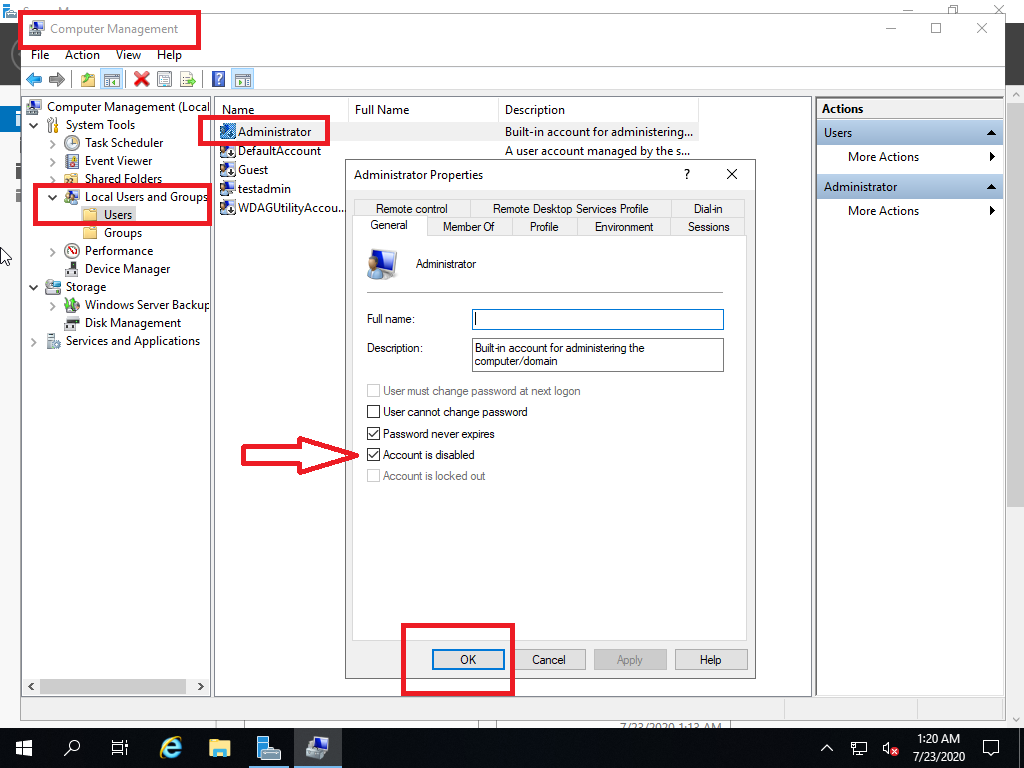
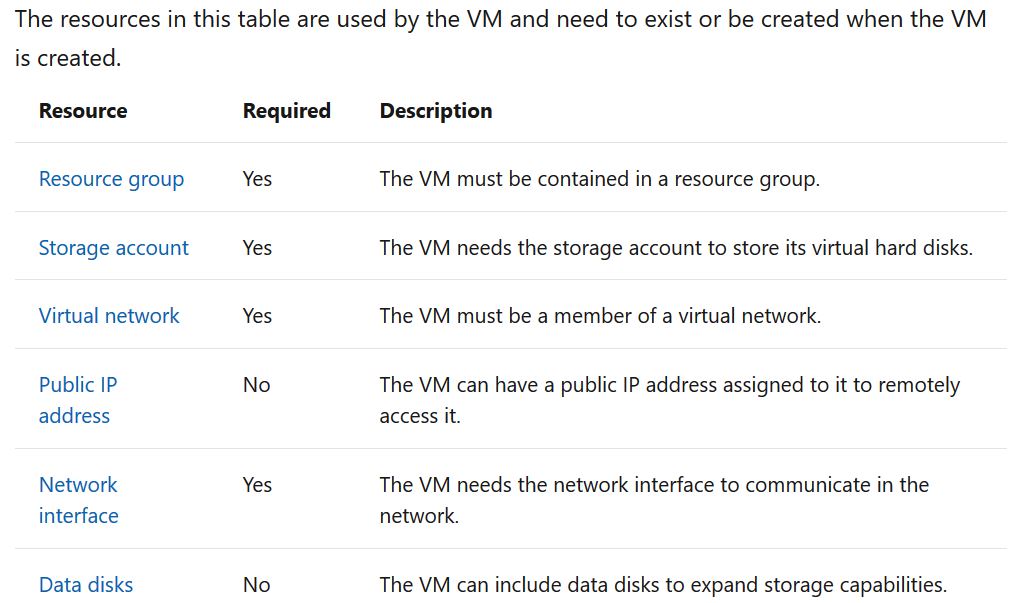
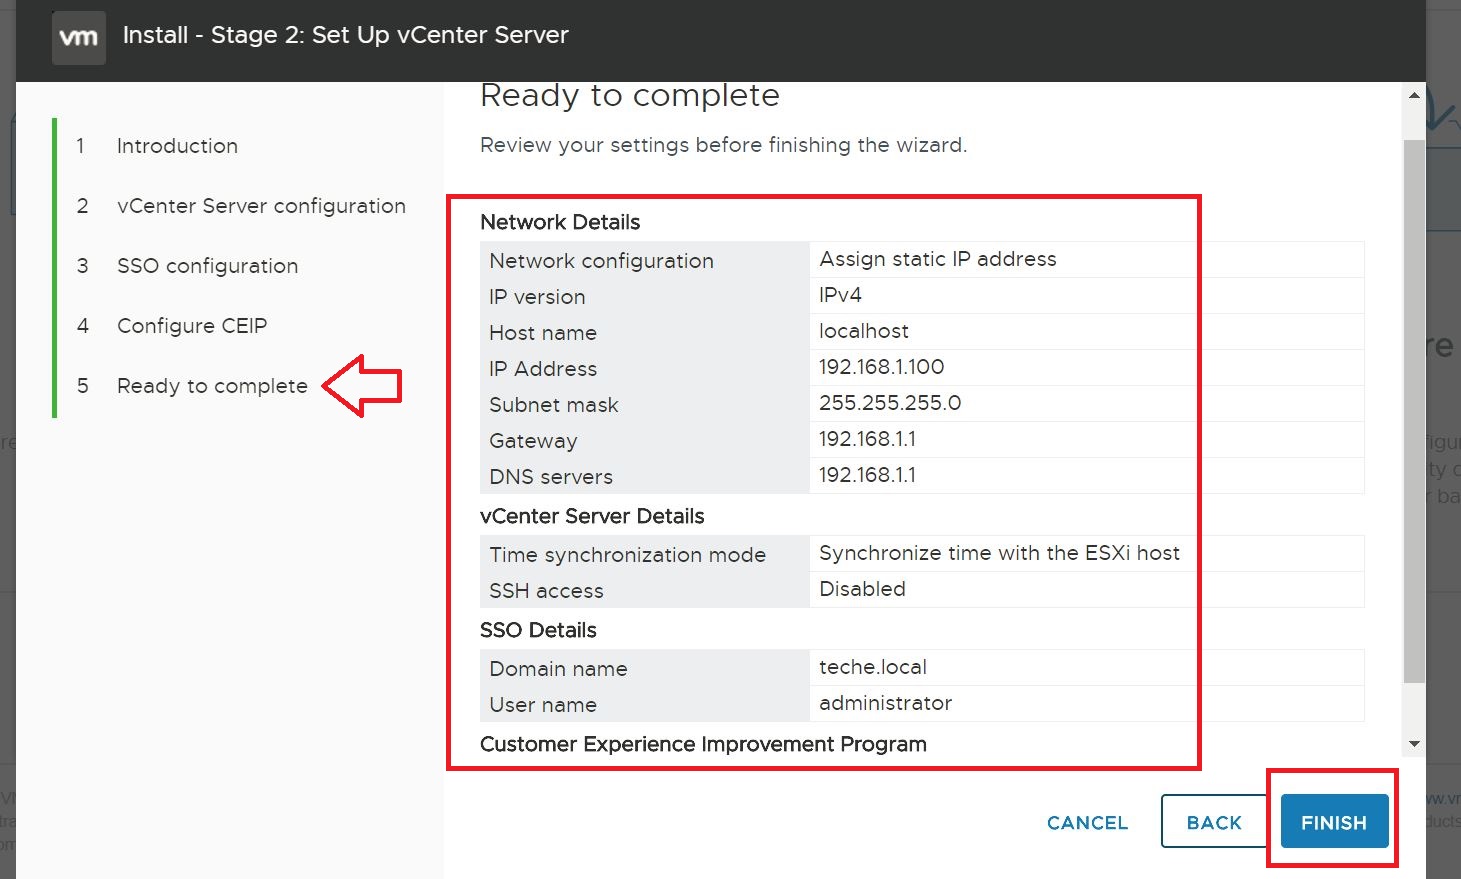
You can migrate batches of users from G Suite to Microsoft 365 or Office 365, allowing a migration project to be done in stages. This migration requires that you provision all of your users who will be migrated as mail-enabled users outside of the migration process. You must specify a list of users to migrate for each batch.
Link: https://docs.microsoft.com/en-us/exchange/mailbox-migration/perform-g-suite-migration
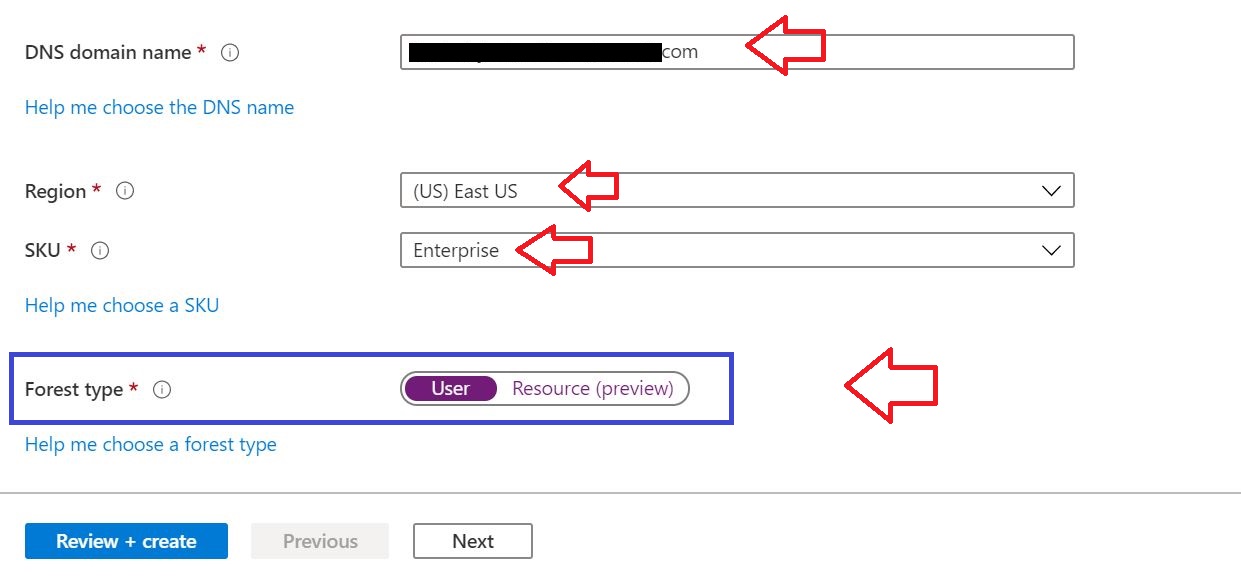
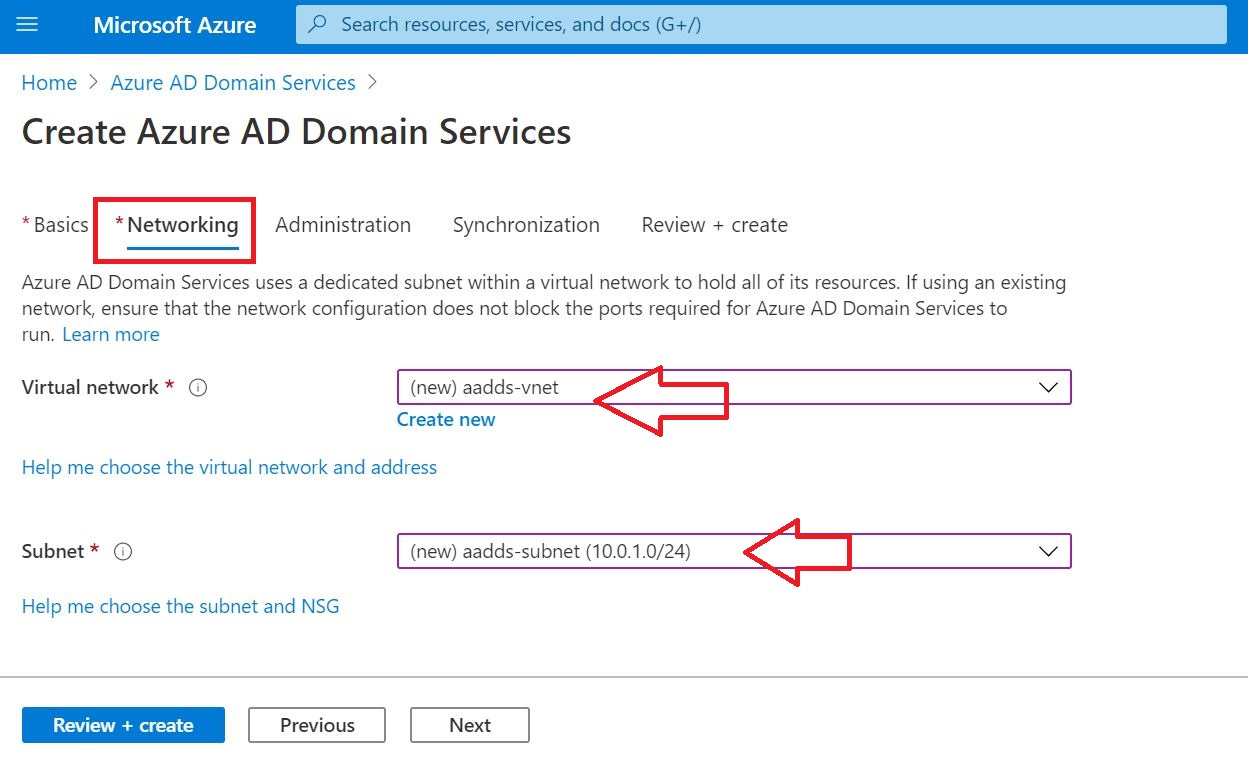
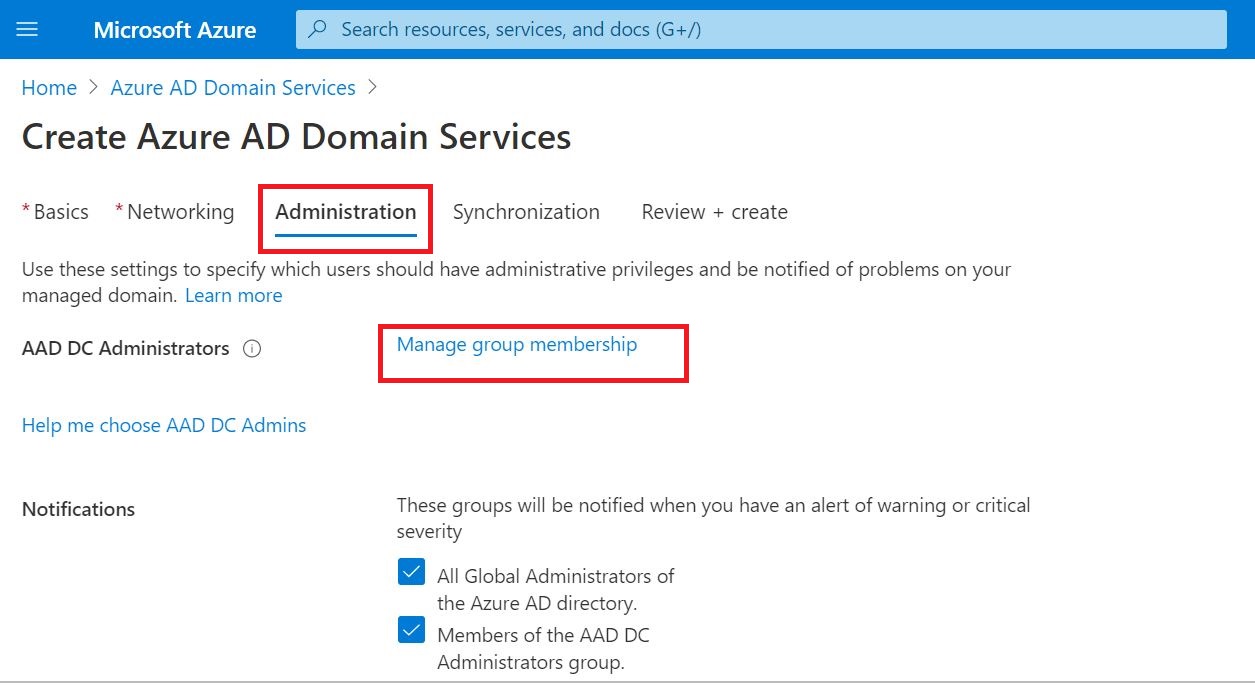
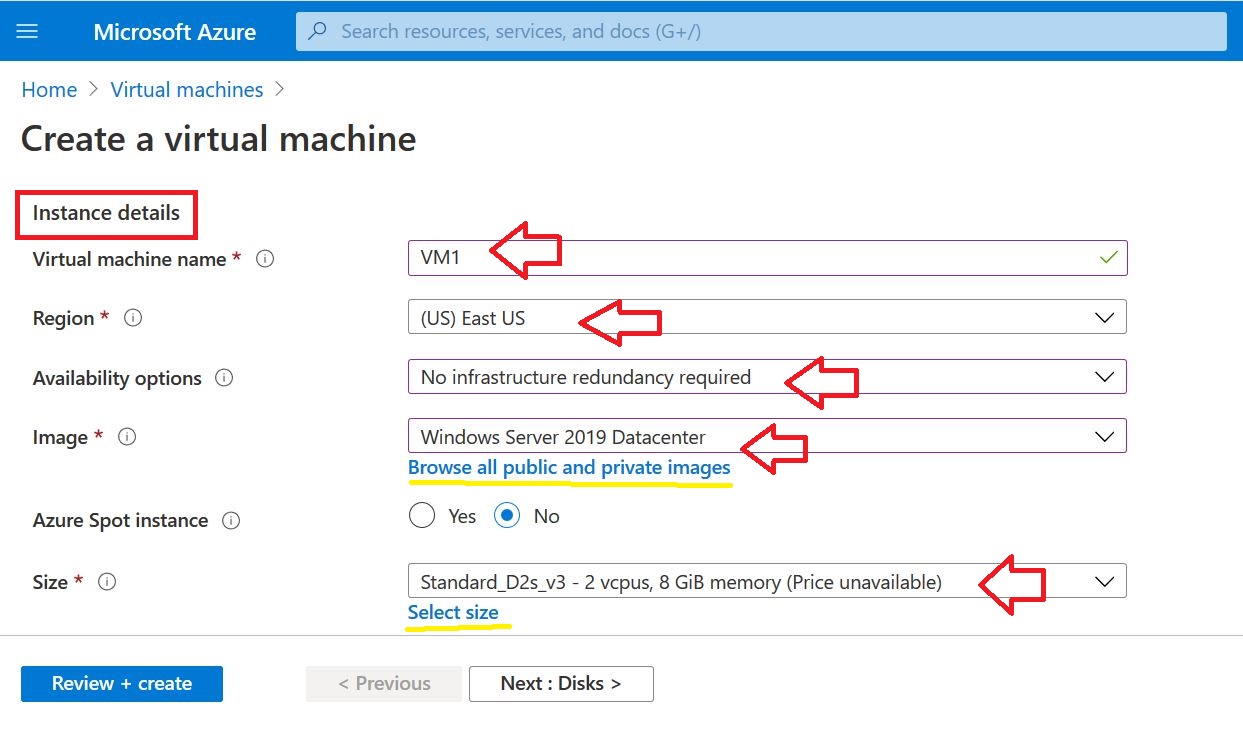
01 Add the Domain to Office 365
As the first step, the domain bought from GoDaddy Internet Registrar is configured and verified in O365.
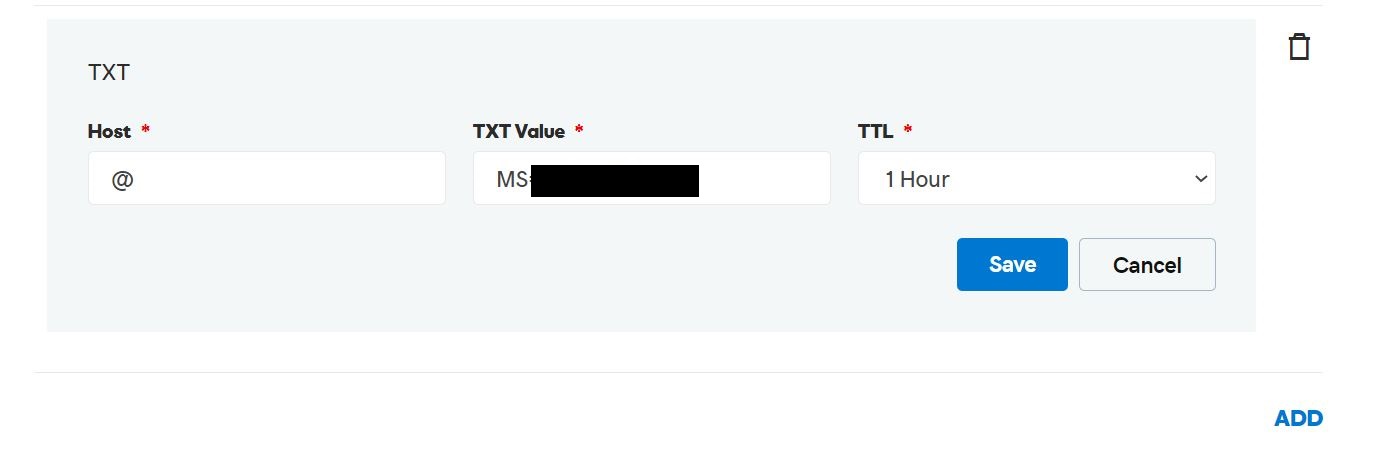
Following link will provide you instructions on how to setup DNS records properly.
Link: Set up your domain (host-specific instructions)
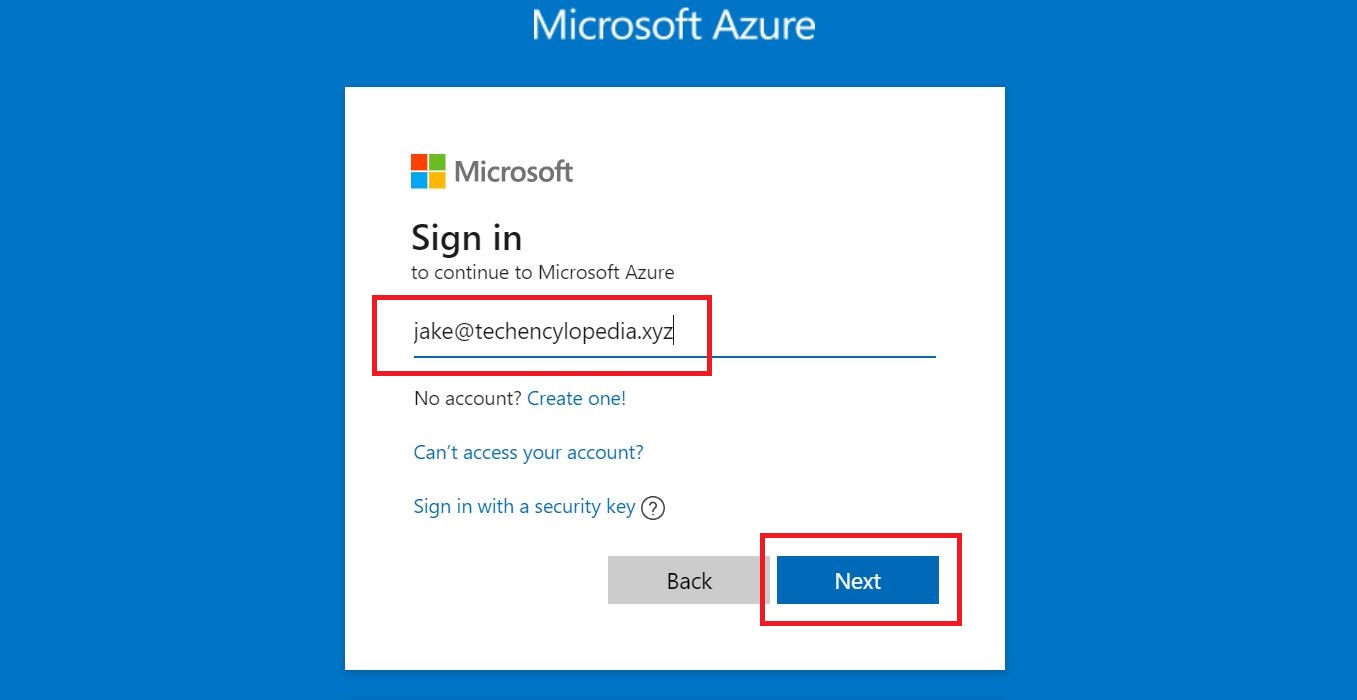
Go to office.com
https://www.office.com/
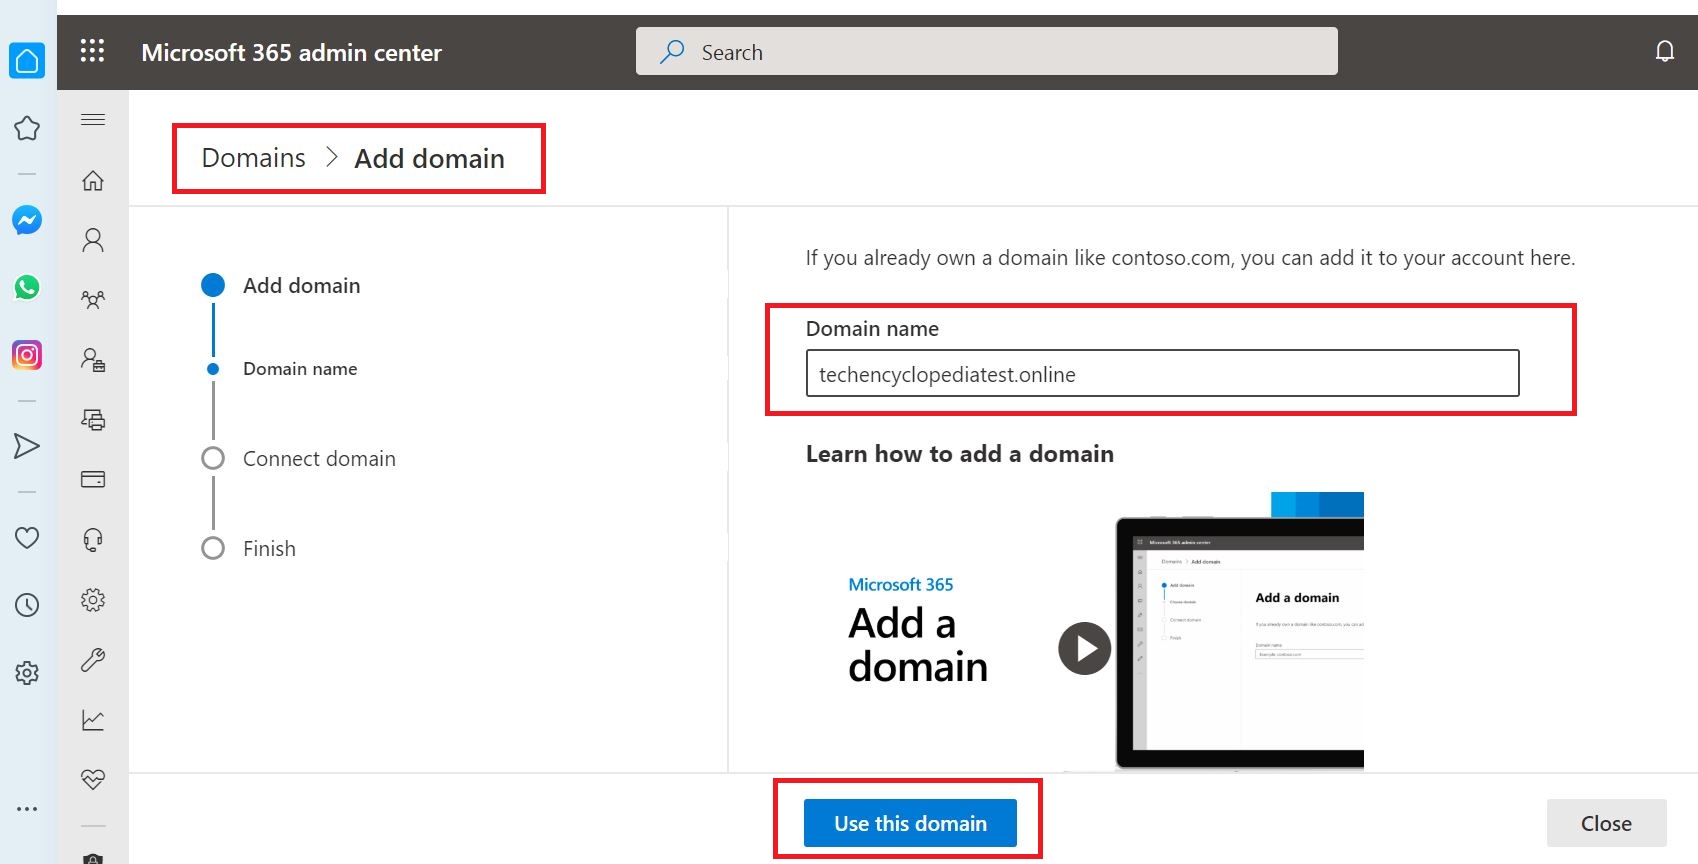
Enter the Domain name bought from the Internet Registrar (In this case, I used GoDaddy)
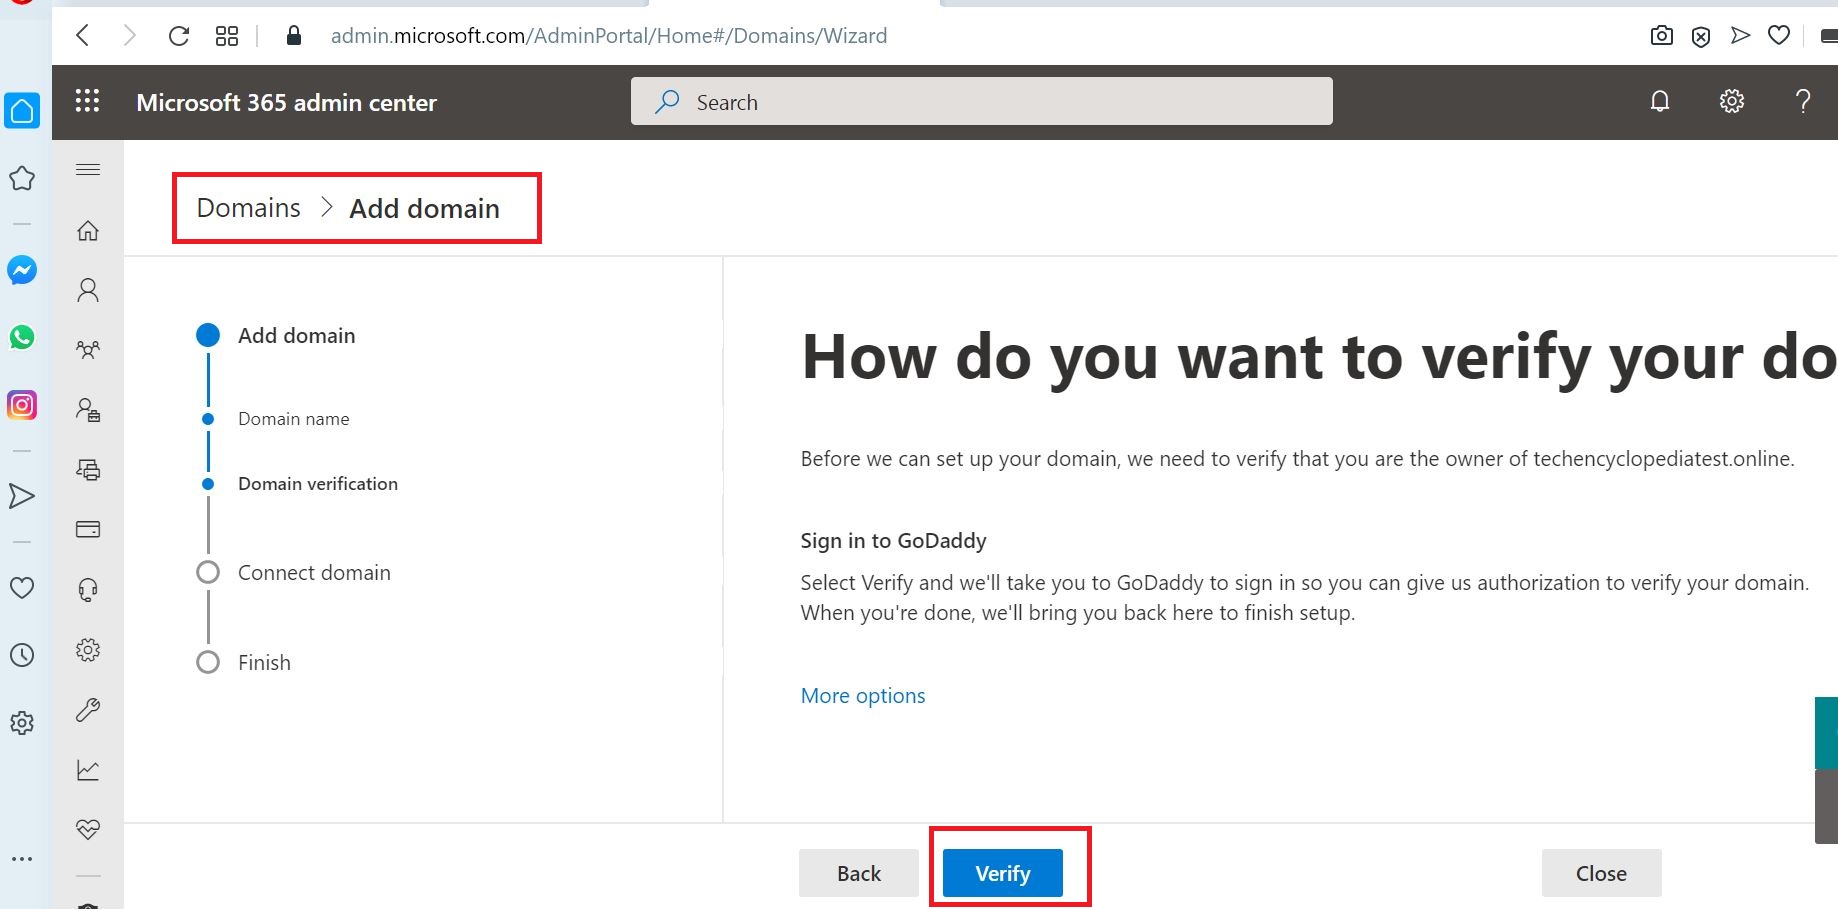
Then click Use this domain to proceed
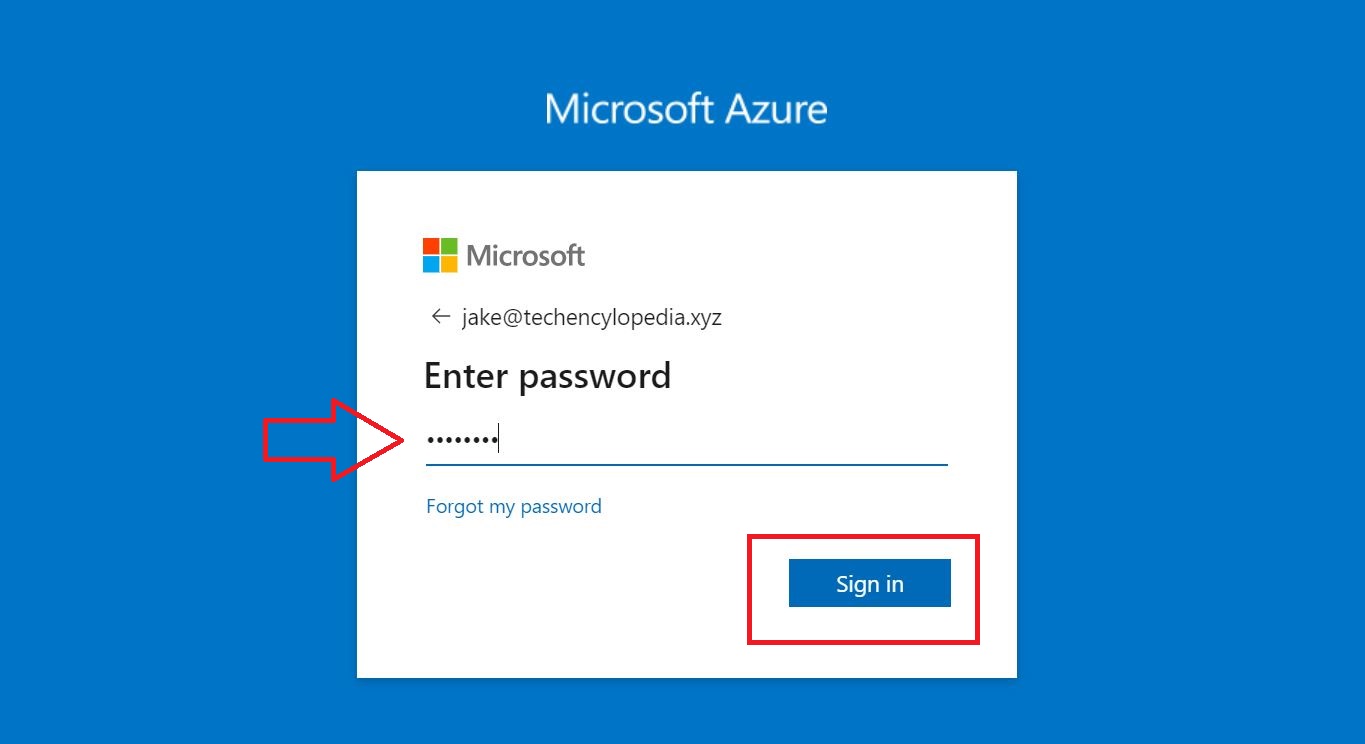
Click Verify for domain verification. This will take you to GoDaddy main website.
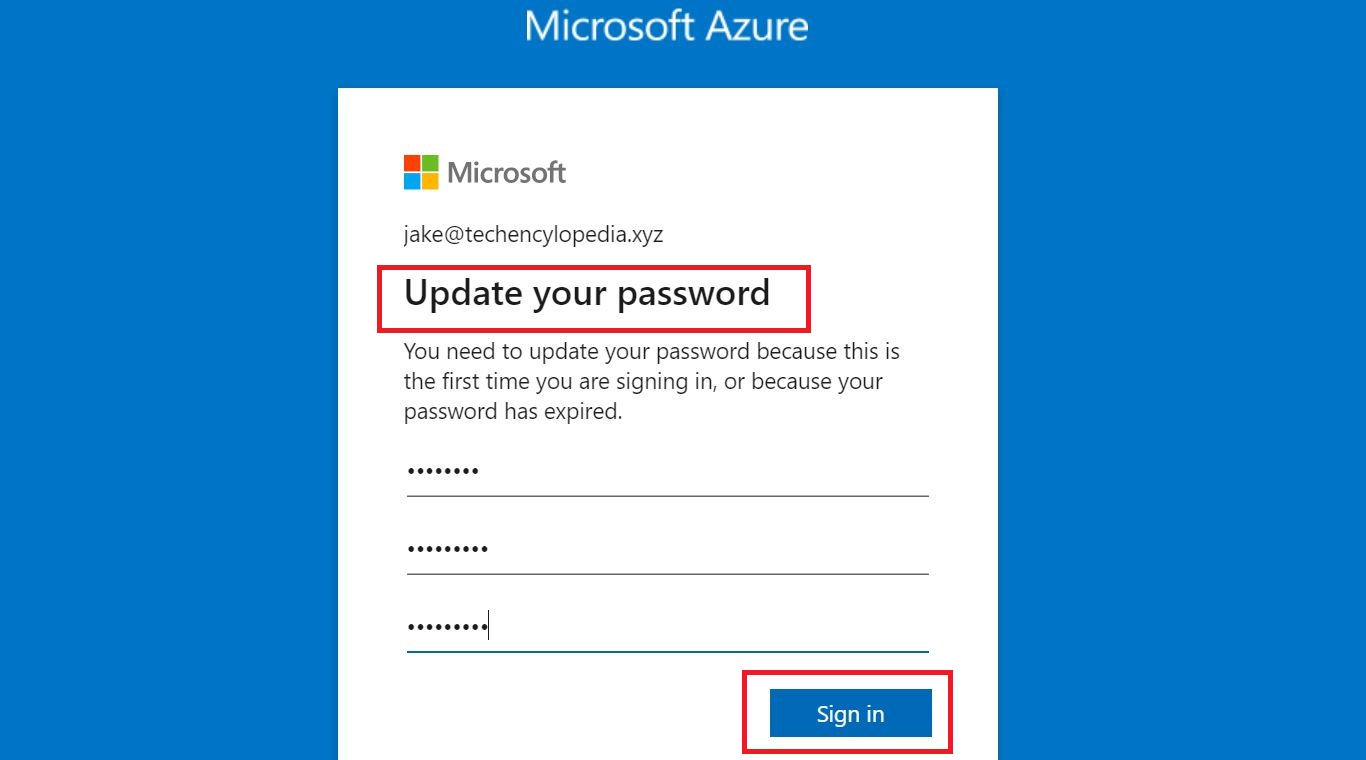
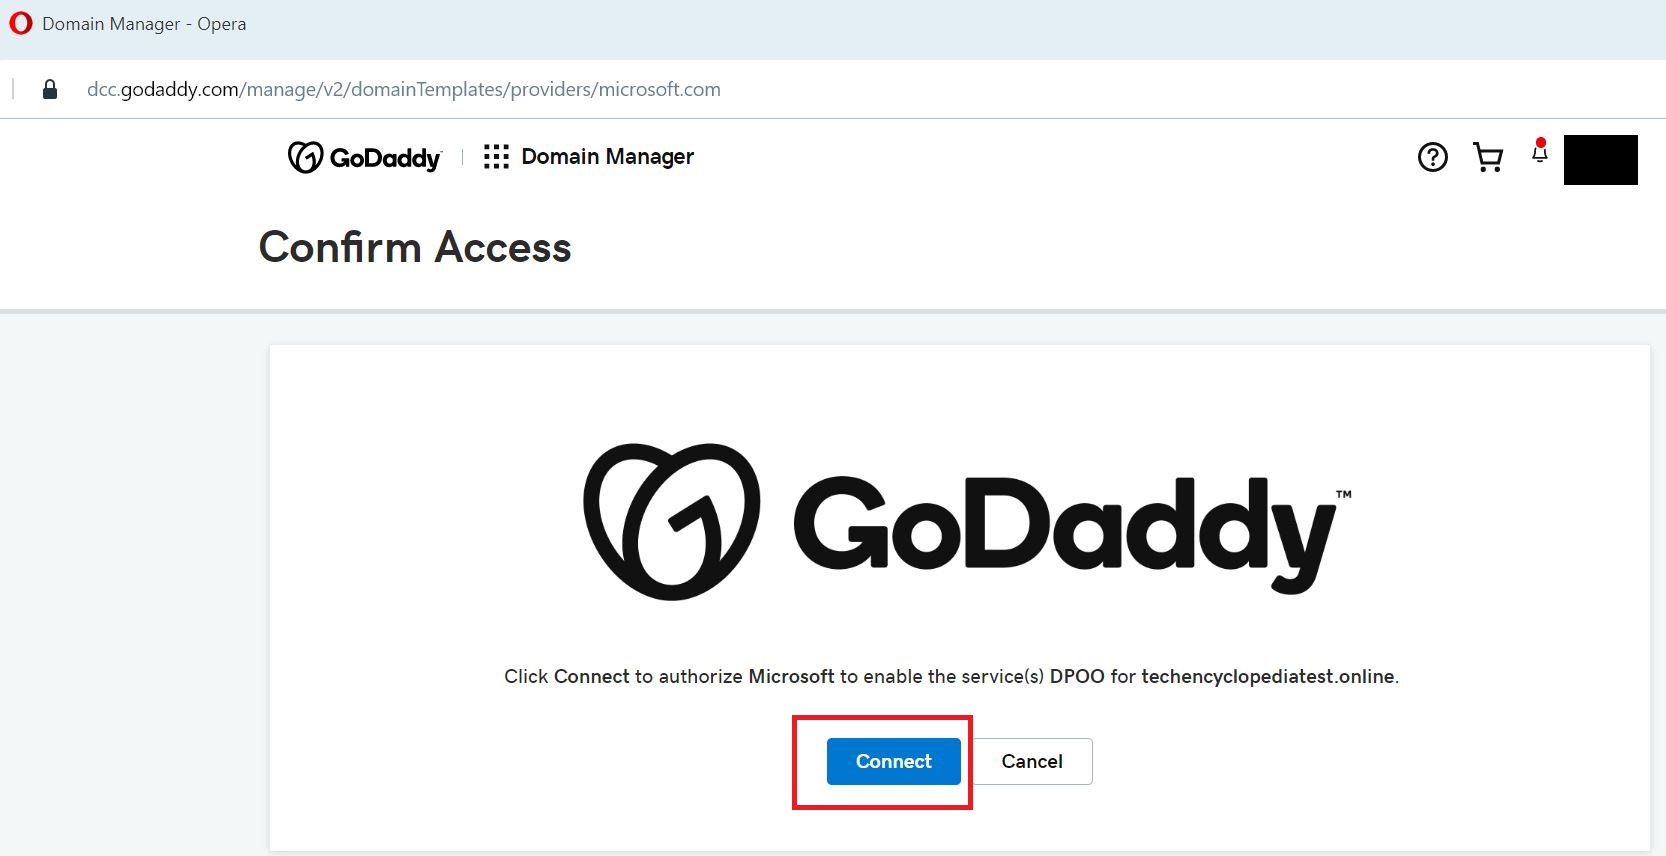
Sign in using your GoDaddy credentials

Click Connect to authorize Microsoft to enable the required services for the domain
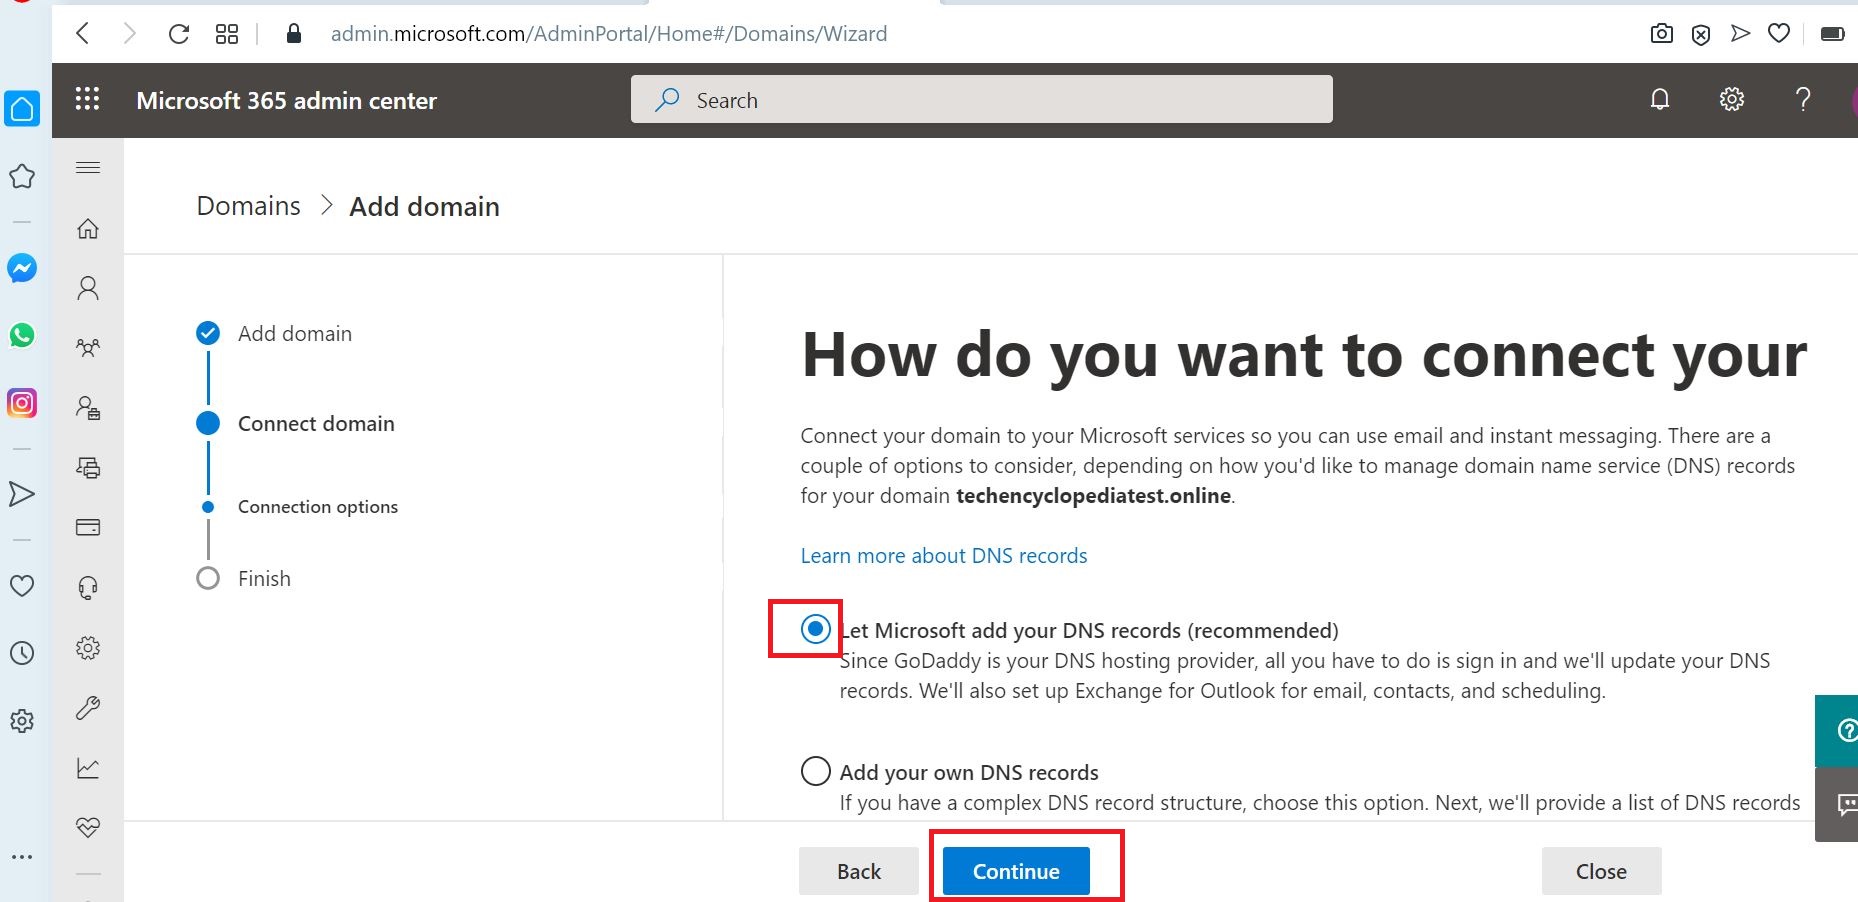
In this scenario, the option is selected to Let Microsoft add DNS records (If needed manually DNS records can be added)
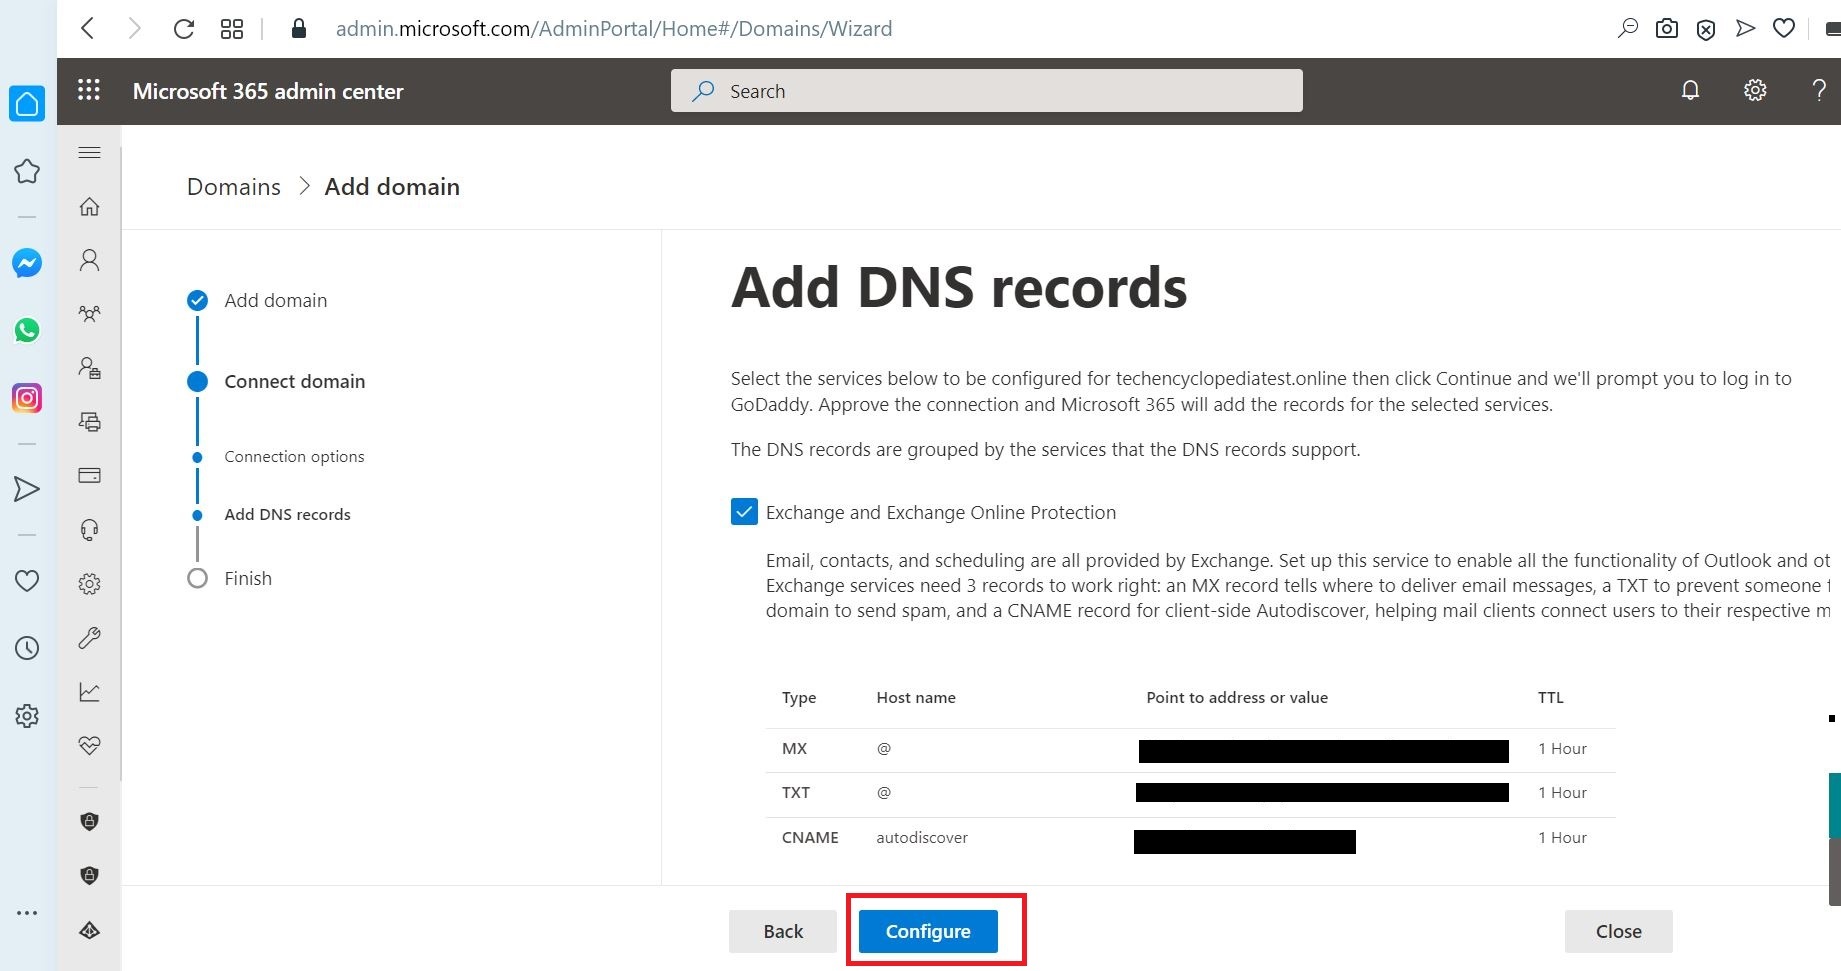
Click Configure to add DNS records
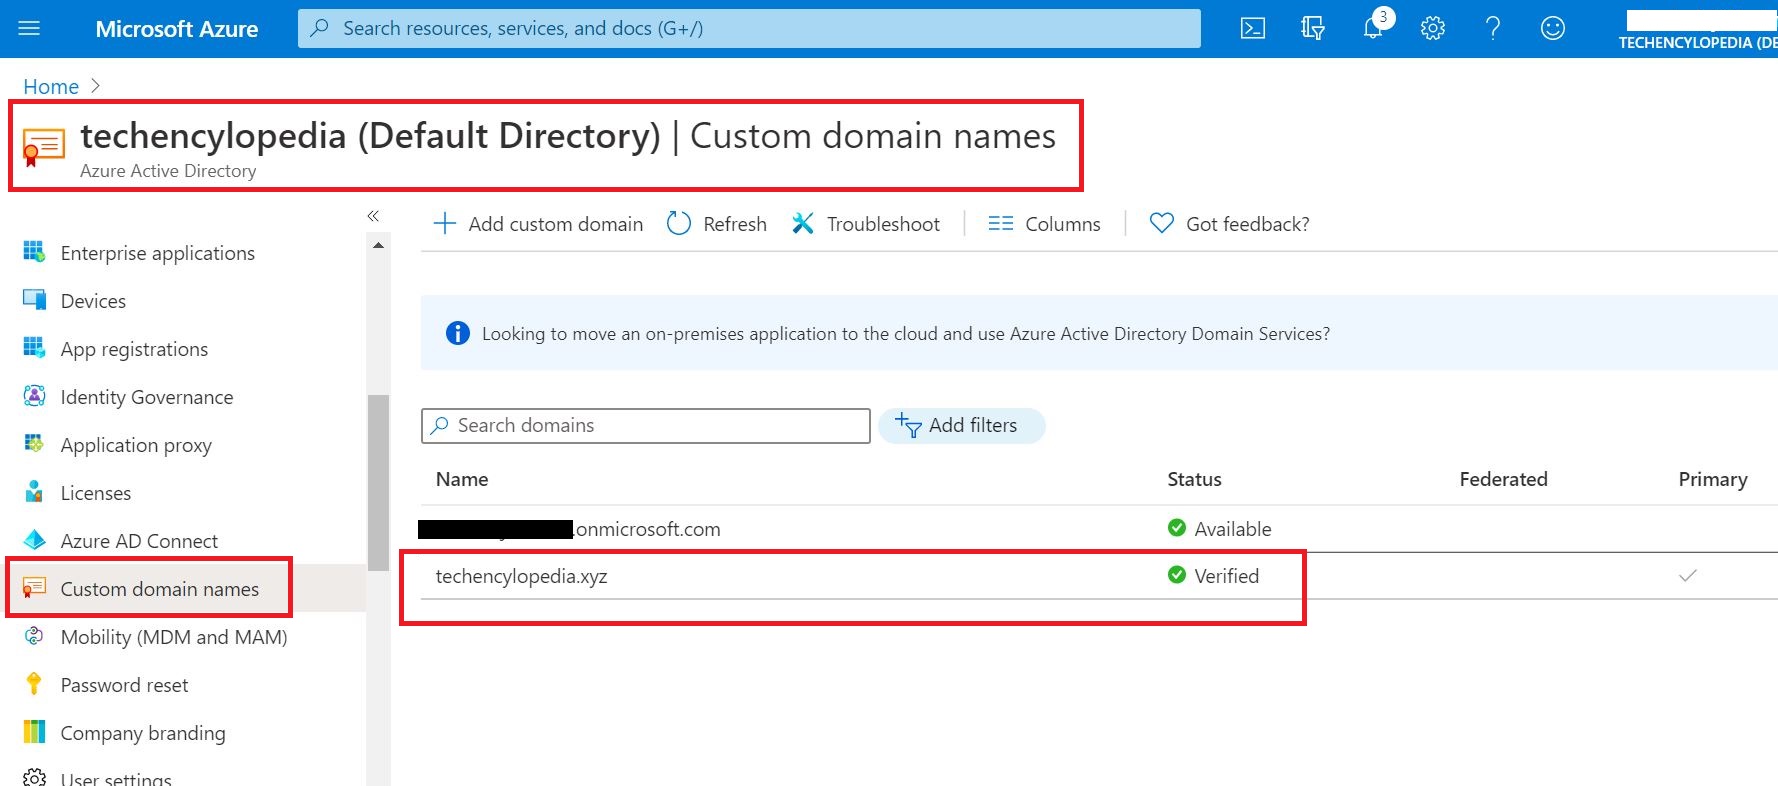
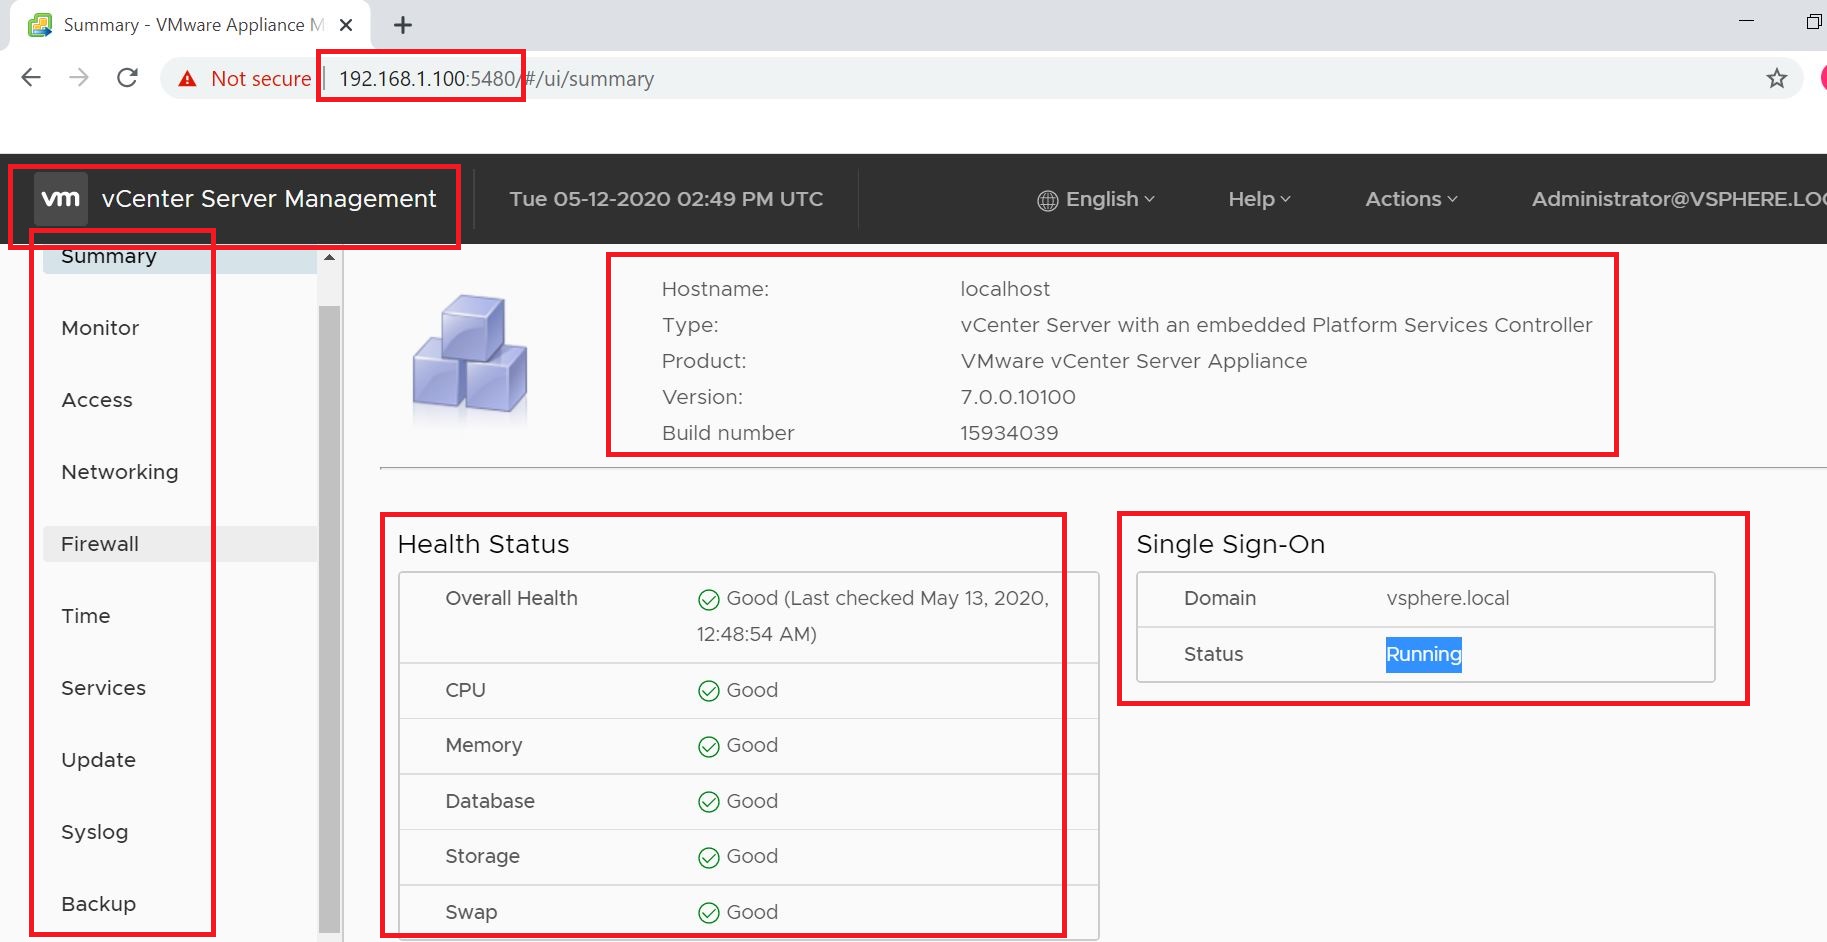
The Domain setup is complete message will be visible after the correct configuration
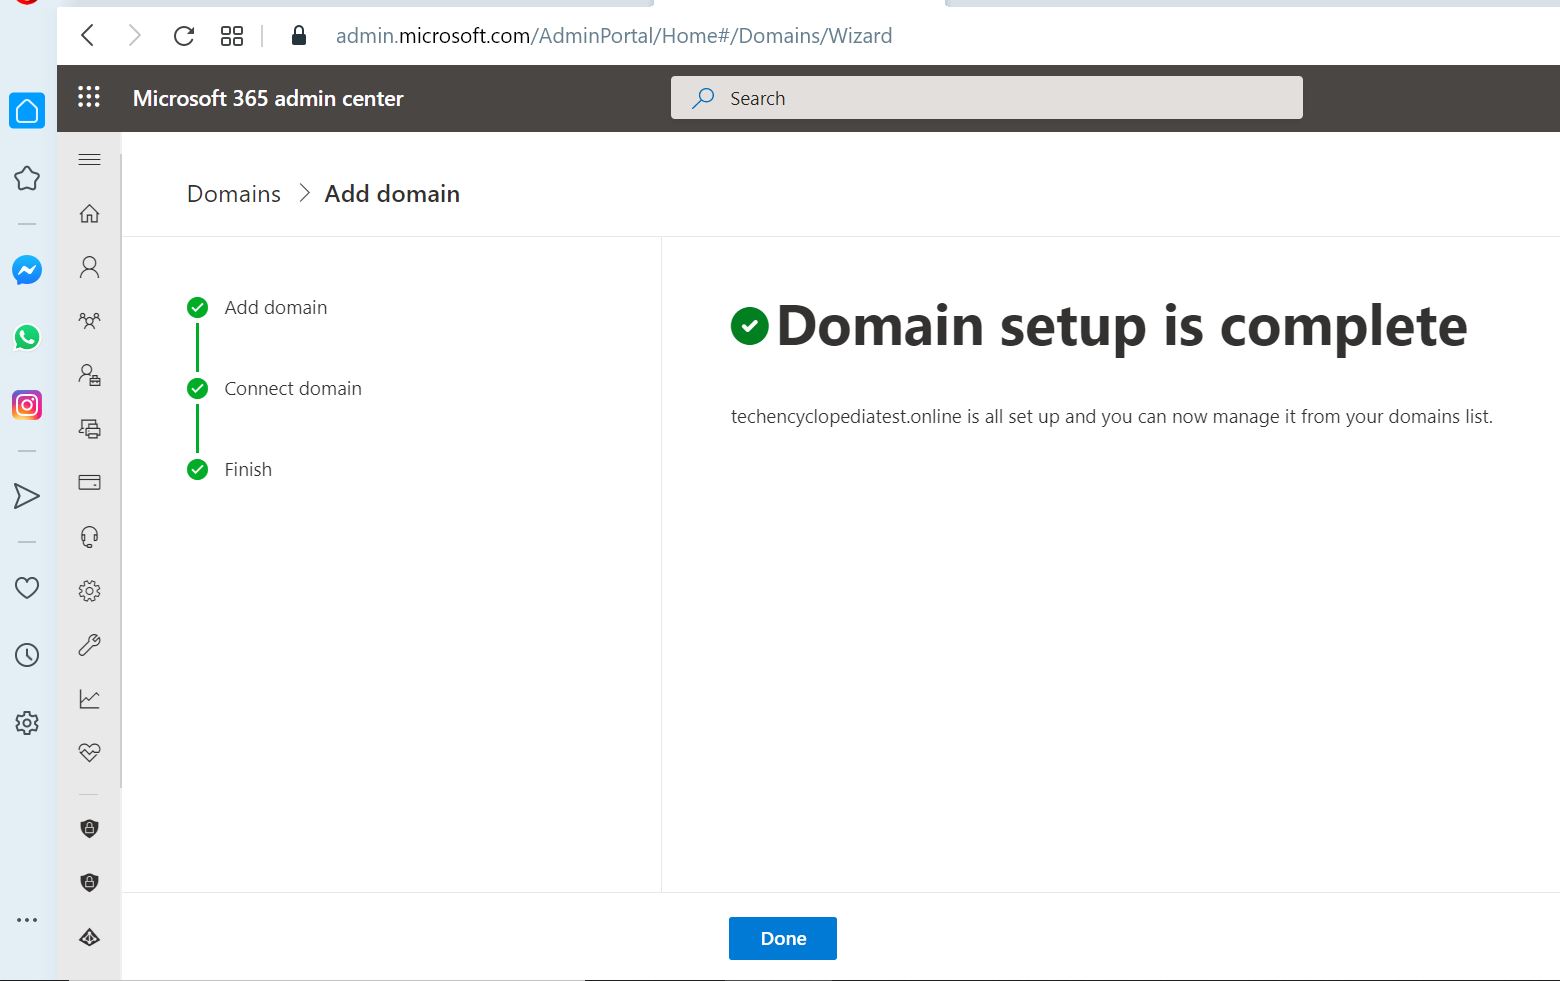
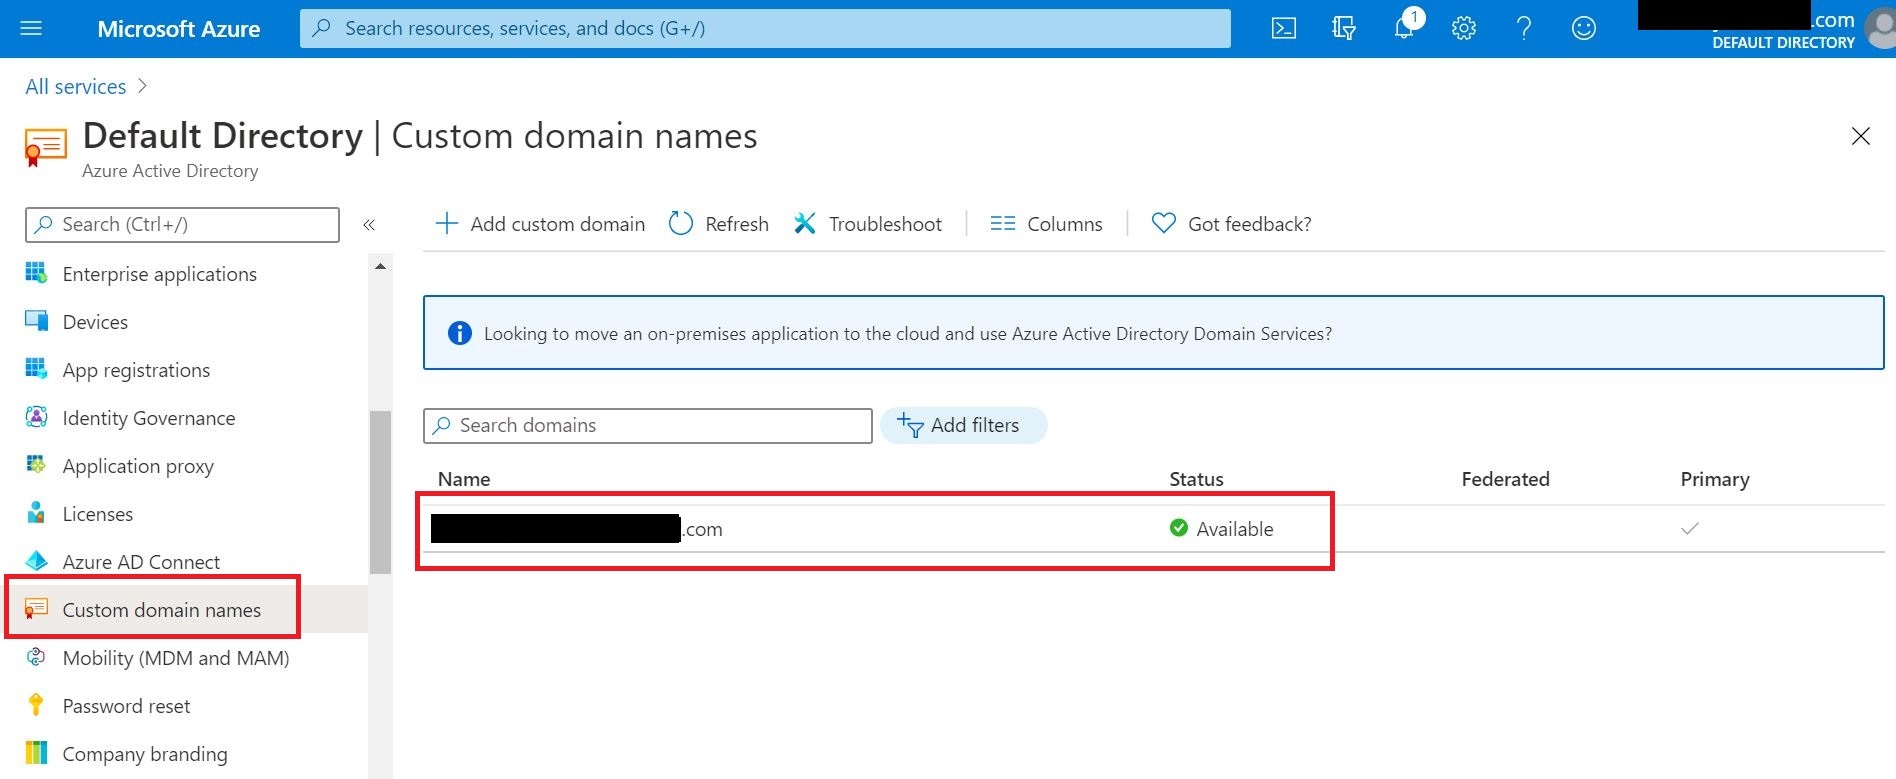
In the Microsoft 365 Admin center, go to the configured domain and make sure the domain status is Healthy
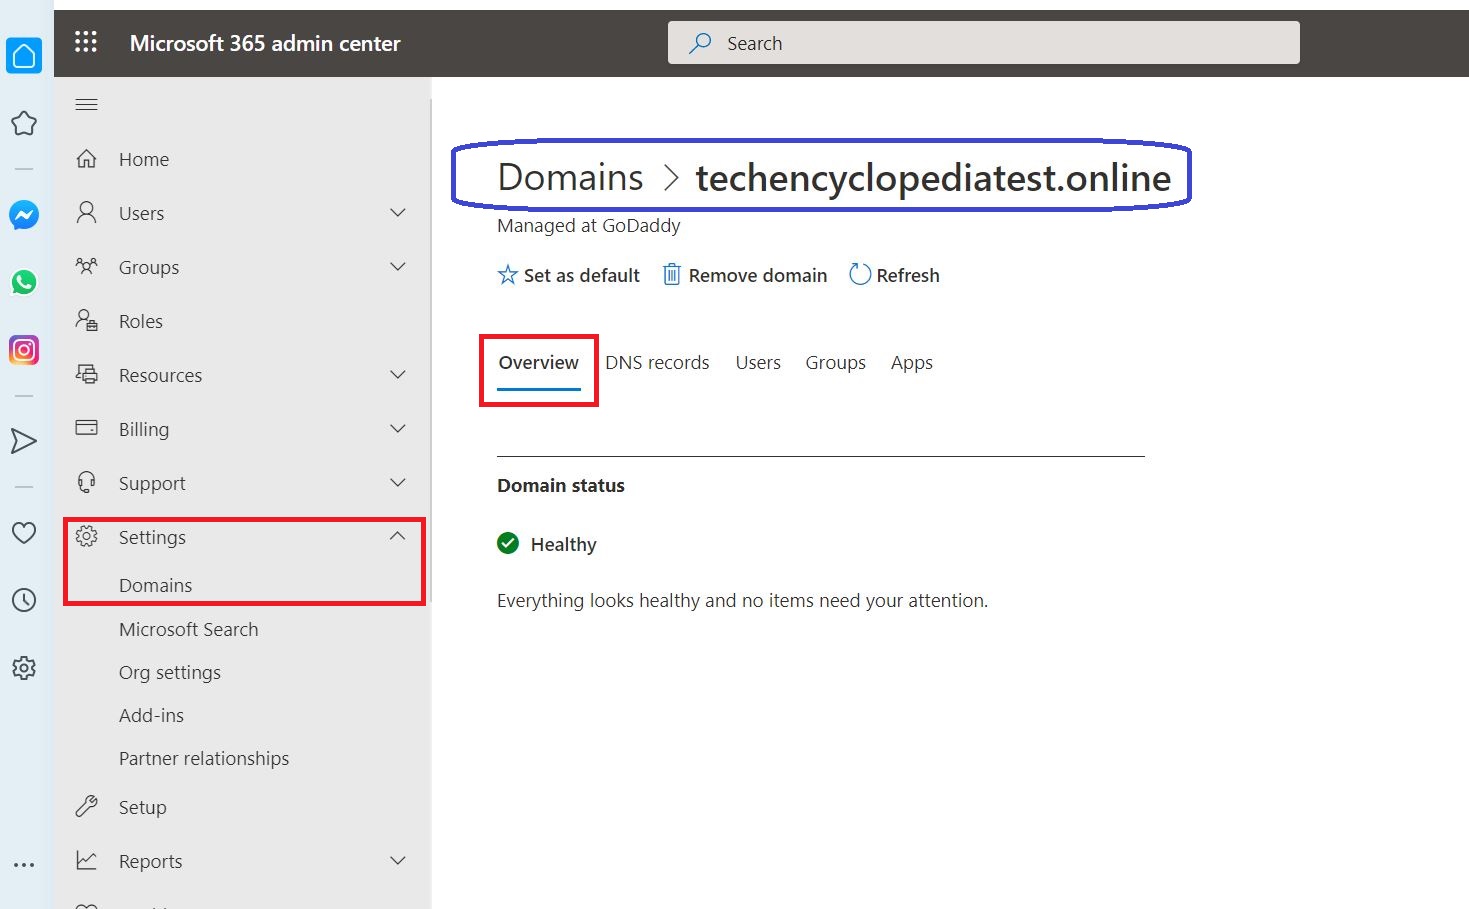
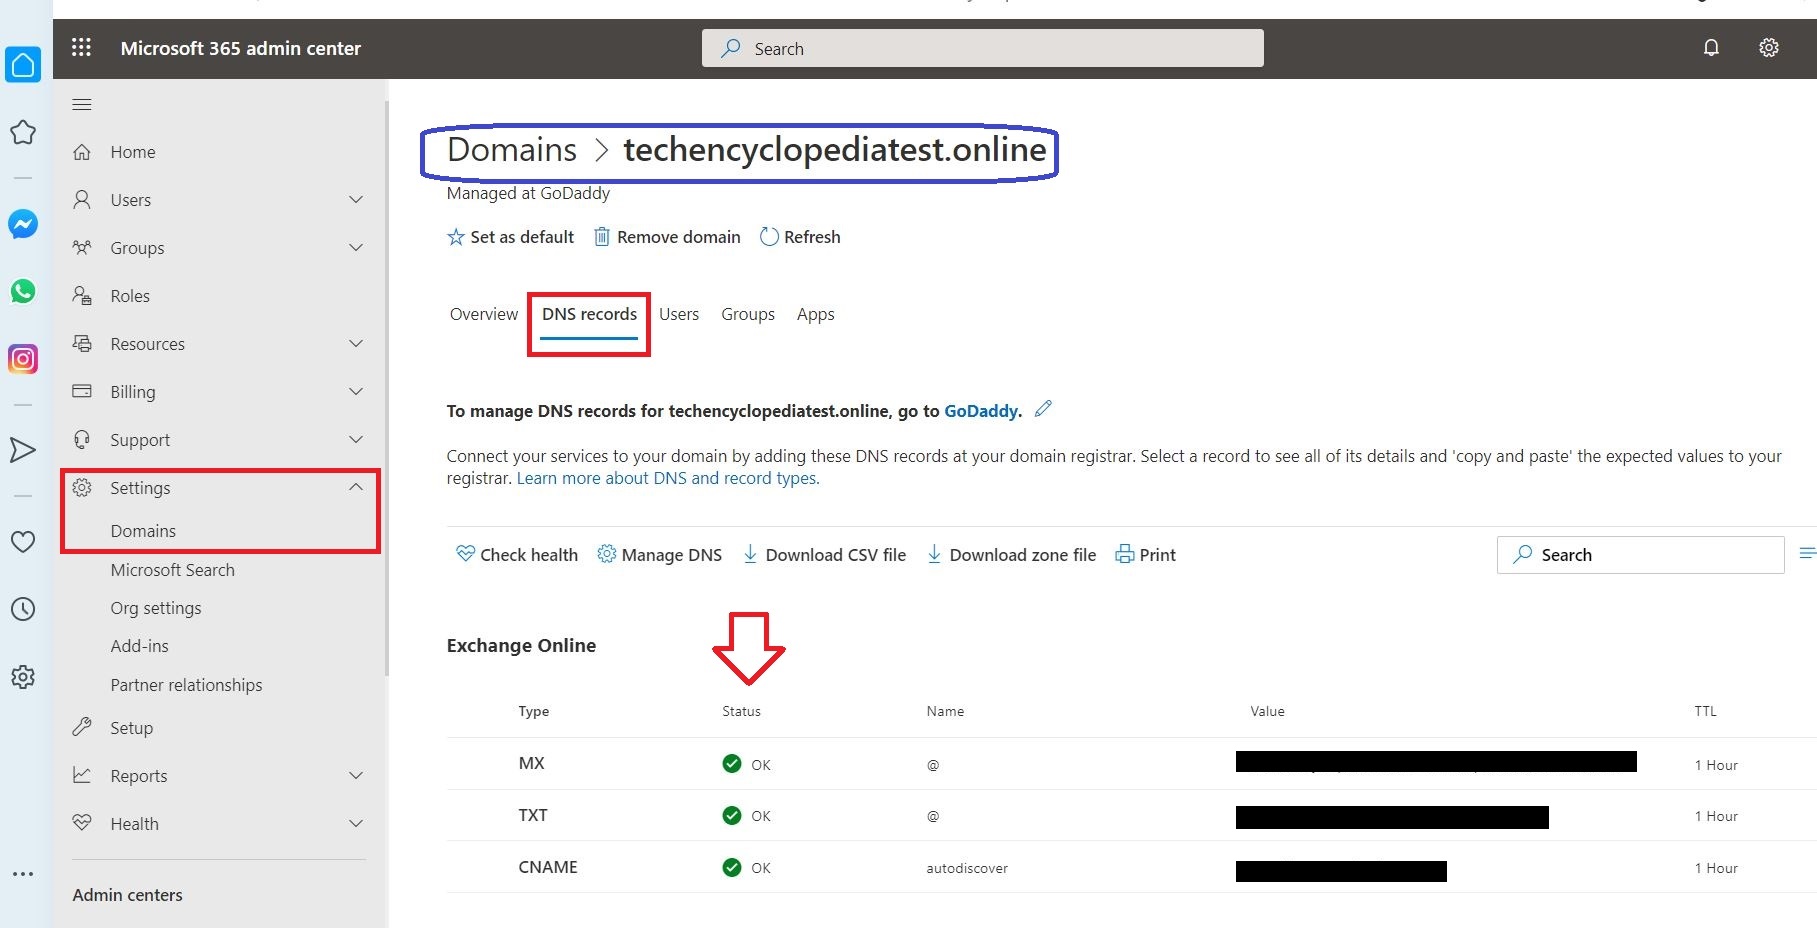
And also in DNS records section make sure the status is OK
02 Create a Google Service Account
It is needed to create a Google Service Account in the Developer page for Service Accounts
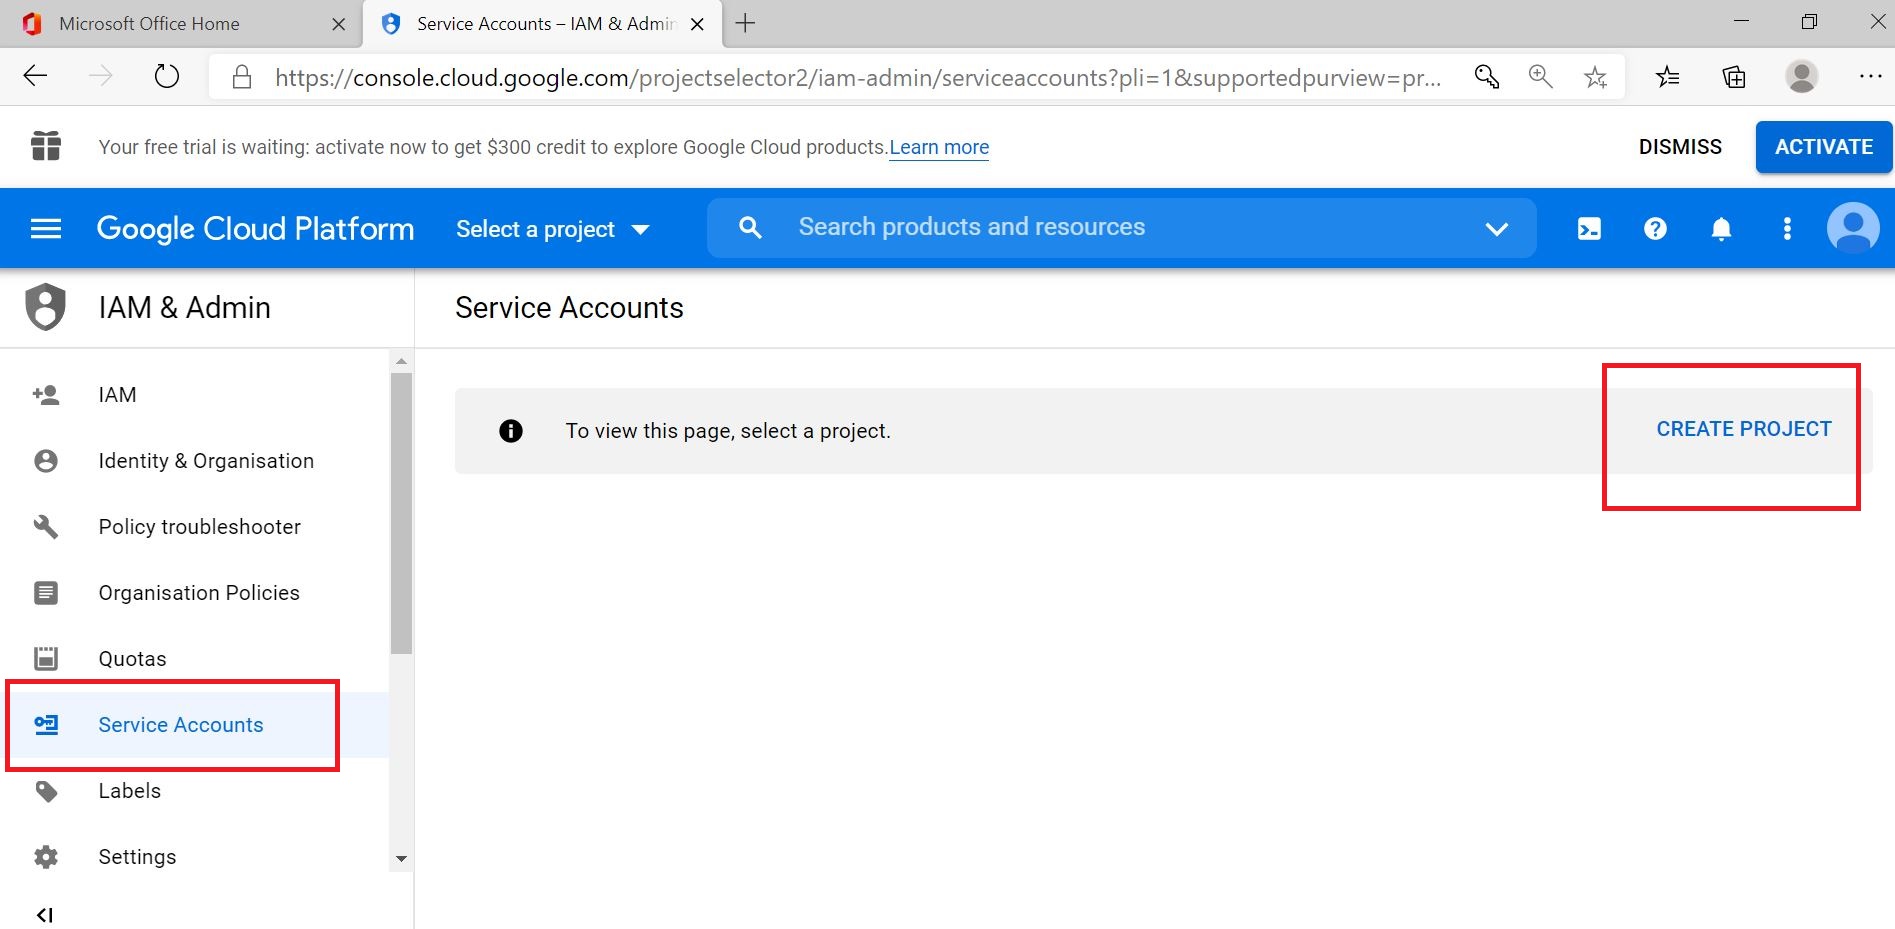
Go to the Developer page for Service Accounts and login as the G Suite admin
https://console.developers.google.com/iam-admin/serviceaccounts
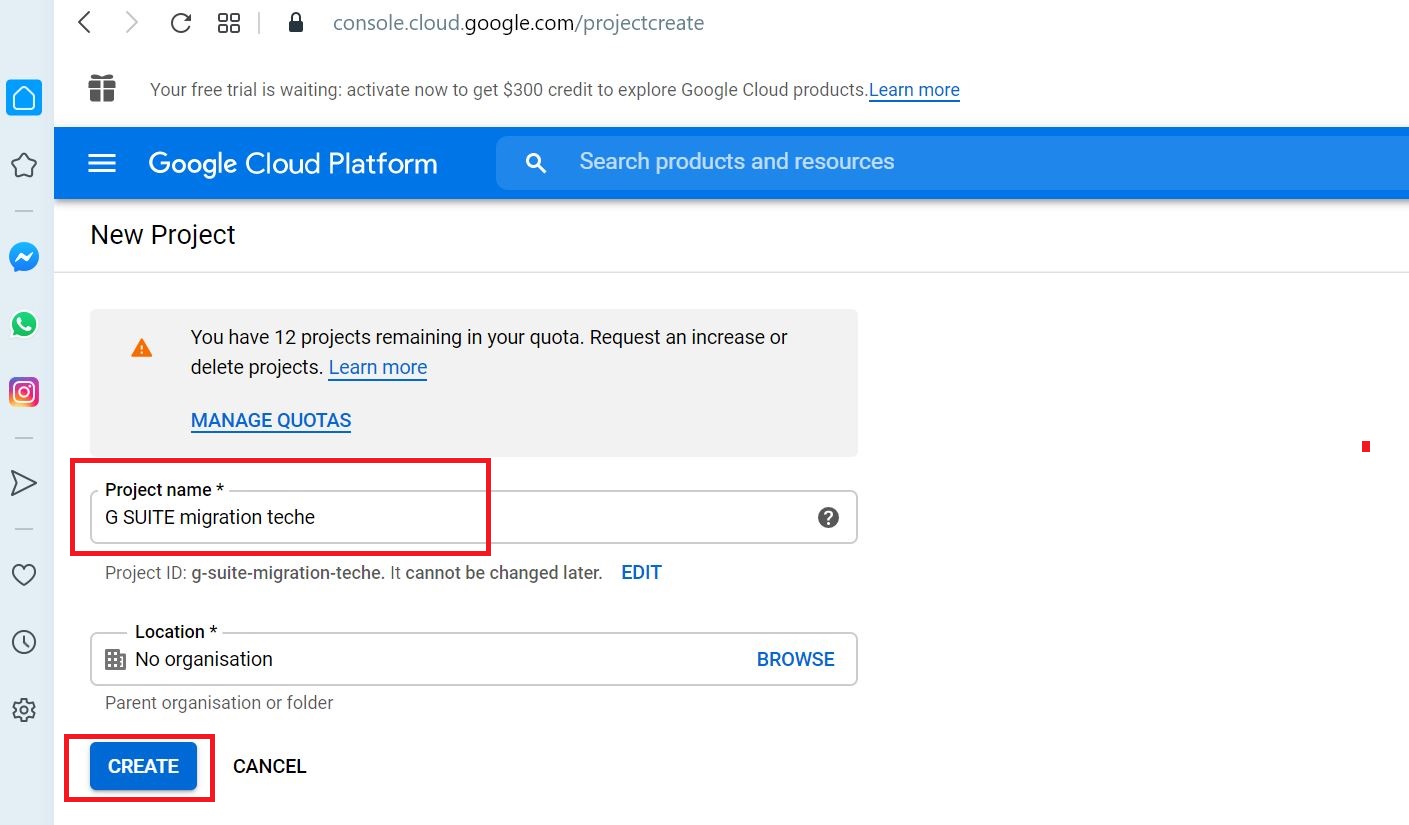
Select CREATE PROJECT to create a new project
Enter the project name and CREATE a project
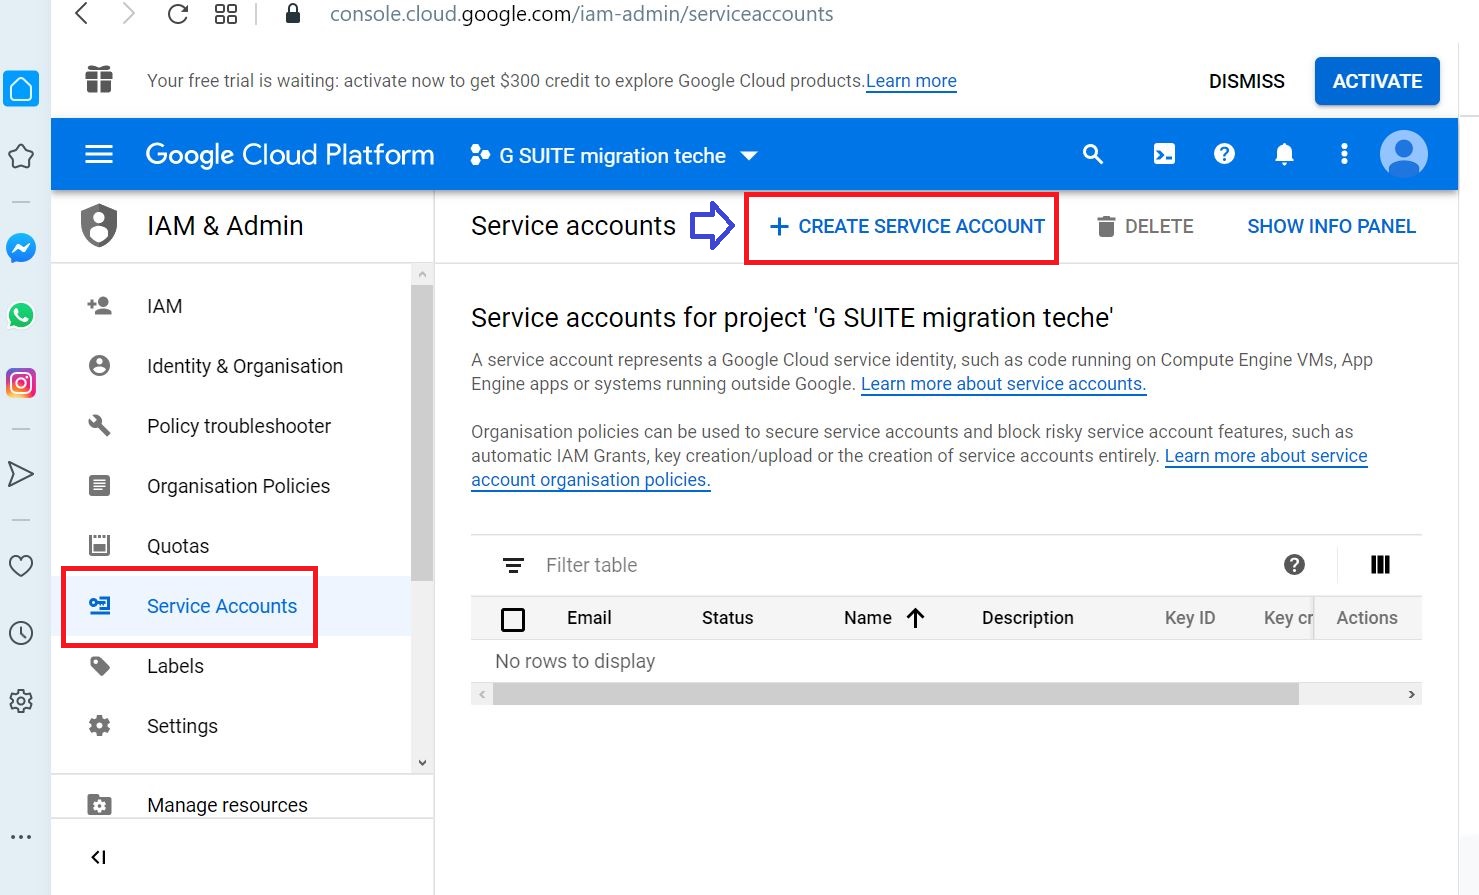
CREATE SERVICE ACCOUNT
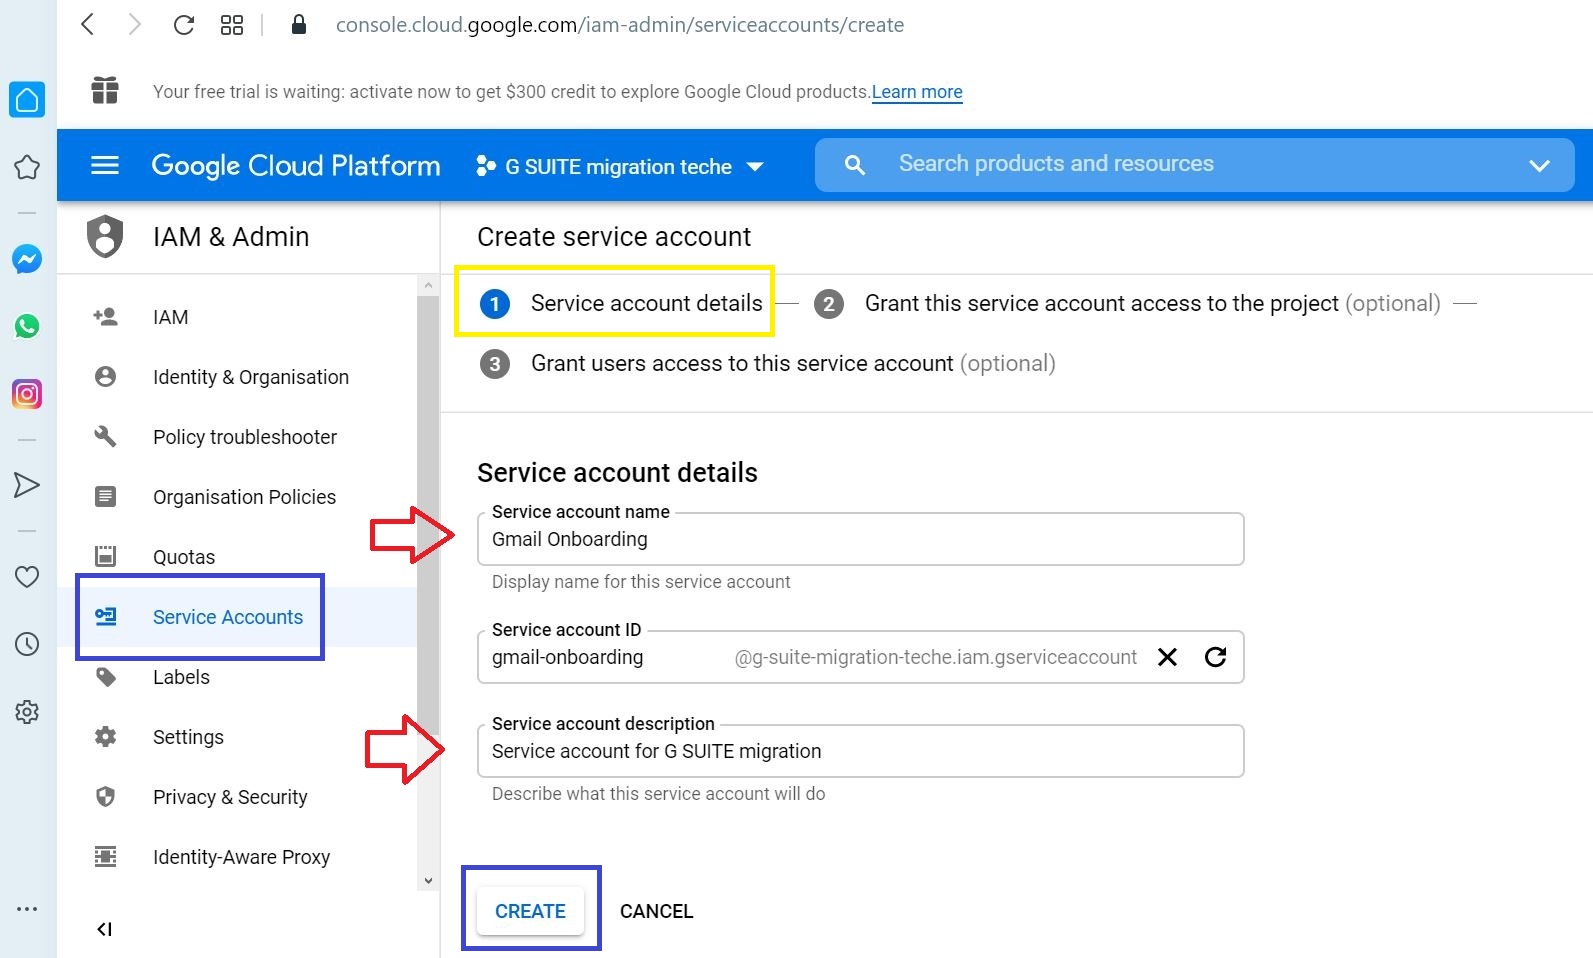
Click Create in Service Account details screen after entering following details
- Service account name
- Service account description
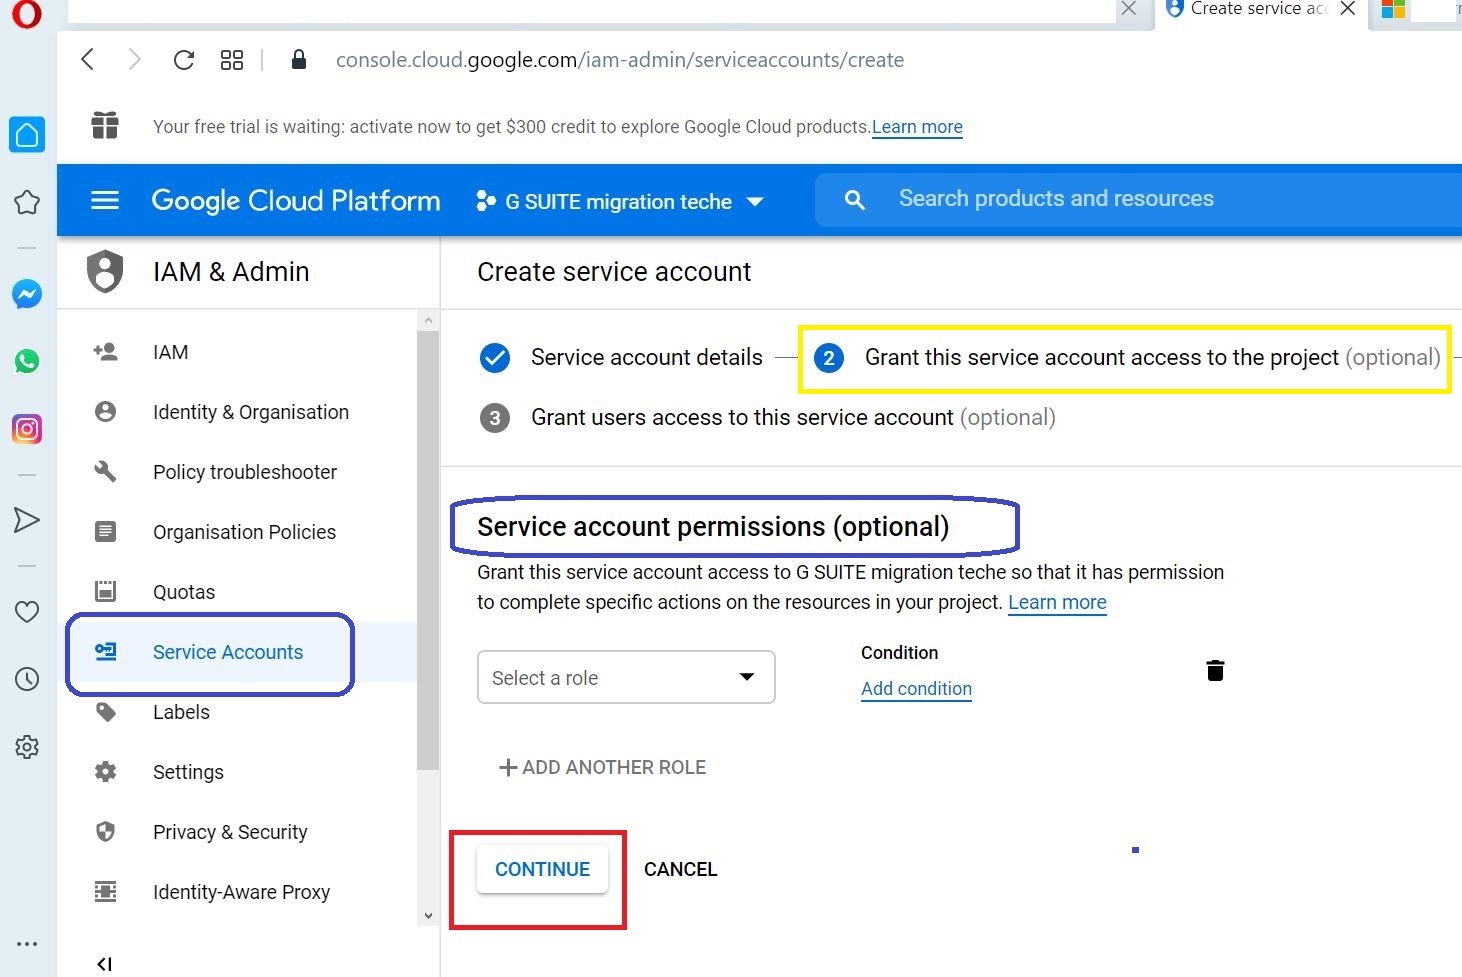
Click CONTINUE to proceed in Service account permissions (optional) screen
Click DONE to proceed in Grant users access to this service account (optional) screen
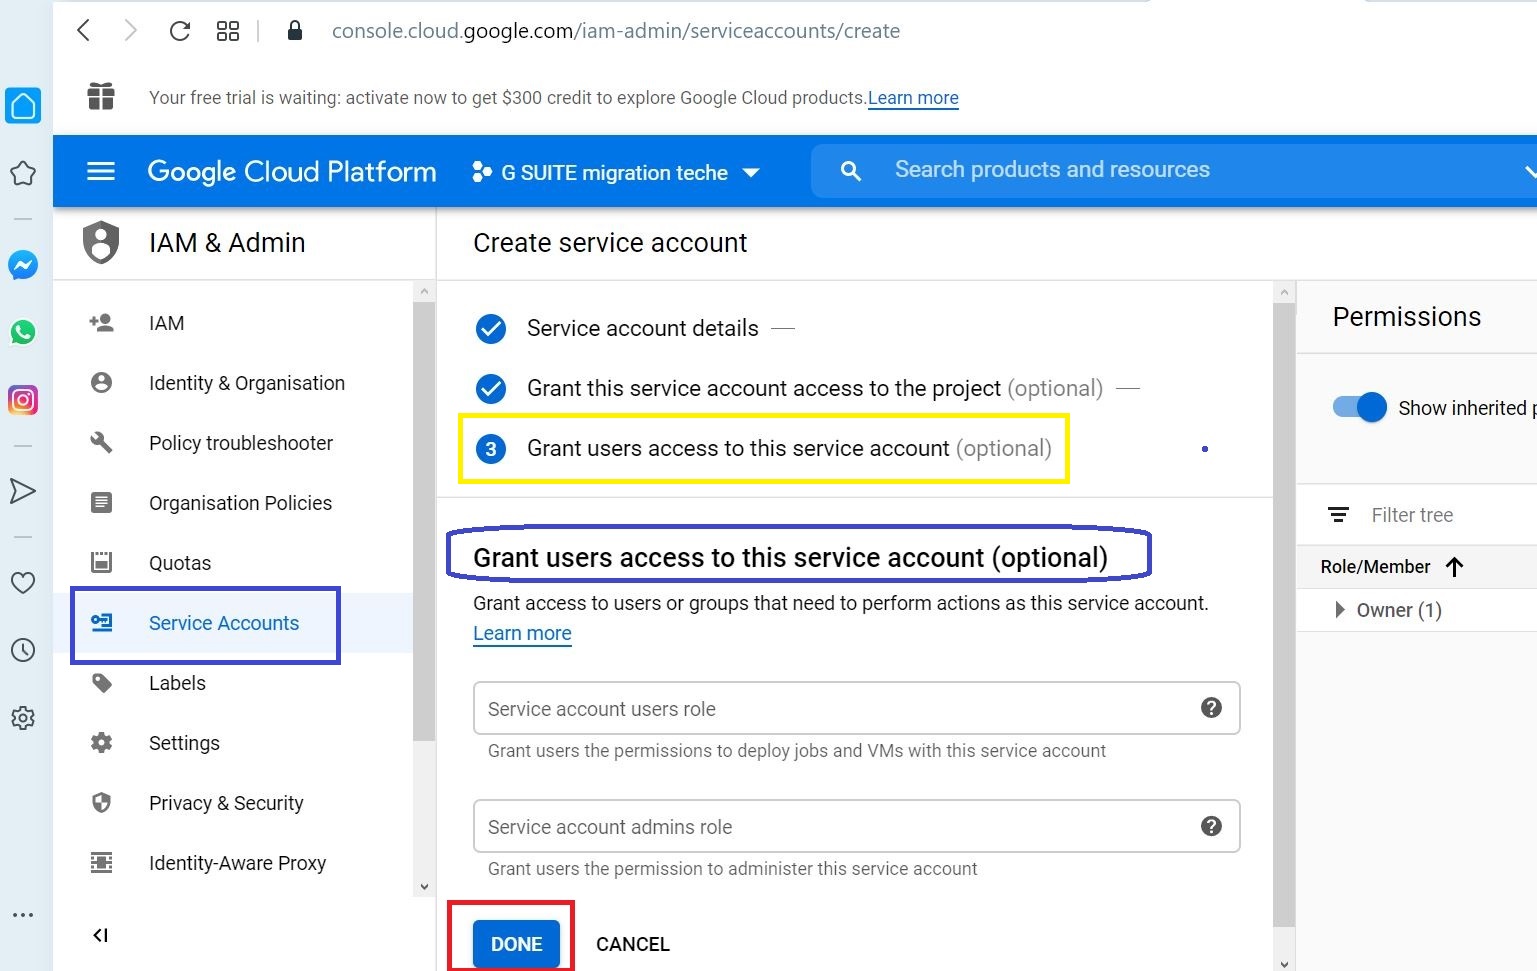
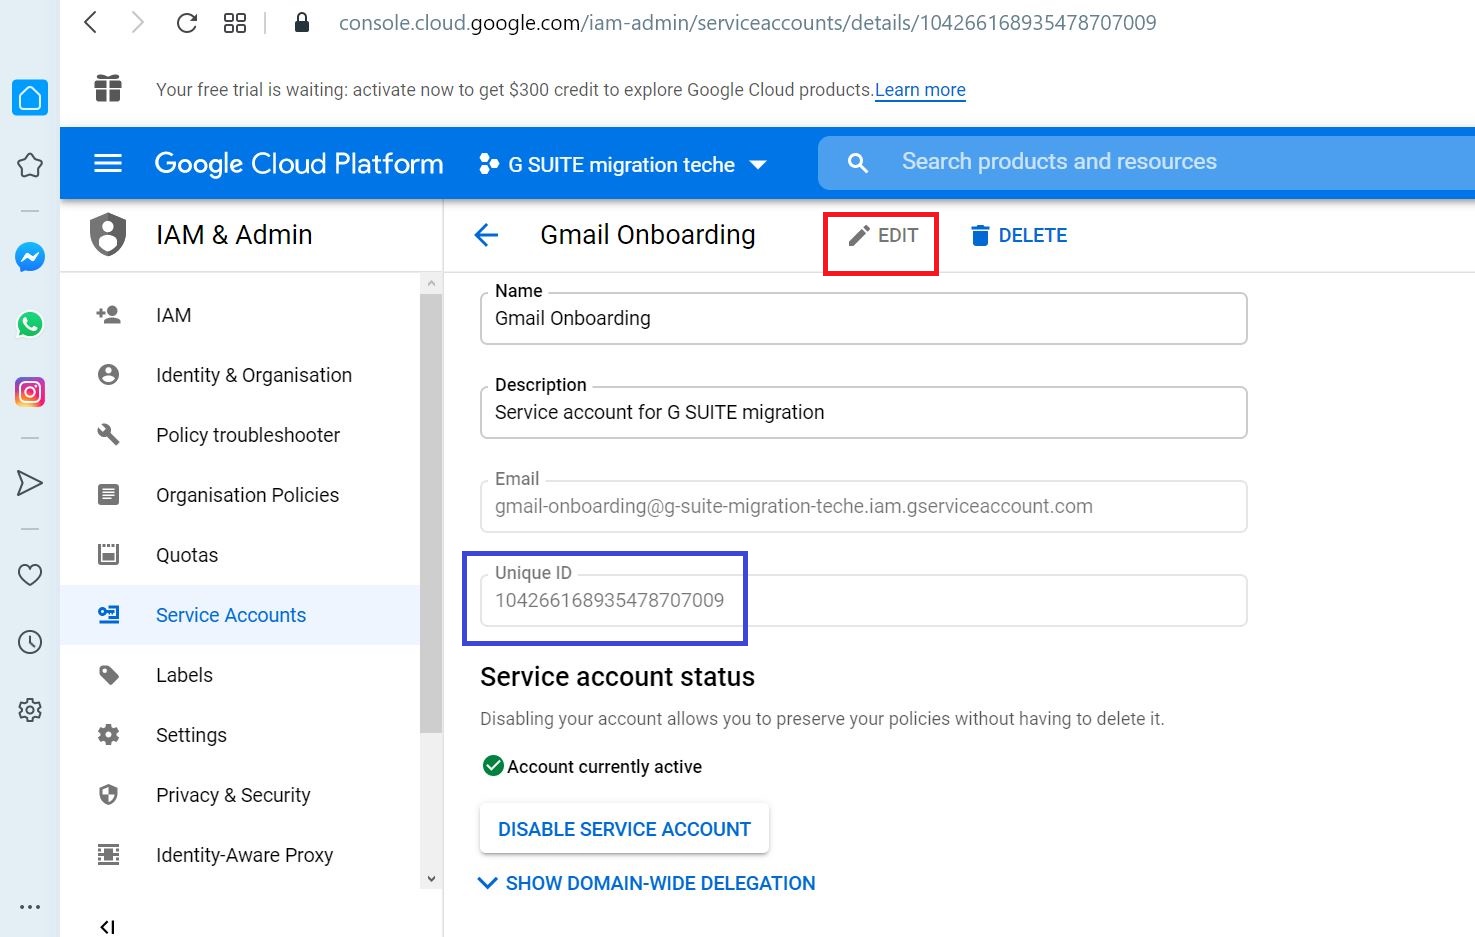
Select the E-mail Address of the service account just created to enter the details

Click EDIT to make configuration
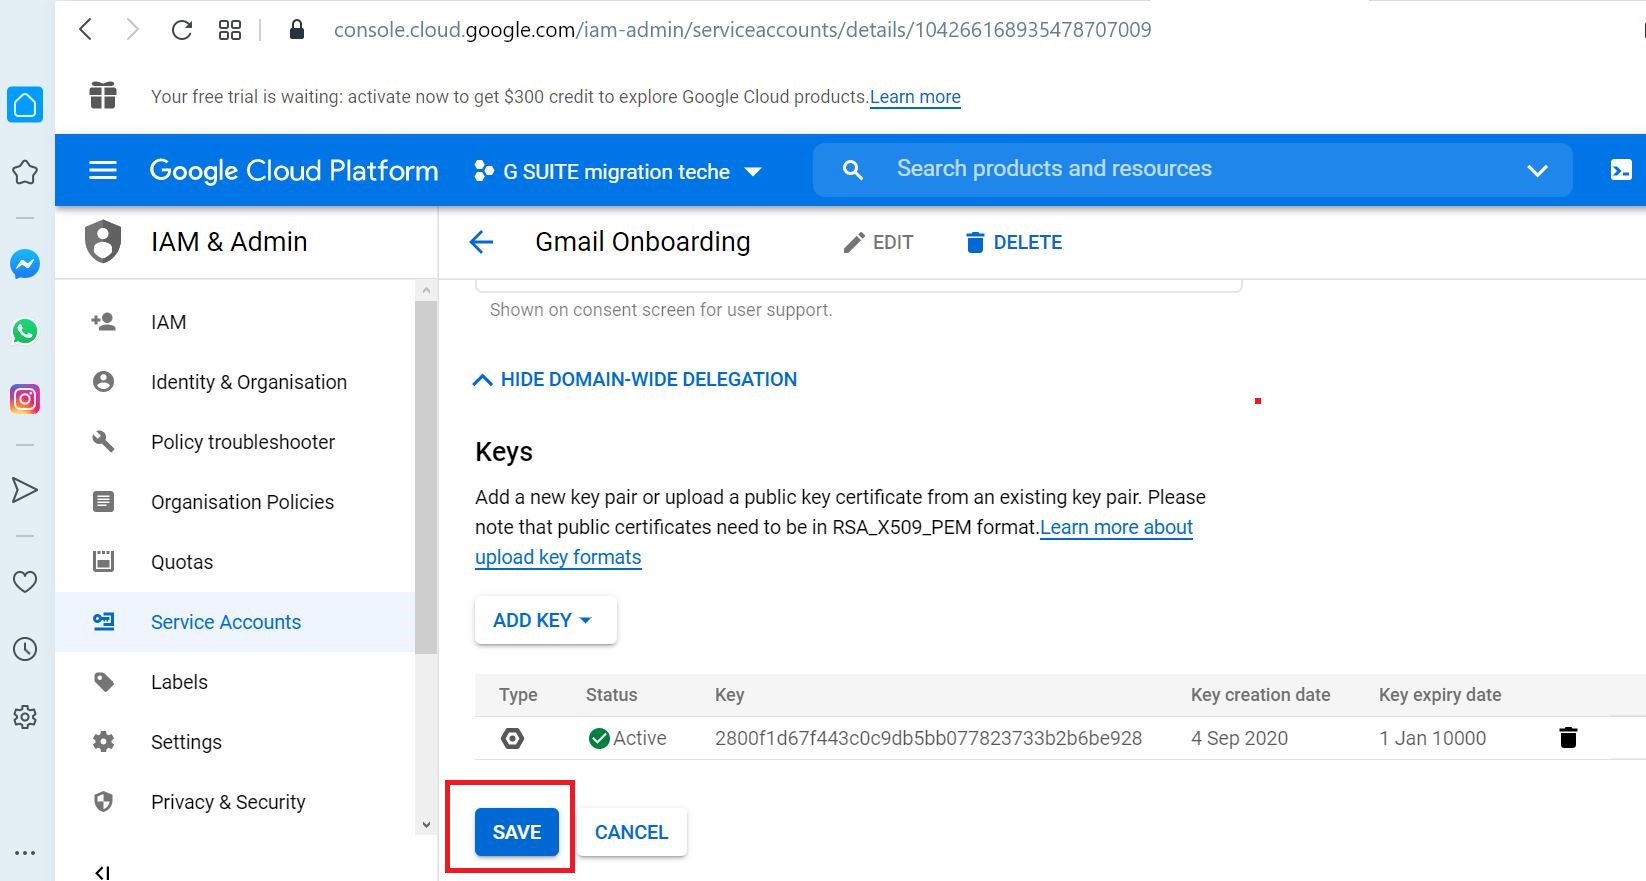
Remember the Uniqe ID which is needed later on
Tick Enable G Suite Domain-wide Delegation
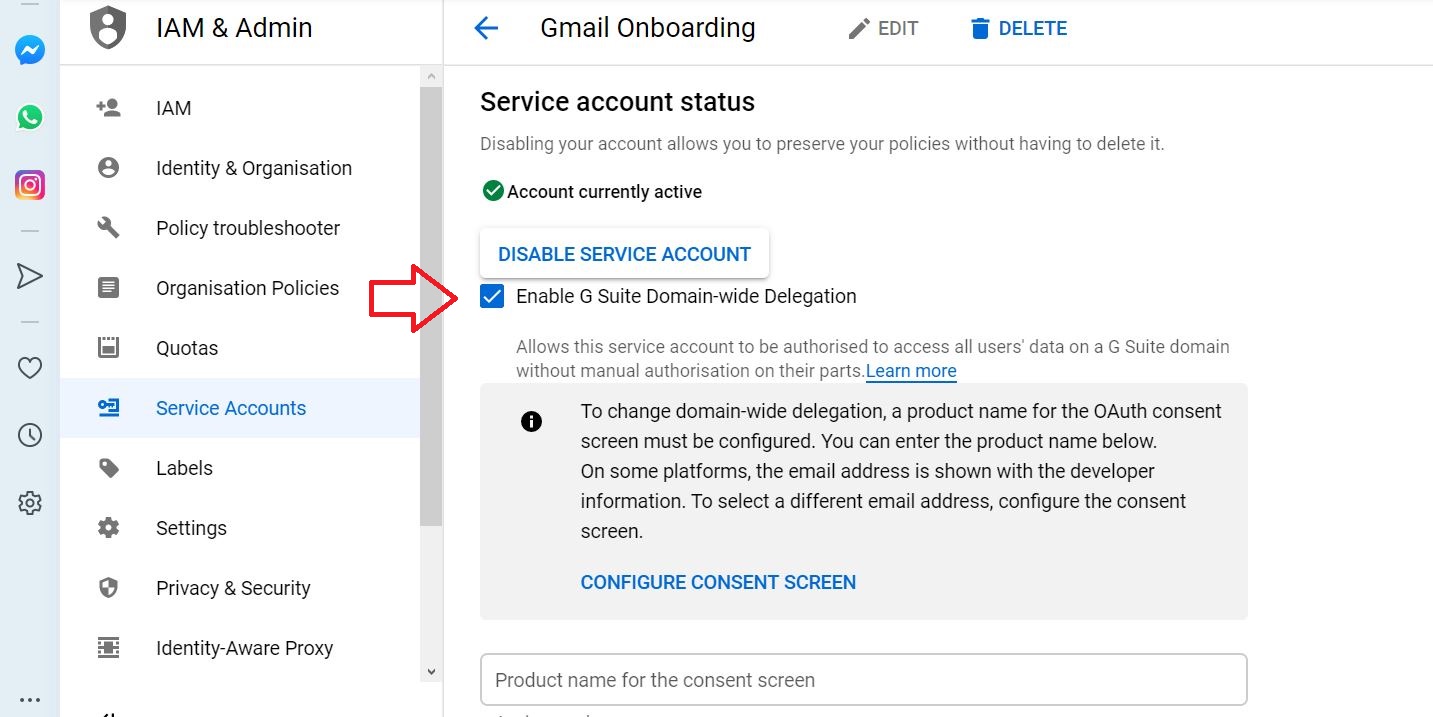
To create a private key select Create new key
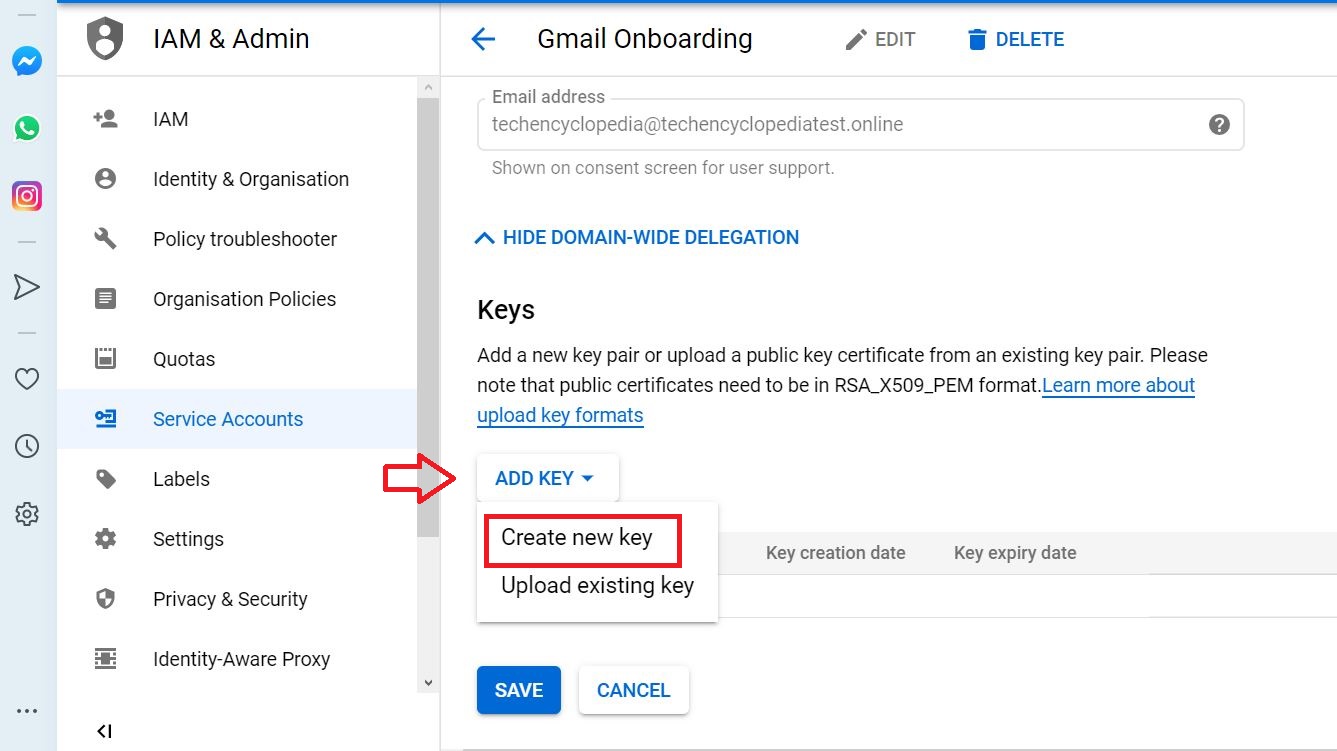
The private key is created. for the key type JSON is recommended.
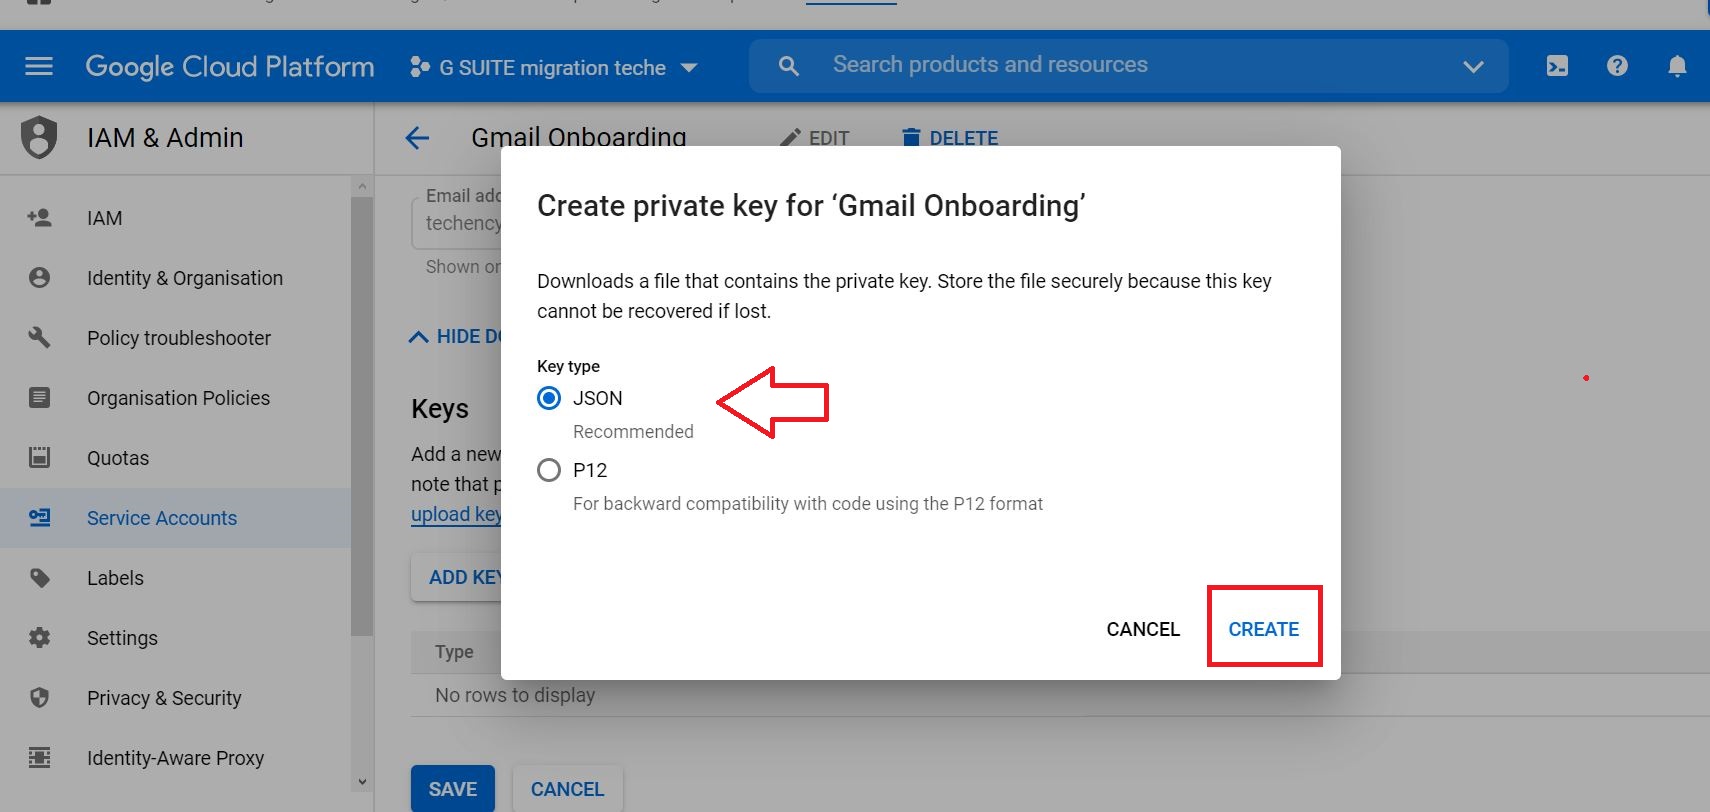
The JSON file is downloaded. This file is needed later on.

Do not forget to SAVE the configuration
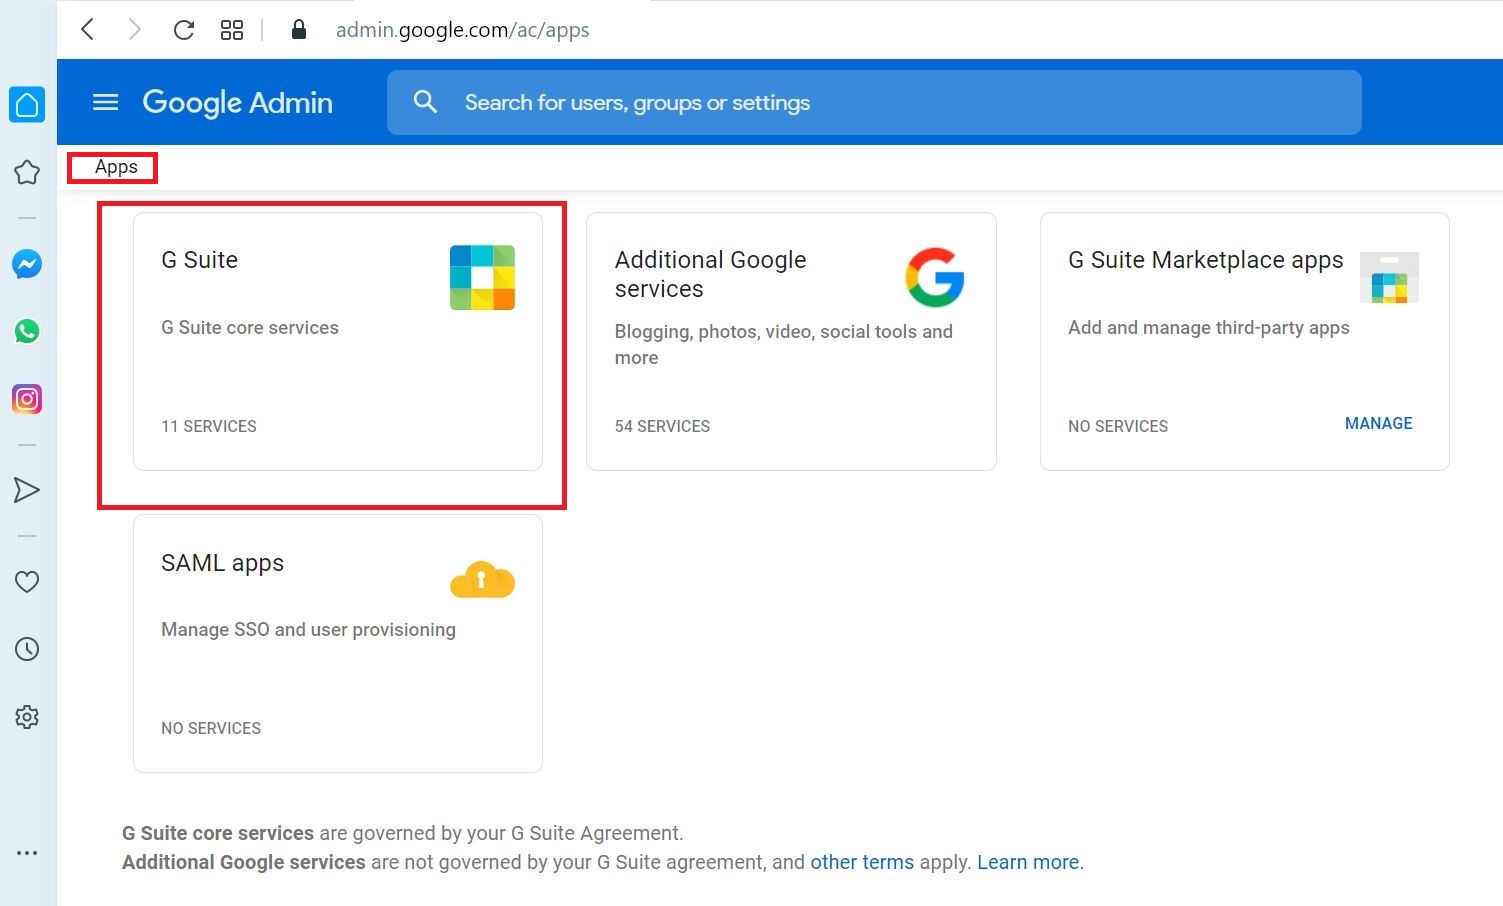
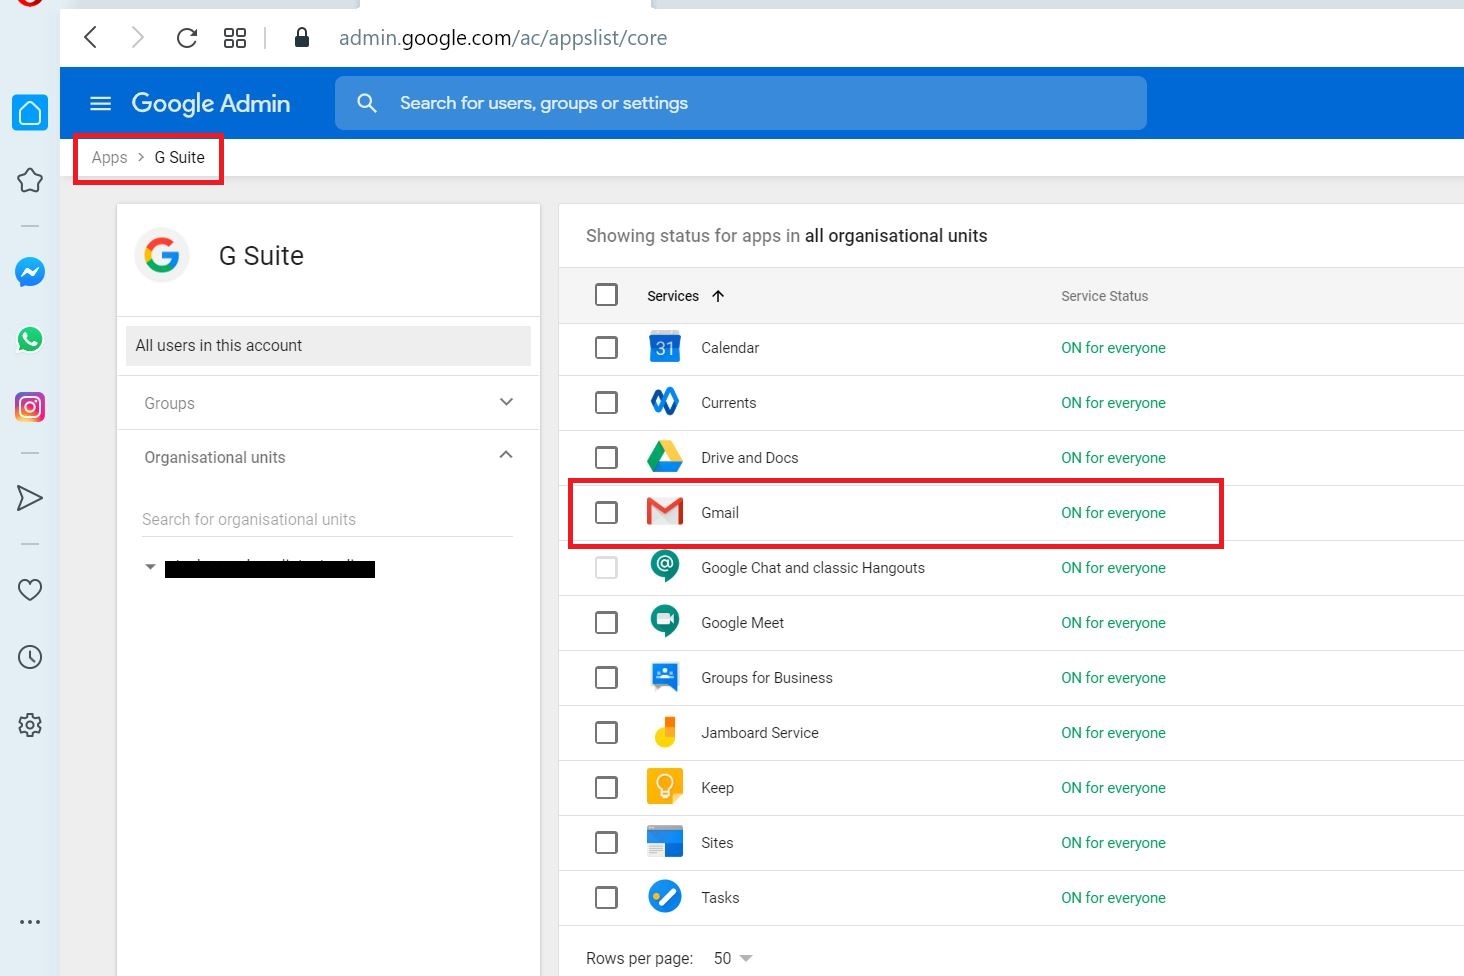
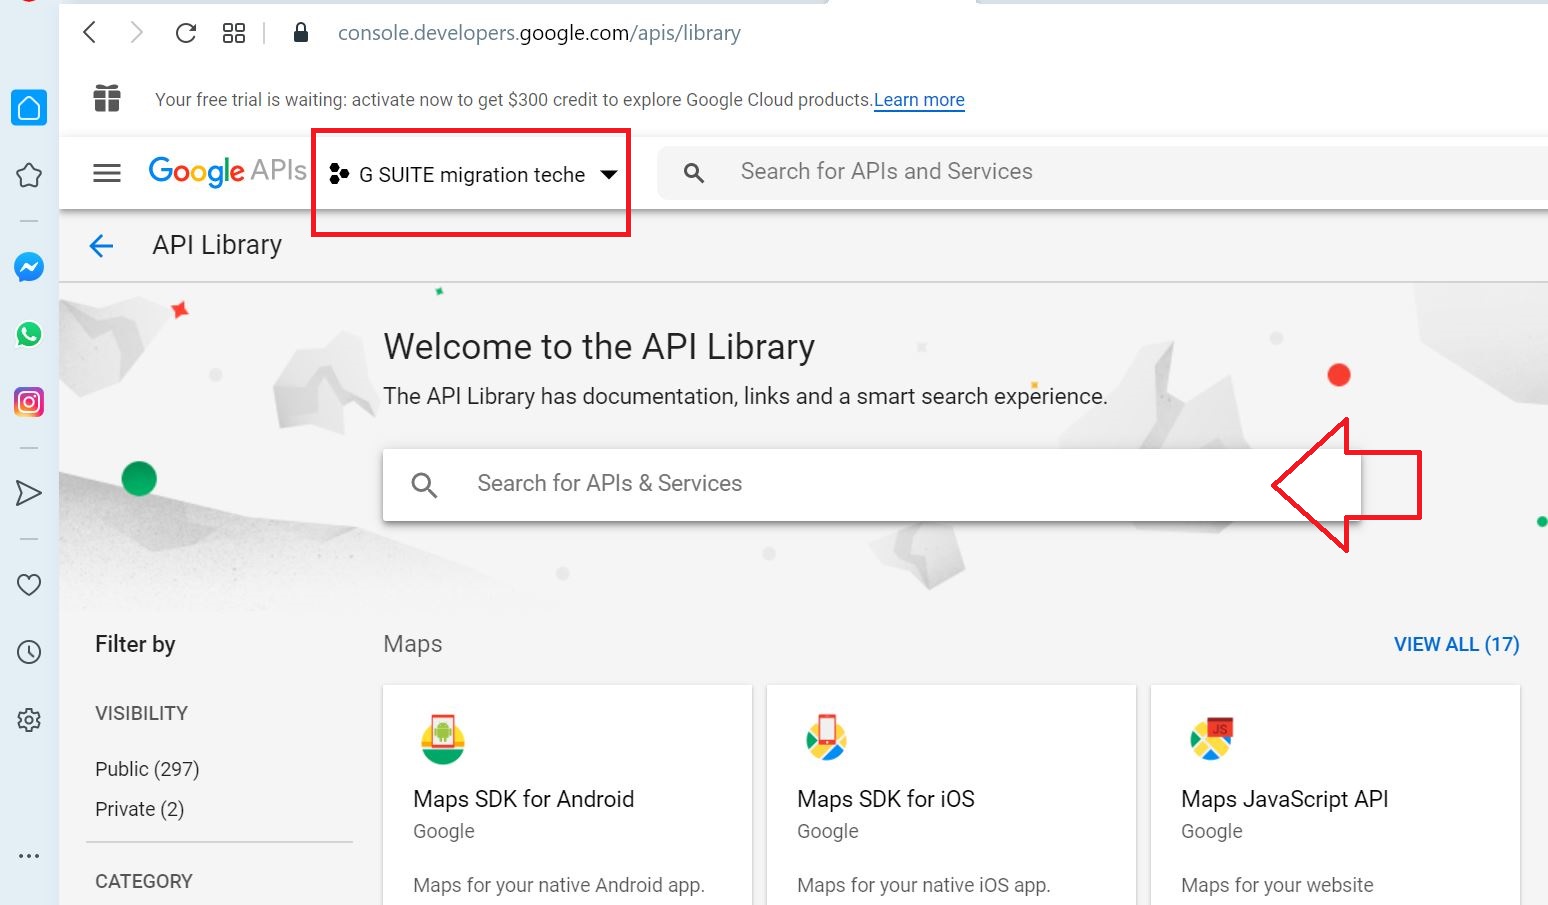
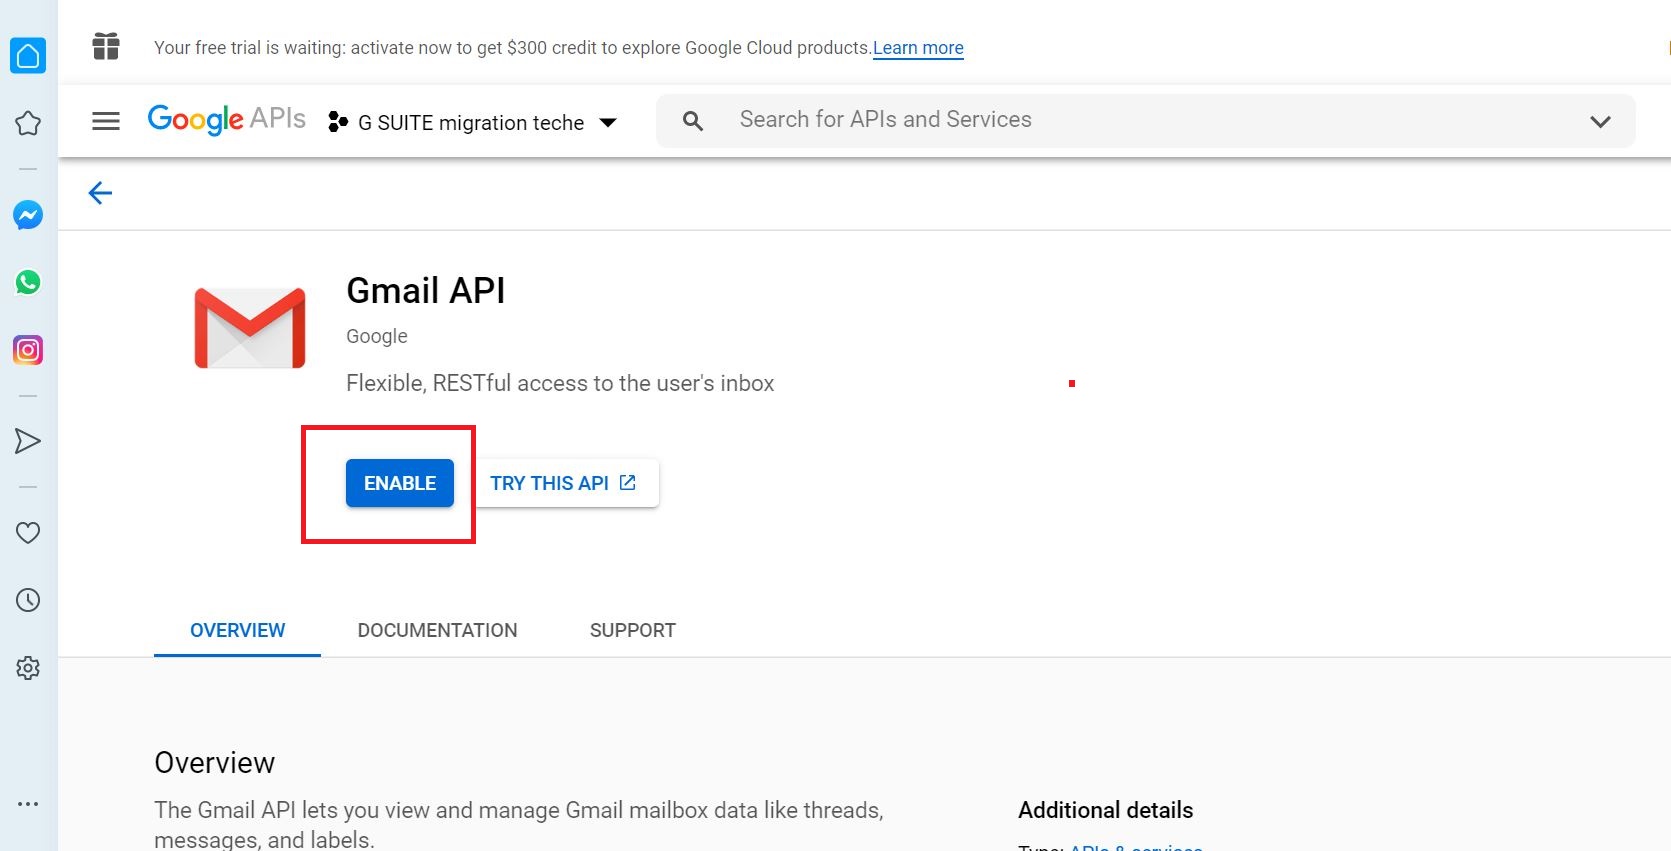
03 Enable API usage in your project
We need to enable the required APIs (Gmail, Google Calendar and Contacts) in the project created in Developer page for API Library.
Go to the Developer page for API Library, sign in and enable the following APIs
- Gmail API
- Google Calendar API
- Contacts AP
https://console.developers.google.com/apis/library
Firstly, select the project created earlier
Search the API (EX- Gmail API)
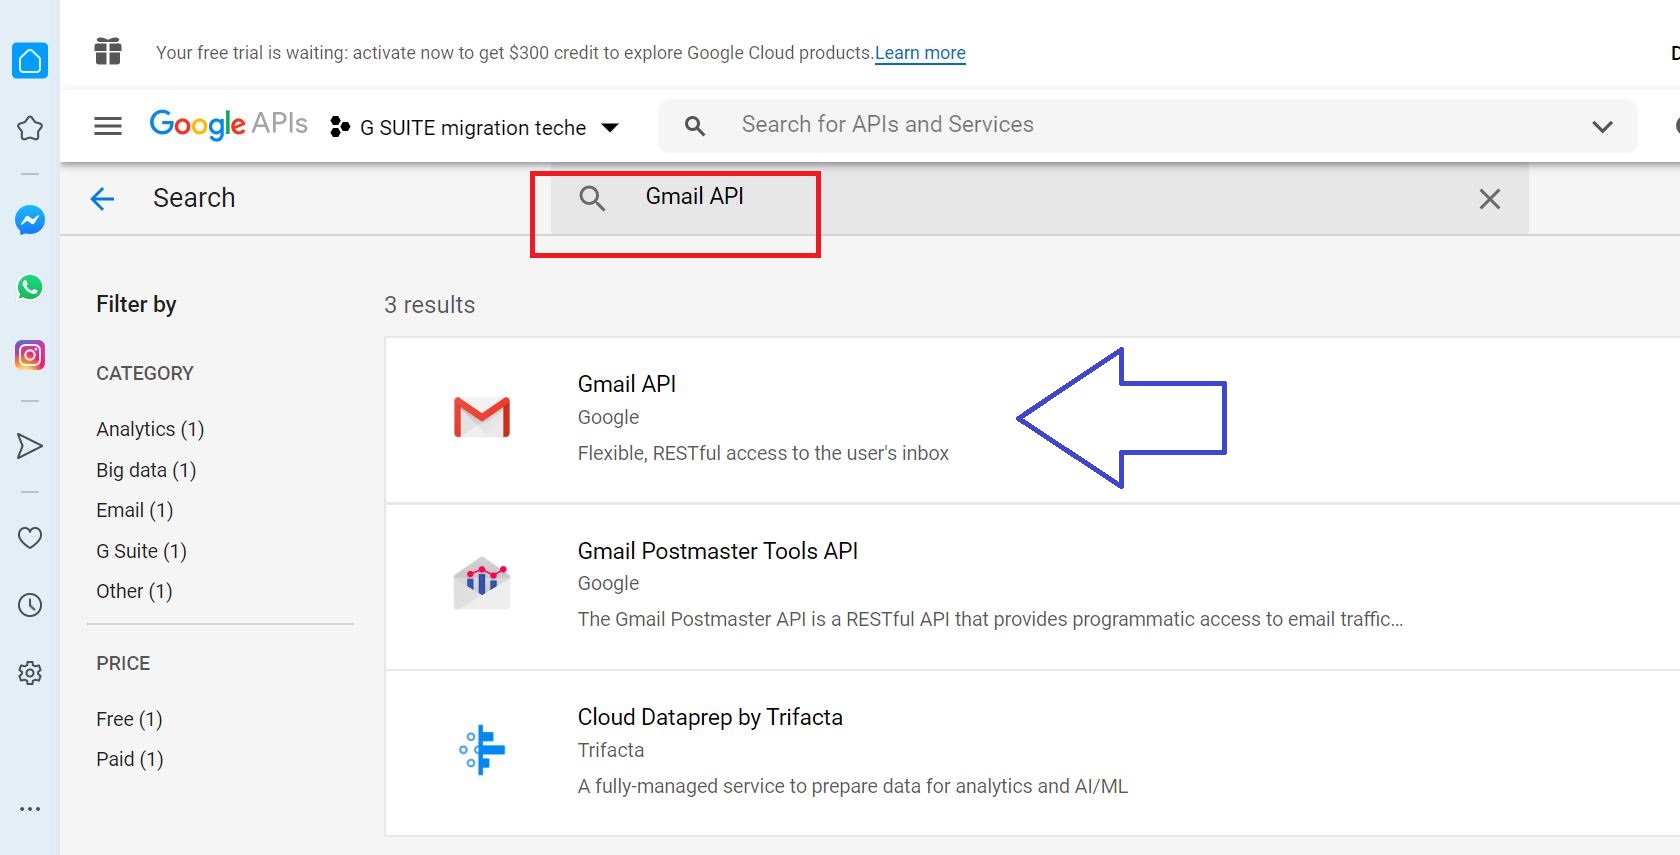
Enable the API
Follow the same process for Google Calendar API and Contacts API
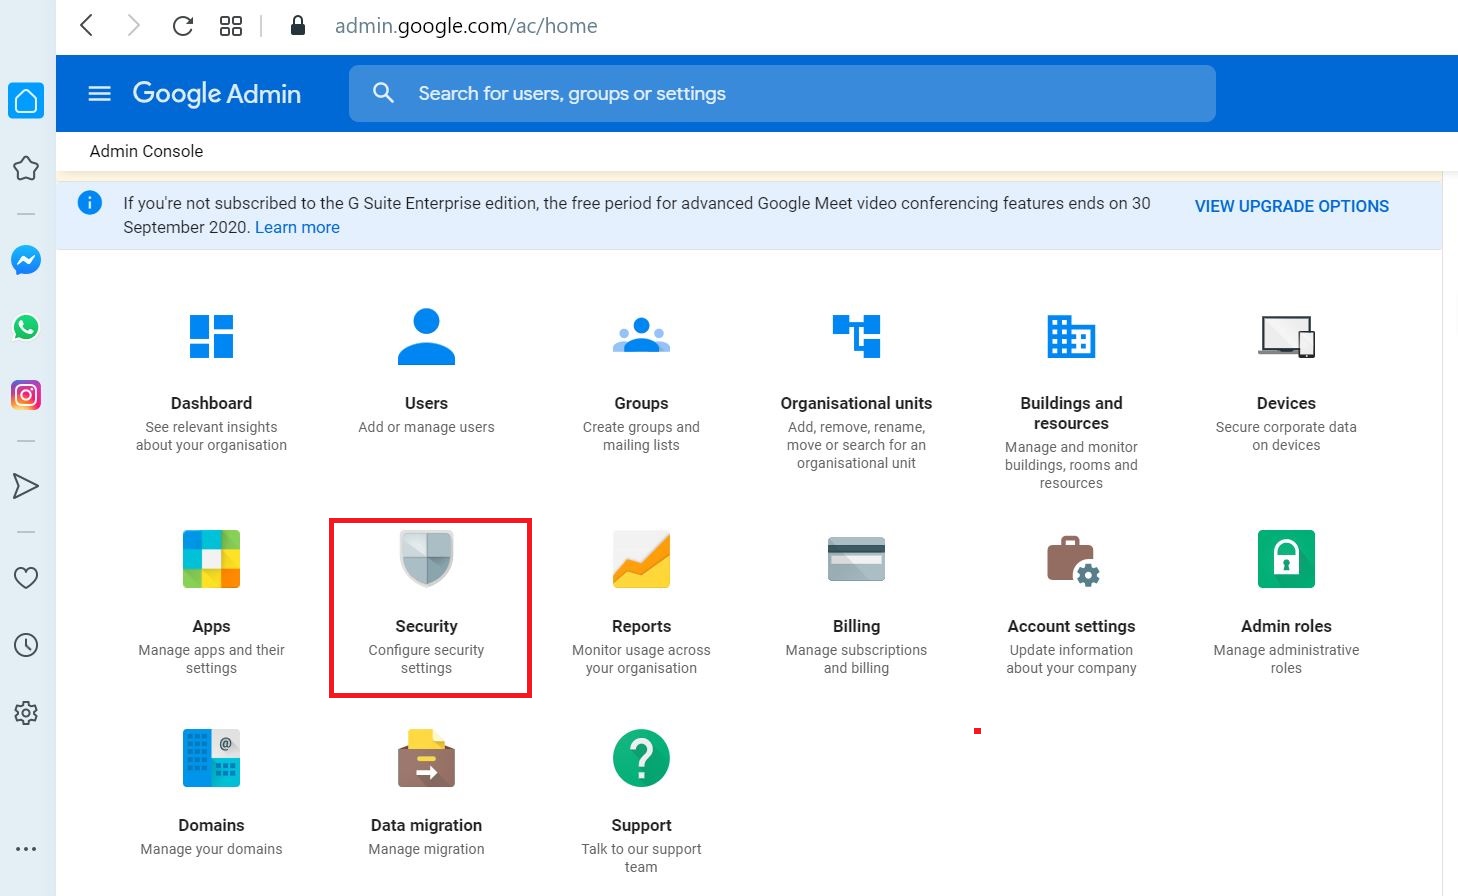
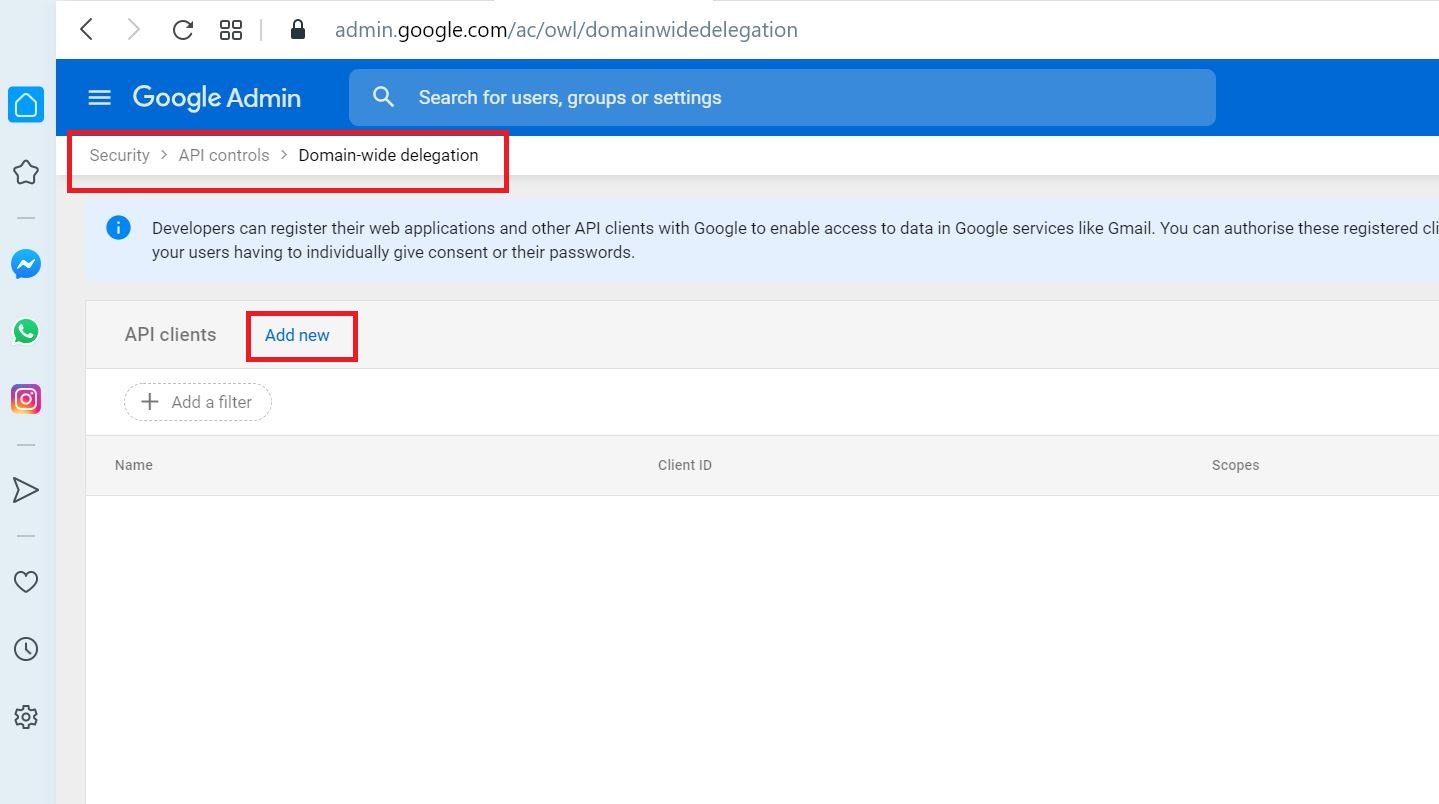
04 Grant access to the service account for your Google tenant
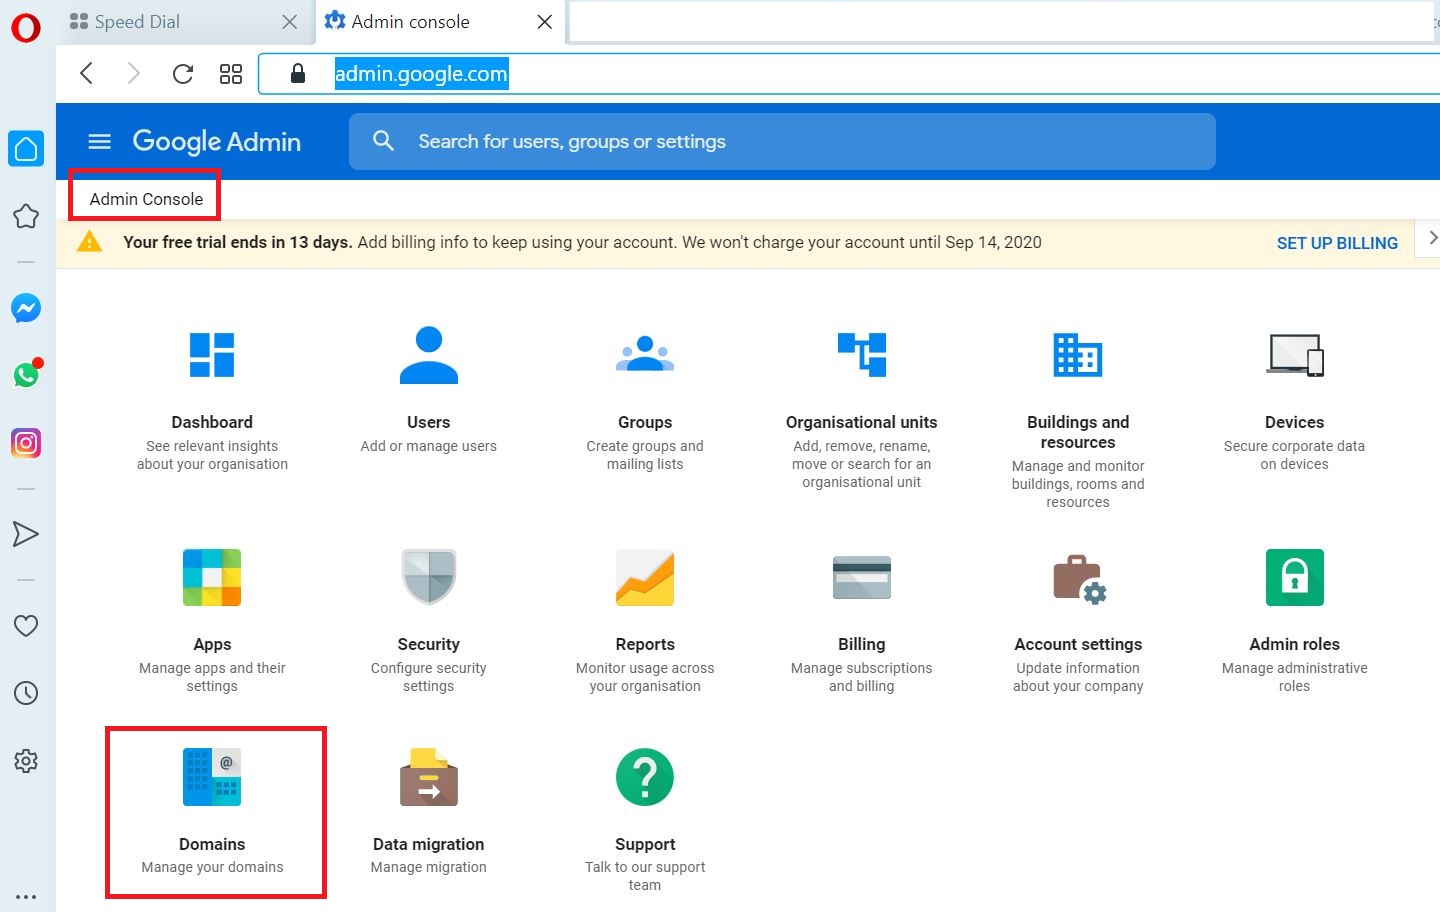
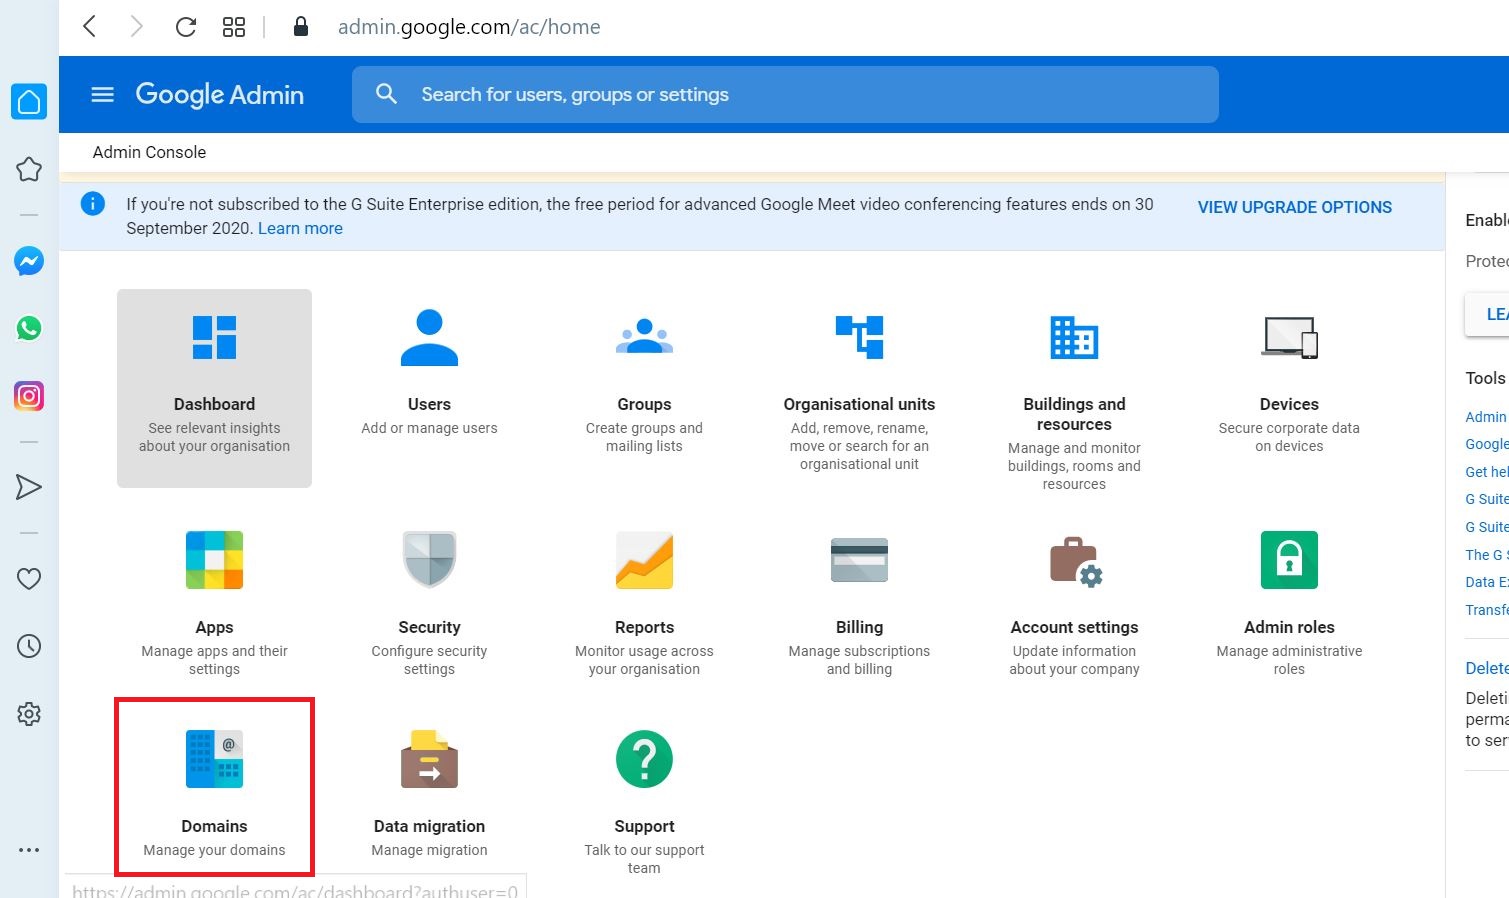
Go to G Suite admin page
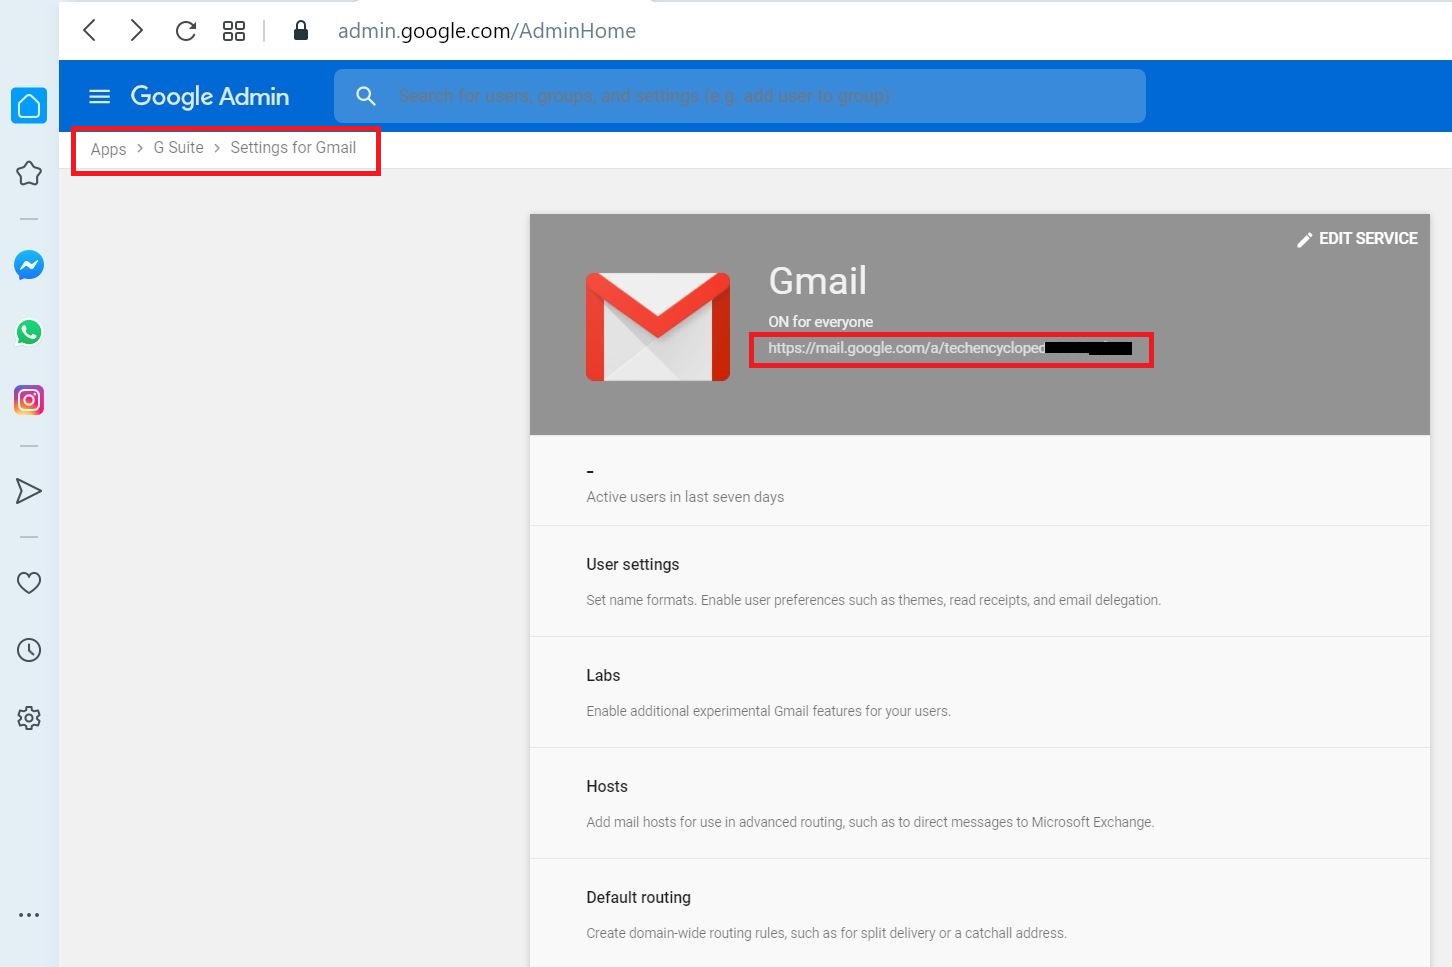
https://admin.google.com/AdminHome
Select Security
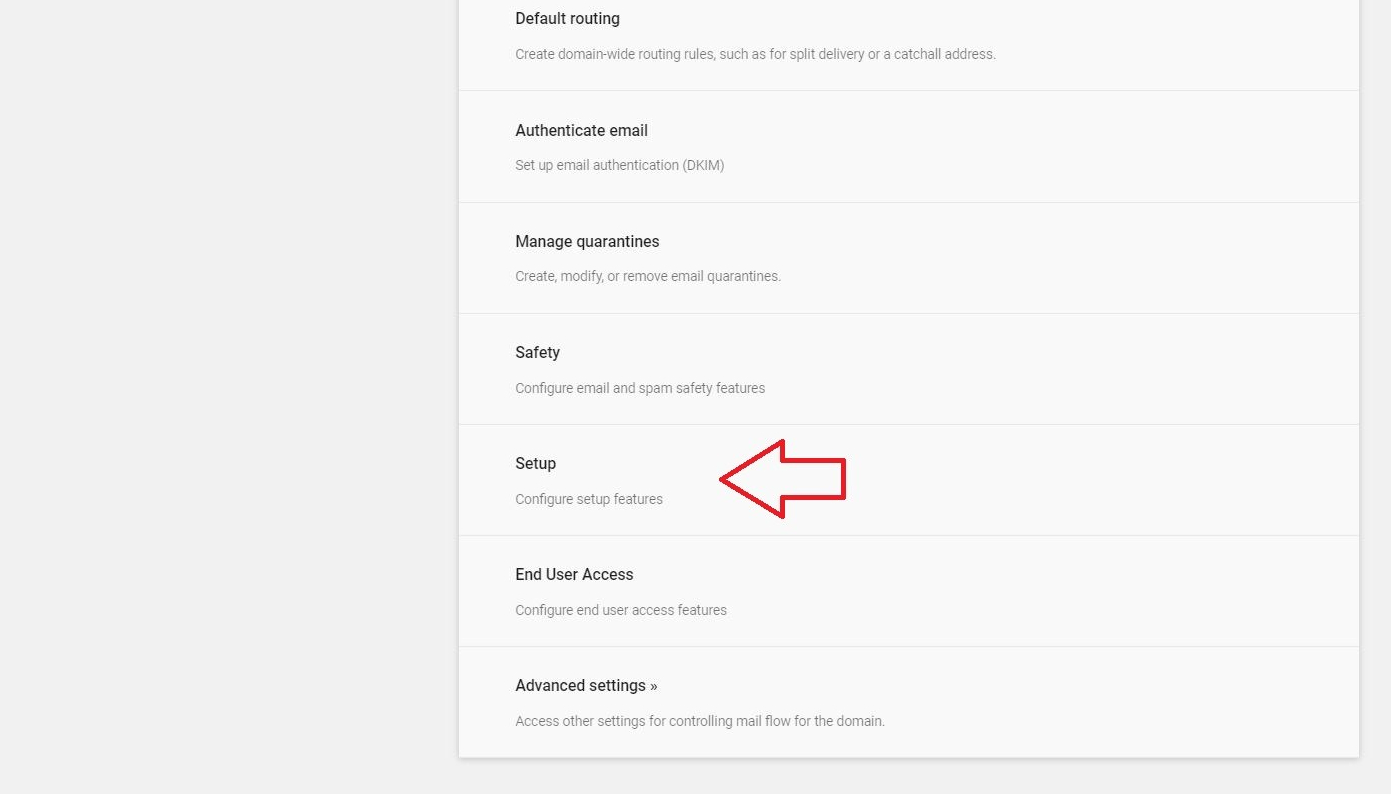
Select Advanced Settings
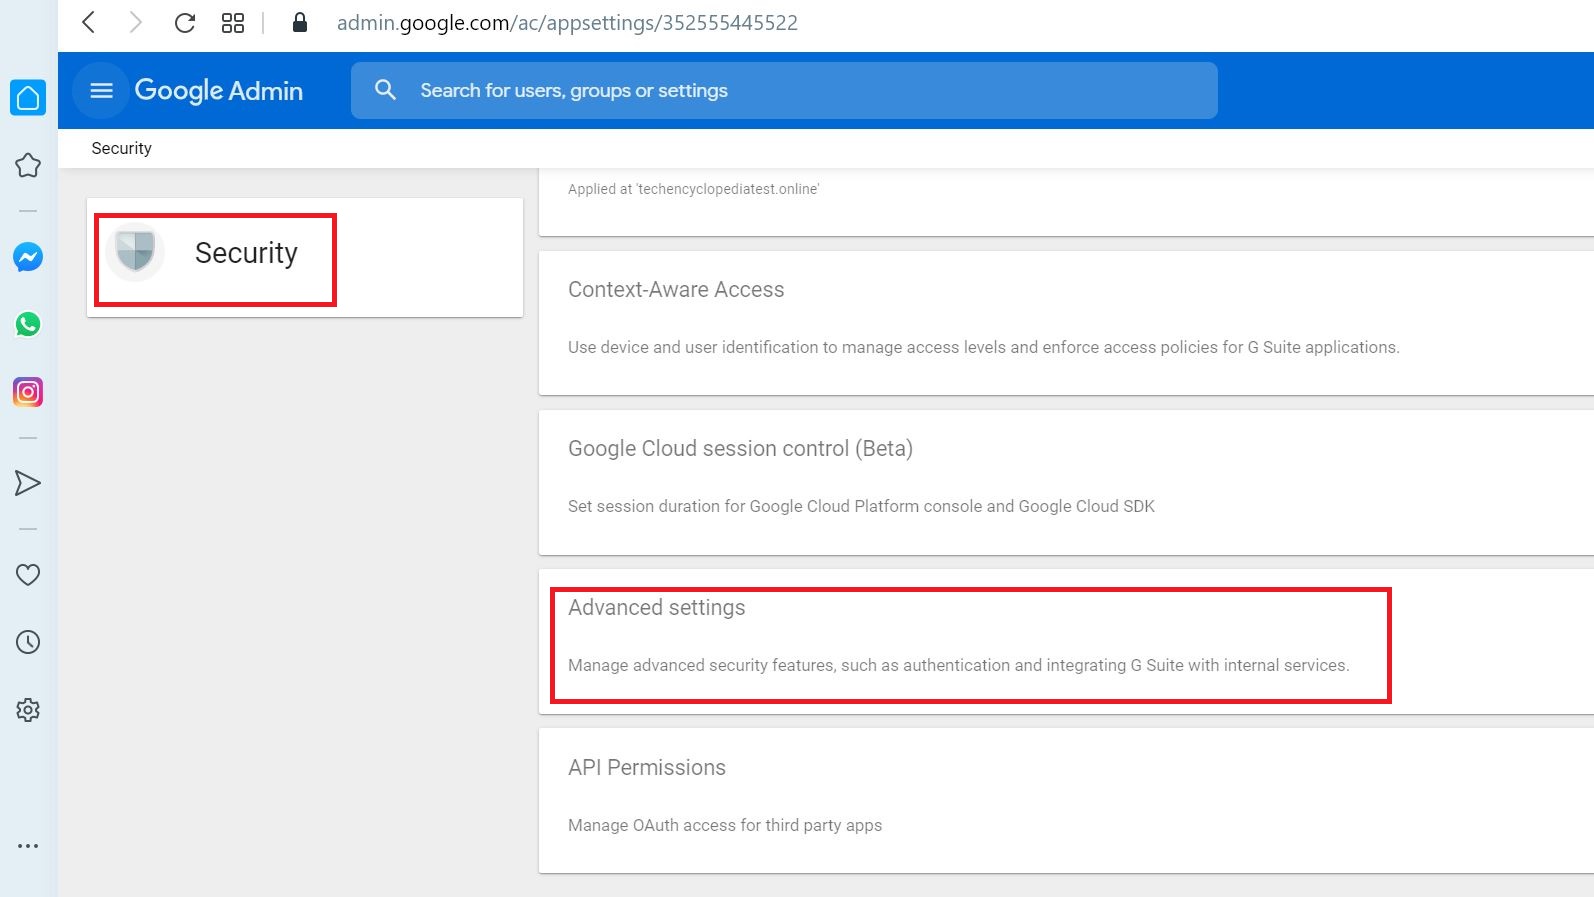
Select MANAGE DOMAIN-WIDE DELEGATION
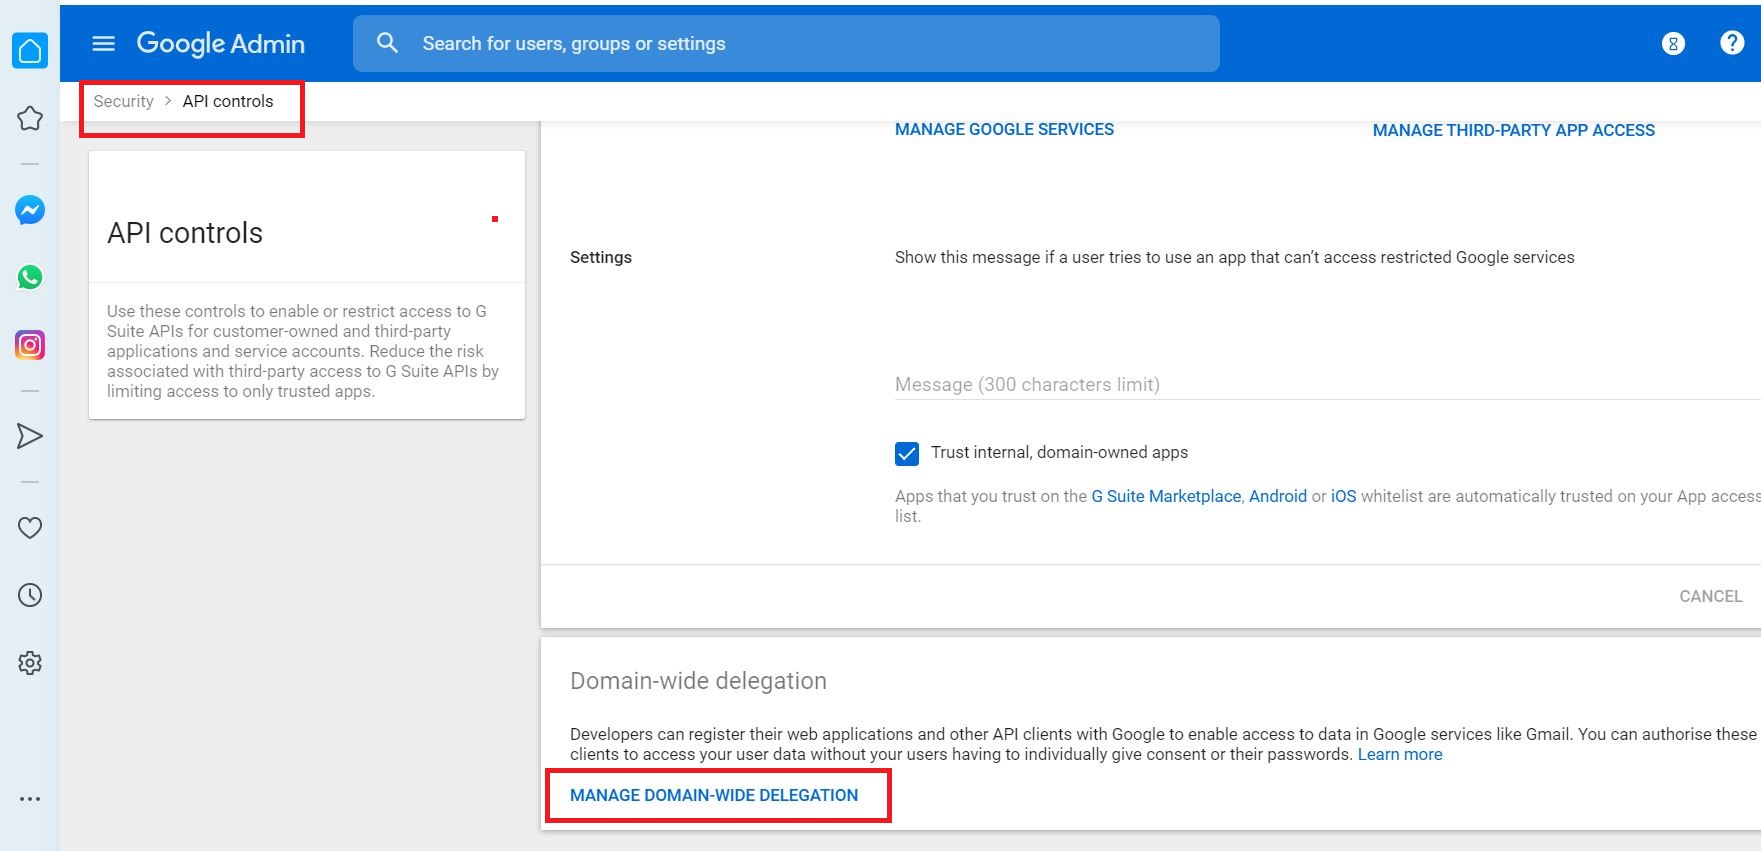
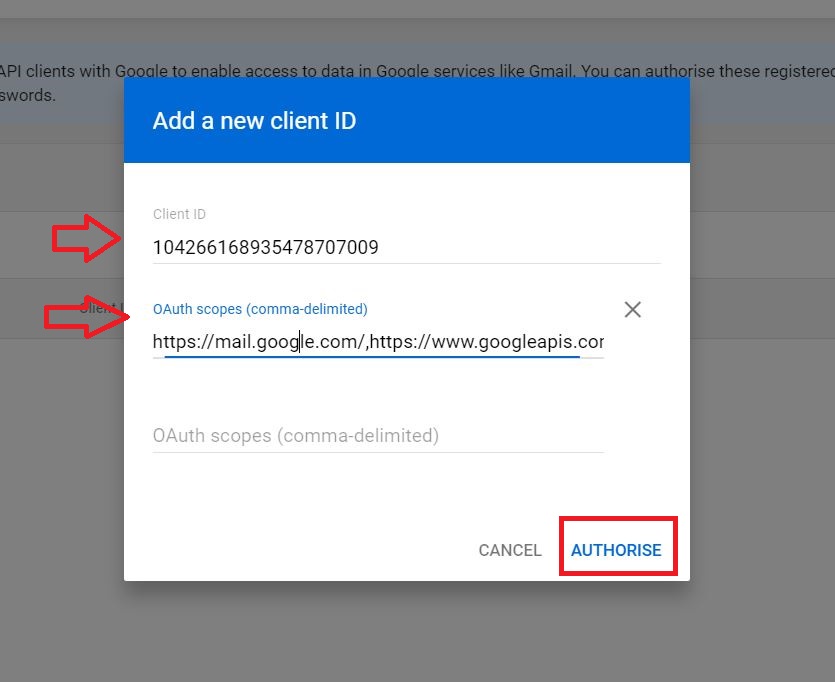
Select Add new to add the client ID generated earlier and OAuth scopes
Developers can register their web applications and other API clients with Google to enable access to data in Google services like Gmail. You can authorise these registered clients to access your user data without your users having to individually give consent or their passwords.
Open Authorization (OAuth) is an open standard protocol that allows an end user’s credentials to access third party applications without exposing the user’s password. OAuth acts as the middle man to decide whether to allow end users access to third party applications. For example, say you want to access web application XYZ, and you do not have a user account for accessing this web application. However, XYZ has the option to allow you to log in using the credentials from a social media website ABC. So you access the website using the social media login. – Cisco
Add the client ID and comma separated 4 OAuth scopes and click AUTHORISE
https://mail.google.com/,https://www.googleapis.com/auth/calendar,https://www.google.com/m8/feeds/,https://www.googleapis.com/auth/gmail.settings.sharing
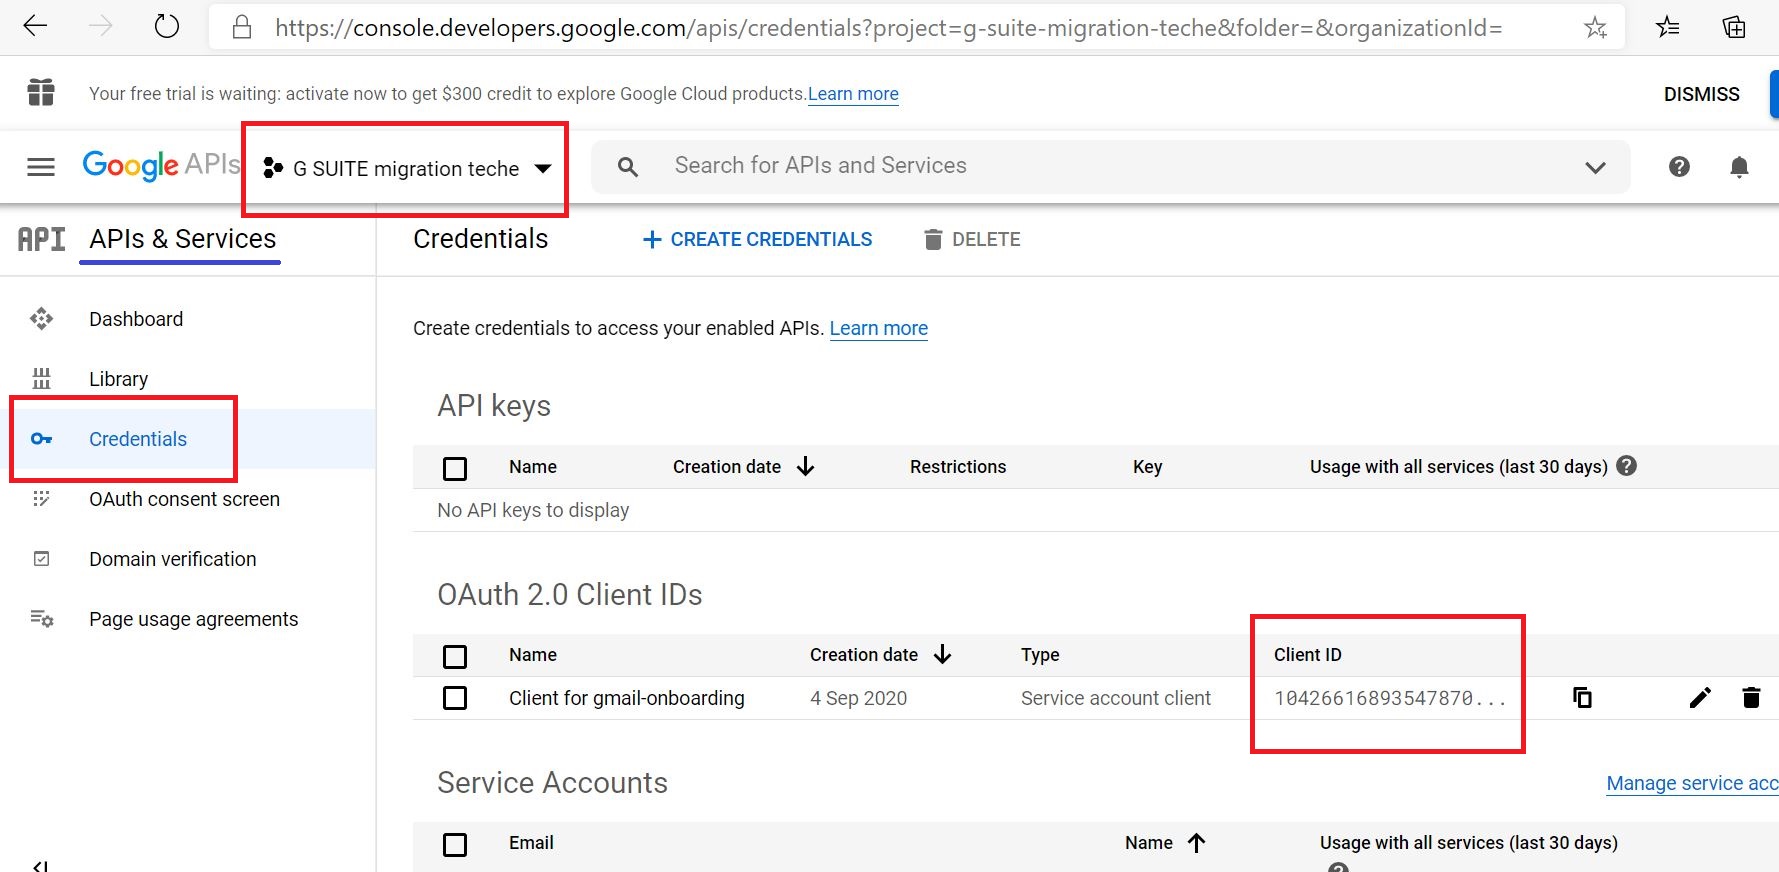
ADDITIONAL: How to get client ID and OAuth Scopes
Get the Client ID
https://console.developers.google.com/apis/credentials
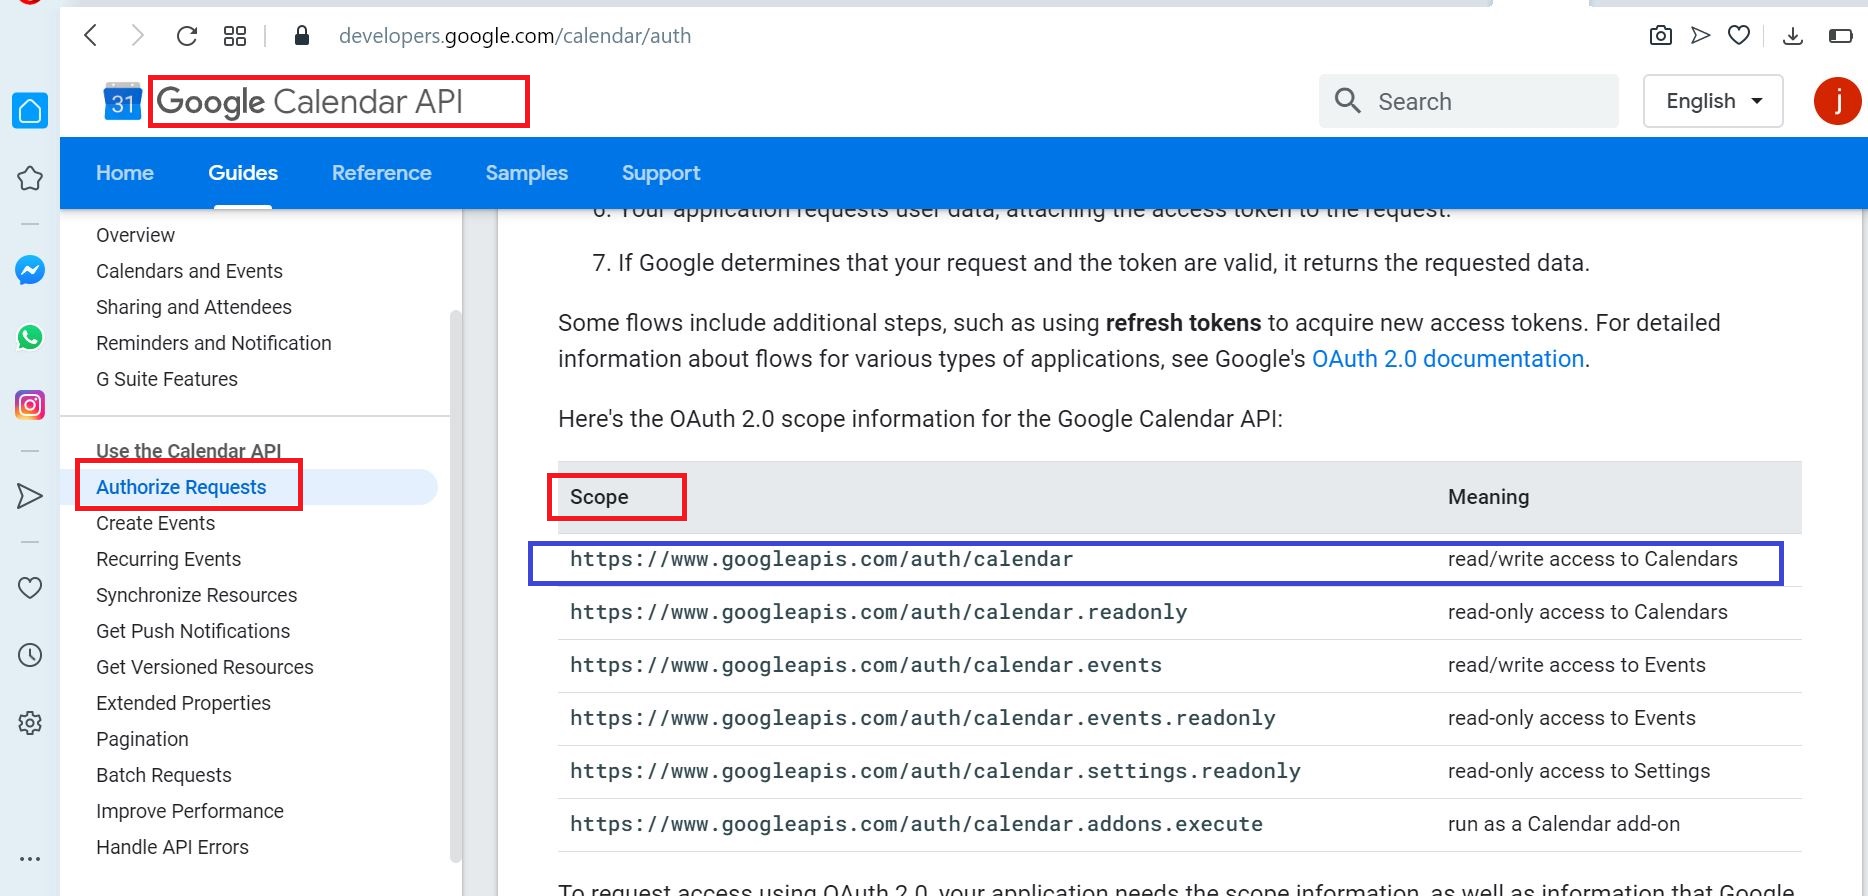
Get Google Calendar OAUTH Scope
https://developers.google.com/calendar/auth
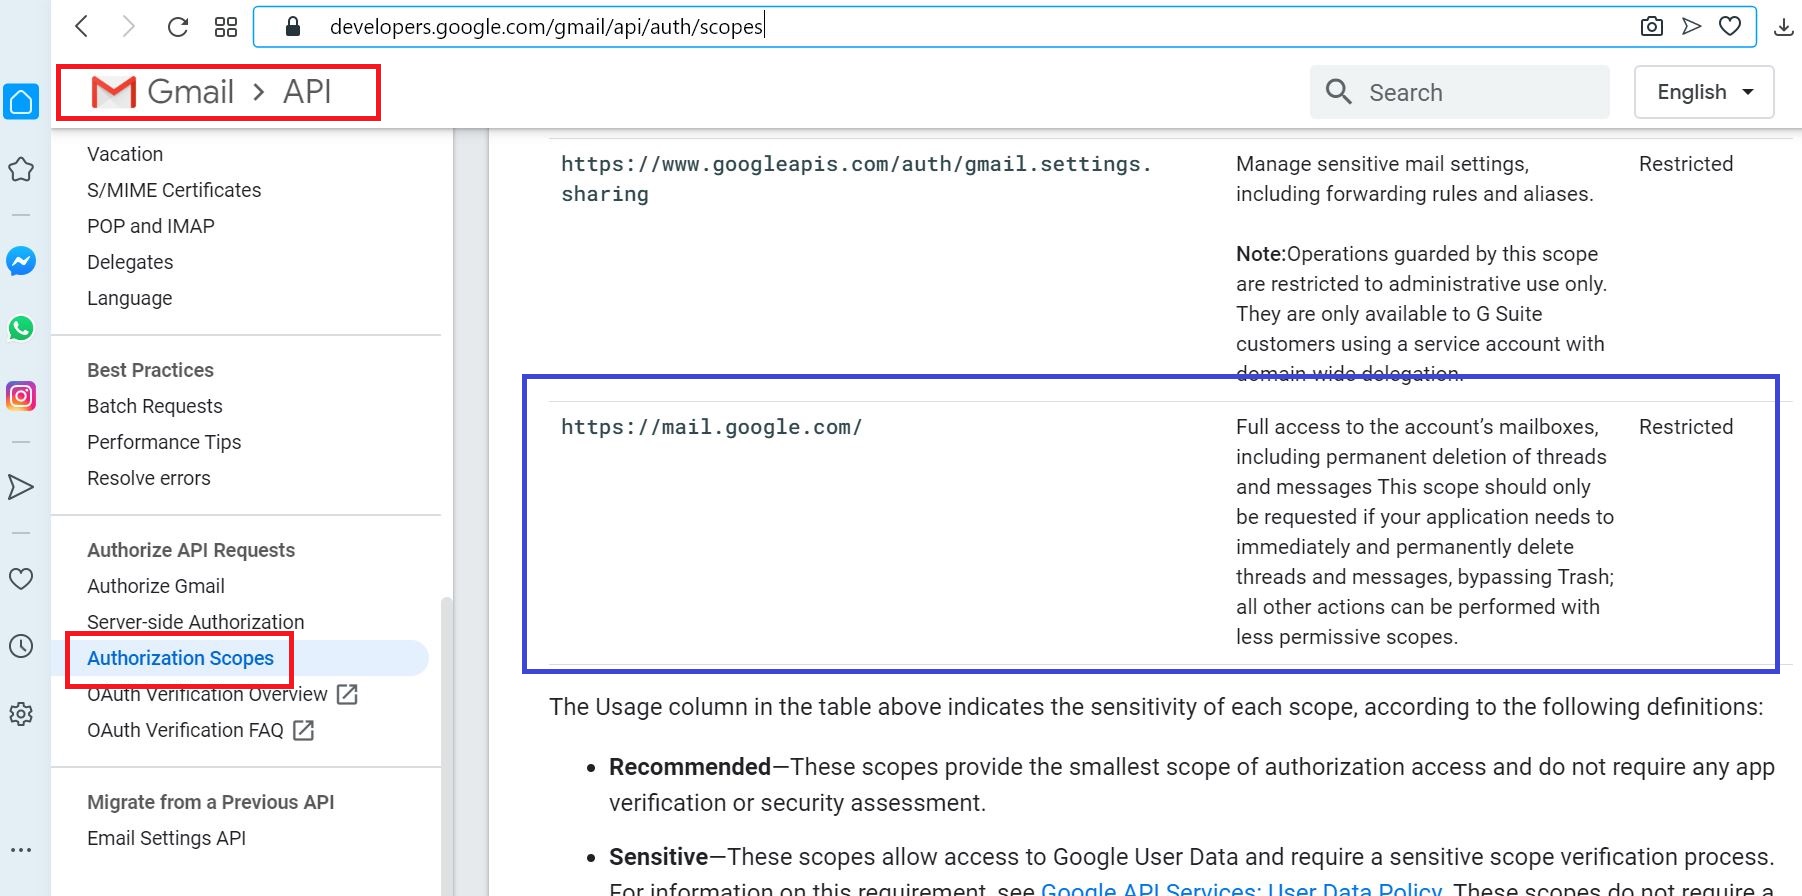
Get Gmail OAUTH Scope
https://developers.google.com/gmail/api/auth/scopes
The client ID and OAuth scopes are added

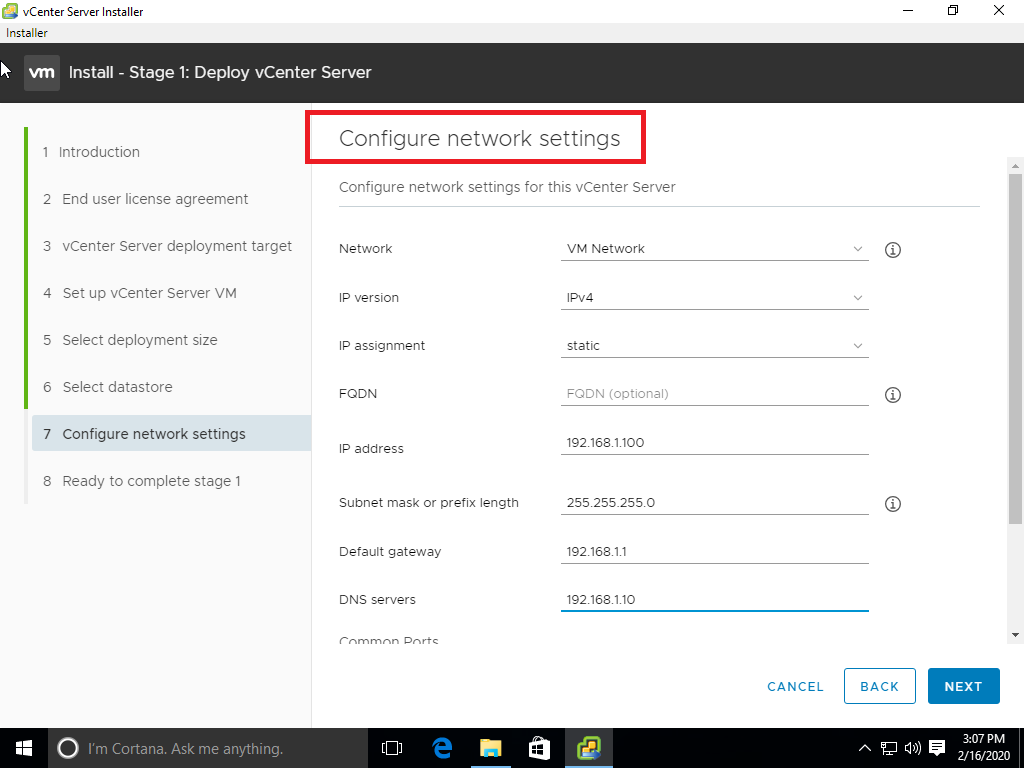
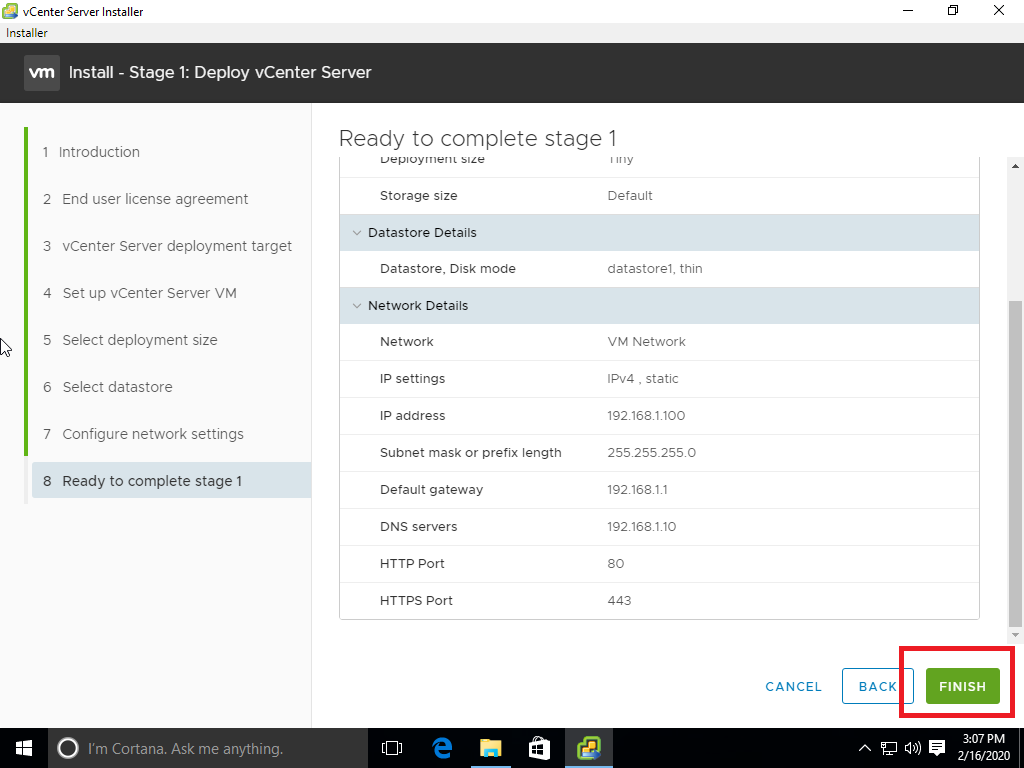
05 Create a sub-domain for mail routing to Microsoft 365 or Office 365
Go to G Suite admin page
https://admin.google.com/AdminHome
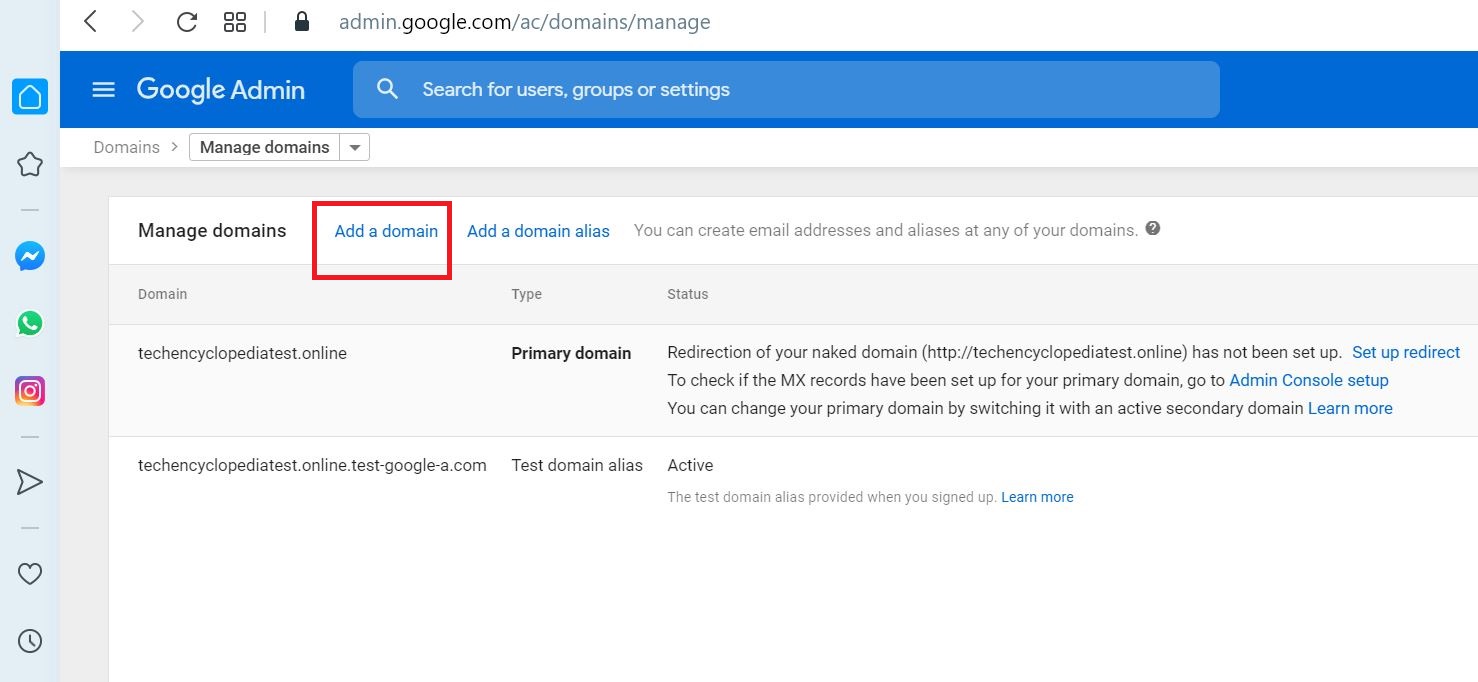
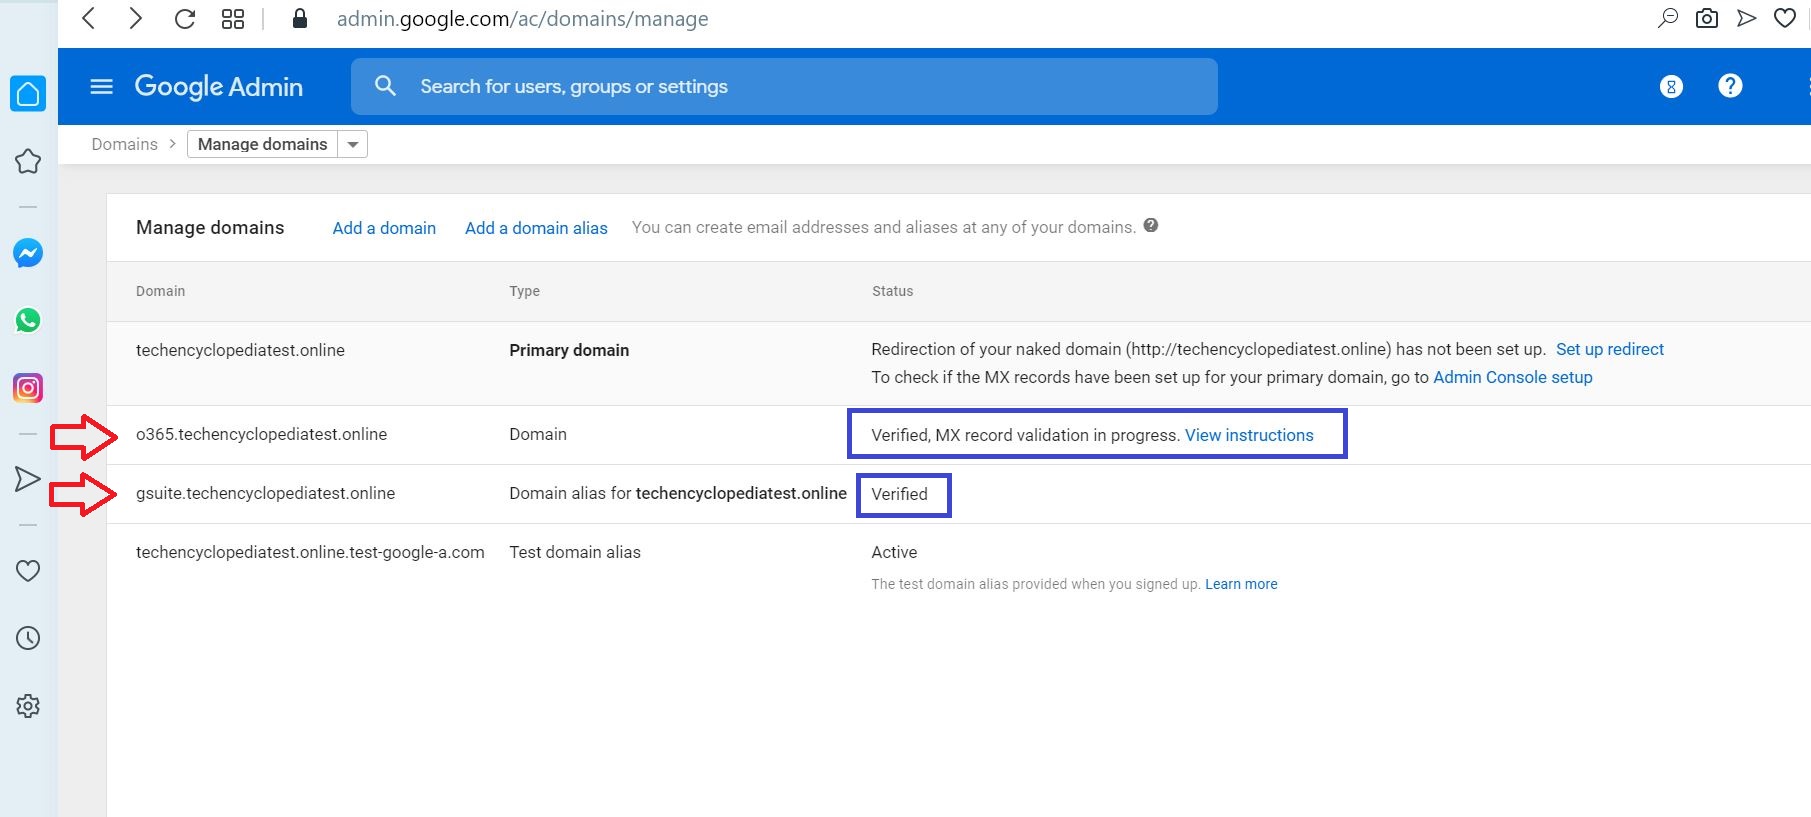
Go to Domains
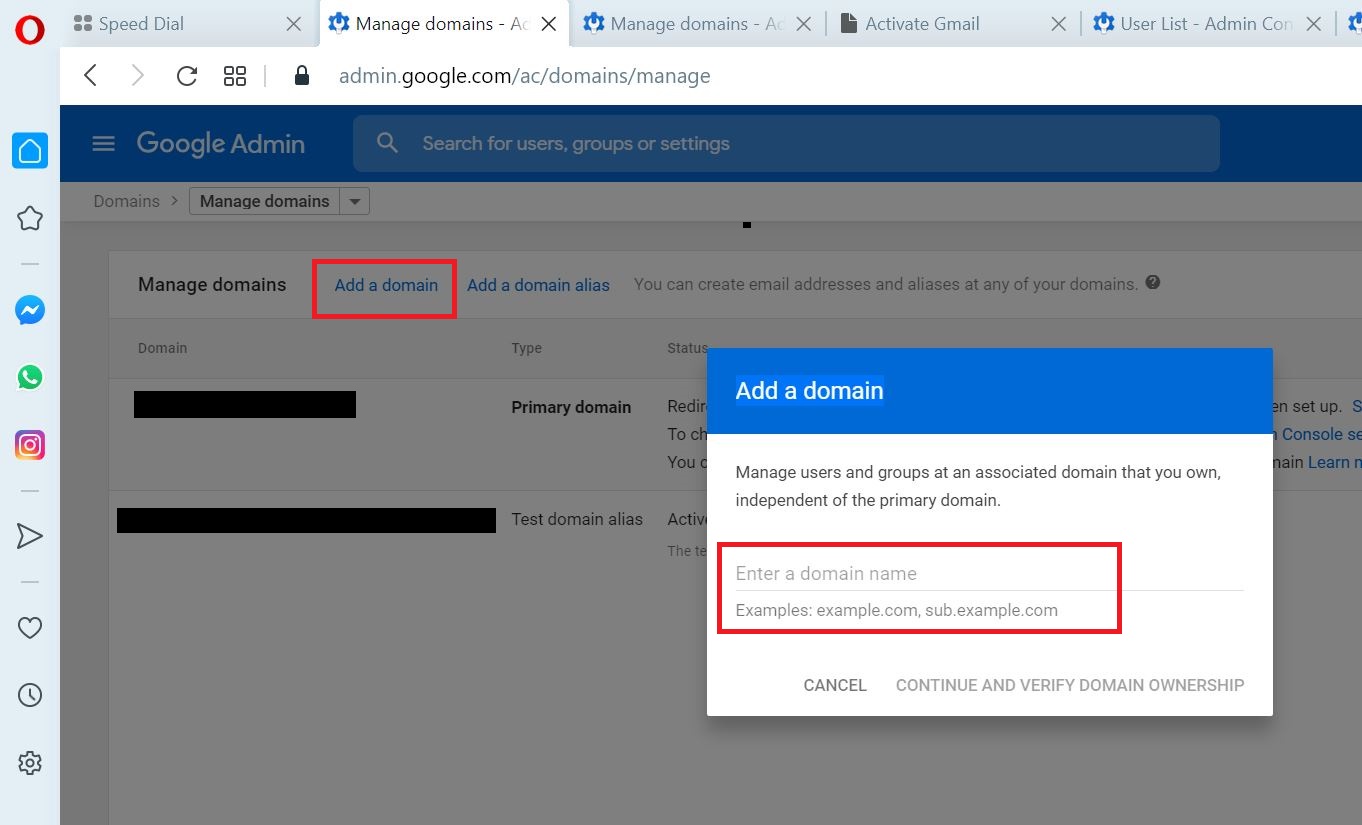
Select Add a domain
Enter the sub domain (ex- 0365.YOUR_PRIMARY_DOMAIN) and click CONTINUE AND VERIFY DOMAIN OWNERSHIP
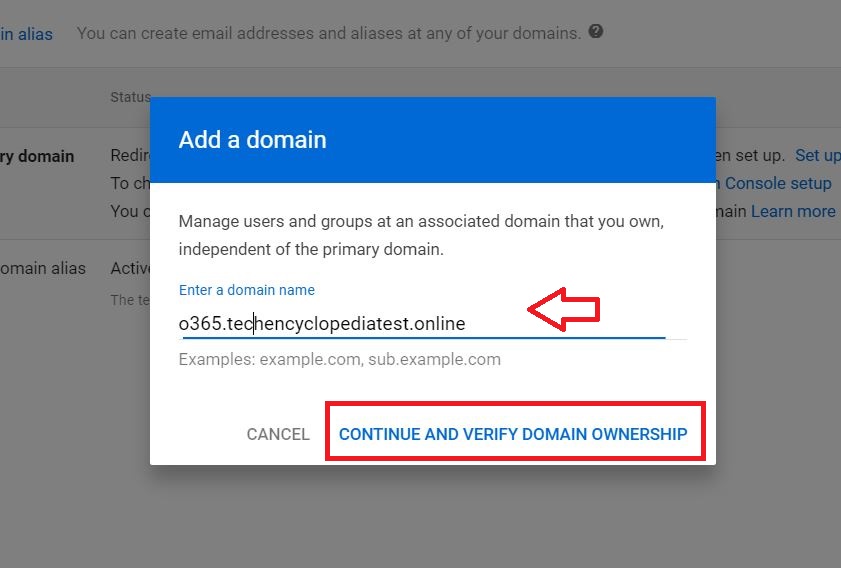
The sub domain is added and Verified
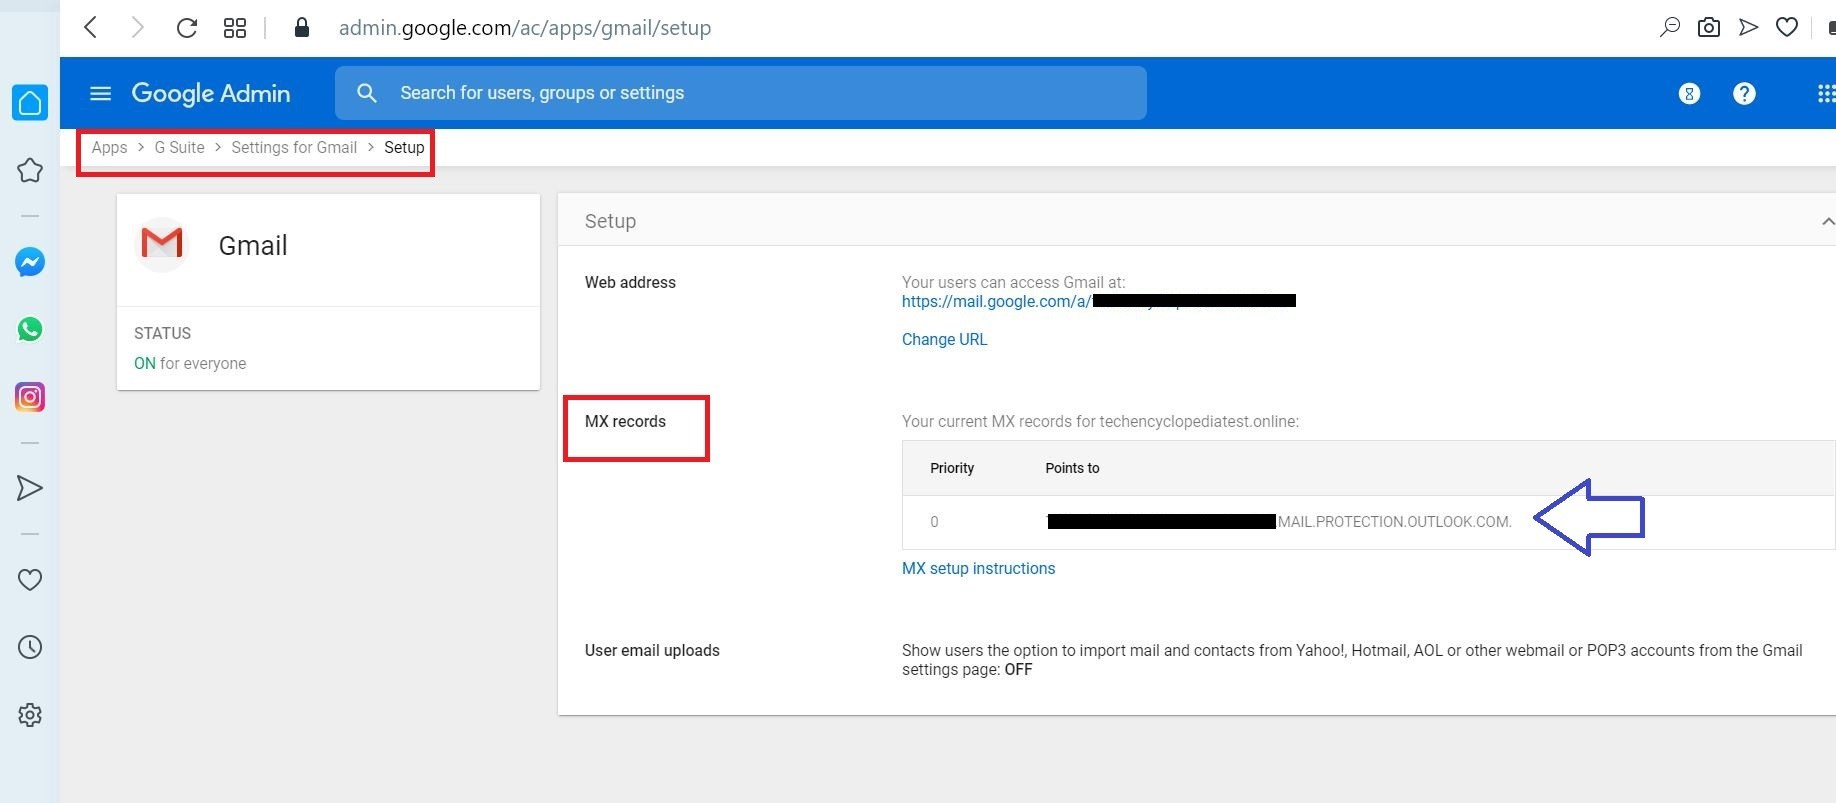
Add the domain (o365.techencyclopediatest.online) to O365 and get MX Records verified
Log into your DNS provider and update your DNS records so that you have an MX record at the domain you created above in step 3, pointing to Microsoft 365 or Office 365. Follow the instructions in Add a domain to Microsoft 365 to add the Microsoft 365 or Office 365 routing domain (“o365.fabrikaminc.net”) to your organization and to configure DNS to route mail to Microsoft 365 or Office 365.
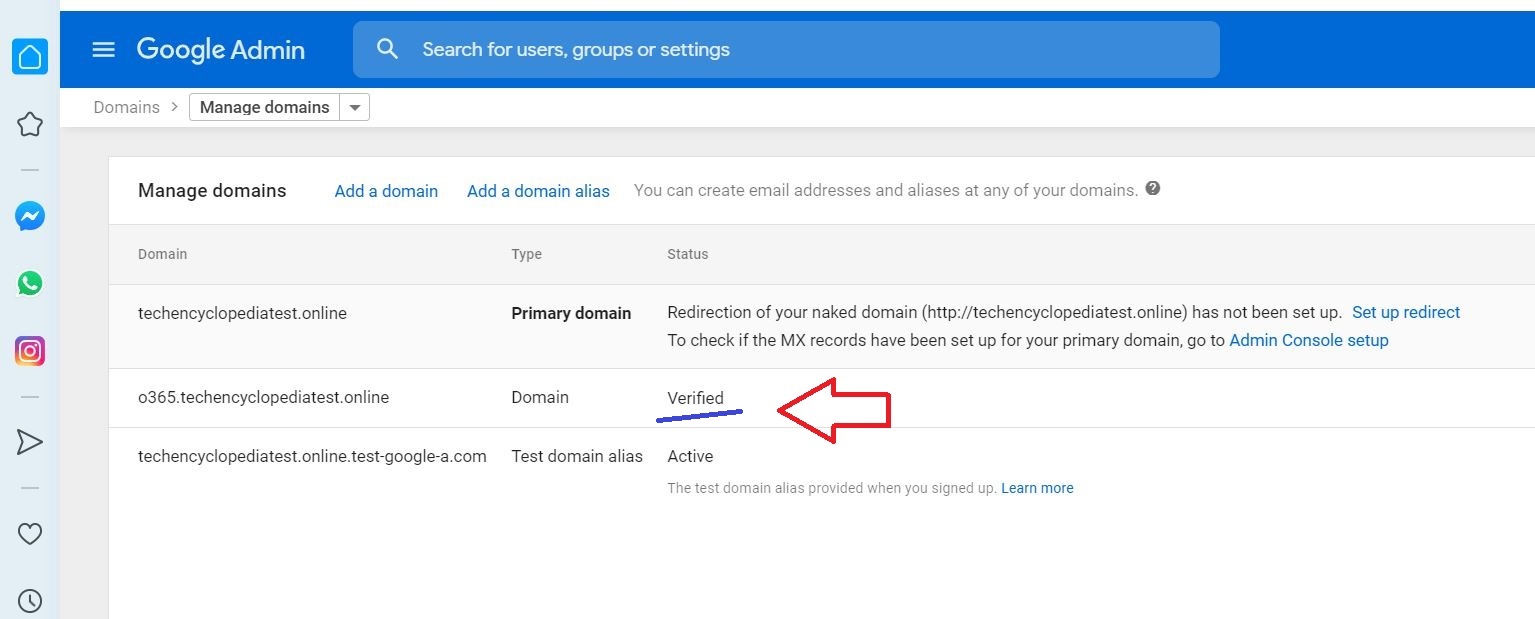
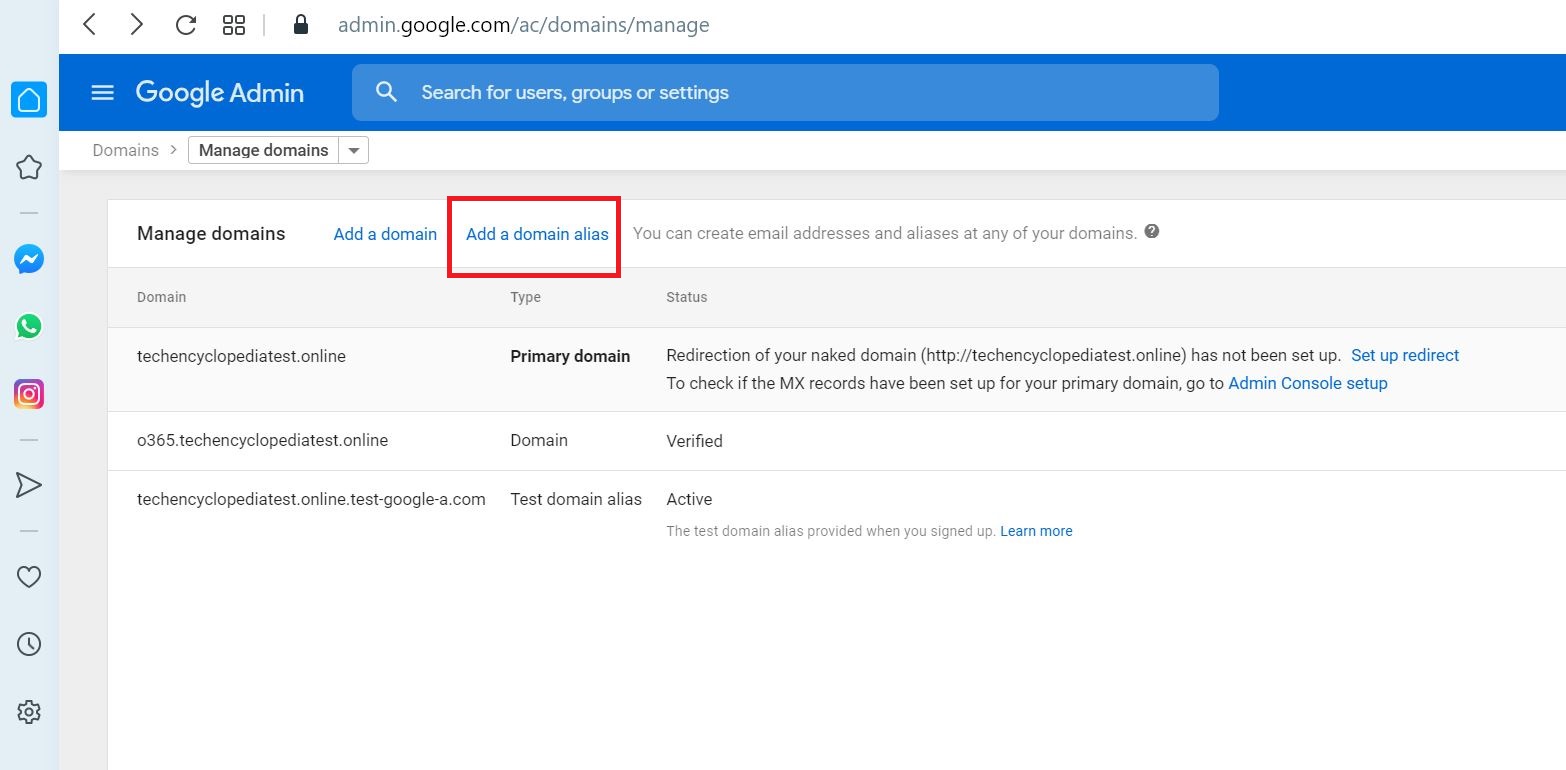
06 Create a sub-domain for mail routing to your G Suite domain
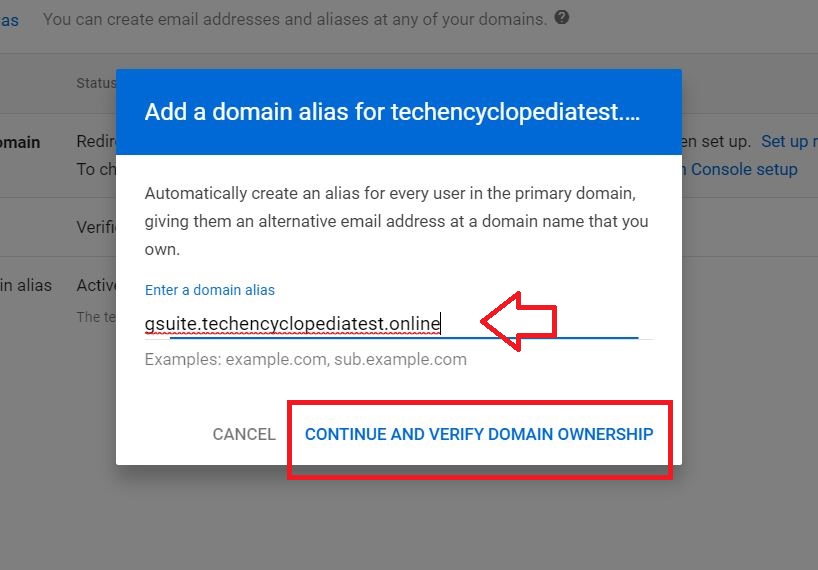
Follow the same steps shown above and Add a domain alias
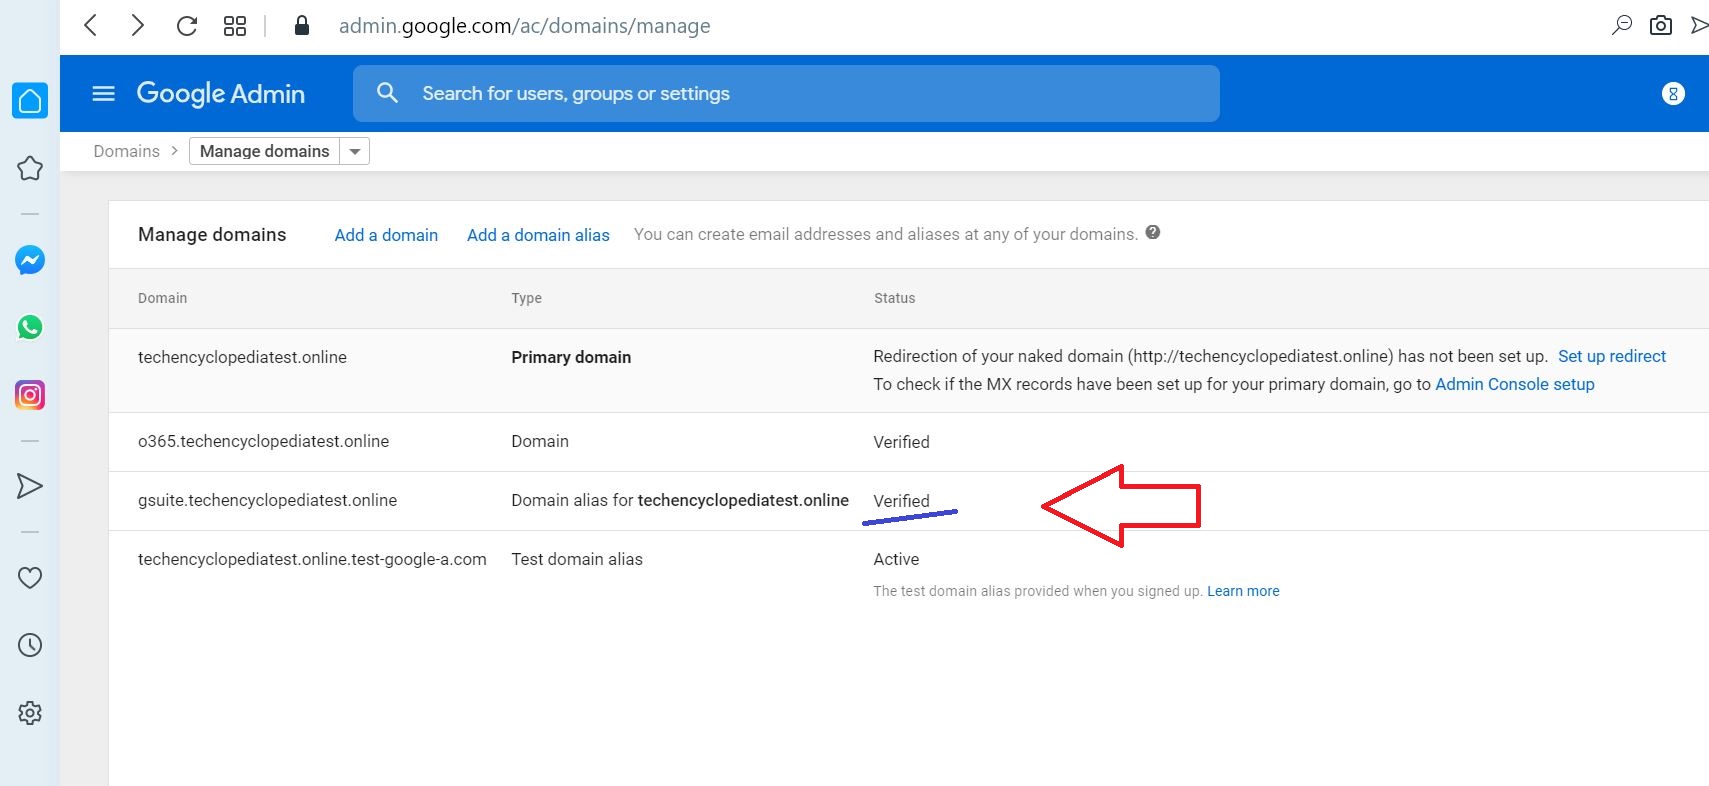
Enter the domain alias (ex- GSUITE.YOUR_PRIMARY_DOMAIN) and click CONTINUE AND VERIFY DOMAIN OWNERSHIP
The added domain alias is Verified
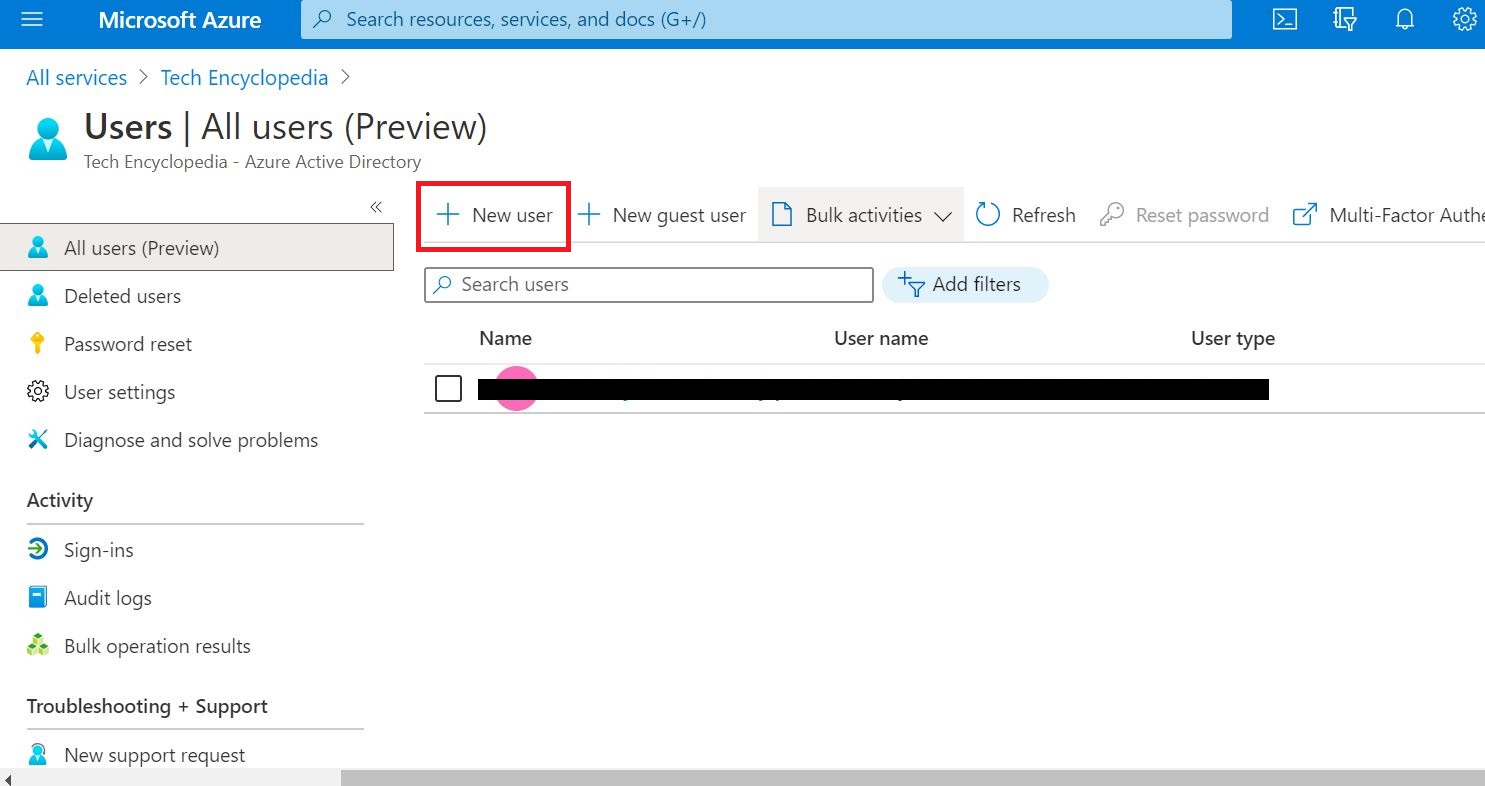
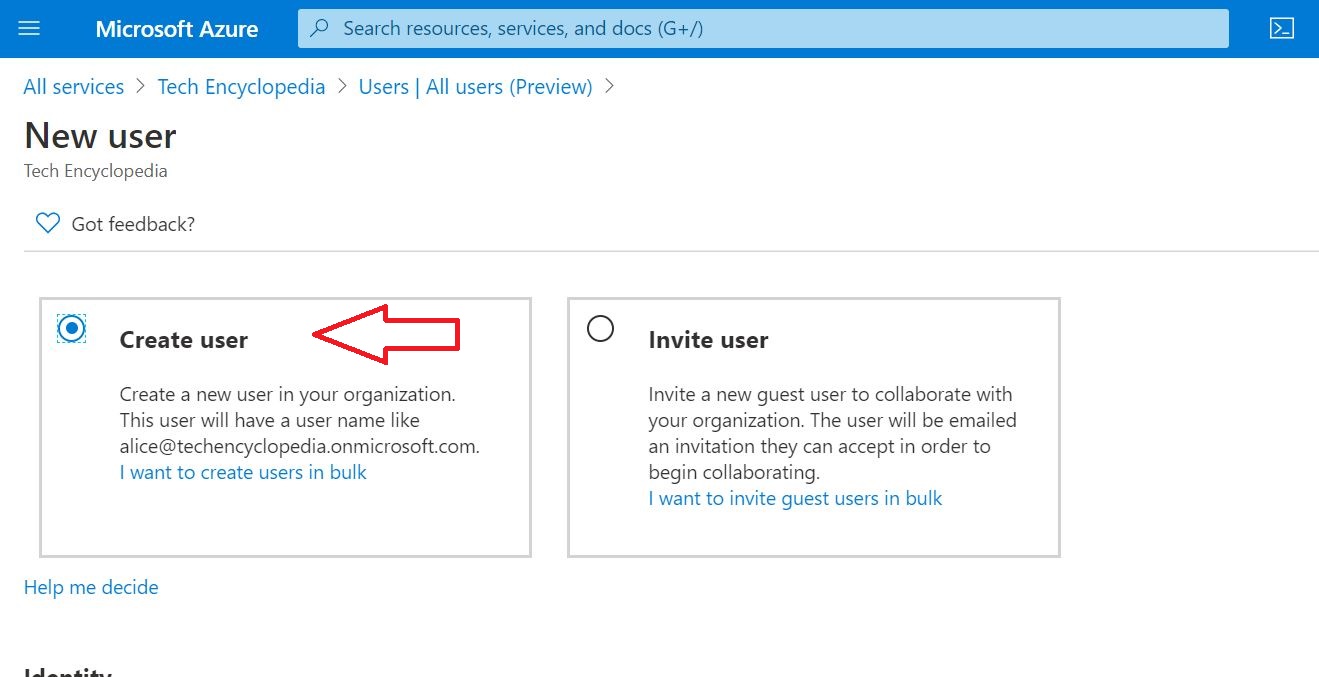
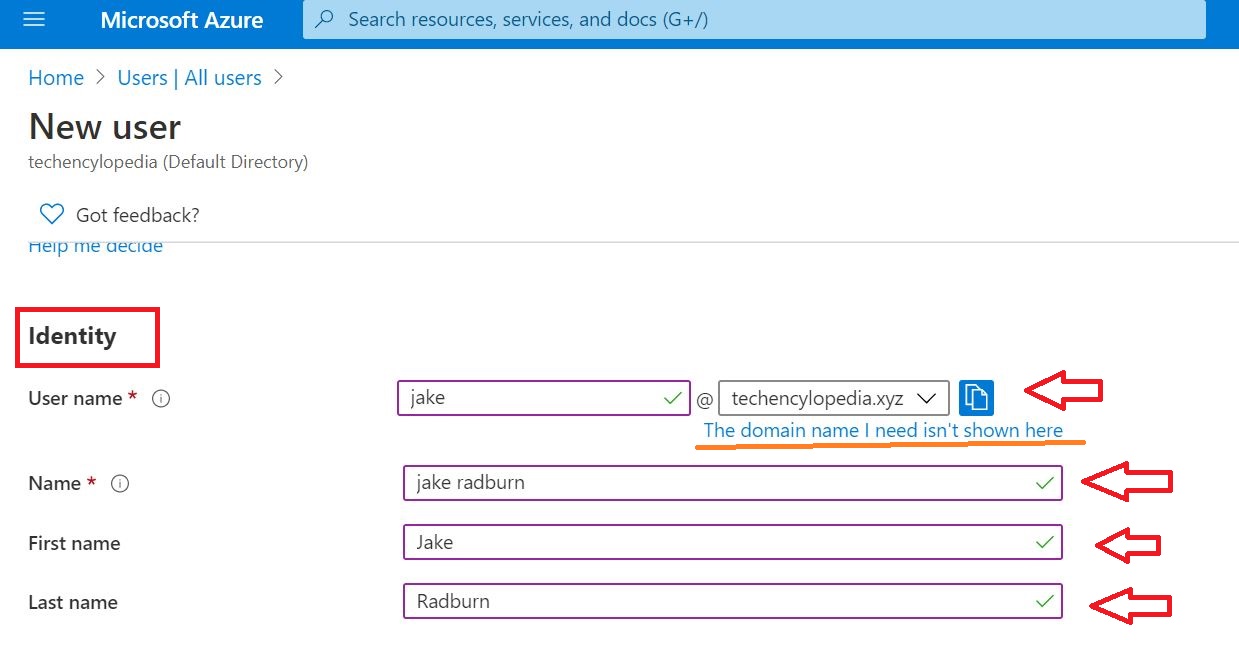
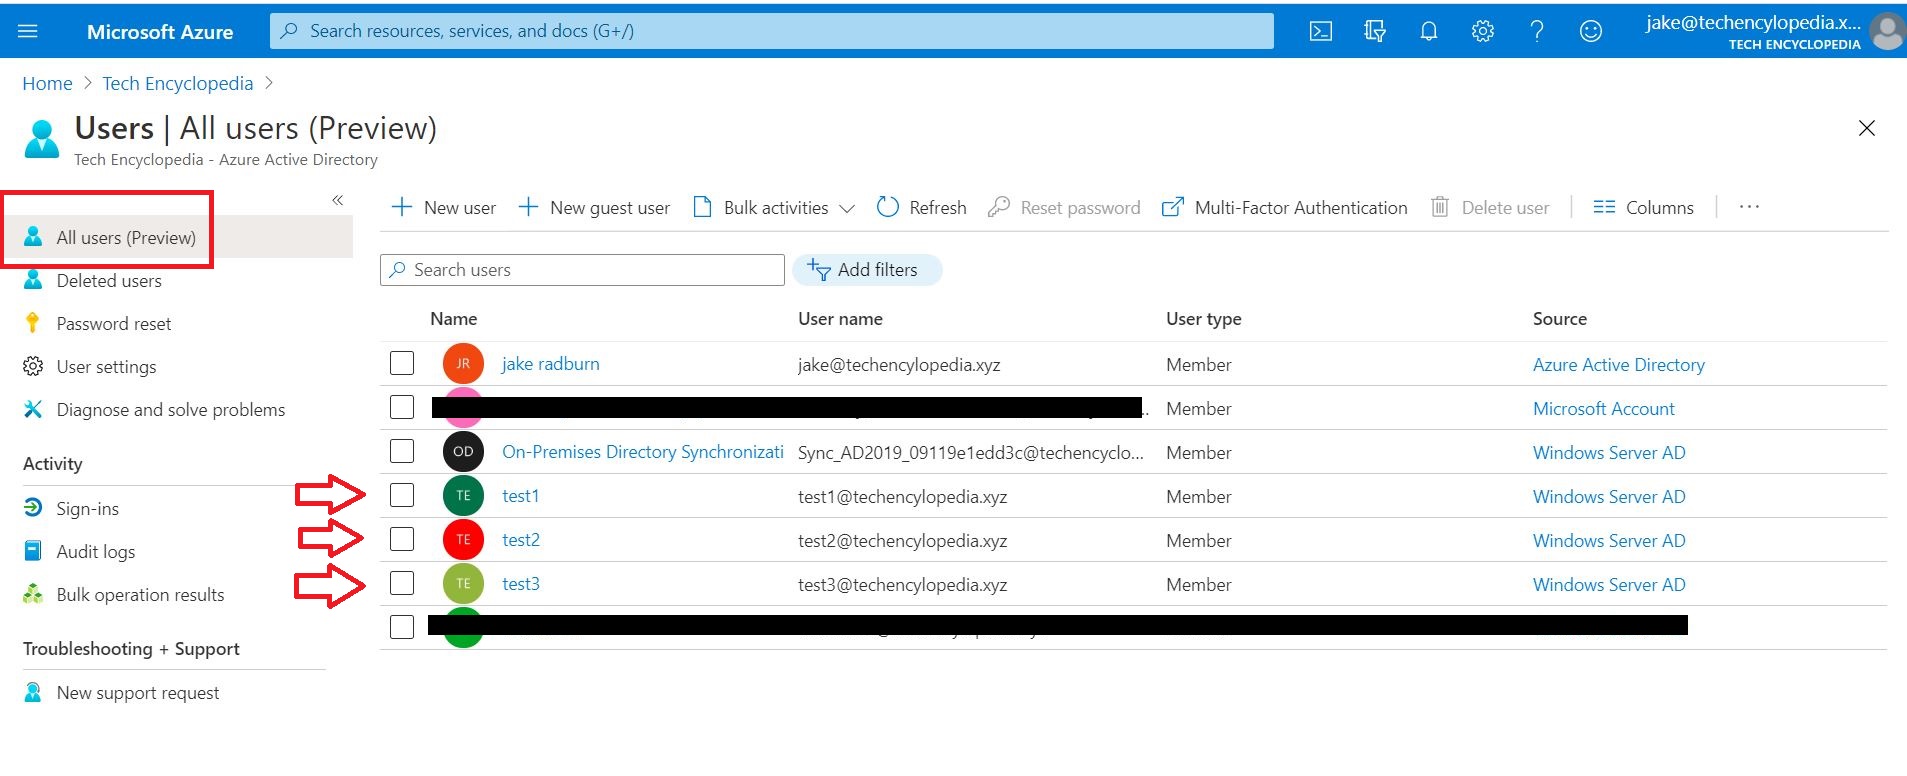
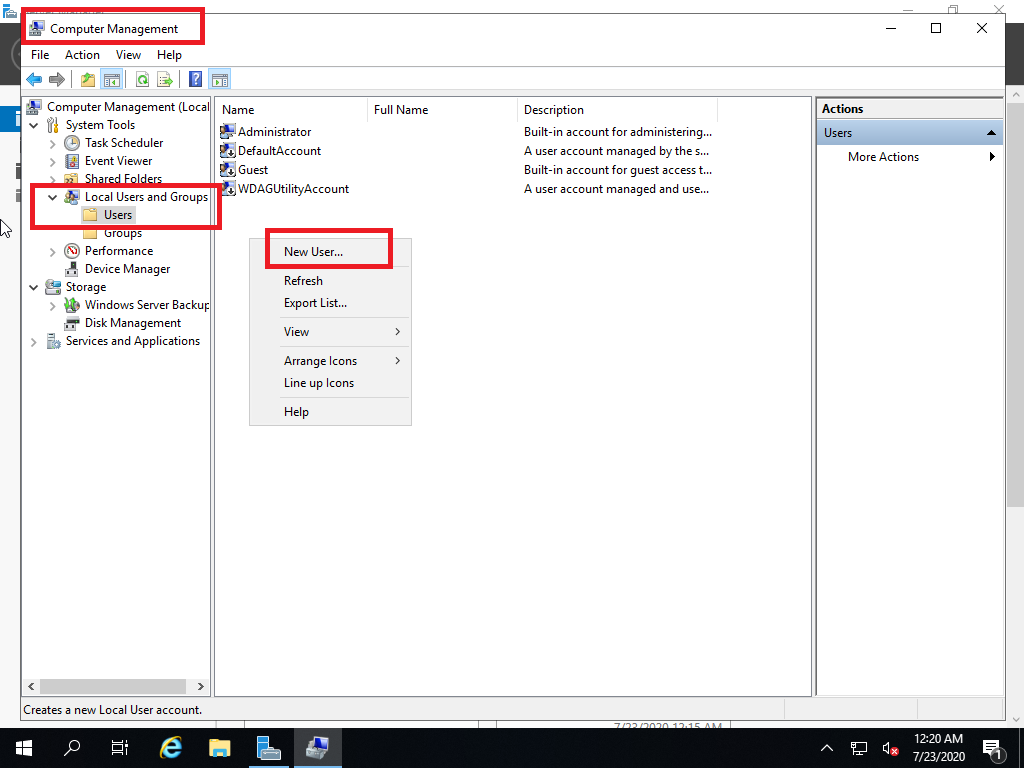
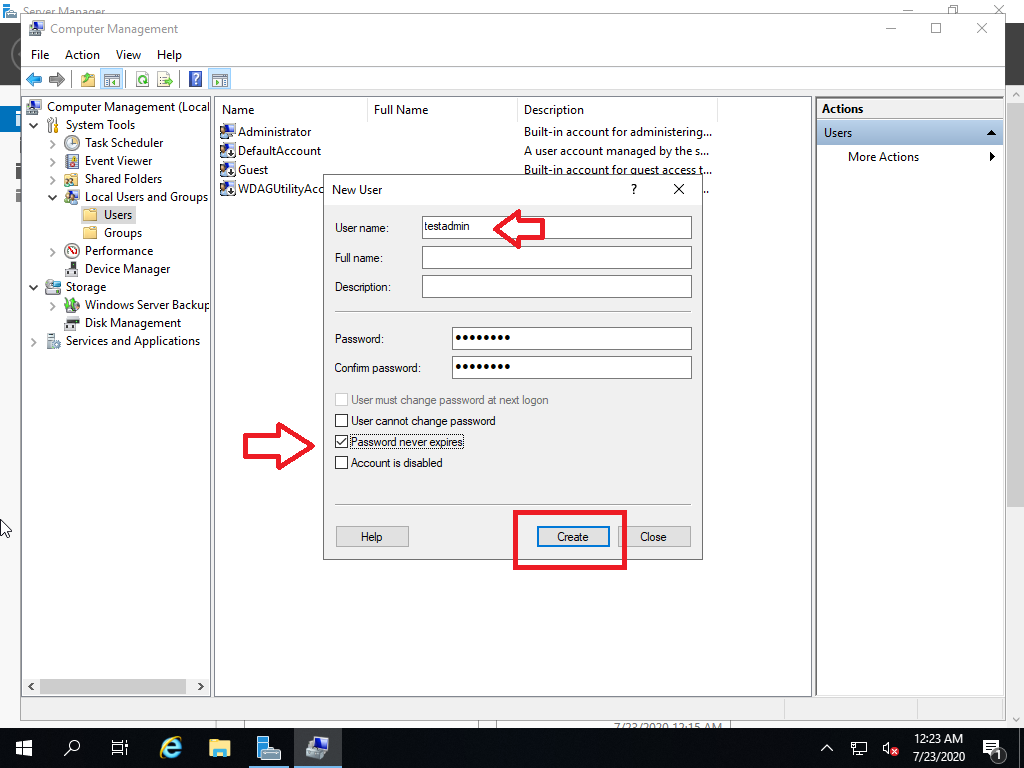
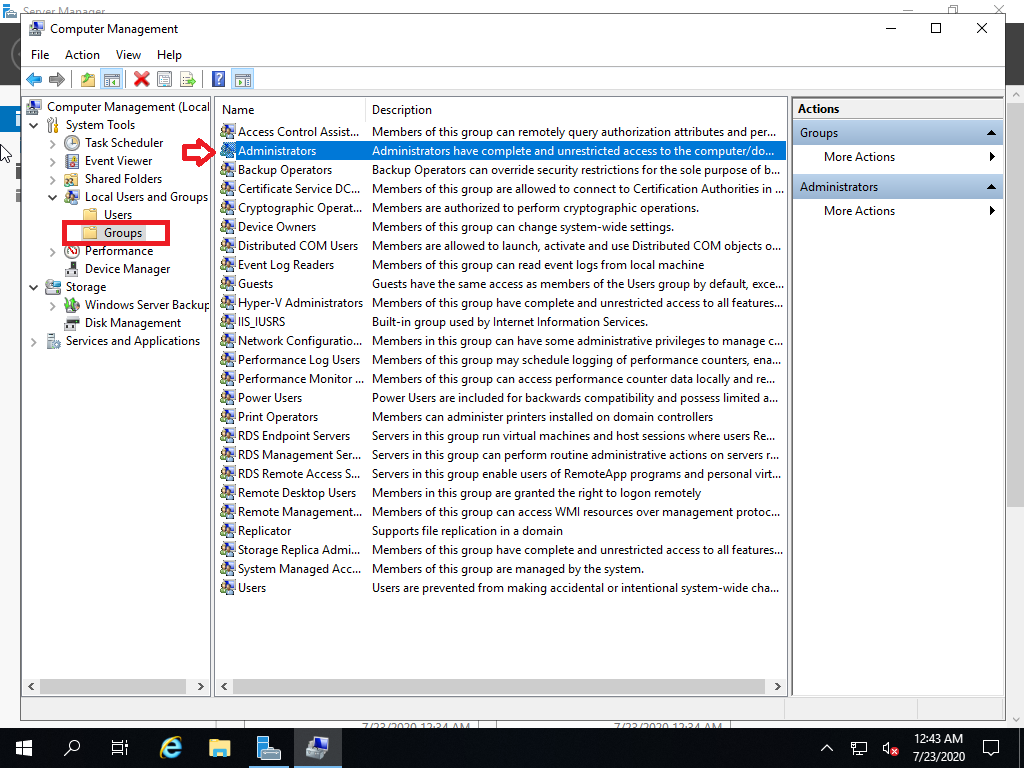
07 Provision users in Microsoft 365 or Office 365
After, following the steps to configure G Suite environment, using Exchange admin center or Exchange Online PowerShell, you can migrate the mail boxes.
Before proceeding with either method, make sure that Mail Users have been provisioned for every user in the organization who will be migrated (either now or eventually). If any users aren’t provisioned, provision them using the instructions in Manage mail users.
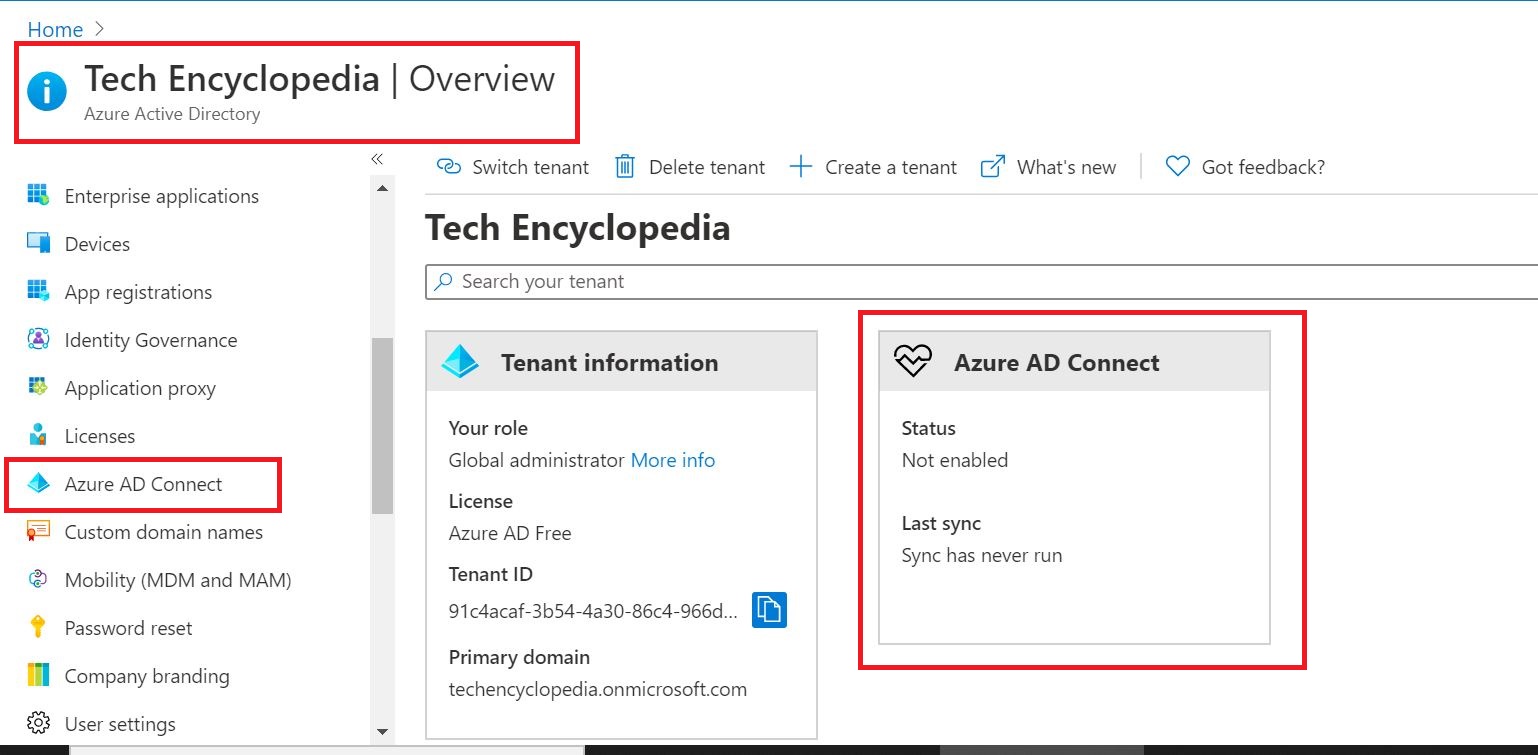
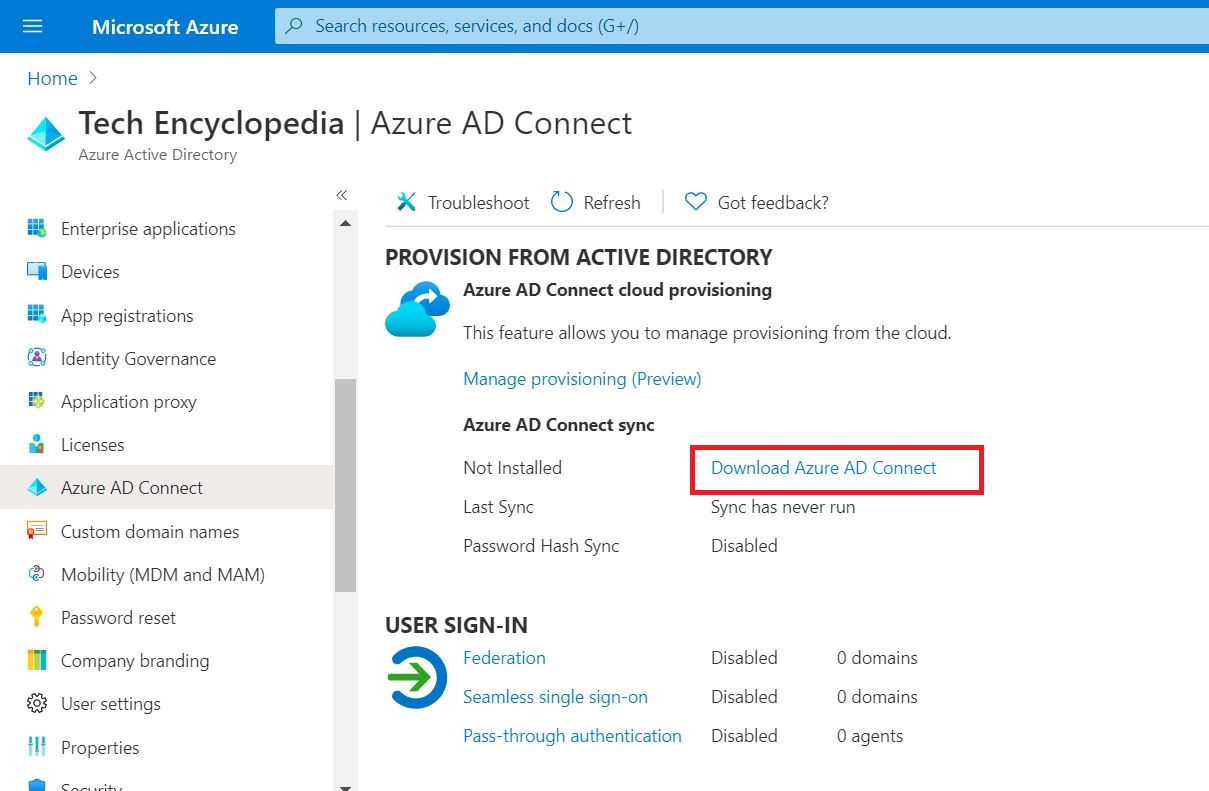
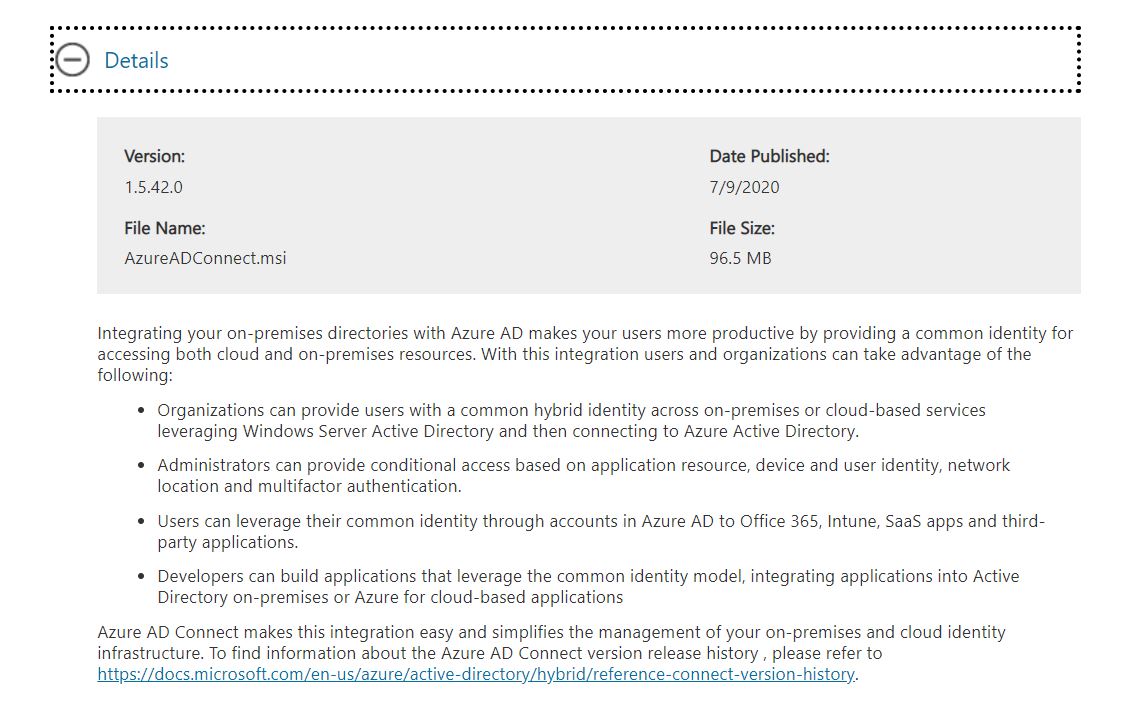
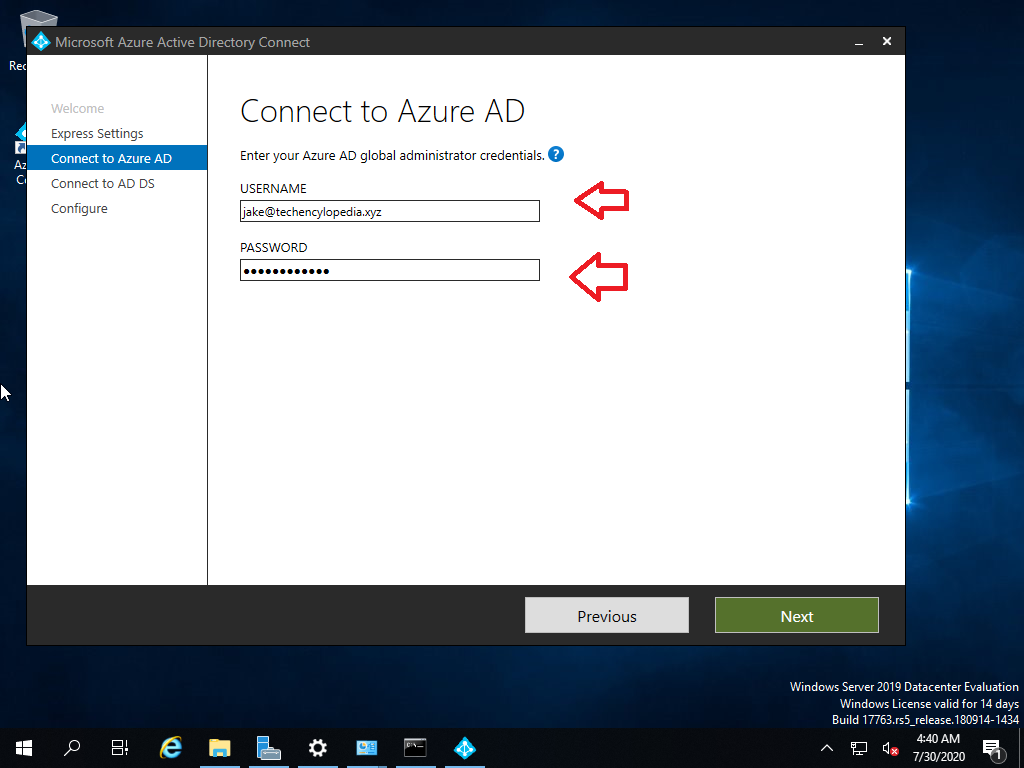
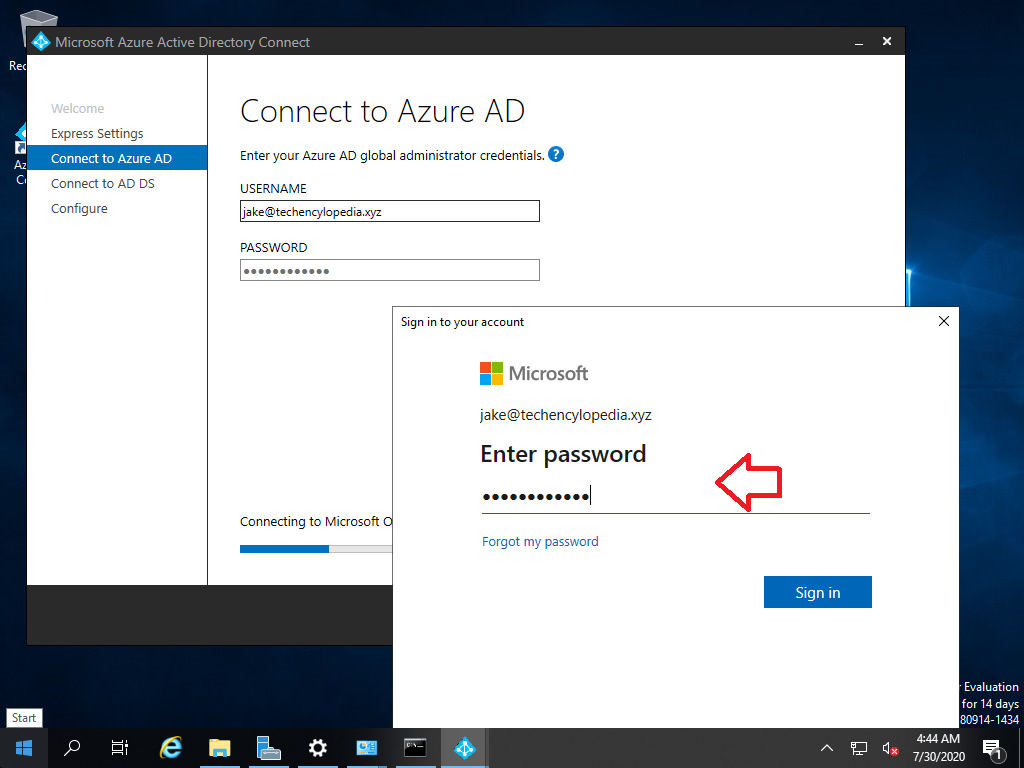
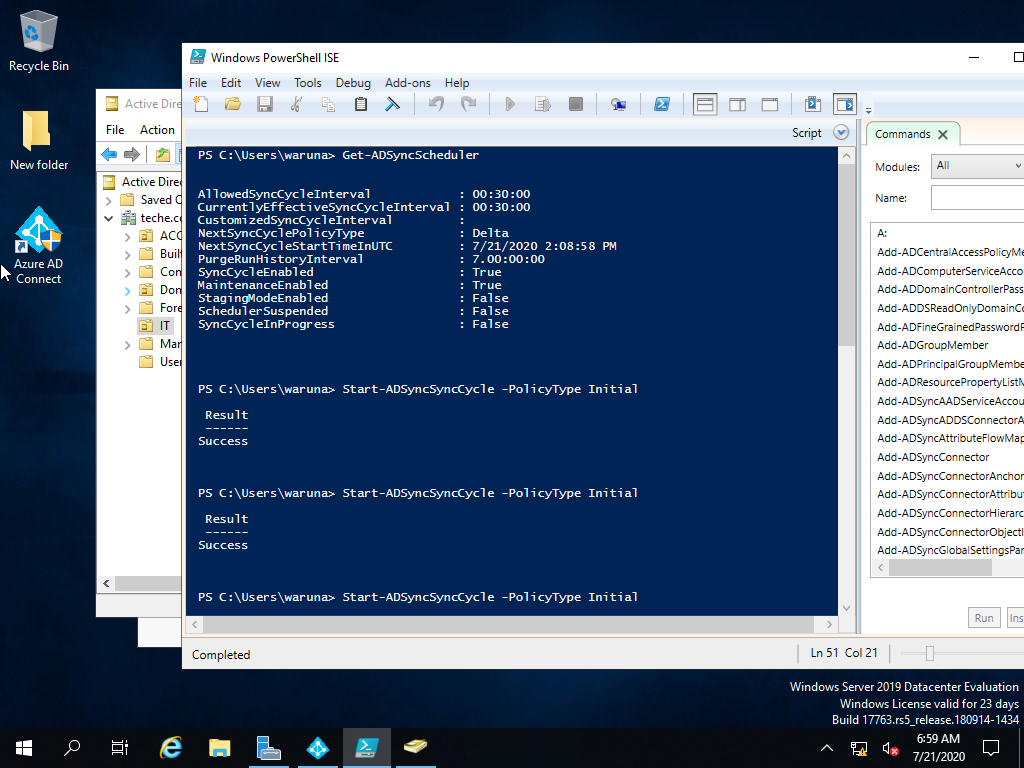
For more advanced scenarios, you may be able to deploy Azure Active Directory (Azure AD) Connect to provision your Mail Users. See Deploy Microsoft 365 Directory Synchronization in Microsoft Azure for an overview, and Set up directory synchronization for Microsoft 365 for setup instructions. Then, you need to deploy an Exchange server in your on-premises environment for user management, and mail-enable your users using this server. For more information, see How and when to decommission your on-premises Exchange servers in a hybrid deployment and Manage mail users. Once the Mail Users have been created in Microsoft 365, the Azure AD Connect may need to be disabled in order to allow the migration process to convert these users into mailboxes – see Turn off directory synchronization for Microsoft 365.
IMPORTANT
Microsoft recommends that the primary address (sometimes referred to as the “User Id”) for each user be at the primary domain (such as “user@abcd.com”). Typically, this means that the primary email address should match between Microsoft 365 or Office 365 and G Suite. If any user is provisioned with a different domain for their primary address, then that user should at least have a proxy address at the primary domain.
Each user should have their ExternalEmailAddress point to the user in their G Suite routing domain (“user@gsuite.abcd.com”). The users should also have a proxy address that will be used for routing to their Microsoft 365 or Office 365 routing domain (such as “user@o365.abcd.com”).
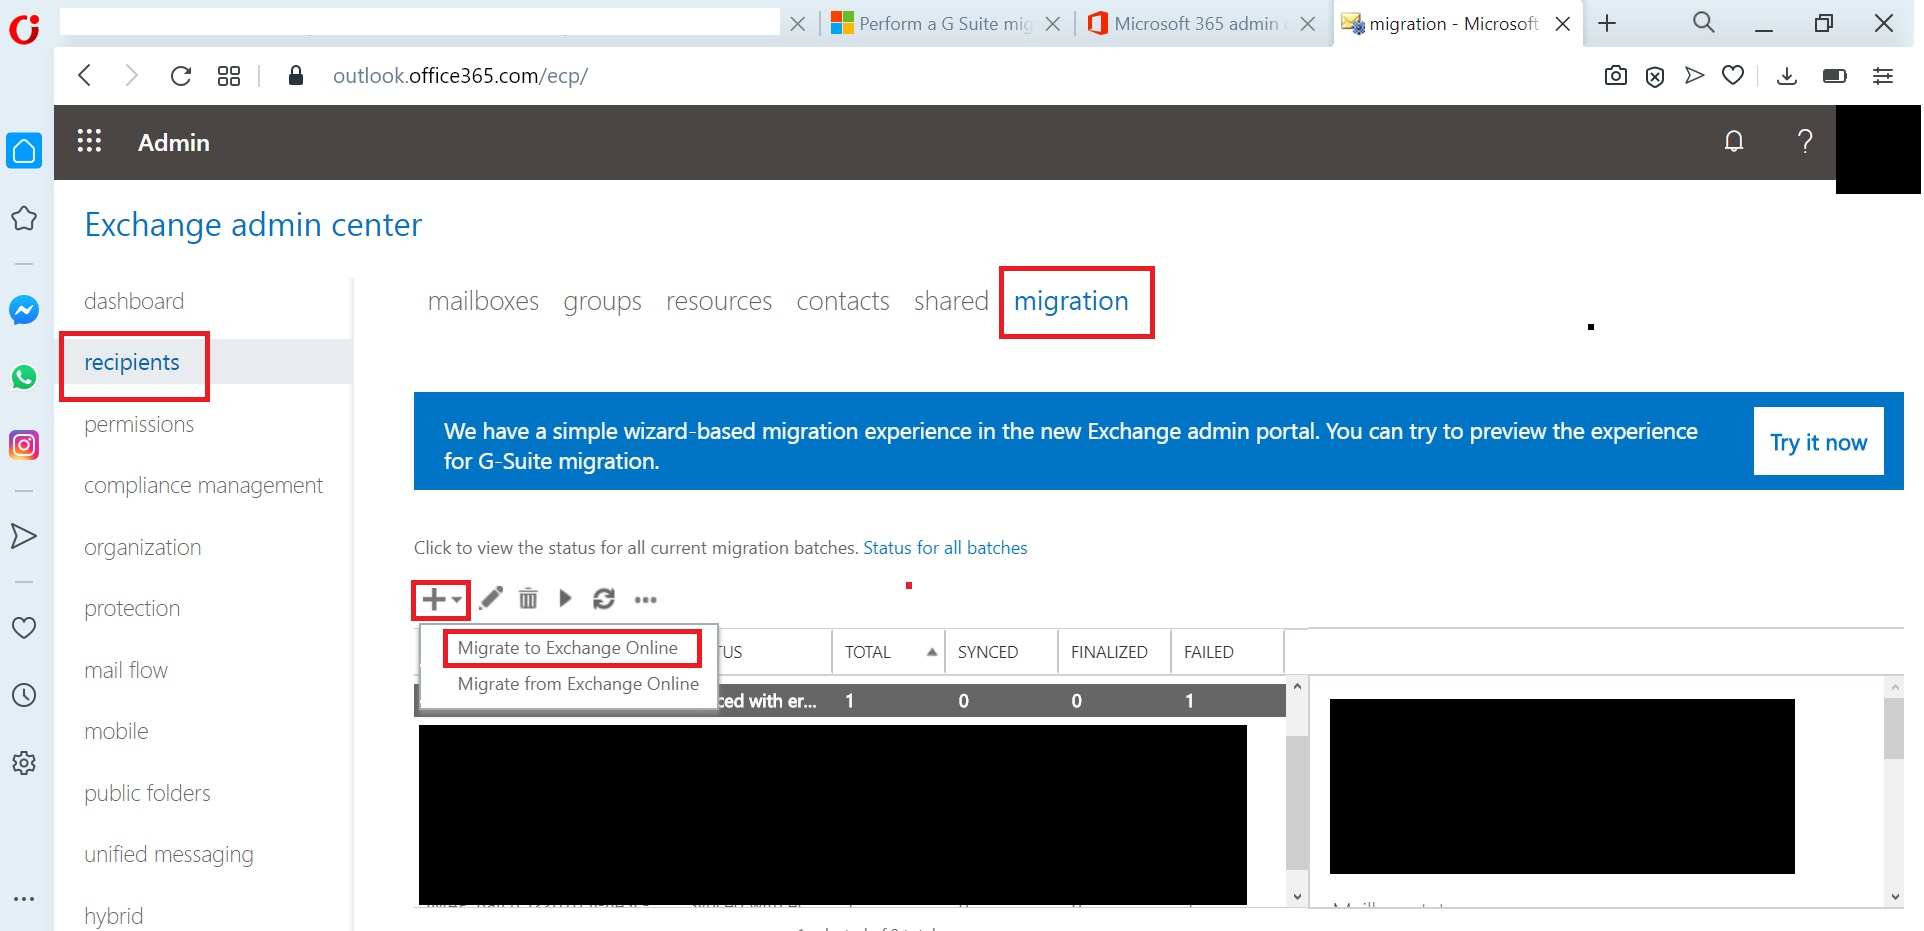
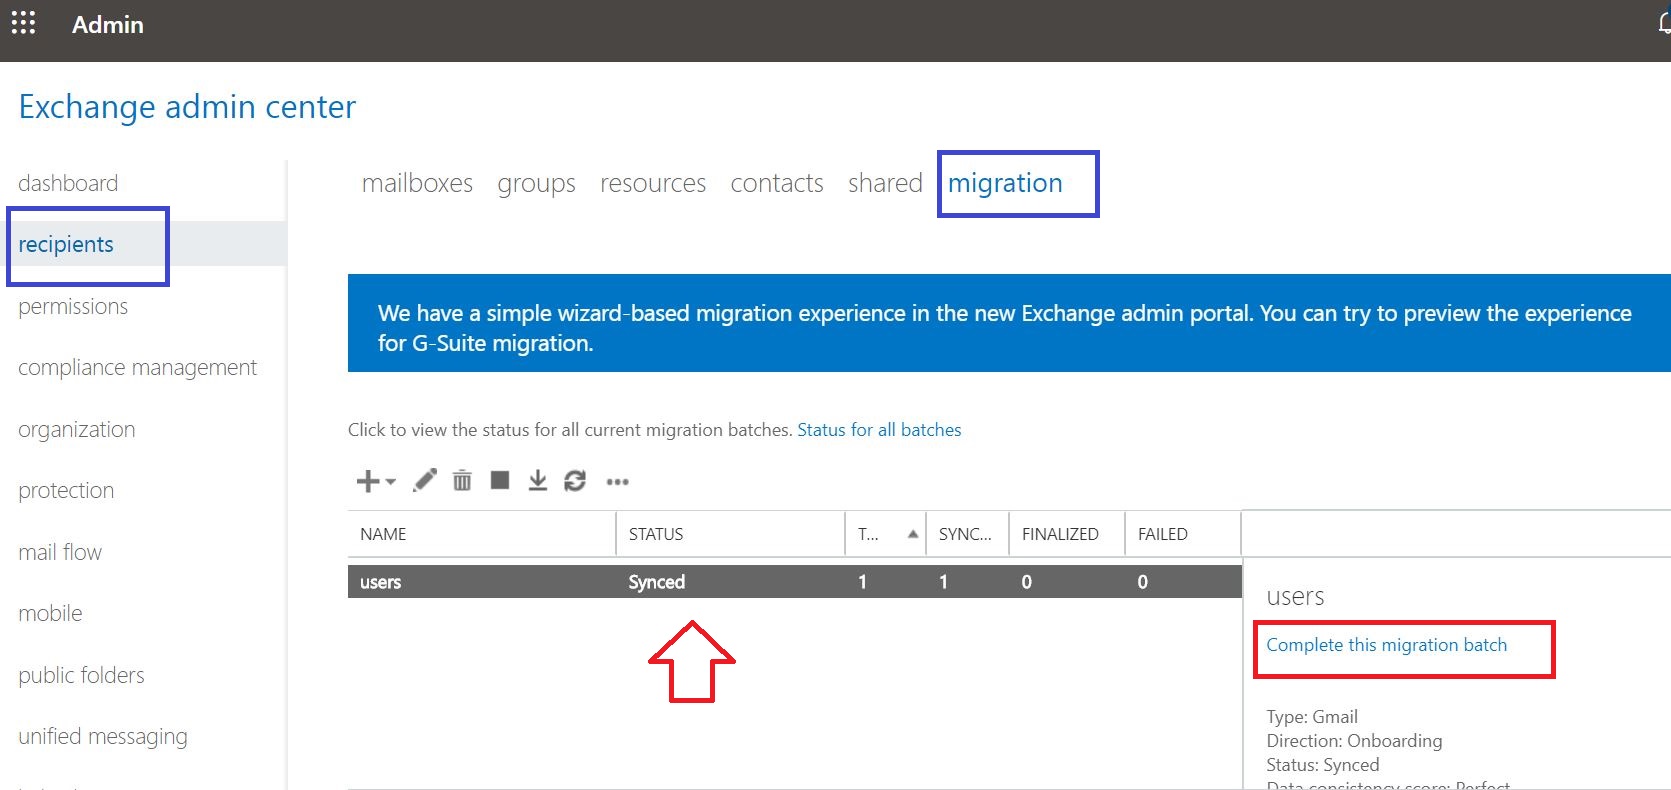
08 Start a G Suite migration batch with the Exchange admin center (EAC)
Once your G Suite environment has been properly configured, you can complete your migration using 2 methods. In this scenario, method 1 is used.
-
- In the Exchange admin center (EAC)
- Through the Exchange Online PowerShell.
Start a G Suite migration batch with the Exchange admin center (EAC)
Go to Exchange online OR you can use the following link
https://outlook.office365.com/ecp/
From EAC Select
Recipients > Migration > Migration to Exchange Online
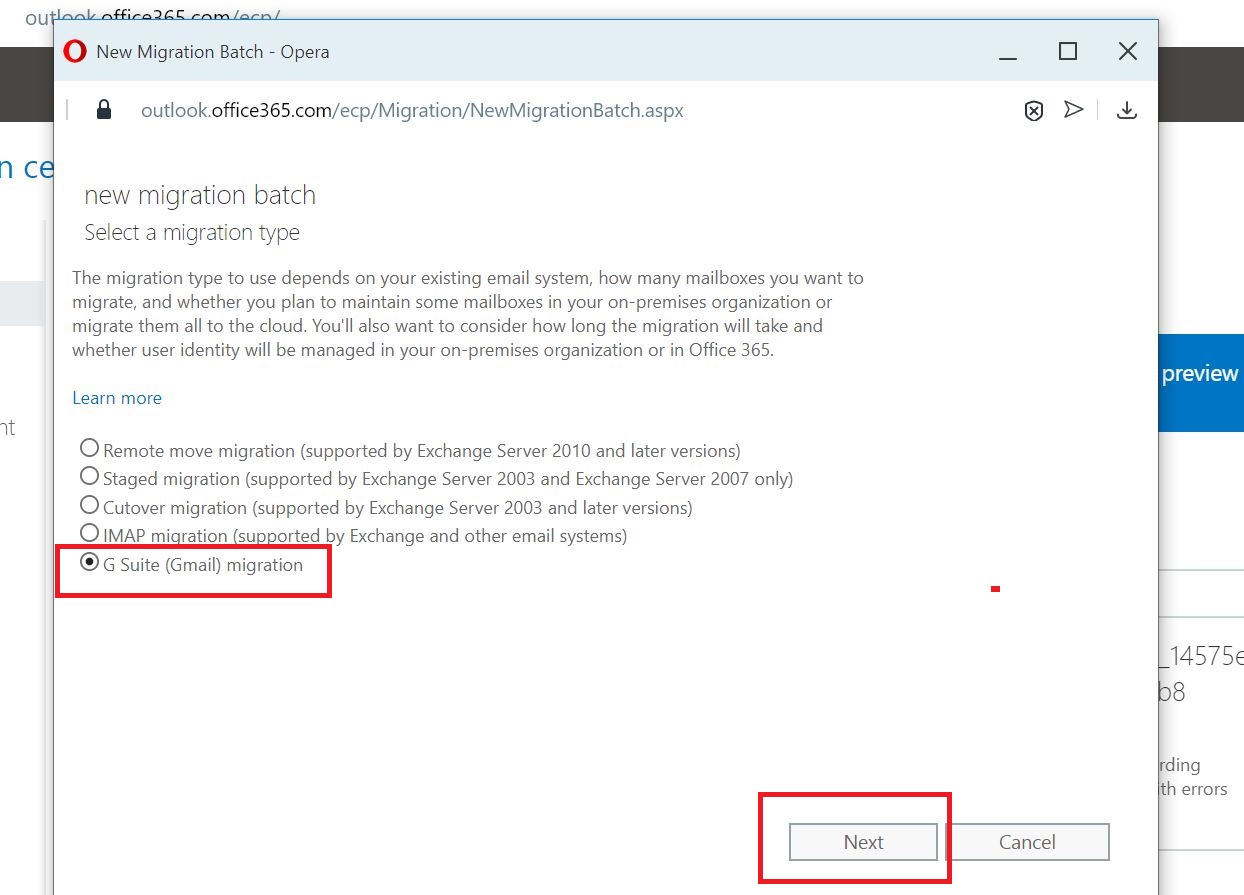
SELECT THE MIGRATION TYPE: The migration type to use depends on your existing email system, how many mailboxes you want to migrate, and whether you plan to maintain some mailboxes in your on-premises organization or migrate them all to the cloud. You’ll also want to consider how long the migration will take and whether user identity will be managed in your on-premises organization or in Office 365.
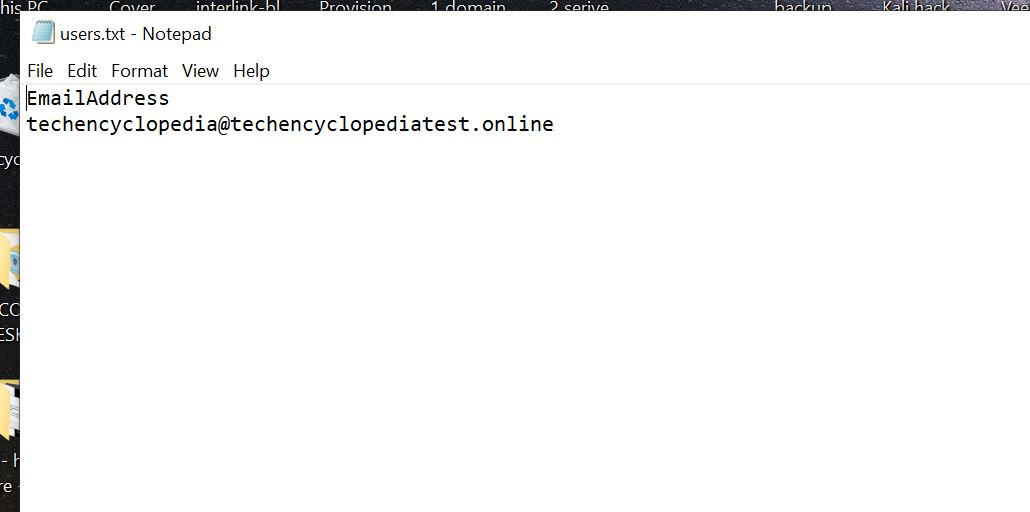
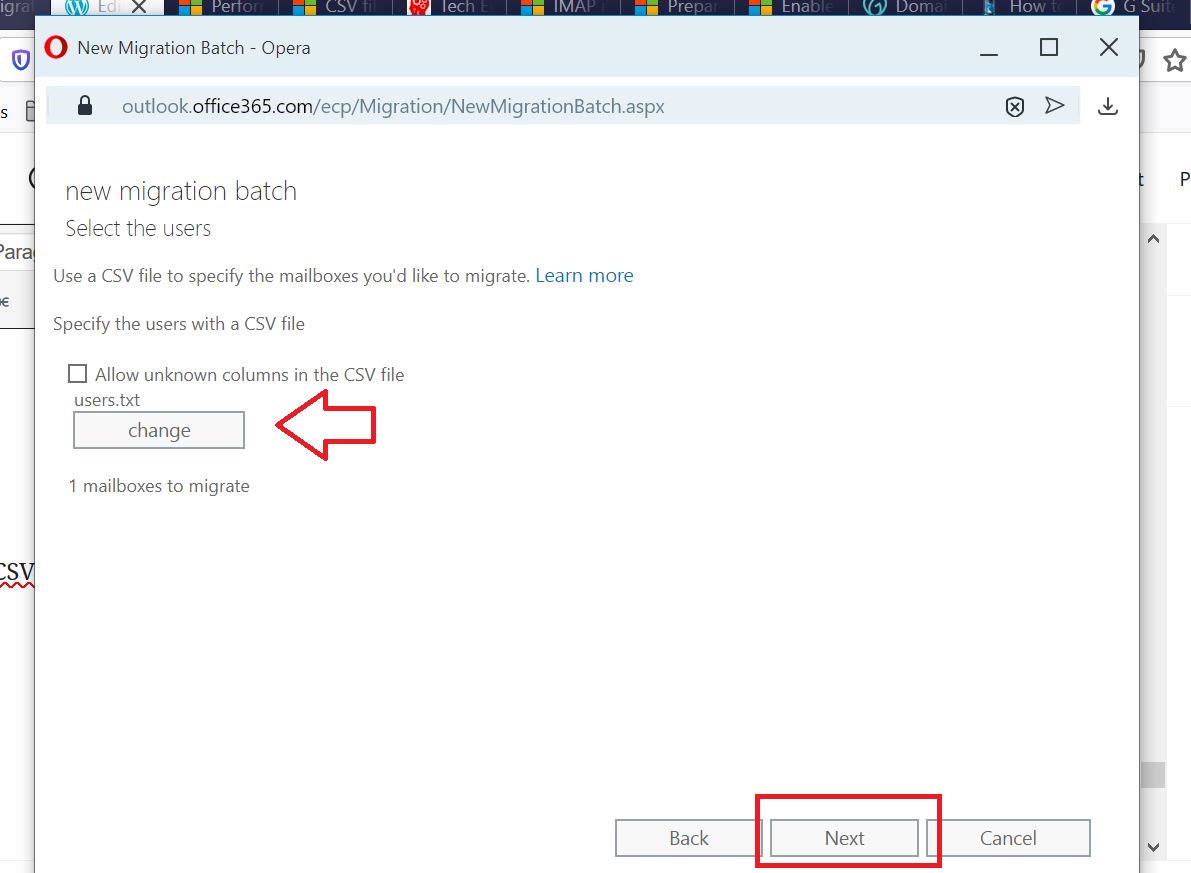
Add the CSV file which contains users email list of the batch.
A CSV file (users.txt) should be created with the users that need to be migrated.
How to create CSV files for migration
You can use any text editor to create the CSV file, but using an application like Microsoft Excel will make it easier to import data and configure and organize CSV files. Be sure to save CSV files as a .csv or .txt file.
It needs two headers.
-
EmailAddress (required). Contains the primary email address for an existing Microsoft 365 or Office 365 mailbox.
-
Username (optional). Contains the Gmail primary email address, if it differs from EmailAddress.
More at this link:
https://docs.microsoft.com/en-us/exchange/mailbox-migration/csv-files-for-migration
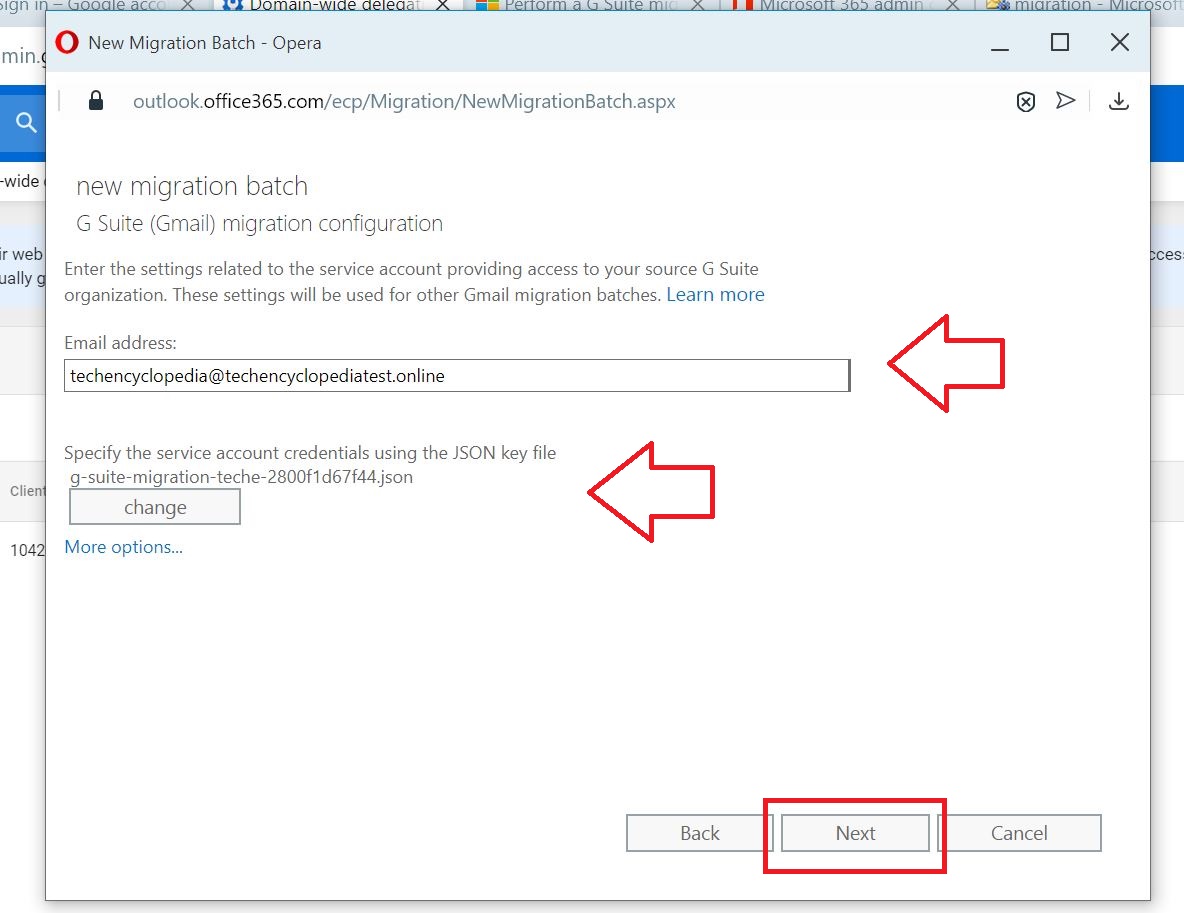
Provide the email address of the super admin within the G Suite environment and add the JSON file previously saved.
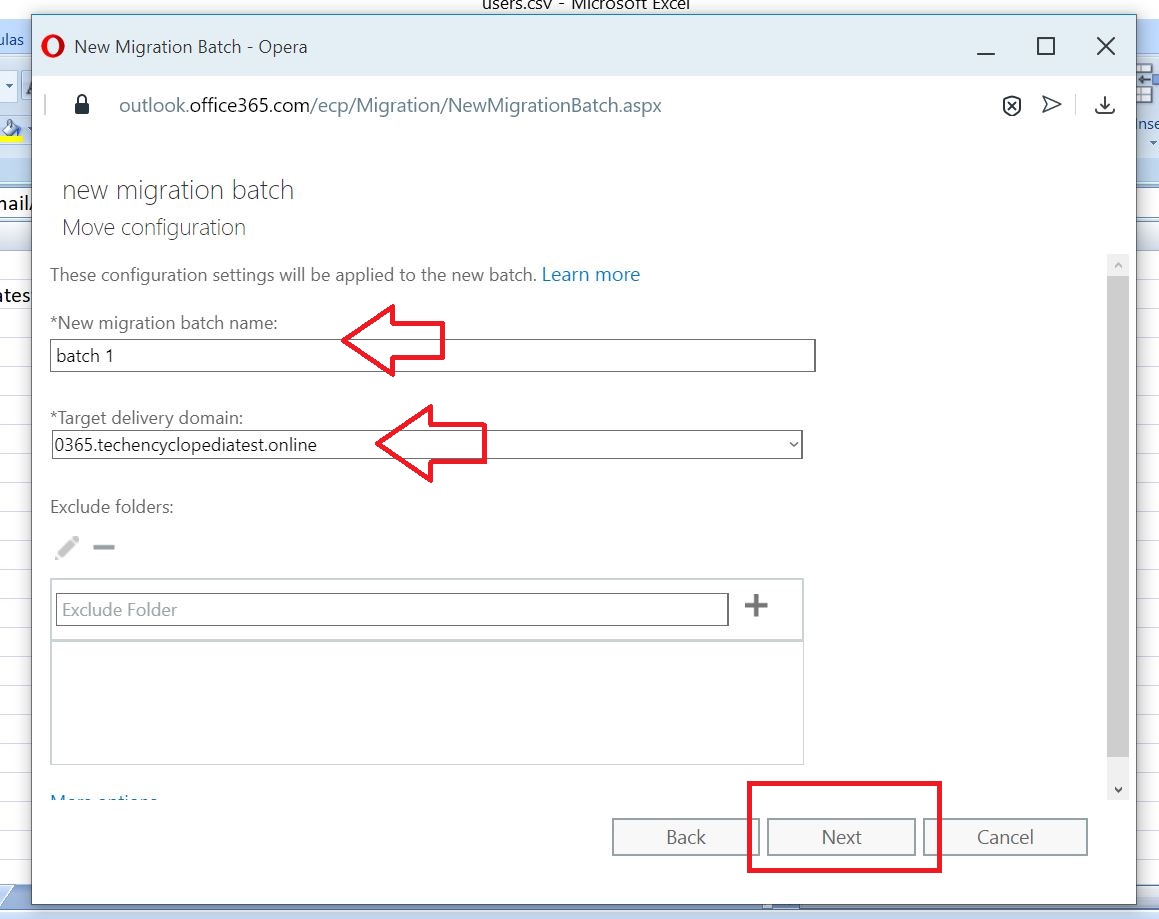
Give a batch name and provide the target delivery domain name (o365.techencyclopedia.test)
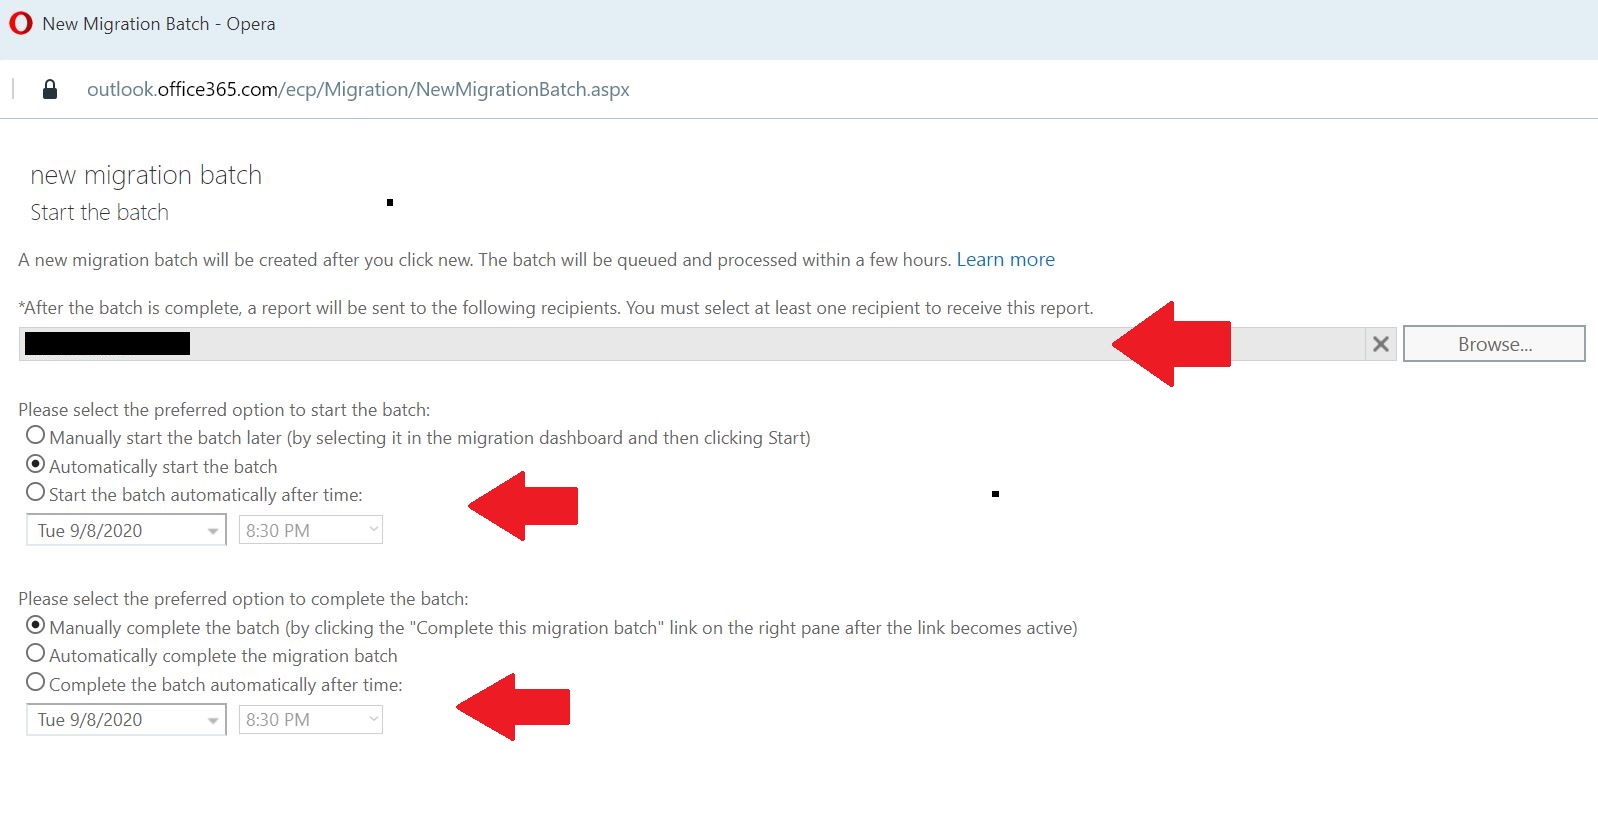
Following options are selected before starting the batch
- Automatically start the batch
- Manually complete the batch (by clicking the “Complete this migration batch” link on the right pane after the link becomes active)
After synch is completed Complete the migration batch
09 Finalizing your migration
After you have successfully migrated all of your G Suite users to Microsoft 365 or Office 365, you can switch your primary MX record to point to Microsoft 365 or Office 365. The update to the MX record will propagate slowly, taking up to the length of time in the record’s previous TTL (time to live). At this point, you are free to decommission your source G Suite tenant.
And also make sure to conduct testing ‘to’ and ‘from’ the mailboxes.
TROUBLESHOOT
Verify MX records of sub domains
If the sent emails are not received to both G Suite and O365 make sure the MX Records are configured and verified for the added subdomains.
Check spam or junk email folder
If emails are not receviced double check the spam or junk email folder
IMPORTANT LINKS
The following article provides valubale insight on the topic ‘How to accomplish a smooth email migration‘ by http://www.wireload.net
https://www.wireload.net/news/2010/03/how_to_accomplish_a_smooth_email_migration_for_your_domain.html
- Create two sub domains
- Create a forwarding address in new domain
- After the migration delete the forwarding address
Using above steps will allow us to not worry about the DNS propagation anymore.
The solution is simple, which makes it great. The key is to have two email addresses on separate domains (sub-domains or separate domains). Since this client was on a hosted Exchange plan, they already had two addresses for these accounts: one for their own domain, and one from the email provider (something like username@non-profit.emailprovider.com). Since both these domains have proper MX-records configured, email can be delivered on both addresses. Fairly straight forward, right? (Phase 0 in the illustration below.)
Now let’s move on to the clever part. Since the non-profit was moving to Google Apps, they needed to change the MX-record for their domain to point to Google’s servers. This can usually disrupt the flow of email, as depending on if the sender’s DNS server is using the new updated MX record or not, the email can be delivered to either the new or the old server. However, since the the email accounts can be reached on two separate domains (and therefor two separate MX-records), we can configure the primary domain to forward the emails to the other domain. In Google Apps this means that you have to create forwarding addresses for every user from username@non-profit.org to username@non-profit.emailprovider.com. (Phase 1 in the illustration below.)
Ok, you might think, that just puts us back to square one. Not so fast. What this means is that we do not have to worry about the DNS propagation anymore. We can do this change the weekend before the actual migration and then all we need to do the weekend of the actual migration is to remove the forwarding and set up a real account. Simple and brilliant. You can even break apart the migration into several groups and do one group at the time. (Phase 2 in the illustration below.)
If you do not have a hosted email solution or are moving to Google Apps, you can still use this method. All you need to do is to create a sub-domain on your own domain and configure your email server and MX-record so that you can receive email there too. Setting up a domain alias is fairly straight forward on most SMTP servers. The only thing you need to pay attention to is to make sure that the ‘From’ address is configured to the primary domain and not the sub-domain.