KEEP IN MIND
This tutorial will install Exchange Server 2016 on Windows Server 2016.
- The Active Directory is already installed along with DNS in a separate server. Additional domain controller also have been configured to make it look similar to production environment (In this scenario, I configured Active Directory in Microsoft Server 2019)
How to Install Active Directory in Windows Server 2019:
How to Install Additional Domain Controller in Windows 2919:
- To install Exchange 2016, you have to install Windows Server 2016 and add to the domain.
How to Install Windows Server 2016:
https://techencyclopedia.wordpress.com/2016/08/24/install-windows-server-2016-step-by-step/
- The Exchange installation can be done using domain administrator account. If it is not the domain administrator account, the Schema and Enterprise administrator privileges should be given.
- For this tutorial, Exchange Server 2016 CU11 is used. DOWNLOAD LINK FOR Cumulative Update 11 for Exchange Server 2016 (KB4134118): https://www.microsoft.com/en-us/download/details.aspx?id=57388
It is always good idea to follow articles in Microsoft that focus Exchange to make the installation run error free. Furthermore, the technology changes and new updates are introduced and prerequisites and requirements tend to change. Because of that reason, I have listed important links in this post, so readers can install any version of Exchange server.
The Exchange sever download page provides important links to articles about System Requirements.

Exchange server 2016 versions history
Before installing the Exchange Server, you have to get an idea about the version you have downloaded. Refer following article for Exchange server 2016 build numbers and released dates. Based on the CU version the prerequisites might slightly change. For instance, the required .NET version varies based on the Exchange version.

Prerequisites
It is important to understand the prerequisites needed for Exchange 2016 installation. Refer the following article given below.
https://docs.microsoft.com/en-us/Exchange/plan-and-deploy/prerequisites?view=exchserver-2016
Prepare Active Directory and Schema
You have to prepare the AD and Schema properly and this article shows you how to do that.
TUTORIAL
Tutorial is divided into four sections to make it easier to follow
- STEP 01: Install prerequisites for preparing Active Directory
- STEP 02: Prepare active directory and domains
- STEP 03: Install prerequisites for Server 2016 to install Exchange 2016
- STEP 04: Install Exchange Server 2016
STEP 01: Install prerequisites for preparing Active Directory
Following prerequisites are needed to prepare Active Directory before installing Exchange Server 2016
- Microsoft .NET Framework 4.8 or later
- Visual C++ Redistributable Package for Visual Studio 2012
- Remote tools administration pack
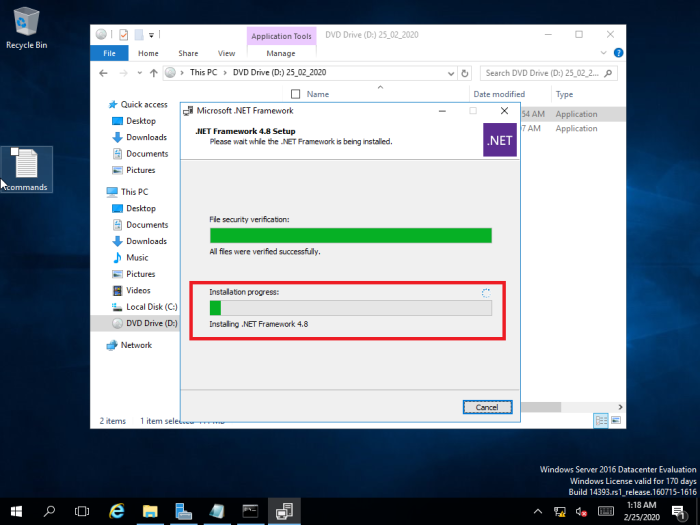
Microsoft .Net Framework 4.8 or later
Download and run the setup
Accept the license terms to continue

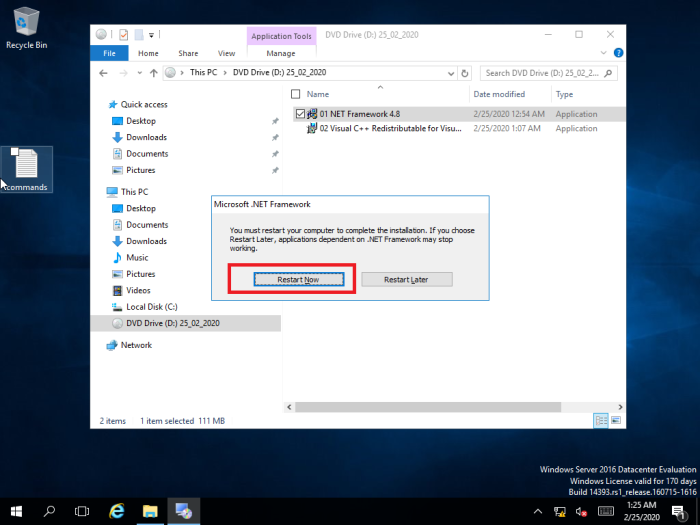
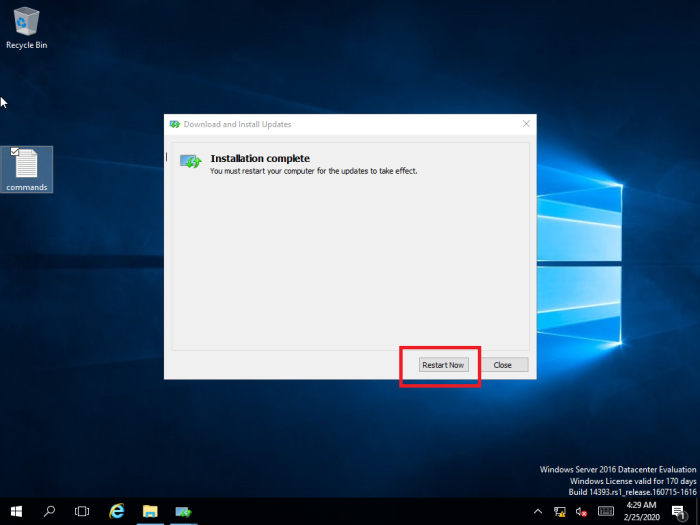
Setup updates the files used by the programs listed. Press ‘No’ and restart the server machine after the installation

Wait until the installation finishes
After installation completes click ‘Finish’

Select ‘Restart Now’ to restart
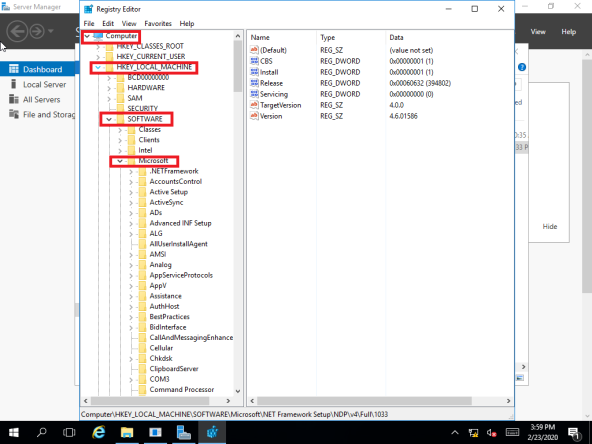
How to check the .NET version
Before installing the .NET, you can check the installed version using regedit.exe
Go to ‘Start’ menu and select ‘Run’ and type ‘regedit.exe’
HKEY_LOCAL_MACHINE\SOFTWARE\Microsoft\NET Framework Setup\NDP\v4\Full


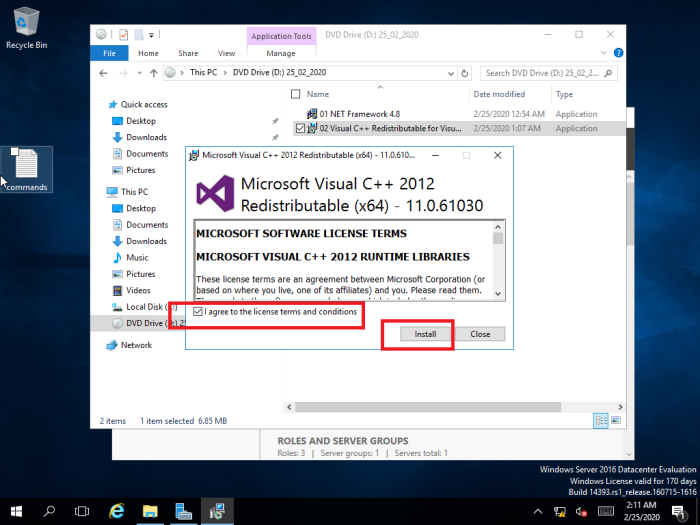
Visual C++ Redistributable Package for Visual Studio 2012
Download and run the setup
Accept the Licence terms and click ‘Install’
Wait until the installation finishes

Close after the Setup Successful message

Remote Tools Administration Pack
Run Windows PowerShell as Administrator and paste following commands to install necessary features
Install-WindowsFeature RSAT-ADDS
Go to ‘Start’ menu select right click on ‘Windows PowerShell ISE’

Select ‘Run as administrator’

Run the command to install ‘Remote Tools Administration Pack’

STEP 02: Prepare active directory and domains
- Prepare Schema
- Prepare Active Directory
- Prepare Domains
Prepare Schema
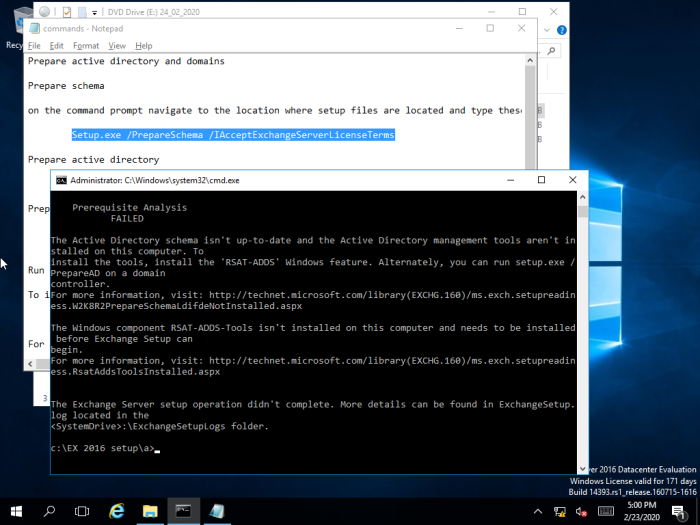
You have to extend the Active Directory Schema and prepare the Active Directory and domain. In the command prompt go to the location where the Exchange 2016 setup files are located and run this command (It is important to make sure there are no mistakes)
Setup.exe /PrepareSchema /IAcceptExchangeServerLicenseTerms
Go to the location where Exchange 2016 setup files are located
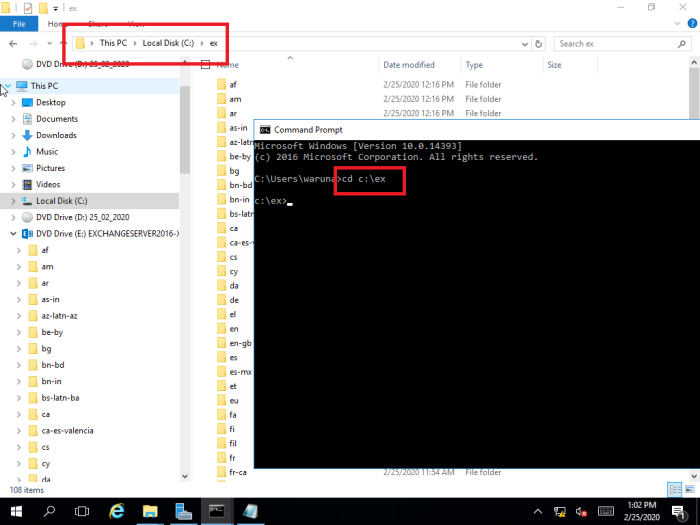
Type the command

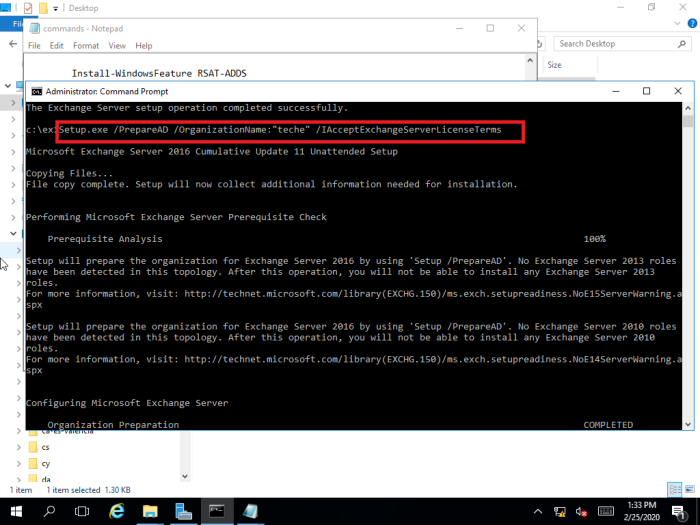
Prepare Active Directory
Setup.exe /PrepareAD /OrganizationName:”” /IAcceptExchangeServerLicenseTerms
You have to provide the organization name between “”
Prepare Domains
Setup.exe /PrepareAllDomains /IAcceptExchangeServerLicenseTerms

STEP 03 : Install prerequisites for Server 2016 to install Exchange 2016
Following prerequisites are needed to be installed in Microsoft Windows Server 2016 before installing Exchange Server 2016
This is for Exchange 2016 Mailbox server role
- Prerequisites for mail box server role (PowerShell command)
- Microsoft .NET Framework 4.8 or later
- Microsoft Knowledge Base article KB3206632
- Visual C++ Redistributable Package for Visual Studio 2012
- Visual C++ Redistributable Package for Visual Studio 2013
- Microsoft Unified Communications Managed API 4.0, Core Runtime 64-bit
Edge Transport role
Please note that, in this case Edge Transport role is not installed. However, the prerequisites needed are stated below.
- Prerequisites for Edge Transport server role (PowerShell command)
- Microsoft .NET Framework 4.8 or later
- Visual C++ Redistributable Package for Visual Studio 2012
Prerequisites for mail box server role (PowerShell command)
Install-WindowsFeature NET-Framework-45-Features, Server-Media-Foundation, RPC-over-HTTP-proxy, RSAT-Clustering, RSAT-Clustering-CmdInterface, RSAT-Clustering-Mgmt, RSAT-Clustering-PowerShell, WAS-Process-Model, Web-Asp-Net45, Web-Basic-Auth, Web-Client-Auth, Web-Digest-Auth, Web-Dir-Browsing, Web-Dyn-Compression, Web-Http-Errors, Web-Http-Logging, Web-Http-Redirect, Web-Http-Tracing, Web-ISAPI-Ext, Web-ISAPI-Filter, Web-Lgcy-Mgmt-Console, Web-Metabase, Web-Mgmt-Console, Web-Mgmt-Service, Web-Net-Ext45, Web-Request-Monitor, Web-Server, Web-Stat-Compression, Web-Static-Content, Web-Windows-Auth, Web-WMI, Windows-Identity-Foundation, RSAT-ADDS

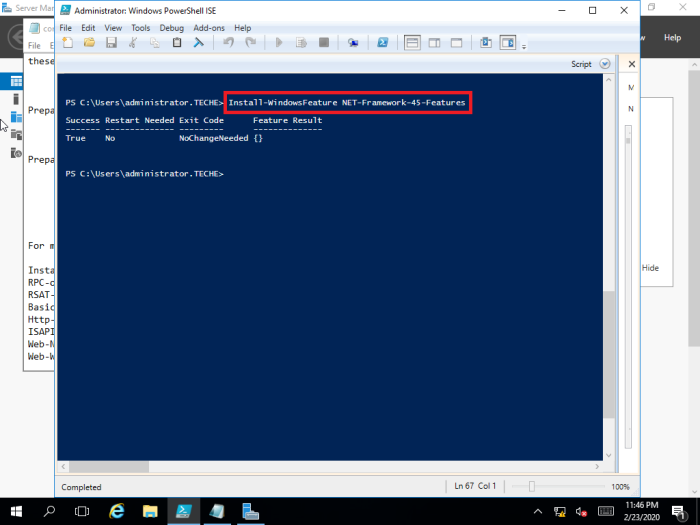
If you encounter an error you can install the features one by one. (In this case the mentioned feature is already installed)
Install-WindowsFeature NET-Framework-45-Features

Microsoft .NET Framework 4.8 or later
Already installed. Refer Step 01.
Microsoft Knowledge Base article KB3206632
If your Windows Server 2016 version is 14393.576 or earlier you need to update Windows to Install Exchange Server 2016
Firstly, check your Windows version by running ‘winver’ command

Since the version is 14393.0, in this case we have to install this update
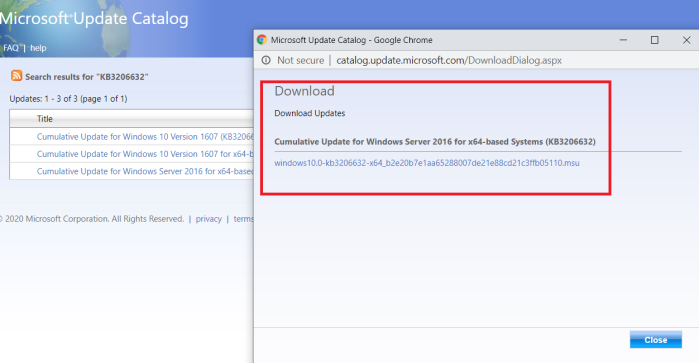
Firstly, download the update
http://www.catalog.update.microsoft.com/Search.aspx?q=KB3206632
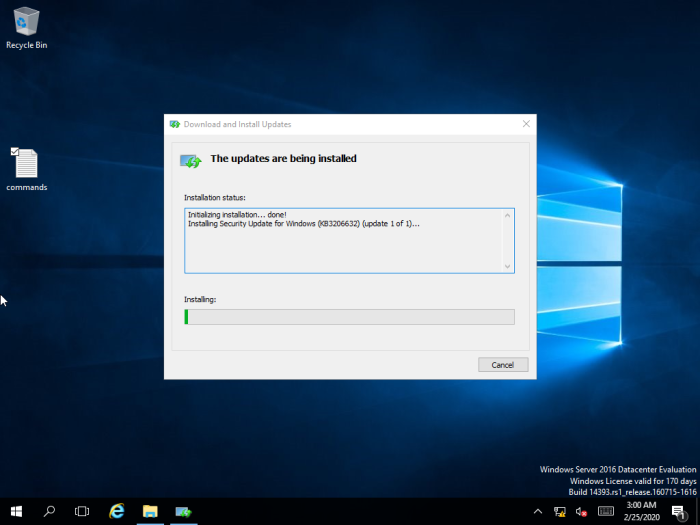
Run the downloaded Windows update
Click ‘Yes’ in ‘Windows Update Standalone Installer’ to proceed

Wait until the installation finishes
Restart the server to complete the installation
Visual C++ Redistributable Package for Visual Studio 2012
Already installed. Refer Step 01.
Visual C++ Redistributable Package for Visual Studio 2013
Only the Mailbox role requires the Visual C++ Redistributable Packages for Visual Studio 2013
Run the setup

Wait until the installation finishes
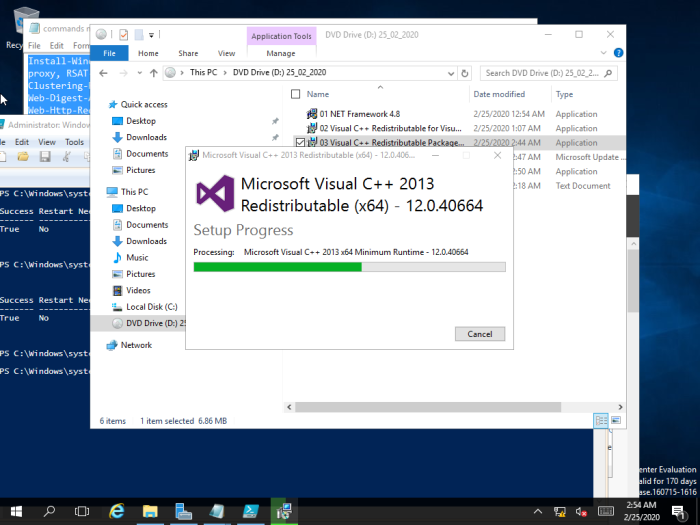
Click ‘close’ after the installation

Microsoft Unified Communications Managed API 4.0, Core Runtime 64-bit
Run the setup file and click ‘Next’ to proceed

Accept the License Terms and click ‘Install’ to proceed
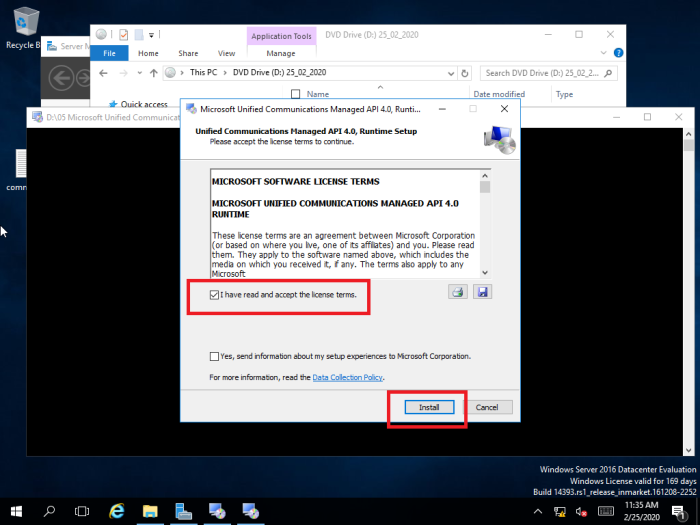
After the installation completes click ‘Finish’

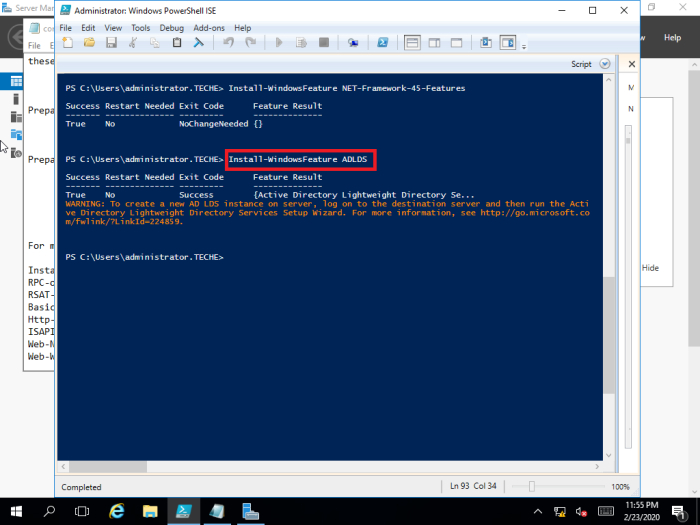
Prerequisites for Edge Transport Server Role (PowerShell command)
This is an optional role and no need to be installed (detailed description is given in STEP 04 regarding Edger Transport role)
Install-WindowsFeature ADLDS
STEP 04: Install Exchange Server 2016
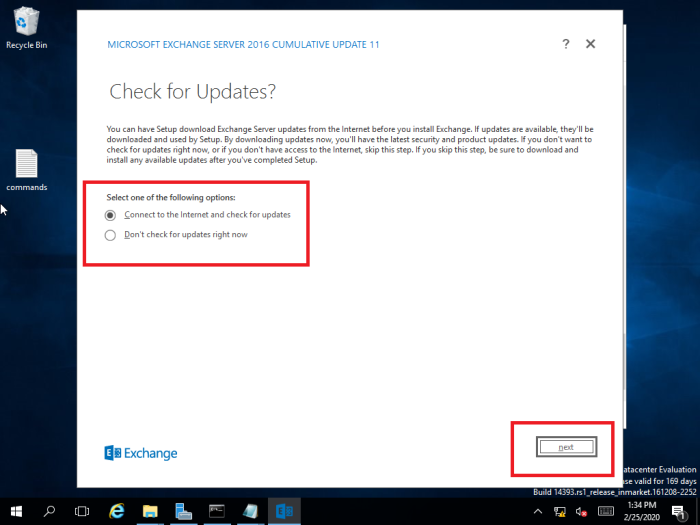
Run the Exchange 2016 setup
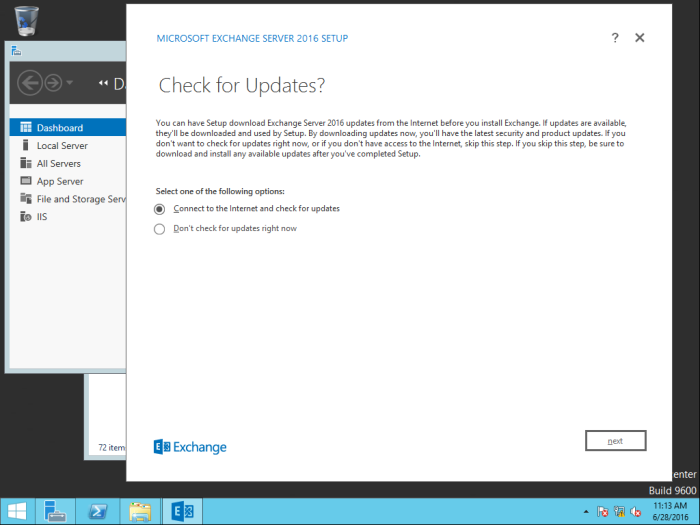
Initially you are asked to check for updates It is important to install the latest version otherwise you might get errors later on during the installation.
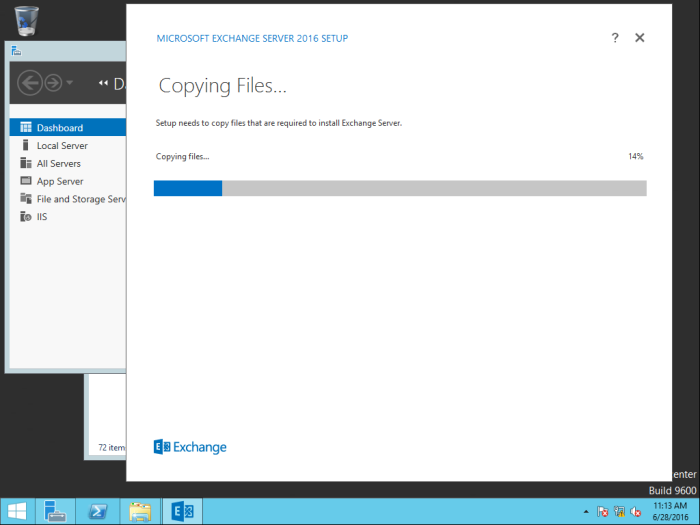
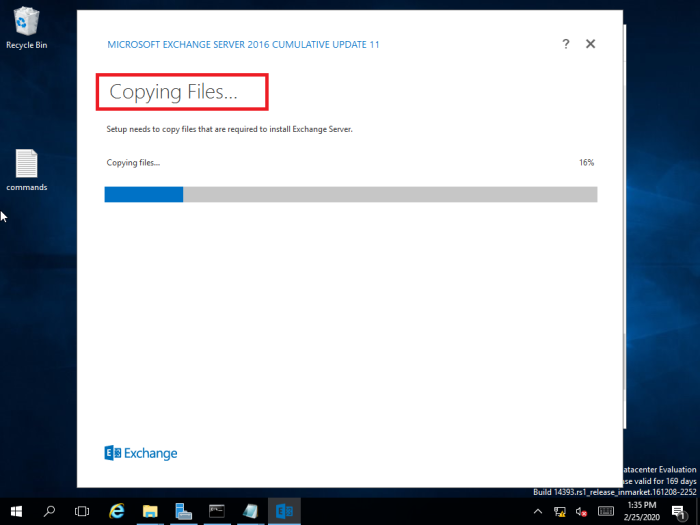
Files that are required to run the Exchange server 2016 installation is copied to the server
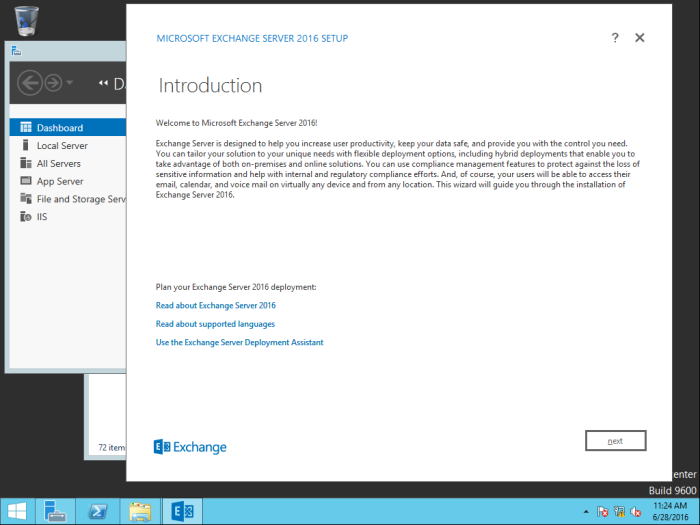
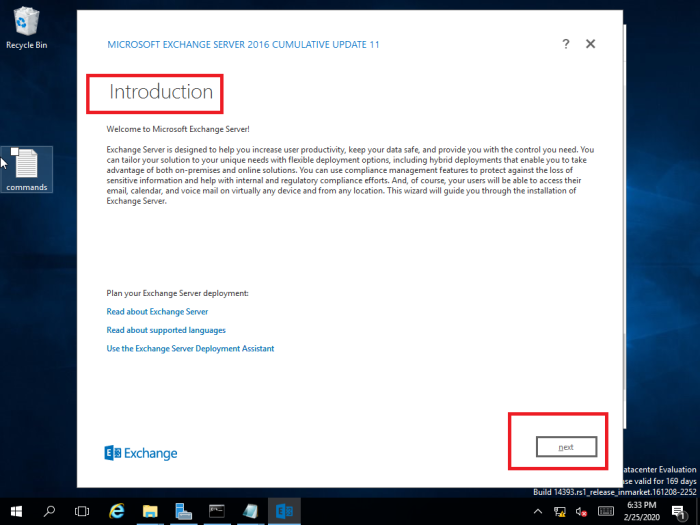
Read the ‘introduction’ Microsoft has provided and it includes important links
Accept the License Agreement and proceed

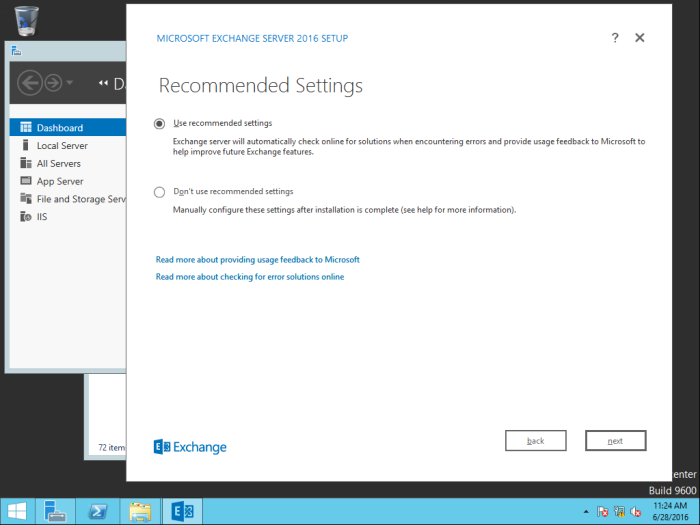
Use ‘Recommended Settings’ and click ‘Next’

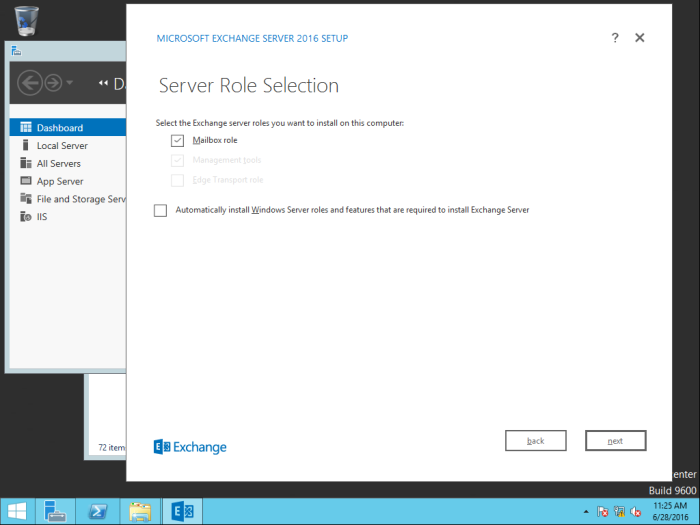
Select ‘Mailbox’ Server role
(you do not need Edge Transport role in this case which is optional . Edge is designed to sit in a perimeter network to provide mail security)
What is Edge Transport role?
Edge Transport server provides protection against spam and apply mail flow rules to control mail flow.
You can install more than one Edge Transport server in the perimeter network. Deploying more than one Edge Transport server provides redundancy and failover capabilities for your inbound message flow. You can load balance the SMTP traffic to your organization among Edge Transport servers by defining more than one MX record with the same priority value for your mail domain. You can achieve consistency in the configuration among multiple Edge Transport servers by using cloned configuration scripts.

If you need you can browse installation location or keep as it is

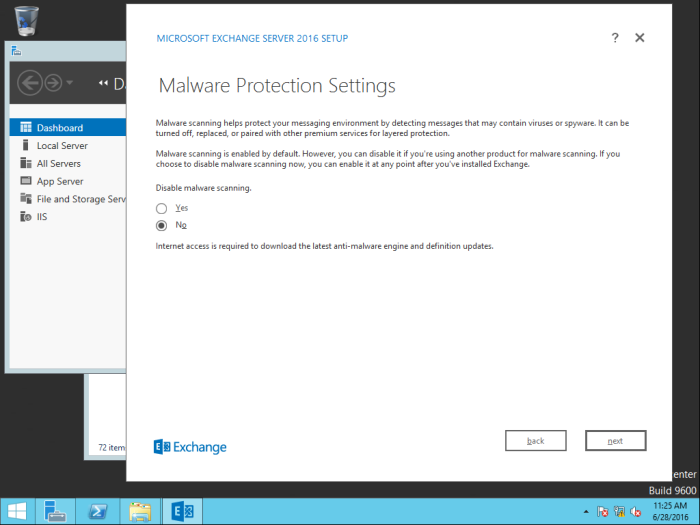
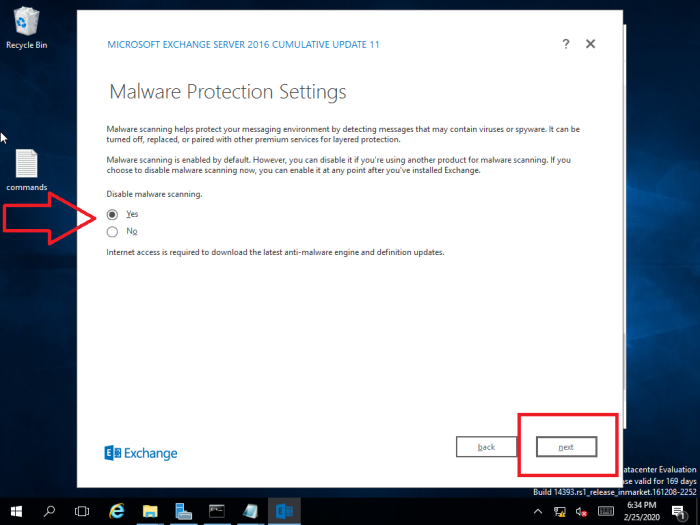
In this case Malware Protection is disabled. If you need you can enable it. Or you can use a third party product.
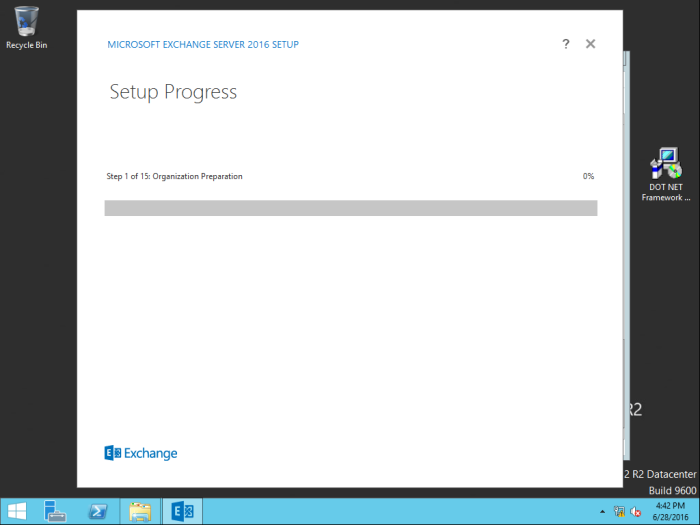
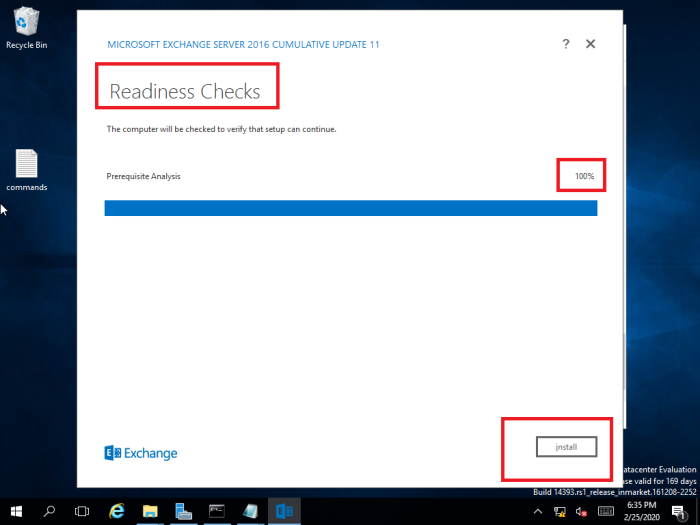
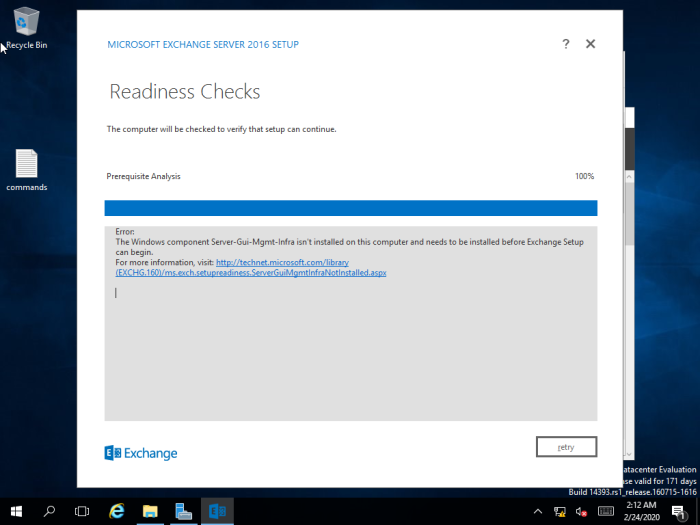
Wait until the ‘Readiness Checks’ completes
Wait until the Exchange Server is installed
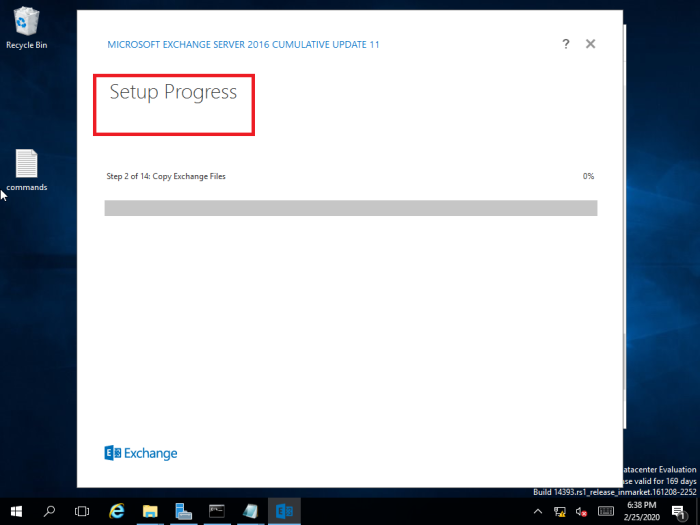
If the setup progress is slow make sure to disable or remove anti-malware service to make the installation run faster

Verify Exchange Server installation
Exchange Management Shell
Run this command in Exchange Management Shell
Get-ExchangeServer
Select the ‘Exchange Management Shell’ from ‘start’ menu

Run the command

Review the Exchange Setup log
go to the following location
<location where exchange server is installed>:\ExchangeSetupLogs\ExchangeSetup.log
Login to Exchange Admin Center
Use following URL
Alternative you can use the IP address instead of ‘localhost’

TROUBLESHOOTING
- If the additional domain controller is installed make sure it is up and running
- Provide Schema and Enterprise administrator privileges to the account that is used to install the Exchange Server
- Always download the most recent Exchange server 2016 product from Microsoft
- Disable or uninstall antivirus protection (Uninstall Windows Defender using remove roles and feature wizard to make the installation faster)
- Exchange Services should be up and running during the installation
Prepare schema error
An error will occur if you try to Prepare schema without installing Remote Tools Administration Pack and rest of the configuration
Installing prerequisites for Mail box server role error
If you encounter an error when installing multiple features, remove the particular feature that gives the error and try to install one by one. The best way to prevent this is to install the latest version of Exchange Sever 2016 and Windows Server 2016.
Download the latest Exchange server 2016 product
When the Exchange server 2016 came, the Server 2016 did not support the product fully and make sure you download the latest Exchange 2016 Cumulative Update
Download link: https://www.microsoft.com/en-us/download/details.aspx?id=57388
Services not running

Check whether MSExchangeADTopology service is running or not. If not manually start the service at the Server Manager or Task Manager
What is MSExchangeADTopology service?
Provides Active Directory topology information to Exchange services. If this service is stopped, most Exchange services can’t start.
REFER THIS LINK TO GET AN IDEA ABOUT EXCHANGE SERVICES: https://docs.microsoft.com/en-us/Exchange/plan-and-deploy/deployment-ref/services-overview?redirectedfrom=MSDN&view=exchserver-2019
Please note that after the ‘Step 4 of 13 – restoring services’ the Services can be started.