This tutorial shows you how to migrate user accounts from Windows Server 2019 Active Directory to Azure Active Directory Domain Services via Azure Active Directory Connect.
KEEP IN MIND
- A virtual Active Directory in Windows Server 2019 test environment was created using VMware Workstation to perform the migration process.
- Please note that, for this tutorial, freely available Microsoft Azure subscription is used.
- The tutorial is divided into 5 main sections
-
-
- Create a tenant
- Add the domain name
- Create a global user
- Download Azure AD Connect
- Install Azure AD Connect and initiate synchronization
-
POST CONFIGURATION TASKS
Windows Server 2019 Active Directory is configured to prepare for the synchronization process.
Link to create Active Directory in Windows Server 2019:
Couple of test users are created in Active Directory for synchronization

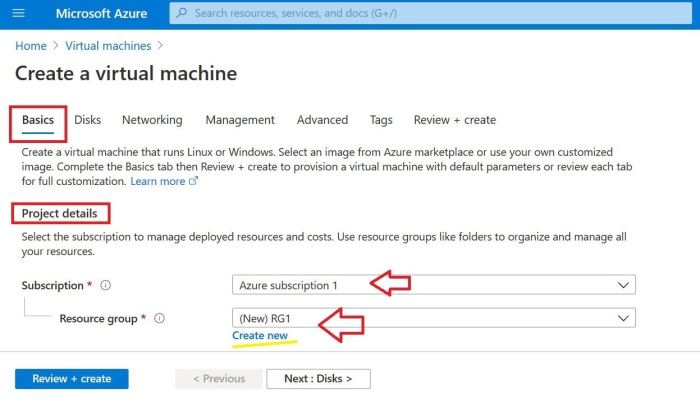
01 CREATE A TENANT
To make the project more organized, a new tenant is created to configure the Azure Active Directory users. A tenant represents an organization in Azure Active Directory.
Choose the Azure Active Directory resource from the Microsoft Azure Portal.
Alternatively, you can search from the search bar located at the top of the screen.

Click the + Create a tenant to create a new tenant

Configure the Basics tab
For the tenant type, Azure Active Directory is chosen

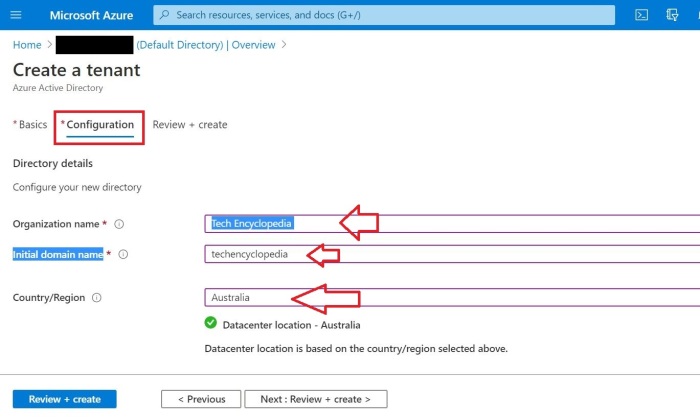
Configure the Configuration tab
Provide the Organization name
Provide the Initial domain name (This will be changed later on)
Provide the Country or Region (The Datacenter location will be based on this input)
Review and Create the tenant
After, reviewing the new tenant information, click create to finalize

After creating the new tenant, switch from the default tenant to the new one.
Go to the Azure Active Directory Overview
Click on Switch tenant

Switch to the new tenant

Confirm that you are connected to the new tenant before proceeding forward.

02 ADD THE DOMAIN NAME
The domain is added to the Azure Active Directory. This should be the same domain name that configured the user accounts in on premises Active Directory Domain Services.
Click on + Add Custom domain to add the domain

To verify the domain name there will be a delay since to propagate DNS records it will take up to 72 hours. However, please note that most of the times it will take less than 72 hours.
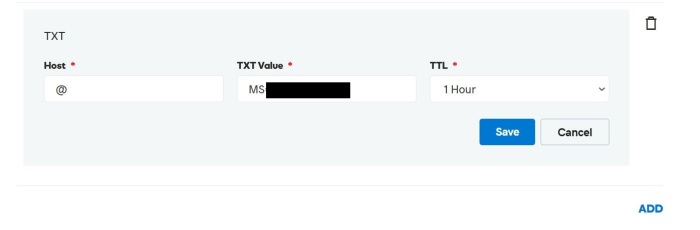
To complete the domain name verification process, create following 2 DNS records in the domain name registrar (GoDaddy)
- TXT
- MX
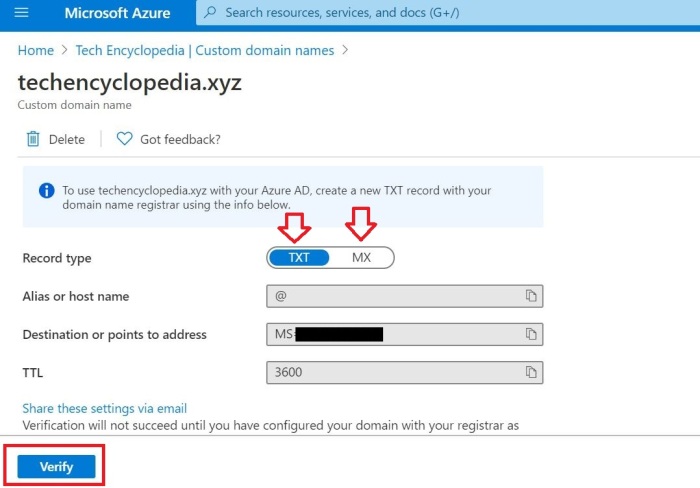
TXT record is added to the GoDaddy (add the MX record as well before clicking the verify button)
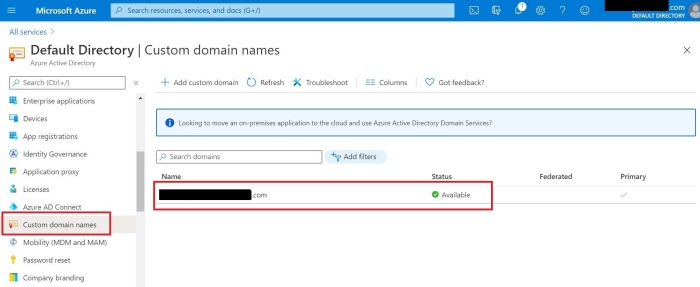
After verifying the domain name make it the primary domain name.
Click on the newly added verified domain name

Click on the Make primary

03 CREATE A GLOBAL USER
As for the next step, you have to create a user account in Azure Active Directory and provide the Global Administrator privileges. Global Administrator possess all the permissions to manage all aspects of Azure AD and Microsoft services that use Azure AD identities.
Go to users in Azure Active Directory

Click on + New user to start creating a new user process

Choose the Create user option

Insert the details under Identity section
Add the User name and make sure the correct domain name is selected.

Configure the password options
In this case, new password is given instead of allowing to generate a password

Groups and roles section is configured
For the role, Global administrator is chosen from the directory roles menu

After changing the role it will look like this

Complete the rest of the configuration
Block sign in option should be ‘no’ and it is selected by default
After completing the user configuration click create to finalize

After the new global user is created using the credentials log back in to the Azure portal. You will have to change the given password and provide phone authentication details to continue.
Enter the user name to sign in

Enter the previously given Password

Next screen will prompt you to Update your password

After logging in authentication phone details should be given

Now you are logged in as the newly created User with Global Administrator privileges

Search for Azure Active Directory resource to make further configurations

04 DOWNLOAD AZURE AD CONNECT
After logging back in as the global administrator, go to the Azure Active Directory and download Microsoft Azure Active Directory Connect.
Click on Azure AD Connect to proceed

Click on Download Azure AD Connect to go to the Microsoft Download page

Click on Download button to continue

Read the system requirements and install instructions prior to installing the Azure Active Directory Connect. The System Requirements will provide the information of the supported Operating Systems.
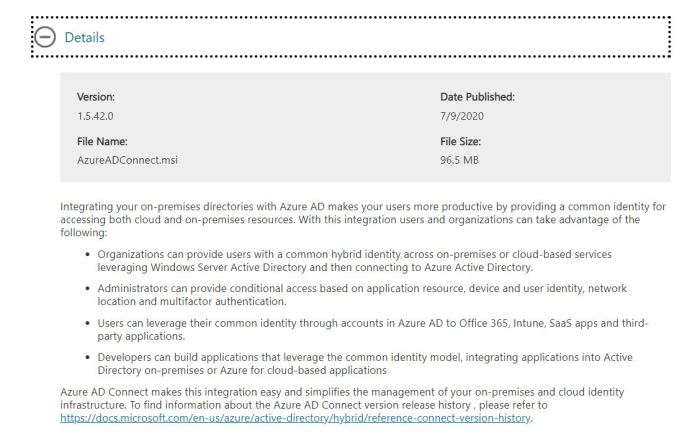
The System Requirements

05 INSTALL AZURE AD CONNECT AND INITIATE SYNCHRONIZATION
Azure AD Connect is installed in the on-premises Windows Server 2019 Active Directory Domain Controller to initiate the synchronization process.
Log in to Windows Server 2019 (Install and configure AD in Windows server 2019)
(Active Directory user should have Enterprise domain administrator privileges)

Double click on downloaded Azure AD Connect setup file to install Azure AD Connect

Agree to the license terms and privacy notice to continue with the instillation

In this case, Express settings are used

Enter the Azure AD global user credentials

Browser window will prompt to sign in to the account using the password

Complete the phone authentication process

Enter the credentials to connect to the on-premises Active Directory

Tick to start the synchronization process right away after completing the installation

Sign in to Azure to check that on-premises Active Directory users are synchronized to the Azure Active Directory.
Go to Azure Active Directory > All users

By default the sync process is scheduled to run every 30 minutes. You might want to use sync powershell commands to manually run the process.
Azure AD Connect sync: Scheduler
Read more at:
https://docs.microsoft.com/en-us/azure/active-directory/hybrid/how-to-connect-sync-feature-scheduler
The scheduler is by default run every 30 minutes. In some cases, you might want to run a sync cycle in between the scheduled cycles or you need to run a different type.
To see your current configuration settings, go to PowerShell and run
Get-ADSyncSchedulerIf you need to manually run a sync cycle, then from PowerShell run
Start-ADSyncSyncCycle -PolicyType DeltaTo initiate a full sync cycle, run
Start-ADSyncSyncCycle -PolicyType Initial
TROUBLESHOOTING
CANNOT DELETE USERS ACCOUNTS
If you get an error that can’t manage or remove objects that were synchronized through the Azure Active Directory Sync tool it can be two reasons.
This issue may occur if one or more of the following conditions are true:
- The on-premises AD DS is no longer available. Therefore, you can’t manage or delete the object from the on-premises environment.
- You deleted an object from the on-premises AD DS. However, the object wasn’t deleted from your cloud service organization. This is unexpected behavior.
Read more at following article
https://docs.microsoft.com/en-au/troubleshoot/azure/active-directory/cannot-manage-objects