KEEP IN MIND
- Debian 10 (Buster) is used for this tutorial and configured using manual partition option in virtual environment using VMware workstation.
- Sizes of the partitions can be different according to the requirement of the organization or user.
- Advantages of manual partition include smooth backup and restore process, ability to maintain specially allocated partitions for different section for storage etc.
- It is recommended to create a Standard /boot partition to keep the boot files and Linux Kernal separately as the system will might errors when booting from LVM partition. Or it can be a personnel preference since latest version supports the boot in LVM. (Read more at: https://askubuntu.com/questions/76095/what-is-the-use-of-boot-lvm-based-in-partitioning)
- Logical Volume Manager is used to create partitions for
-
-
- /swap
- / (root)
- /home
- /srv (For FTP servers a /srv partition is recommended)
- /tmp
- /var (For web or mail servers it is recommended to create a separate /var partition)
- /var/log
- /var/mail
Debian production release history
Refer the production release at https://wiki.debian.org/DebianReleases

Why manual partition?
At a bare minimum, GNU/Linux needs one partition for itself. You can have a single partition containing the entire operating system, applications, and your personal files. Most people feel that a separate swap partition is also a necessity, although it’s not strictly true. “Swap” is scratch space for an operating system, which allows the system to use disk storage as “virtual memory”. By putting swap on a separate partition, Linux can make much more efficient use of it. It is possible to force Linux to use a regular file as swap, but it is not recommended.
Reason 01
Most people choose to give GNU/Linux more than the minimum number of partitions, however. There are two reasons you might want to break up the file system into a number of smaller partitions. The first is for safety. If something happens to corrupt the file system, generally only one partition is affected. Thus, you only have to replace (from the backups you’ve been carefully keeping) a portion of your system. At a bare minimum, you should consider creating what is commonly called a “root partition”. This contains the most essential components of the system. If any other partitions get corrupted, you can still boot into GNU/Linux to fix the system. This can save you the trouble of having to reinstall the system from scratch.
Reason 02
The second reason is generally more important in a business setting, but it really depends on your use of the machine. For example, a mail server getting spammed with e-mail can easily fill a partition. If you made /var/mail a separate partition on the mail server, most of the system will remain working even if you get spammed.
Drawback
The only real drawback to using more partitions is that it is often difficult to know in advance what your needs will be. If you make a partition too small then you will either have to reinstall the system or you will be constantly moving things around to make room in the undersized partition. On the other hand, if you make the partition too big, you will be wasting space that could be used elsewhere. Disk space is cheap nowadays, but why throw your money away?
More at [Deciding on Debian Partitions and Sizes: https://www.debian.org/releases/jessie/amd64/apcs01.html.en]
Download Debian 10
For this tutorial version 10.3.0 for ‘amd64’ architecture is chosen. (Download the amd64 for 64 bit or i386 for 32 bit systems).
Download links (the links can change time to time)
https://www.debian.org/distrib/
Small installation image (netinst image)
This can be downloaded quickly and should be recorded onto a removable disk. To use this, you will need a machine with an Internet connection.
debian-10.3.0-amd64-netinst.iso – size (335 mb)
https://www.debian.org/distrib/netinst
Larger complete installation image
This contains more packages, making it easier to install machines without an Internet connection. You can download DVD images using torrent
debian-10.3.0-amd64-DVD-1.iso.torrent – size (3.69 GB)
debian-10.3.0-amd64-DVD-2.iso.torrent – size (4.36 GB)
debian-10.3.0-amd64-DVD-3.iso.torrent – size (4.34 GB)
https://cdimage.debian.org/debian-cd/current/amd64/bt-dvd/
Directories in Linux
This is the list of directories, you can find in Linux and please note that in this tutorial, partitions are created for only the selected ones.

More at: https://www.debian.org/releases/stable/amd64/apcs02.en.html
TUTORIAL
The tutorial is divided into 7 sections
- Install Debian graphical install
- Create manual partition
- Create standard boot partition
- Configure Logical Volume Manager (LVM)
- Create logical volumes for the rest of the directories
- Configure the partitions
- Finalize installation
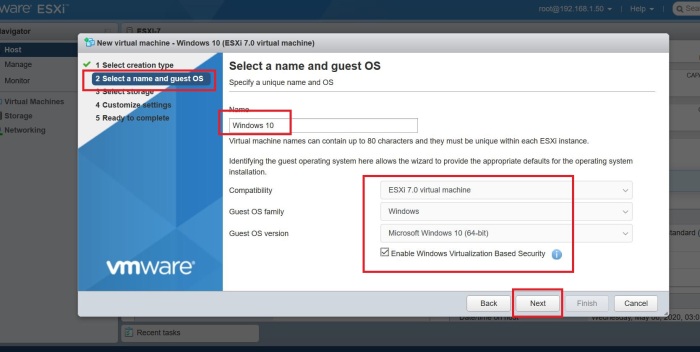
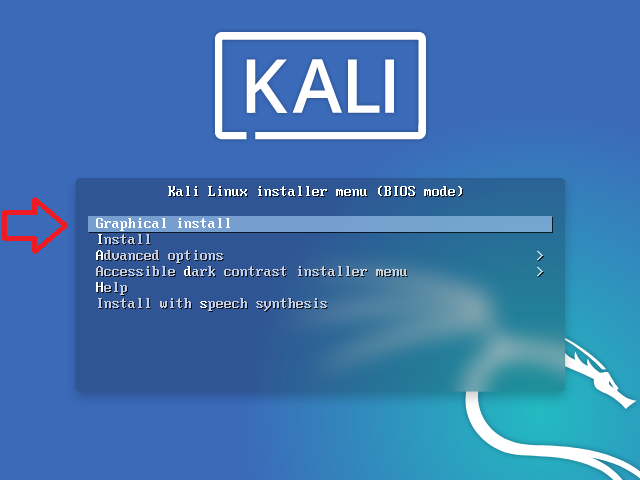
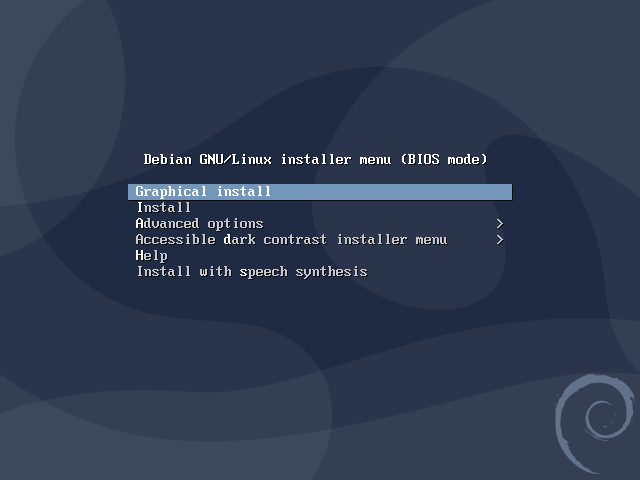
01 Install Debian graphical install
In this case, Graphical Install is selected
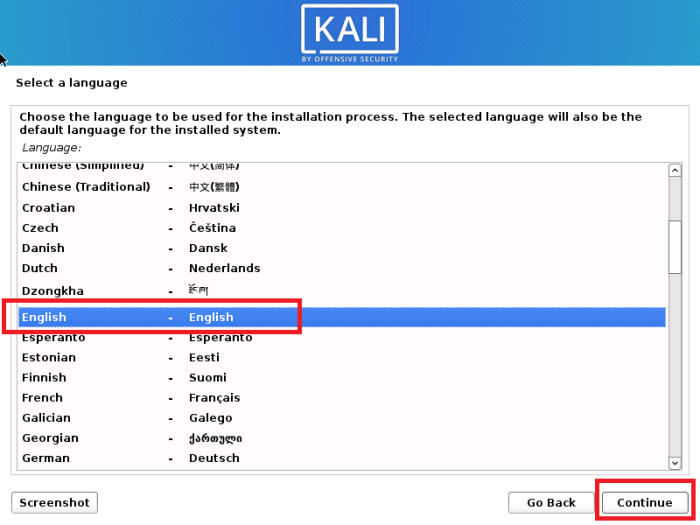
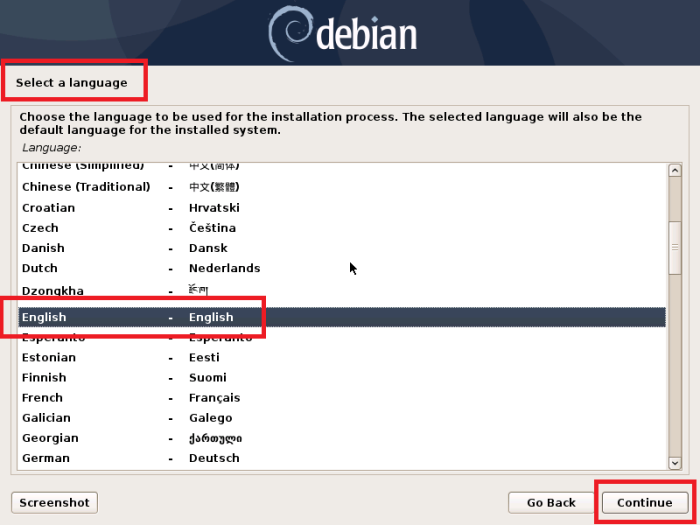
Select the desired language
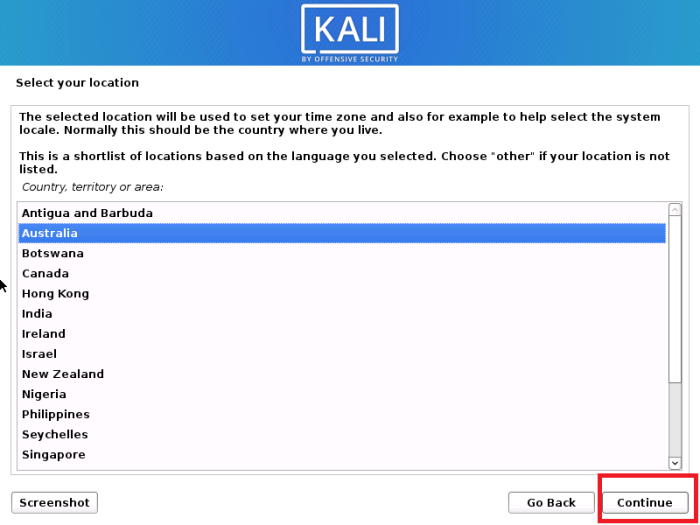
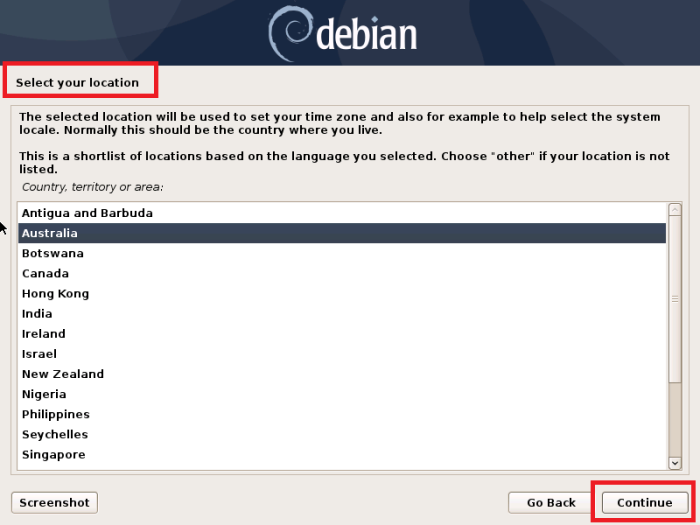
Select the location
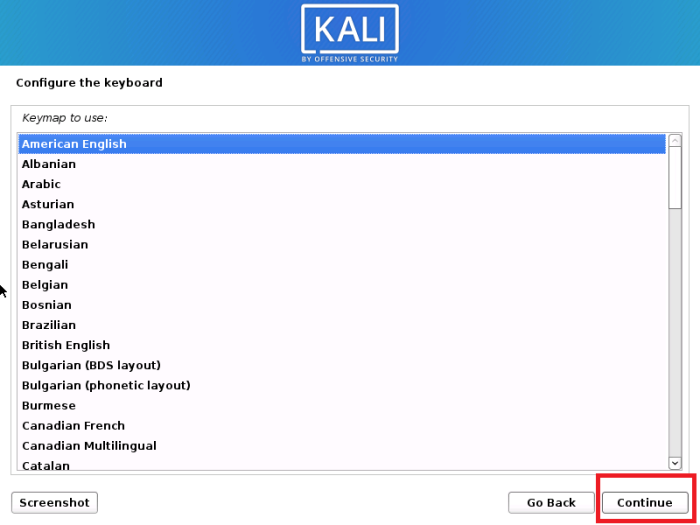
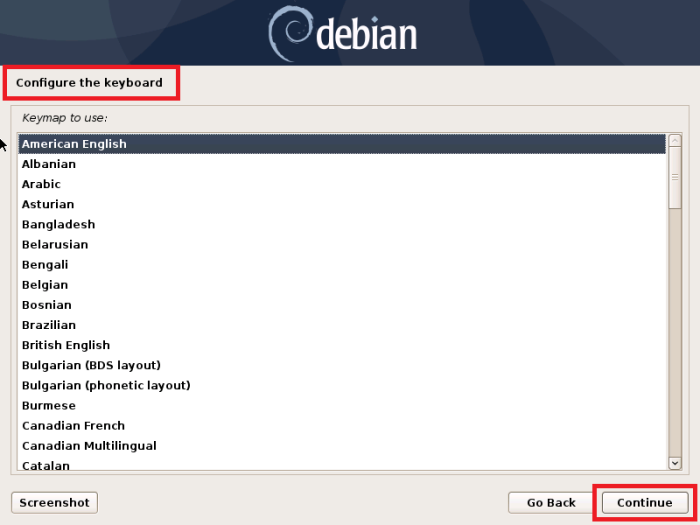
Provide the desired keyboard option
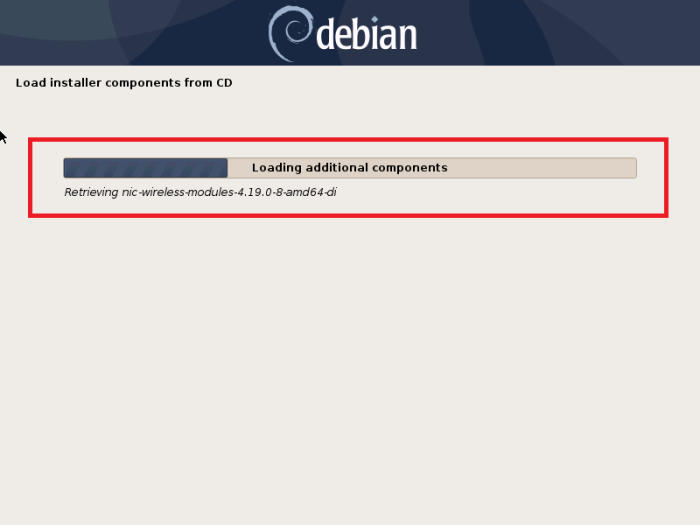
wait until the ‘installer components’ load
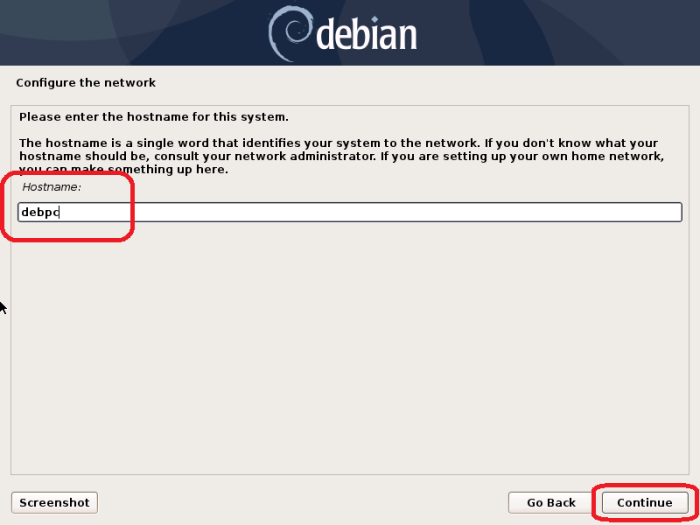
Give the ‘Hostname’ for the system
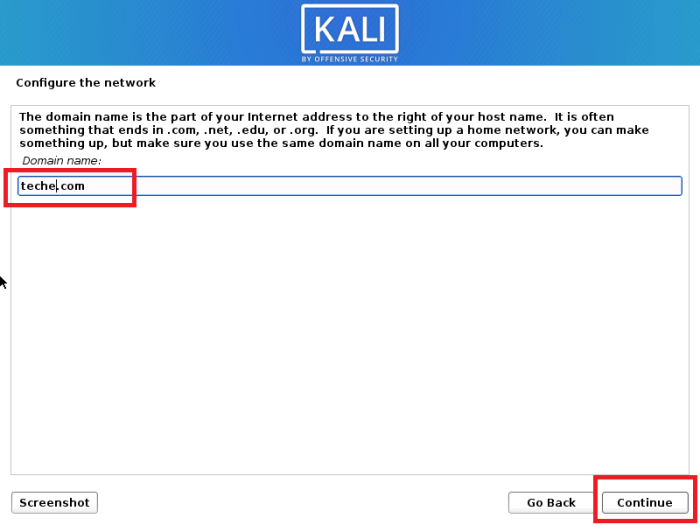
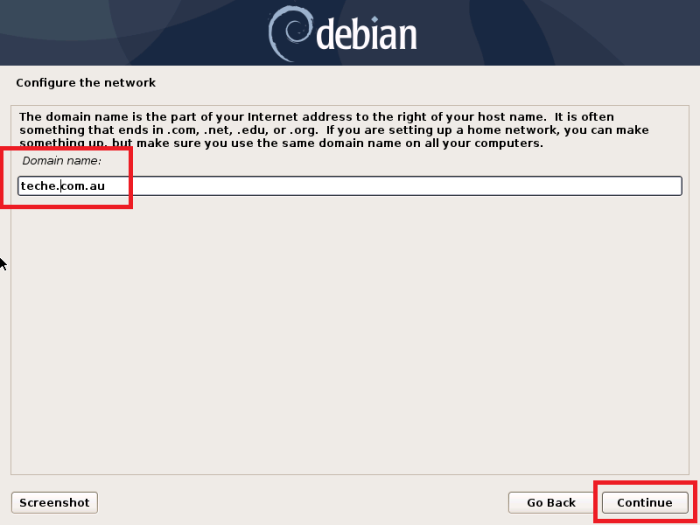
Provide the ‘Domain name’ (you can keep it blank if the system is used as a normal desktop system)
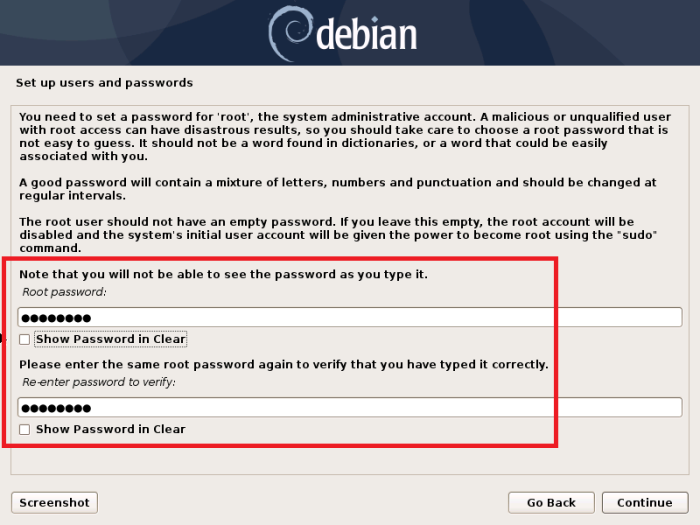
Give a strong password for the root account
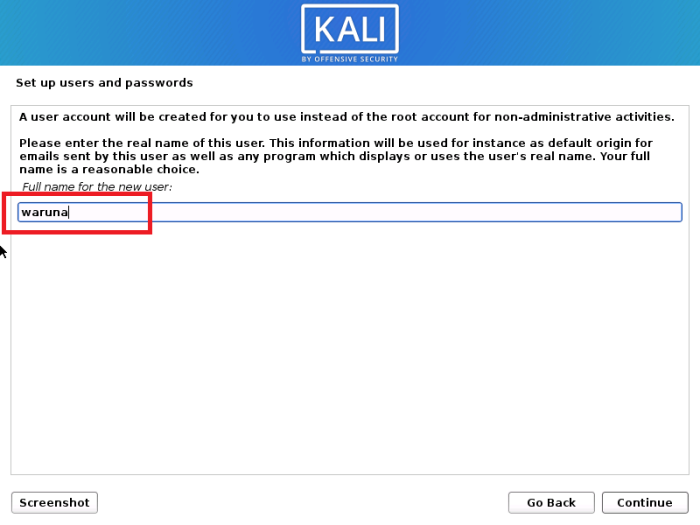
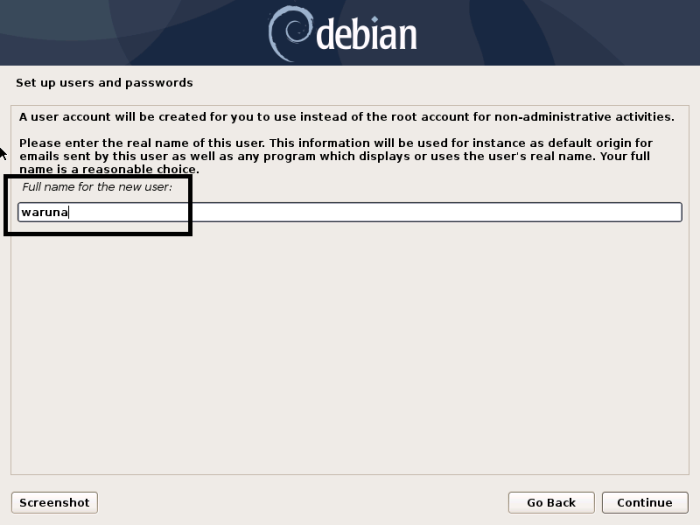
Provide a name for the user who is going to use this system for non-administrative tasks
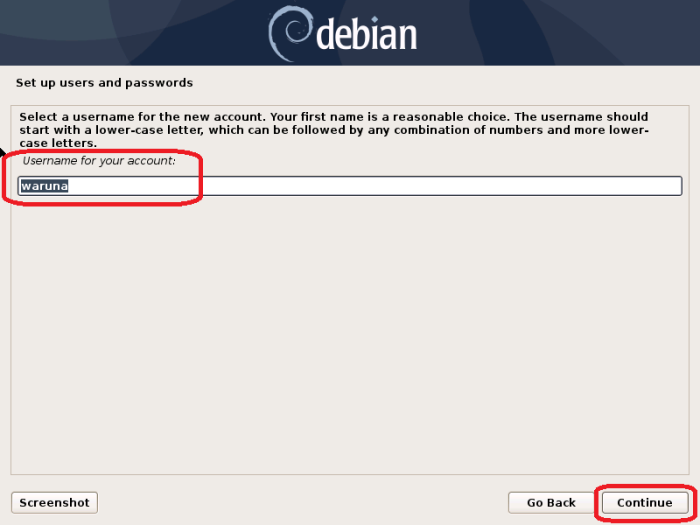
Provide a username for the new account
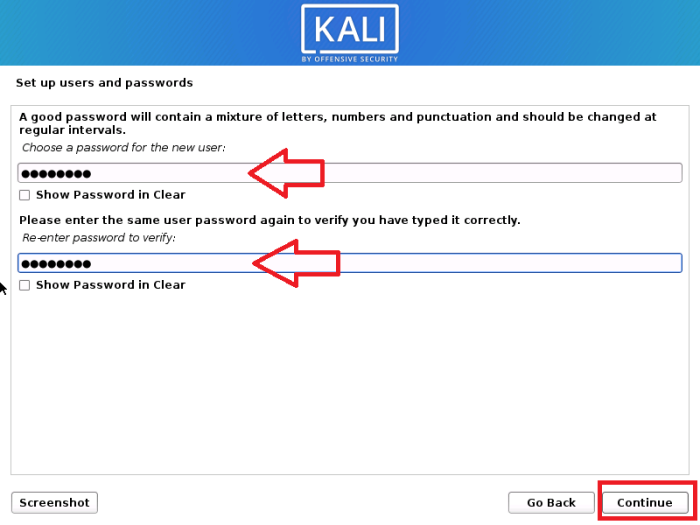
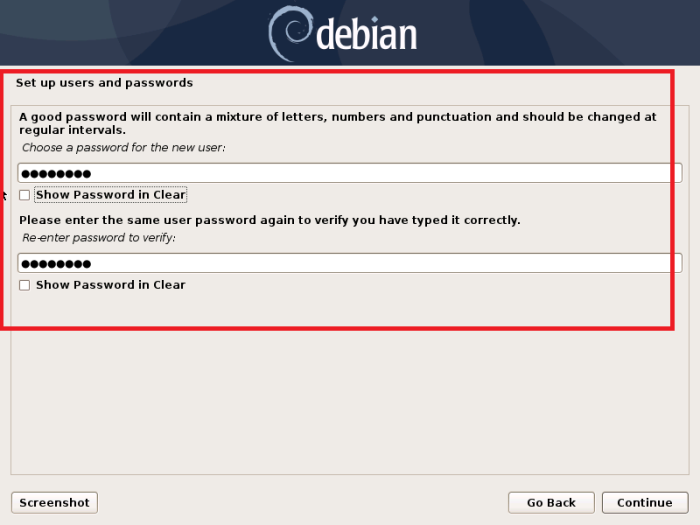
Provide a strong password for the created new user
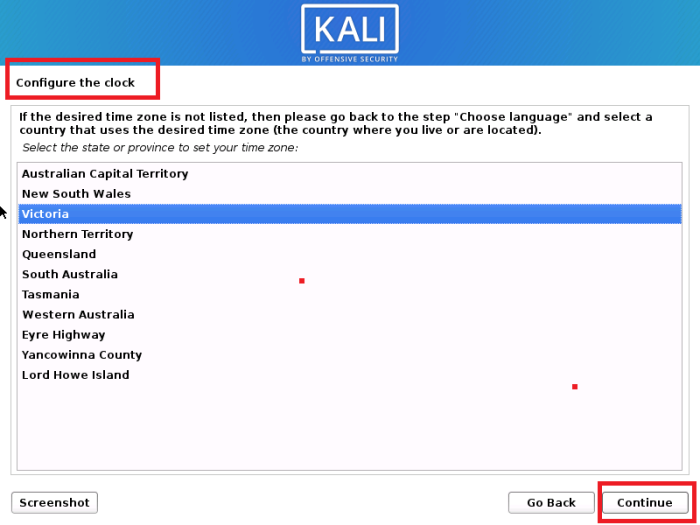
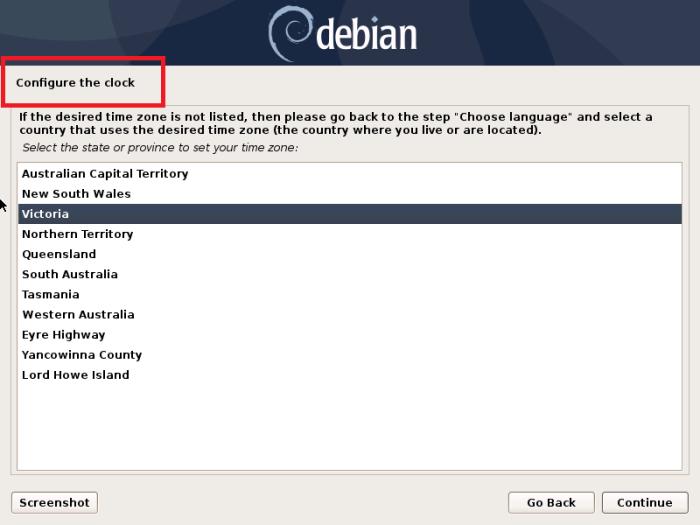
Configure the clock (You should have chosen the correct language earlier to make the time zone to be listed)
Press continue to proceed to the next step which is creating partitions
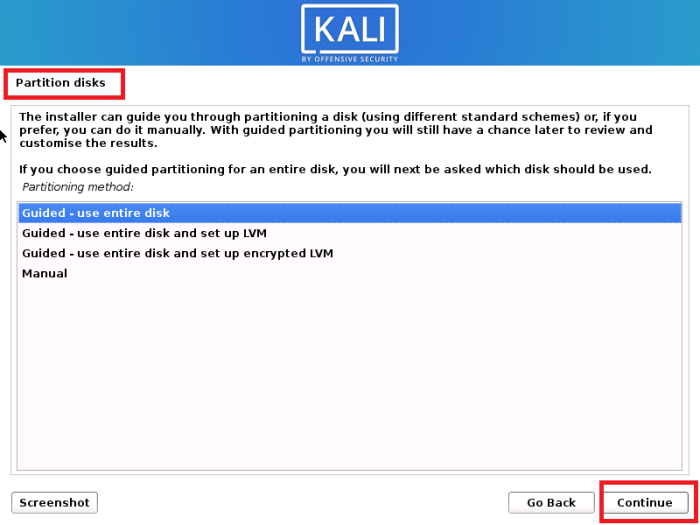
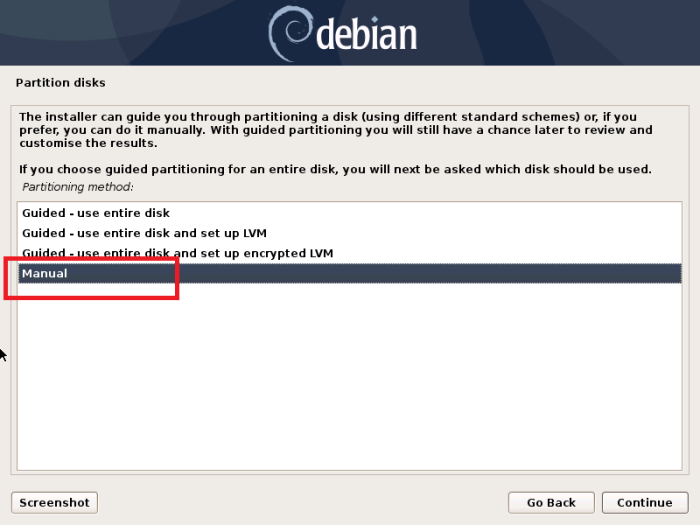
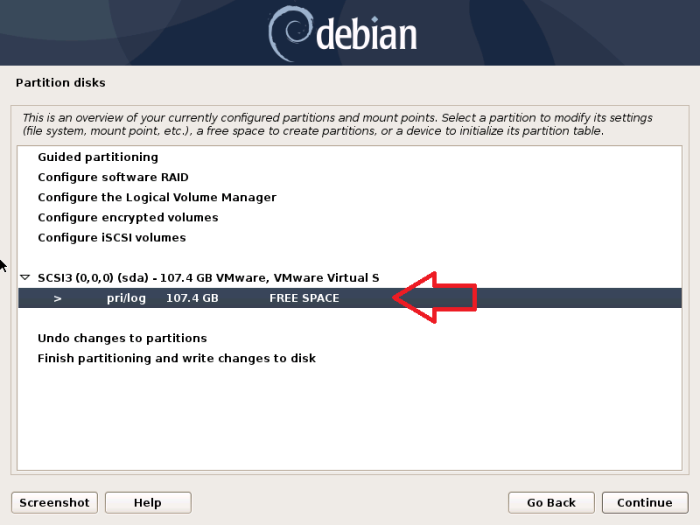
02 Create manual partition
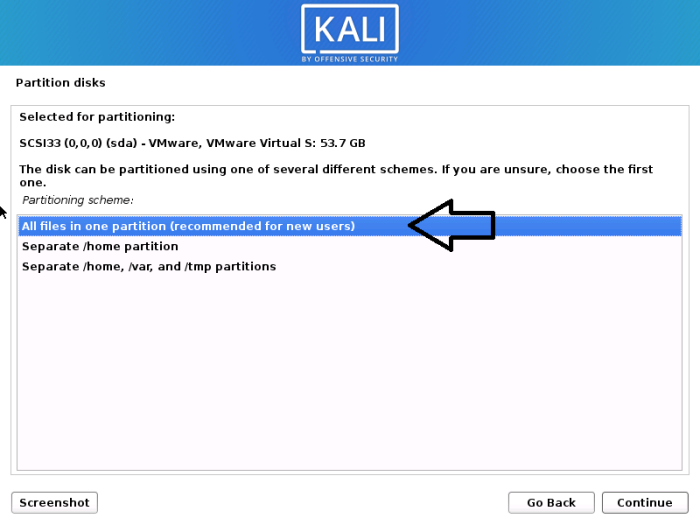
In this tutorial manual partition option is chosen
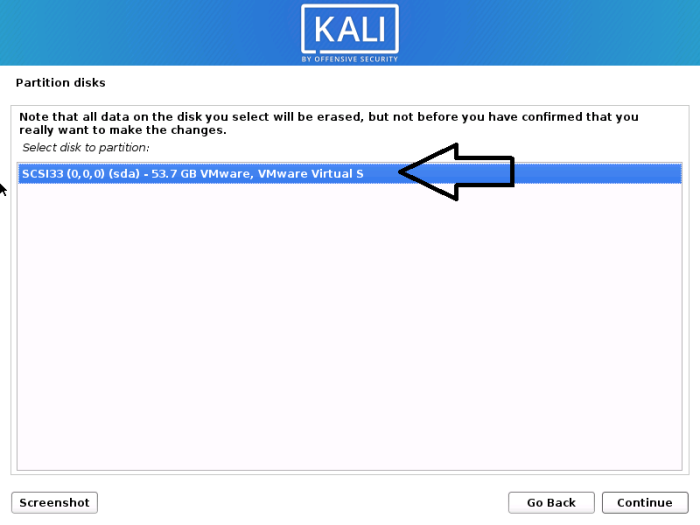
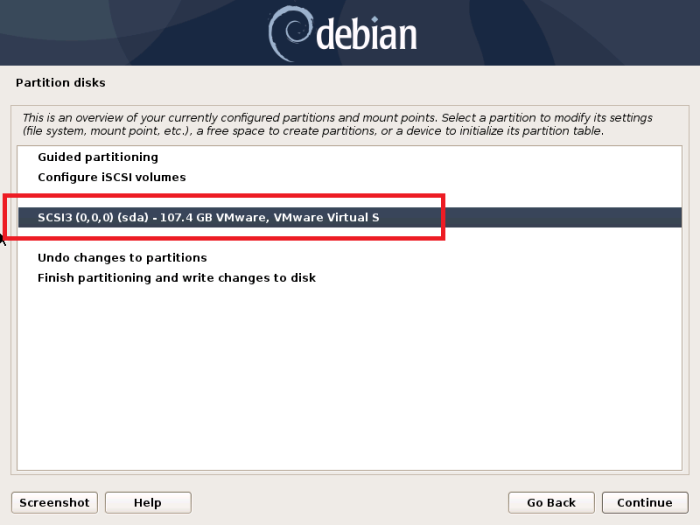
Select the hard disk (In this case, hard disk was created using VMware workstation)
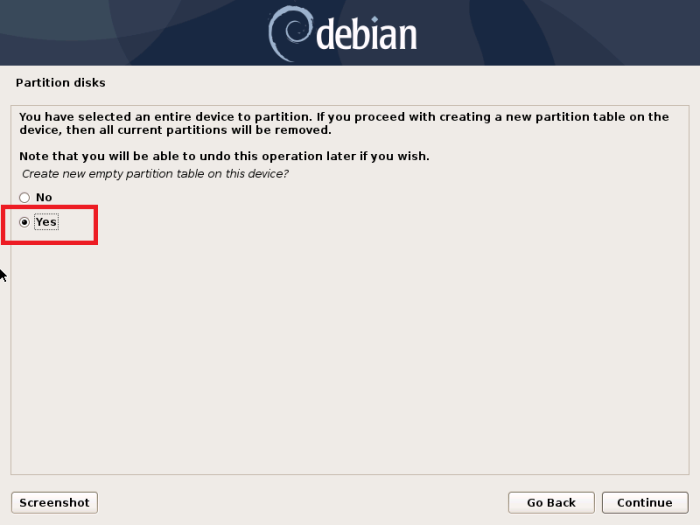
Click ‘Yes’ to proceed
Select the free space to continue
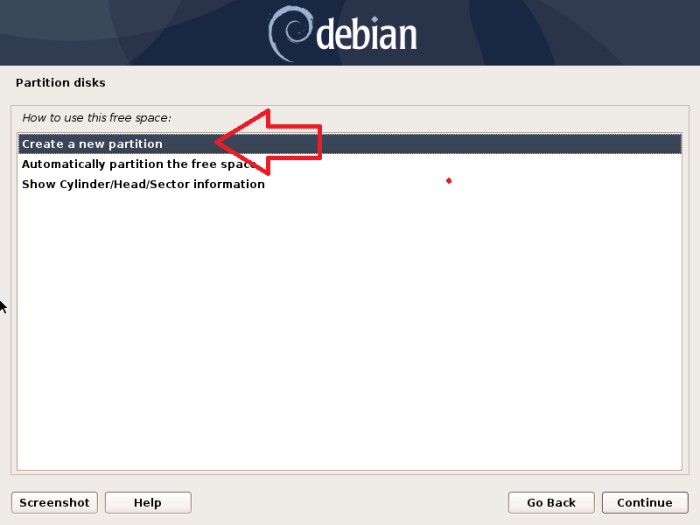
3.0 Create standard boot partition
As The First Partition Create a Standard boot partition
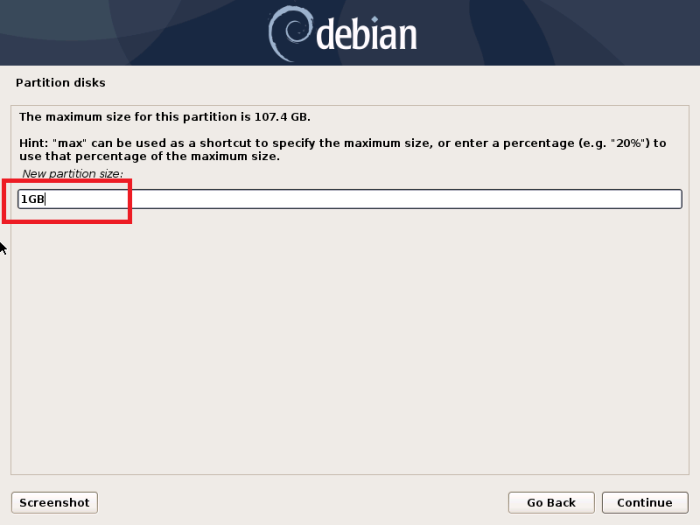
- Size of the partiton: 1 GB
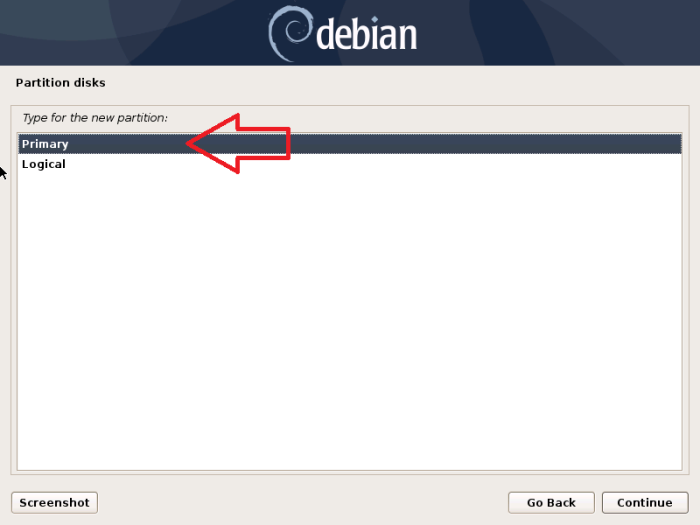
- Type for the new partition: primary
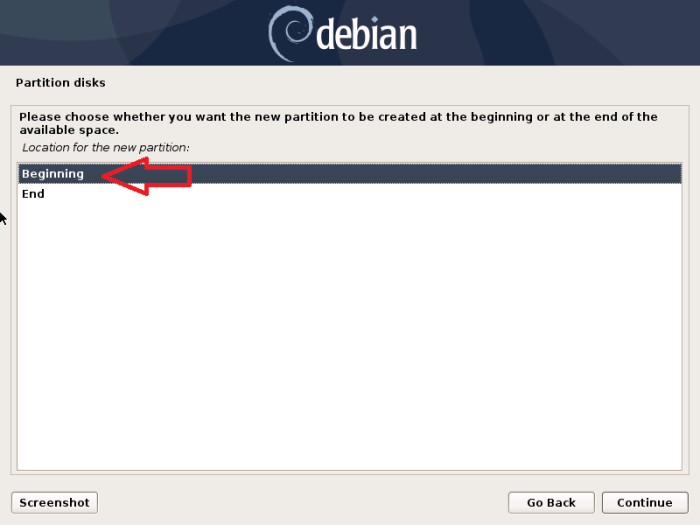
- Location of the new partition: beginning
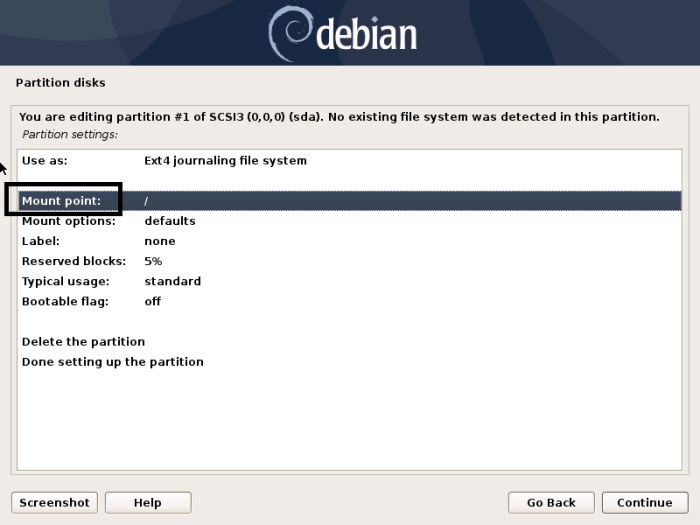
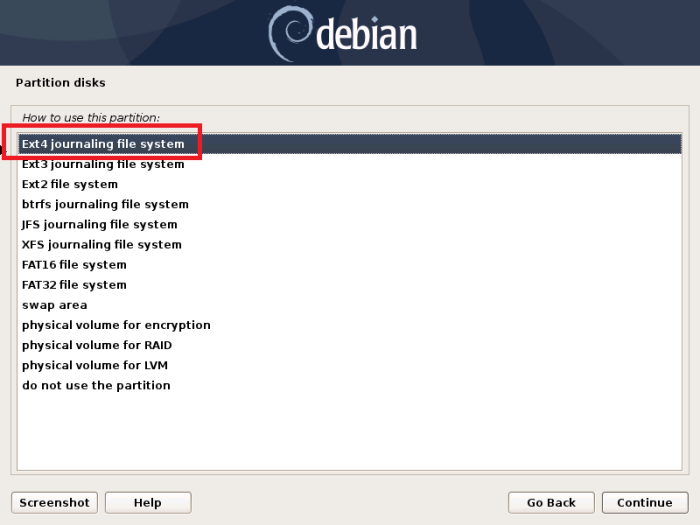
- use as: Ext4 journaling file system
- Mount point: /boot
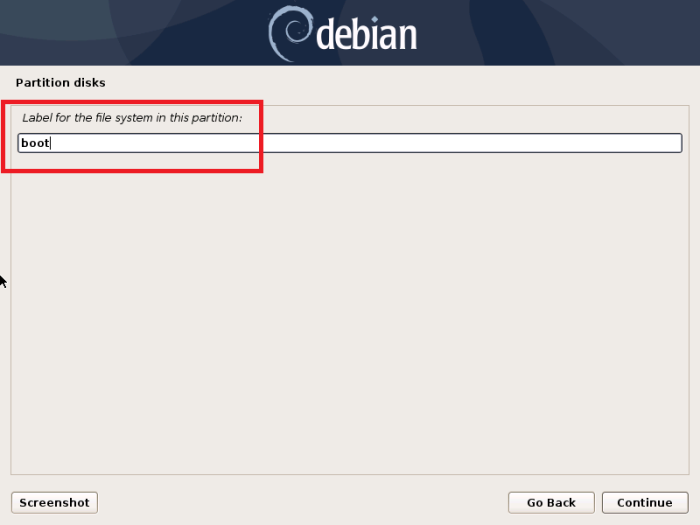
- label: boot
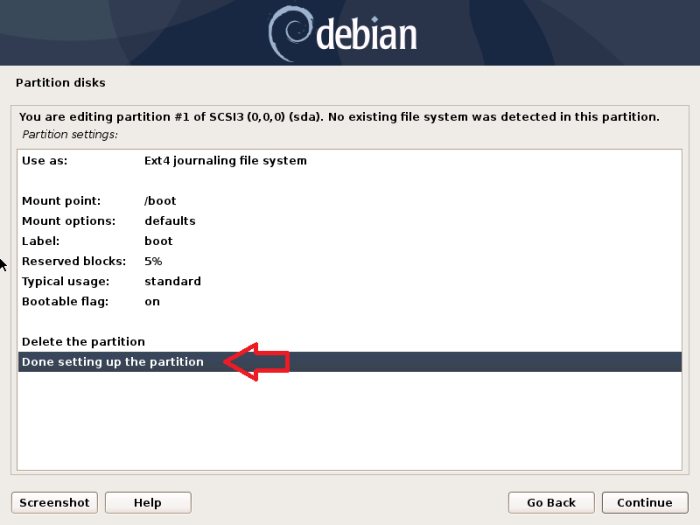
- bootable flag: on
Select the option to create a new partition
Provide the disk space required (I GB is enough for boot partition)
Select primary as the type for boot partition
Create the boot partition at the beginning of the free space
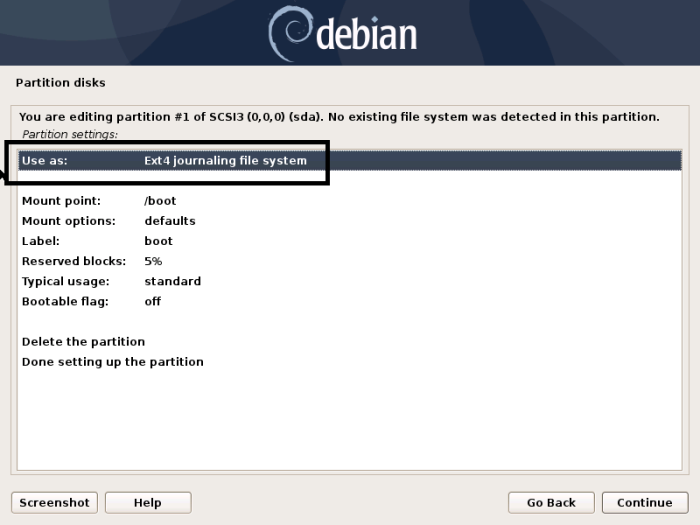
In the partition settings you can select the Mount point,
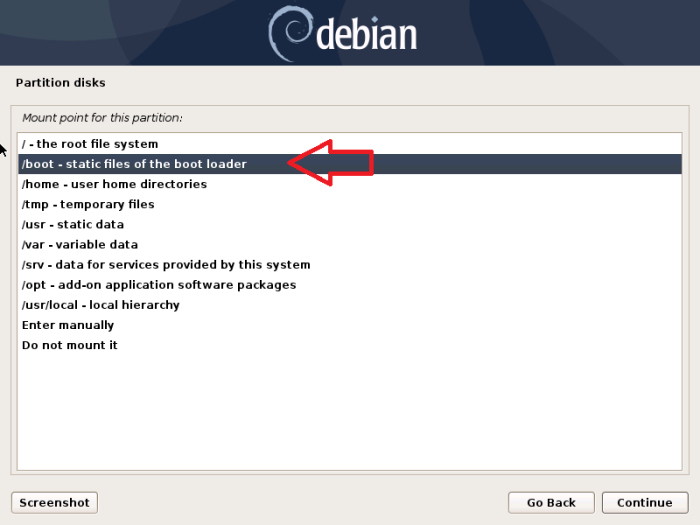
Click on ‘Mount point’ to select the mount point as /boot
‘/boot’ is selected as the mount point
Click on the ‘Label’ to give the label as ‘boot’
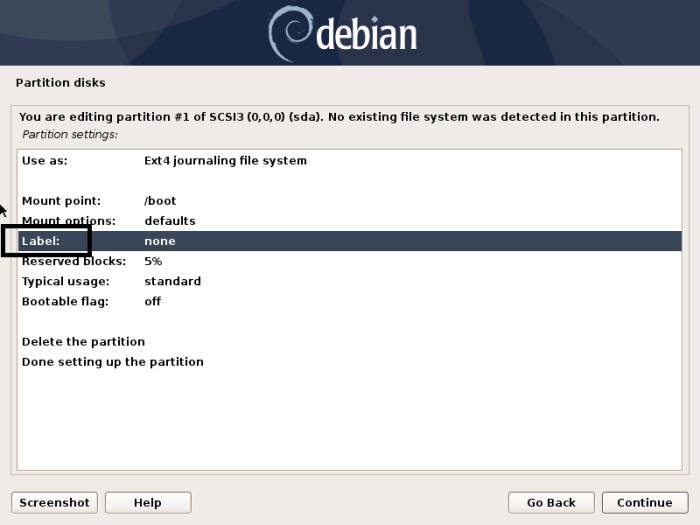
Provide ‘boot’ as the label
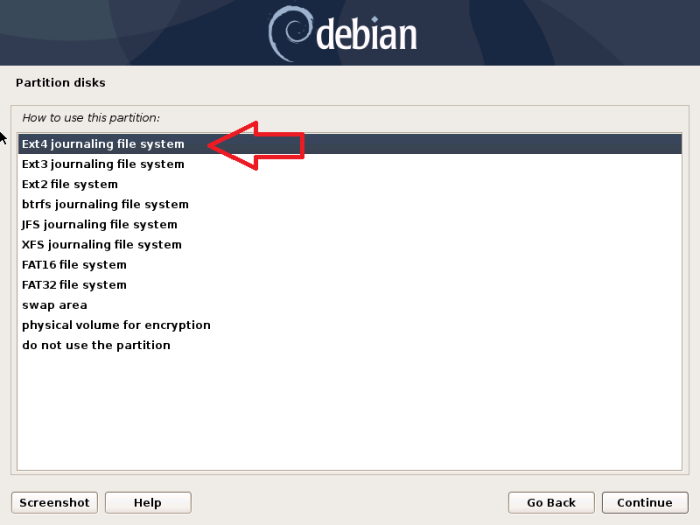
Select the file system as Ext4 (In this scenario Ext4 is selected by default)
What is Ext4?
The ext4 journaling file system or fourth extended file system is a journaling file system for Linux, developed as the successor to ext3. Furthermore, ext4 is the default file system for many Linux distributions including Debian and Ubuntu. –wiki
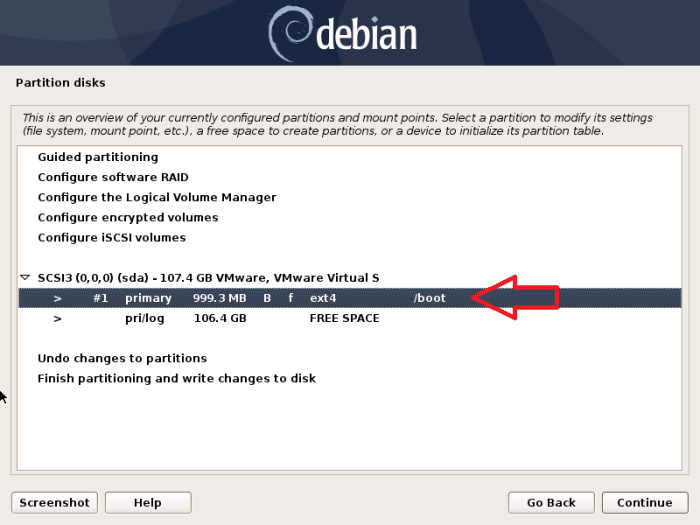
Review the settings and finish configuring
Note that freshly configured /boot partition is available in the list
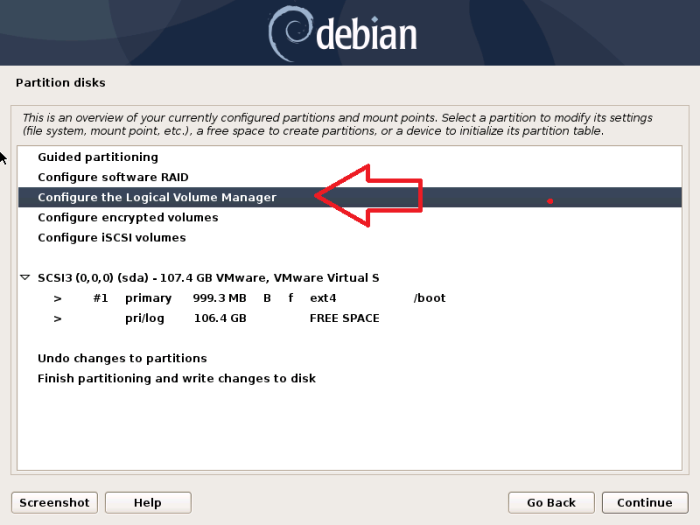
4.0 Configure Logical Volume Manager (LVM)
- Firstly create a LVM physical volume
- Then create other partitions as LVM logical volumes within the LVM physical volume
Select the option from the menu to configure the LVM
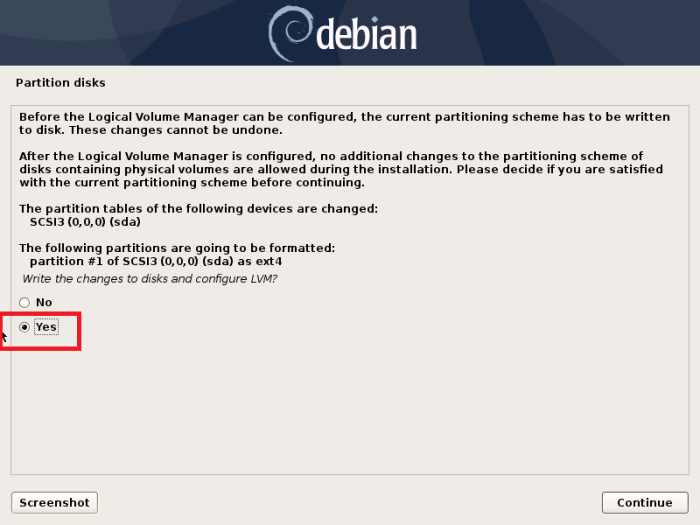
Click ‘yes’ to proceed
Create a logical volume group
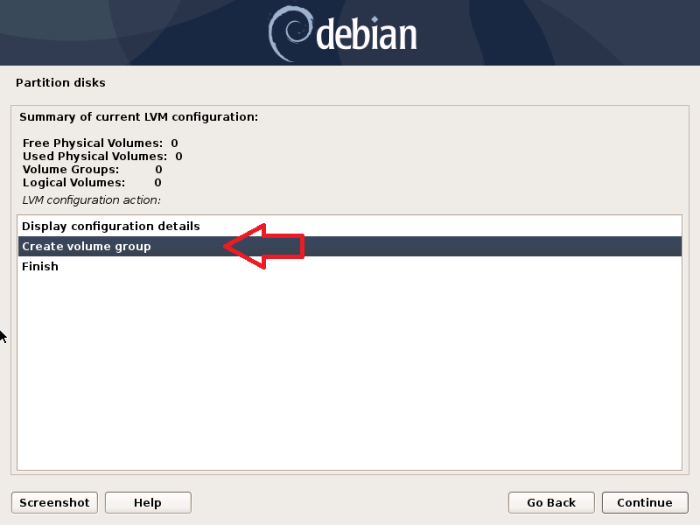
Provide a name to the Volume Group

Choose the free space for the new volume group
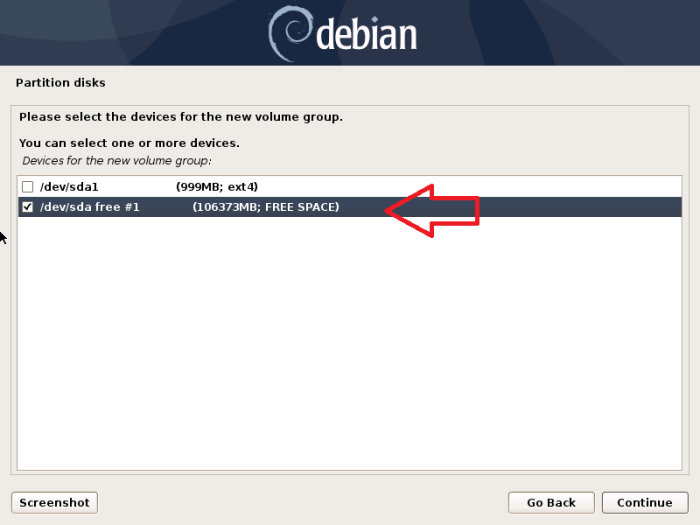
Select ‘Yes’ to proceed

5.0 Create logical volumes for rest of the directories
In this tutorial logical volumes are created for following directories only for reference/ educational purposes. Additionally, you can create more separate partitions based on the requirement of the organization and personnel preferences.
- /swap
- / – (root)
- /home
- /srv (For FTP servers a /srv partition is recommended)
- /tmp
- /var (For web or mail servers it is recommended to create a separate /var partition)
- /var/log
- /var/mail
Swap Space
There are two basic types of memory in a typical computer. The first type, random access memory (RAM), is used to store data and programs while they are being actively used by the computer. Swap space is the second type of memory in modern Linux systems. The primary function of swap space is to substitute disk space for RAM memory when real RAM fills up and more space is needed.
There’s no one hard-and-fast rule that will tell you how much paging or swap space you need. The answer depends on what you do with your computer and how much memory you use. For example, if you have 8 GB of memory but you never ever used more than those 8 GB, you could get by with no swap space at all — it’s likely you would need more than 8 GB eventually, of course. On the other hand, you might have a computer with 64 GB of memory, but it might regularly work with 100 GB data sets — you’d probably want at least the 64 GB swap space just to be safe. So a computer with 8 GB of RAM might need no page file and a computer with 64 GB of RAM might need a huge page file. It all depends on what the computer is doing. [More at: https://www.howtogeek.com/196238/how-big-should-your-page-file-or-swap-partition-be/]
The root (/) directory
Primary hierarchy root and root directory of the entire file system hierarchy.
The root directory is the directory on Unix-like operating systems that contains all other directories and files on the system and which is designated by a forward slash ( / ). Size is 5 –6GB for a workstation or a server installation.
The /home Directory
A home directory, also called a login directory, is a subdirectory of /home that serves as the repository for a user’s personal files, directories and programs. It is also the directory that a user is first in after logging into the system.
The name of a user’s home directory is by default the same as that of the user. Thus, for example, a user with a user name of william would have a home directory also named william, and that directory would have an absolute pathname of /home/william.
The only account that will by default have its home directory in a location other than /home is the root (i.e., administrative) user, whose home directory by default is /root, another standard sub-directory of the root directory.
A common strategy for large installations is to place /home on its own partition (i.e., a logically independent section) of a hard disk drive (HDD) or even on a separate HDD. This is because users’ home directories usually contain the most important data on a system, and having them on a partition or disk separate from other parts of the system can make it easier to back them up and thereby reduce the chances of loss of data.
The /srv Directory
Site-specific data served by this system, such as data and scripts for web servers, data offered by FTP servers, and repositories for version control systems.
The /tmp Directory
Temporary data created by programs will most likely go in this directory. 40–100MB should usually be enough. Some applications — including archive manipulators, CD/DVD authoring tools, and multimedia software — may use /tmp to temporarily store image files. If you plan to use such applications, you should adjust the space available in /tmp accordingly.
The /var Directory
/var is a standard sub-directory of the root directory in Linux and other Unix-like operating systems that contains files to which the system writes data during the course of its operation.
Among the various sub-directories within /var are..
- /var/cache (contains cached data from application programs),
- /var/games (contains variable data relating to games in /usr),
- /var/lib (contains dynamic data libraries and files),
- /var/lock (contains lock files created by programs to indicate that they are using a particular file or device),
- /var/log (contains log files),
- /var/run (contains PIDs and other system information that is valid until the system is booted again) and
- /var/spool (contains mail, news and printer queues).
- /var/mail (A mail server getting spammed with e-mail can easily fill a partition. If you made /var/mail a separate partition on the mail server, most of the system will remain working even if you get spammed).
[More at: http://www.linfo.org/var]
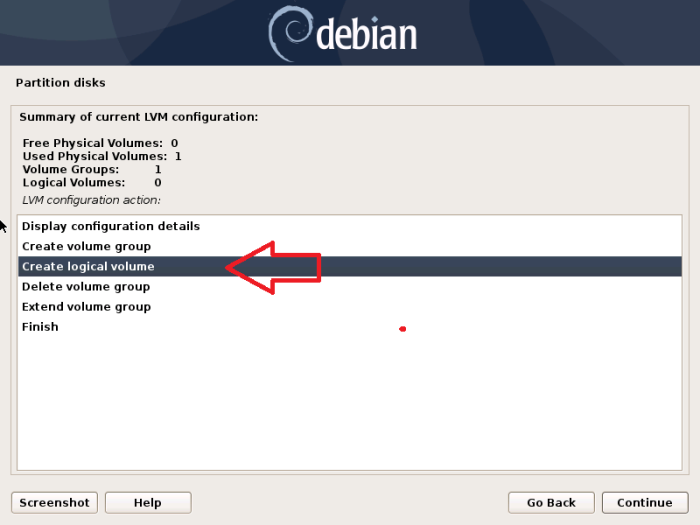
Firstly, swap partition is created
Create a volume for the swap space
Choose the previously created Logical Volume Group

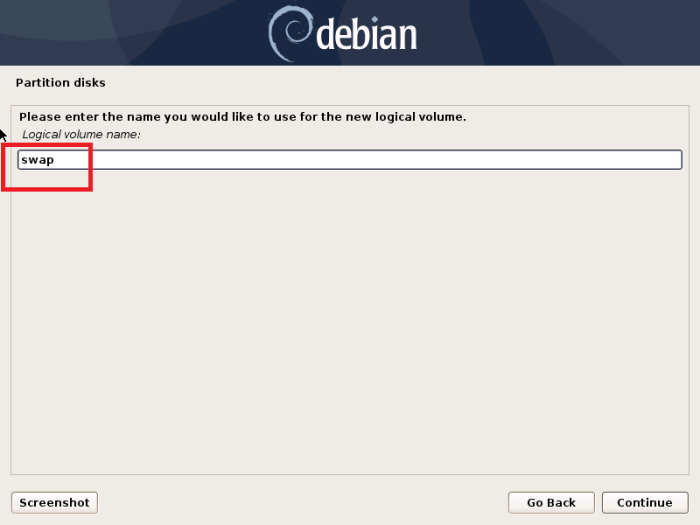
Give the name as swap
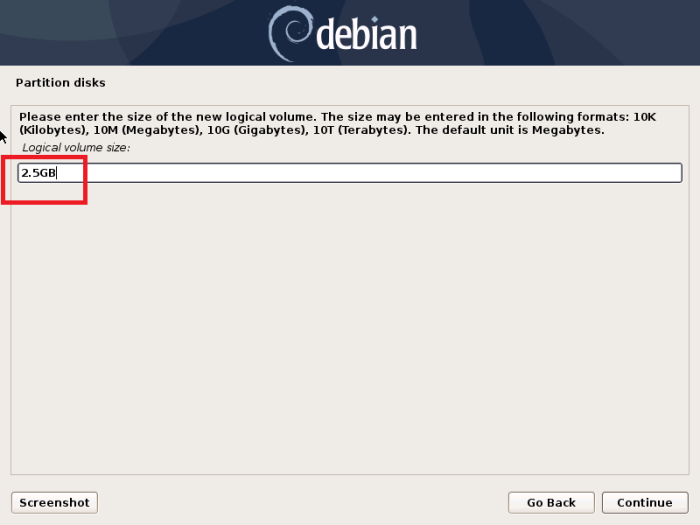
Provide the size for the swap partition
How to decide the swap partition size
- Size of the LVM logical volume partition: 2.5 GB [since the system RAM is 2 GB, 2 GB + 500 mb]
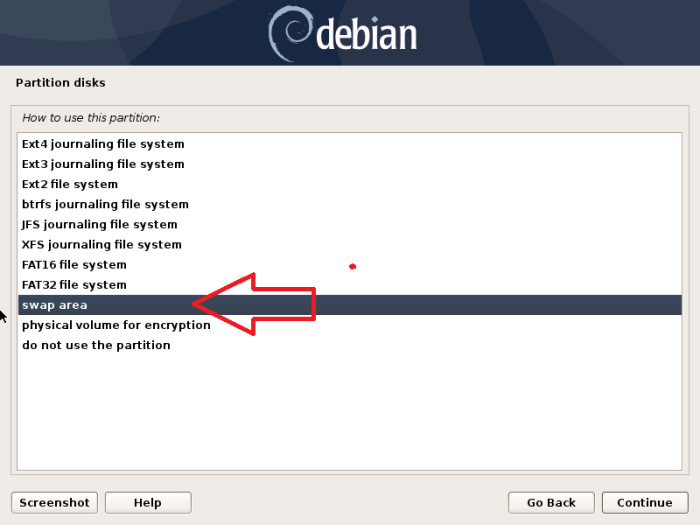
- use as: swap area
You can calculate the capacity according to the system RAM. If the system RAM is less than 2 GB it can be multiplied by 2, if the system RAM is more than 2 GB, you can add 500 mb to the system RAM. However, this can be different based on the requirement.
EX -:
system RAM is 250 mb —> Desired Capacity is 500 mb [250 mb * 2]
system RAM is 3 GB —> Desired Capacity is 3.5 GB [3 GB + 500 mb]
Another guide that explains the swap partition size: https://opensource.com/article/18/9/swap-space-linux-systems
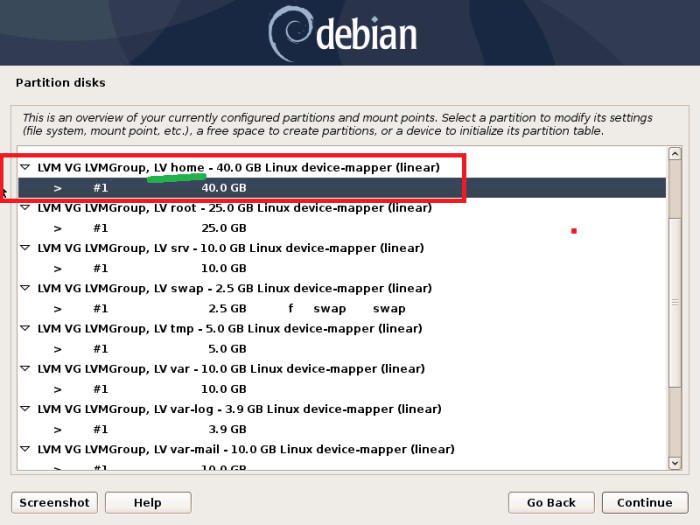
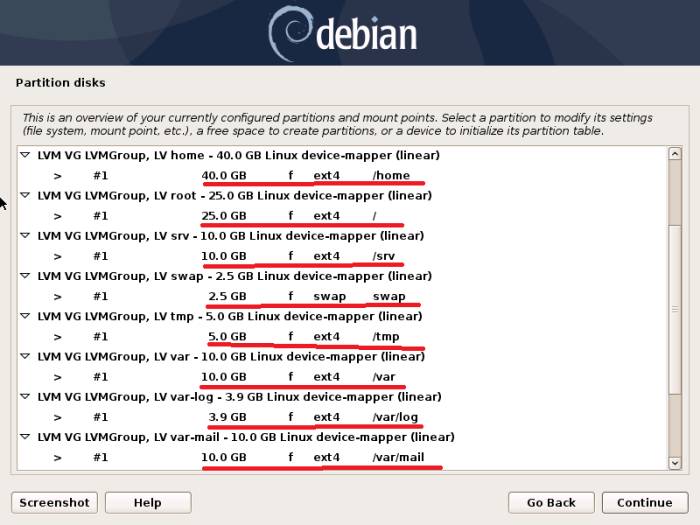
Keep creating the rest of the partitions in LVM

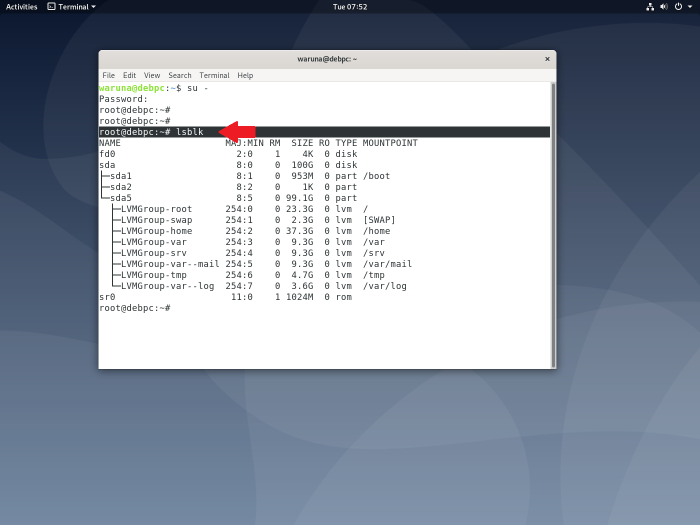
Altogether, 8 partitions are created (Again, it needs to be reminded that the partitions and sizes varies according to the requirement of the servers or workstations)

6.0 Configure the partitions
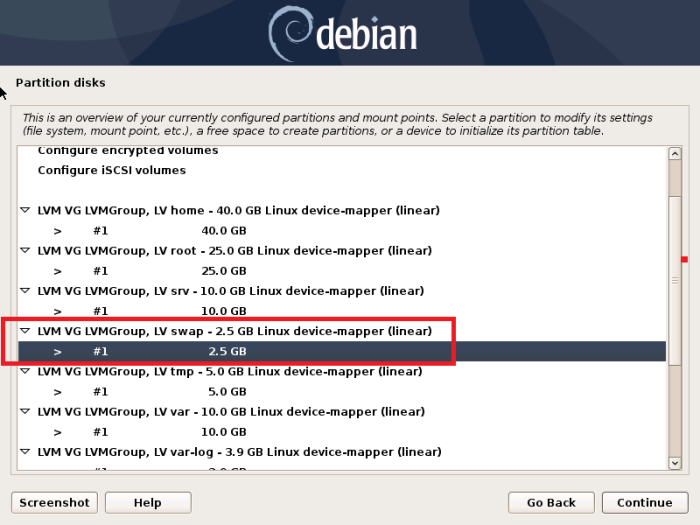
Firstly, configure the swap space
Select swap logical volume
In the partition settings, change the file system to ‘swap area’ (this is the only change you have to make)

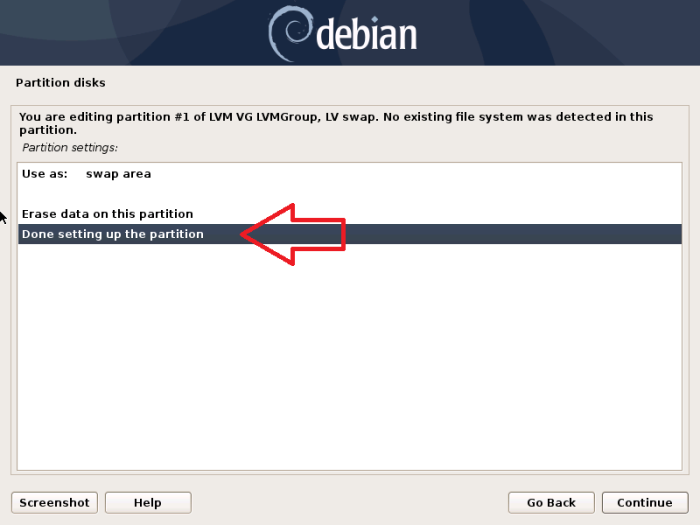
Complete the configuration
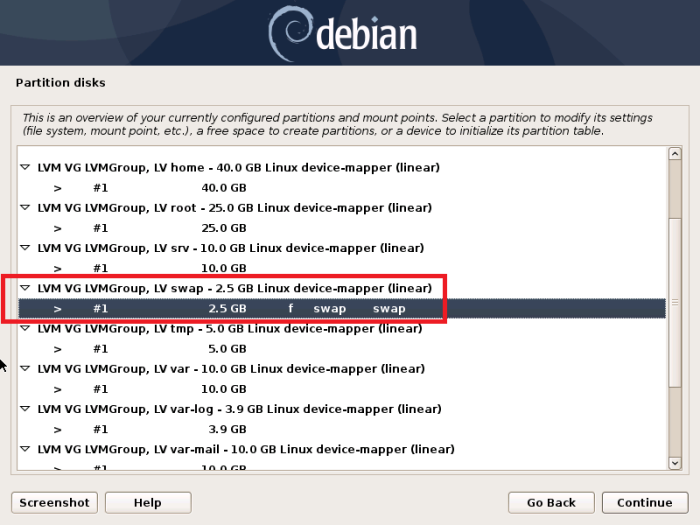
Notice how the changes are taken into effect
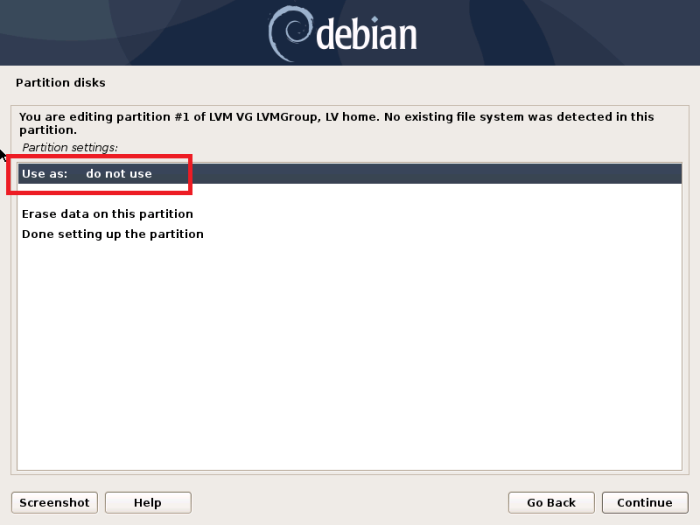
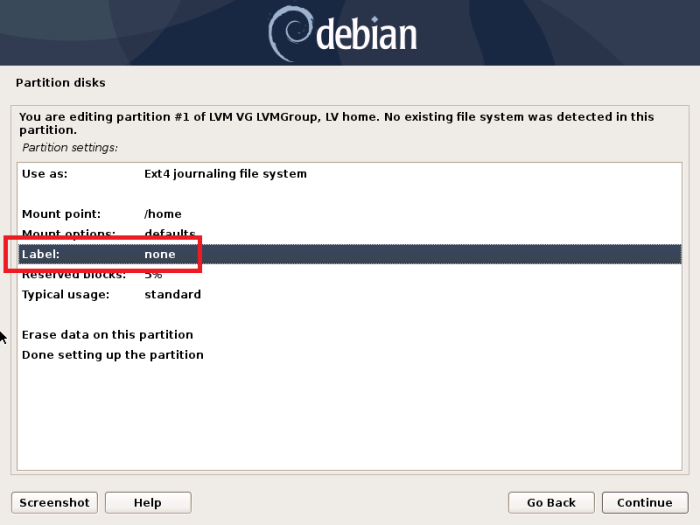
Configure the /home logical volume settings
/home partition
- use as: Ext4 journaling file system
- Mount point: /home
- label: home
Select the previously created home volume
Change the file system to Ext4 journaling file system
Change the mount point to /home
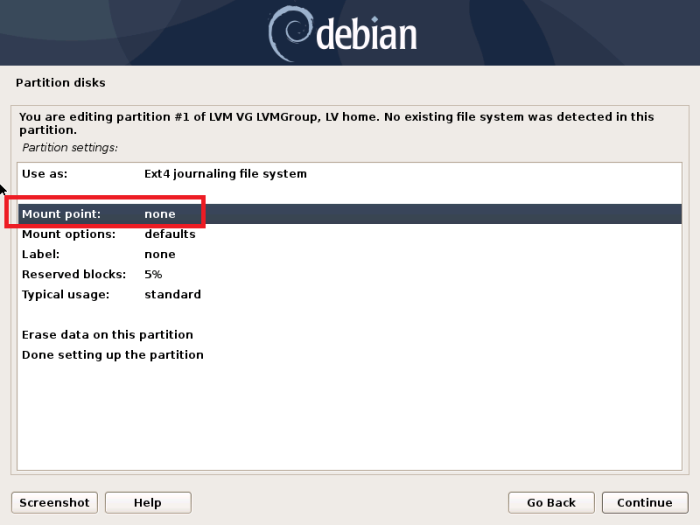

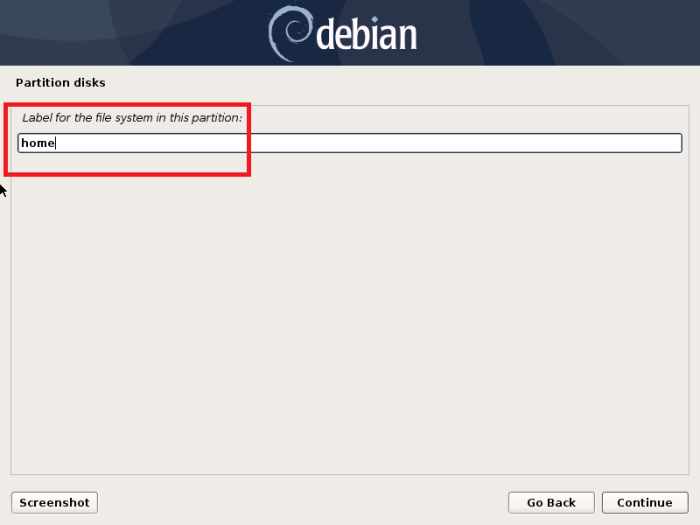
Label the volume as ‘home’
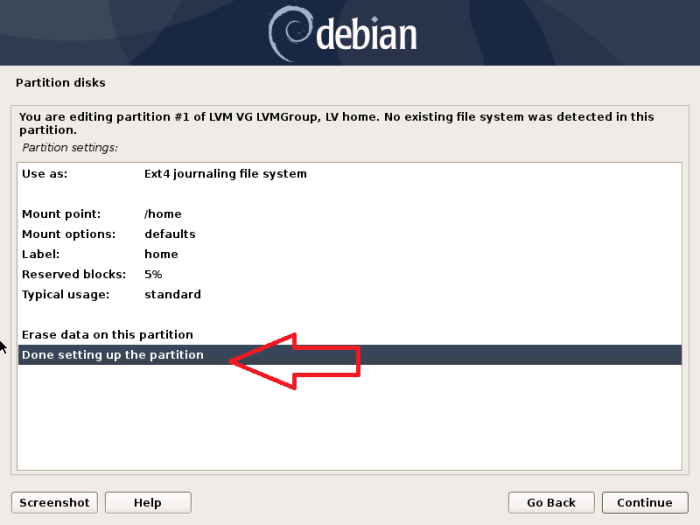
Complete the /home partition settings
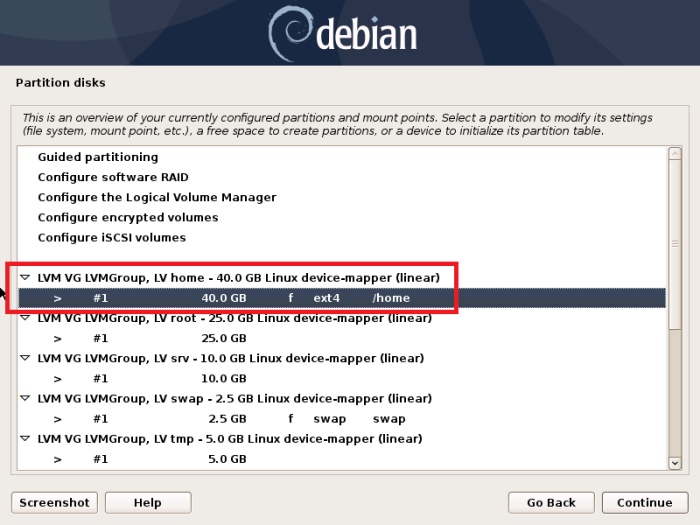
Notice the changes made to the /home logical volume
Configure the rest of the volumes as well with following partitions settings
Root partition
- use as: Ext4 journaling file system
- Mount point: /
- label: root
/srv partition
- use as: Ext4 journaling file system
- Mount point: /srv
- label: srv
/tmp partition
- use as: Ext4 journaling file system
- Mount point: /tmp
- label: tmp
/var partition
- use as: Ext4 journaling file system
- Mount point: /var
- label: var
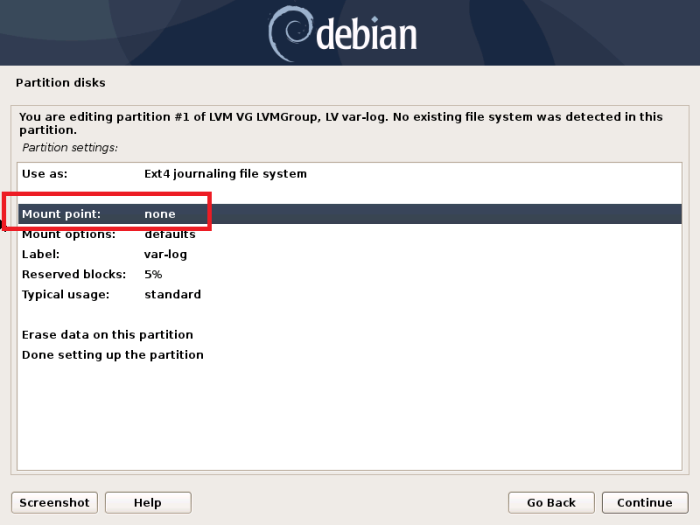
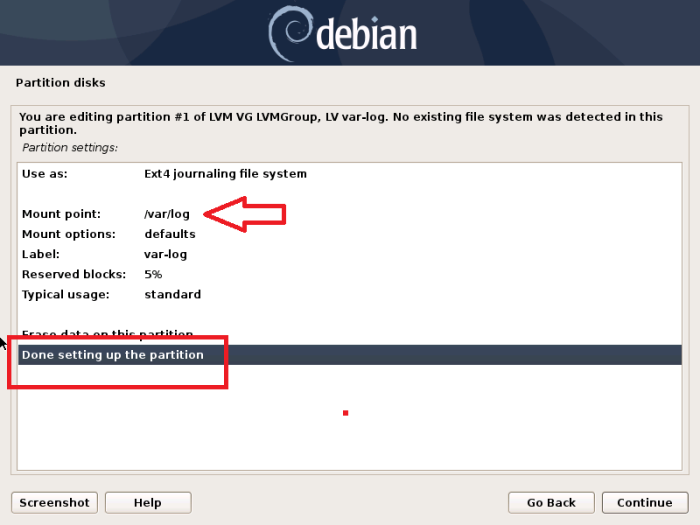
/var/log
- use as: Ext4 journaling file system
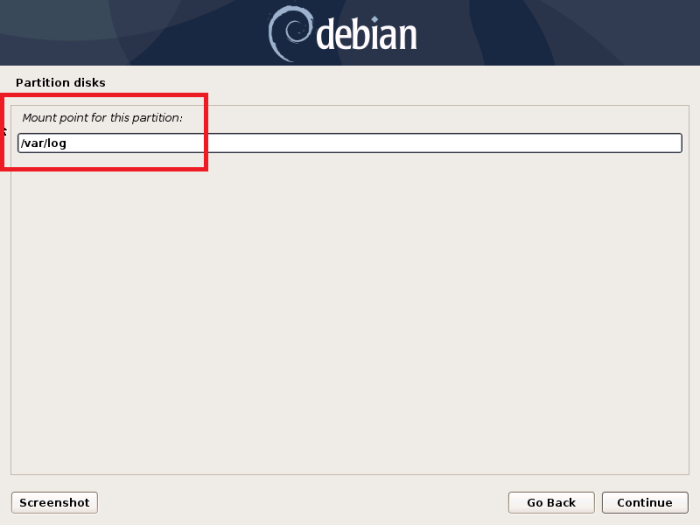
- Mount point: /var/log
- label: var-log
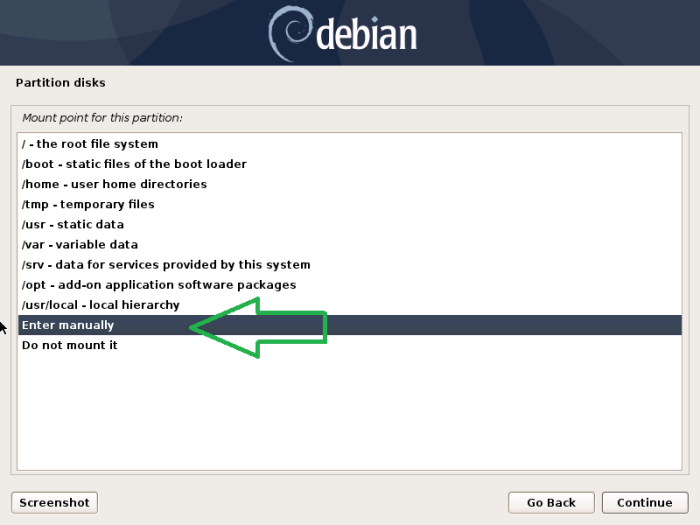
To create /var/log directory you have to provide the mount point manually
/var/mail
- use as: Ext4 journaling file system
- Mount point: /var/mail
- label: var-mail
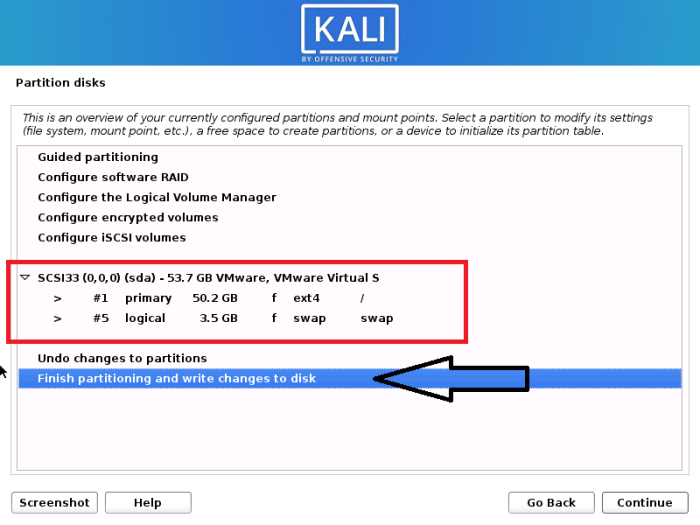
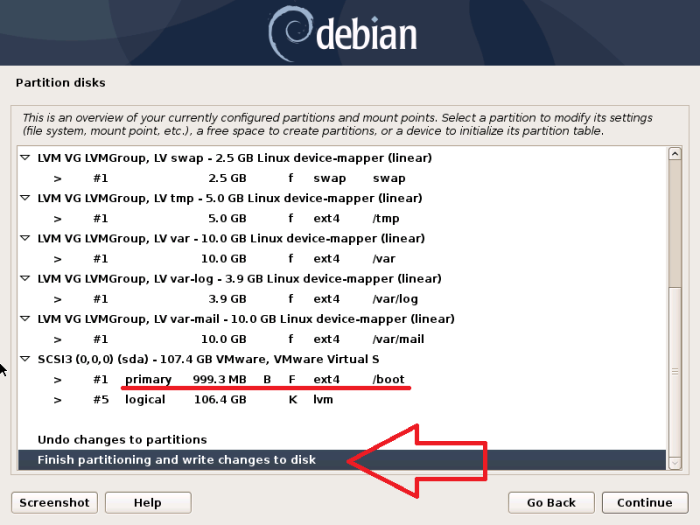
After finishing the configuration review the settings and finish partitioning
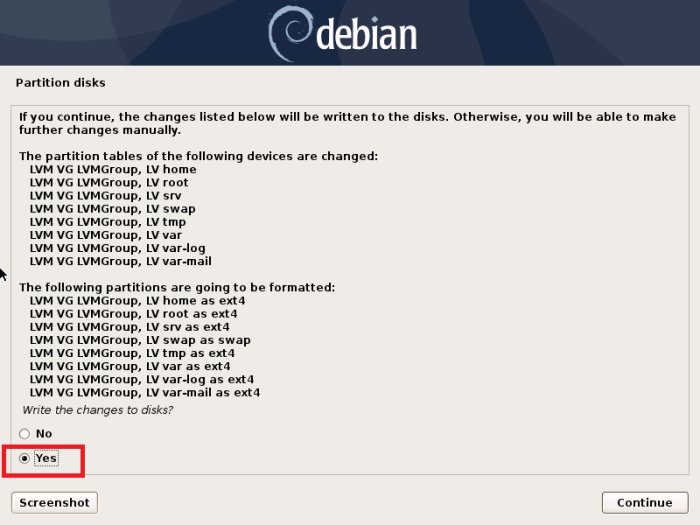
click ‘Yes’ to accept the changes and write to the disk
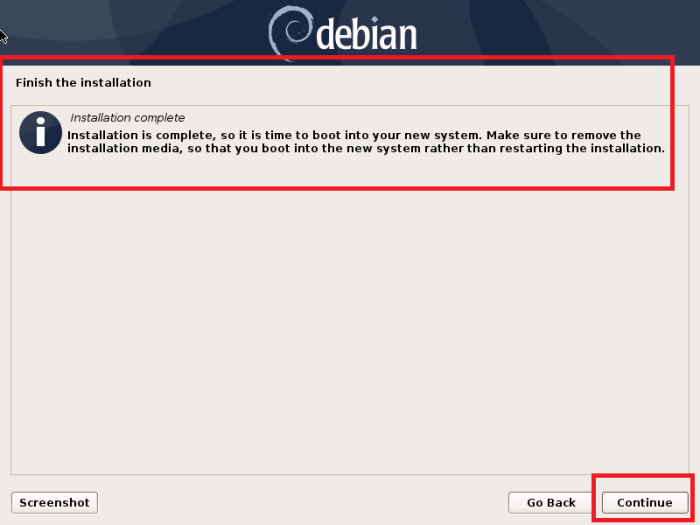
07 Finalize installation
Tick ‘yes’ to scan additional CD/DVD images for installation (I selected ‘No’ since I do not wish to install further from CD/ DVD)

Configure the network mirror by selecting the Debian mirror country

Select the Debian mirror archive mirror (in this scenario, default option is kept as it is)

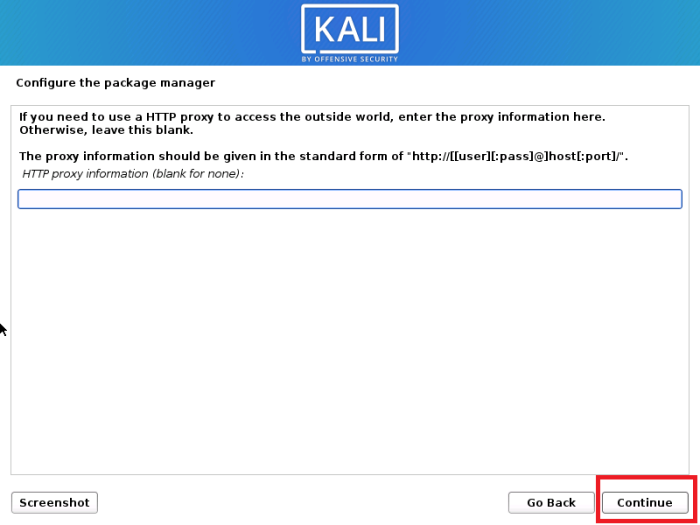
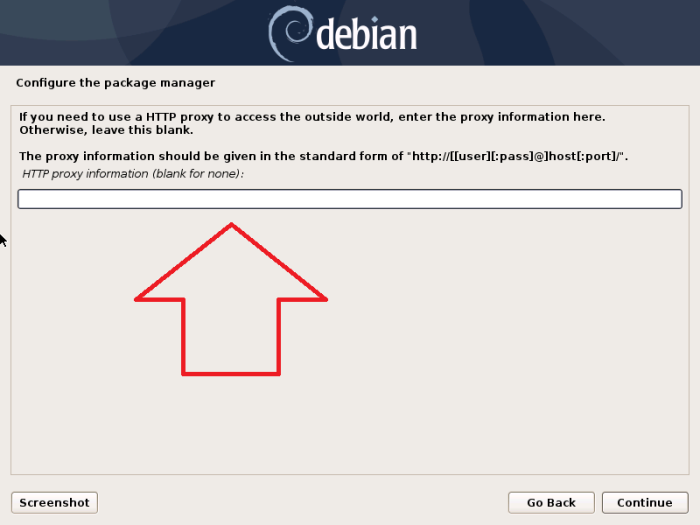
Include the proxy details if needed or keep it blank
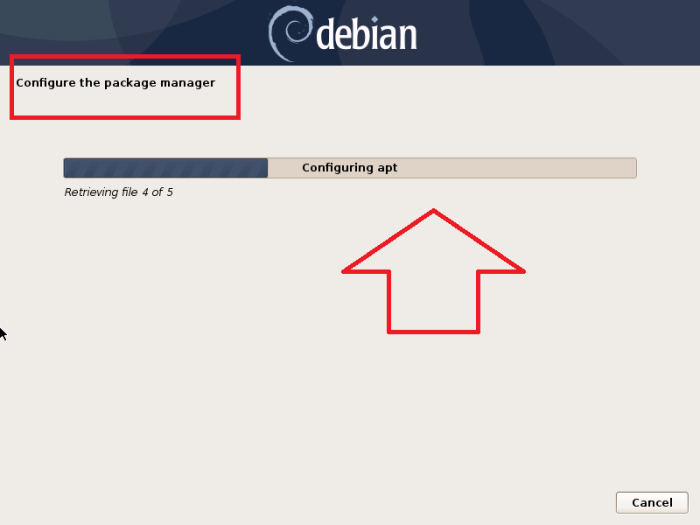
Let the package manager configure its settings
Configure the popularity-contest to participate in the package survey

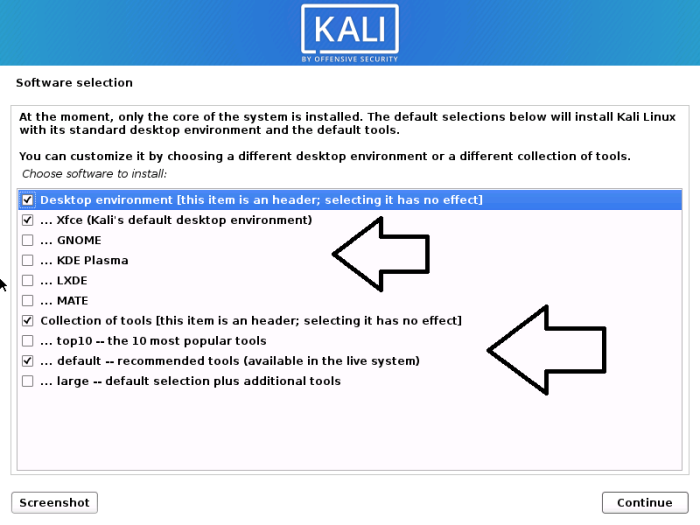
Software selection
For this Debian system, Gnome desktop environment and standard system utilities are installed.
If you want to install Debian Minimal server, you can un-tick the Debian desktop environment.
Read the following article to choose the best desktop environment for you: https://itsfoss.com/best-linux-desktop-environments/

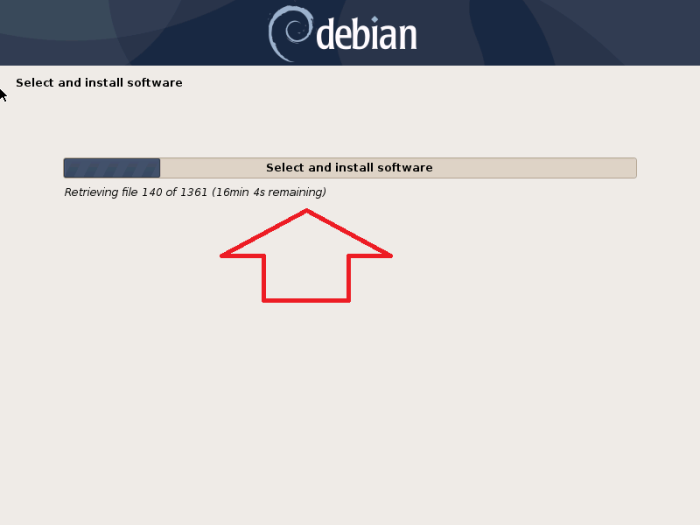
Let the installation finish
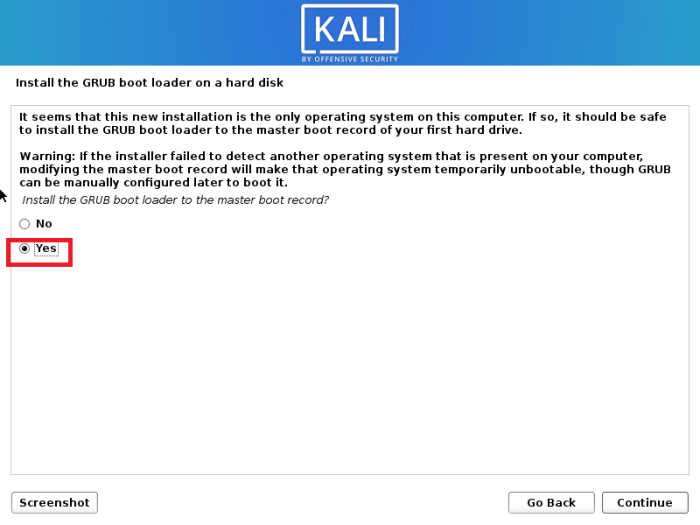
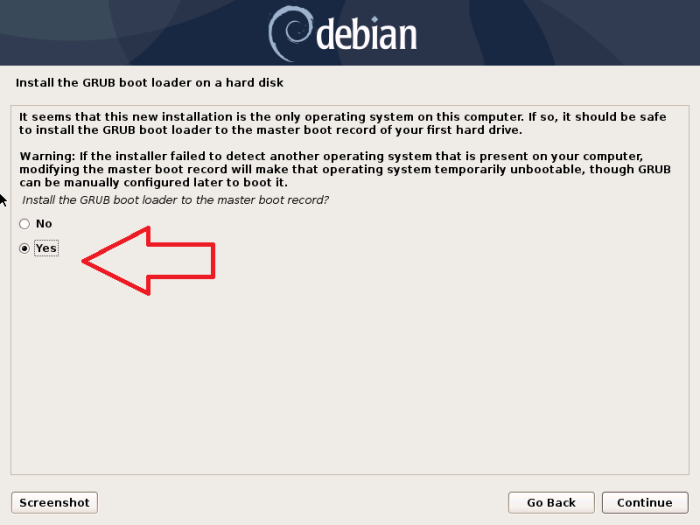
Select ‘Yes’ to install the GRUB boot loader to the master boot record
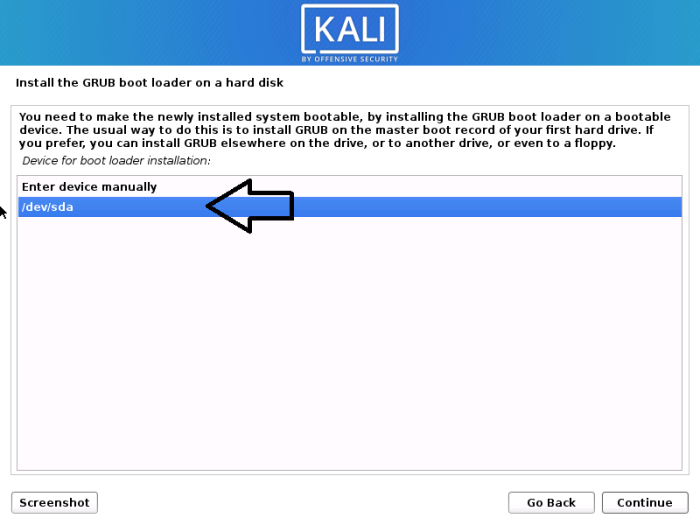
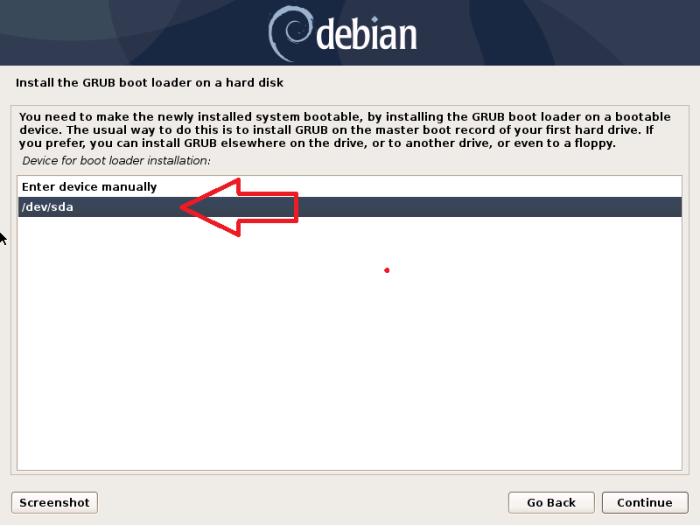
Keep the boot loader installation location as it is
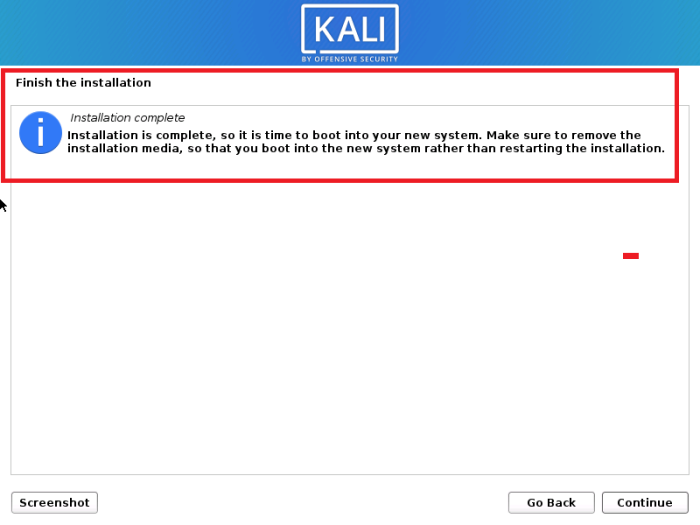
Click ‘continue’ to finish the installation and boot into the new system
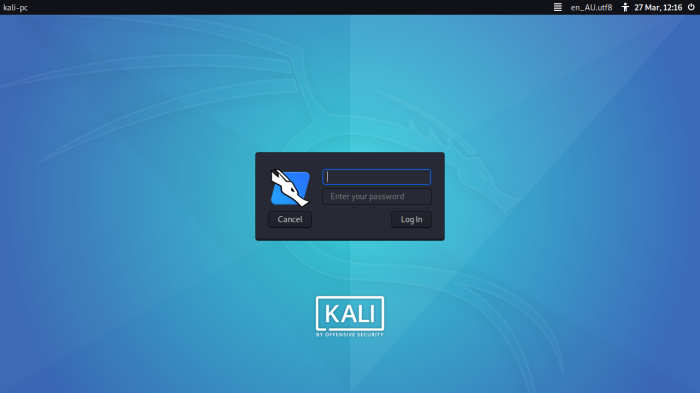
Login to the new system using the password you have provided for the user created earlier

Go to the terminal and switch to root user to check the partition table using the lsblk command
waruna@debpc: ~$ su –
Password: *****
root@debpc:~# lsblk