

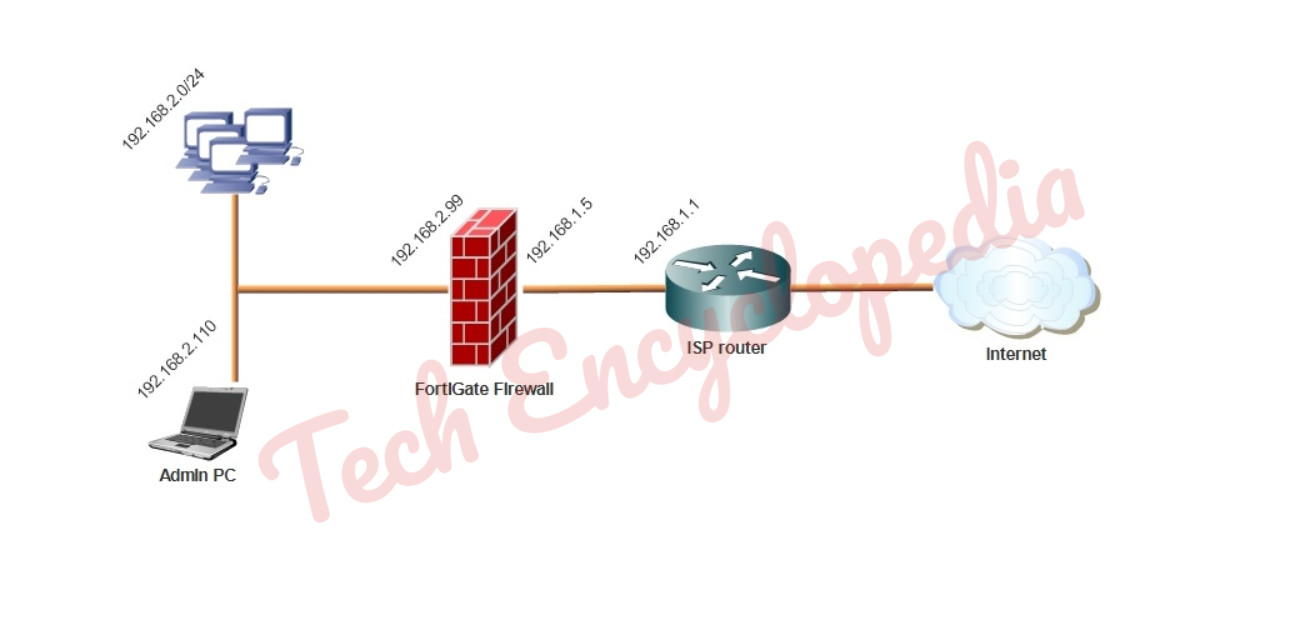
In this case, NAT/Route mode is used which allows FortiGate to hide the IP addresses of the private network using network address translation (NAT).
NAT mode is the most commonly used operating mode for a FortiGate.
Transparent vs NAT/Route mode
A FortiGate unit can operate in one of two modes: Transparent or NAT/Route mode.
In Transparent mode, the FortiGate is installed between the internal network and the router. In this mode, the FortiGate does not make any changes to IP addresses and only applies security scanning to traffic. When a FortiGate is added to a network in Transparent mode, no network changes are required, except to provide the FortiGate with a management IP address. Transparent mode is used primarily when there is a need to increase network protection but changing the configuration of the network itself is impractical.
In NAT/Route mode, a FortiGate unit is installed as a gateway or router between two networks. This allows the FortiGate to hide the IP addresses of the private network using network address translation (NAT).
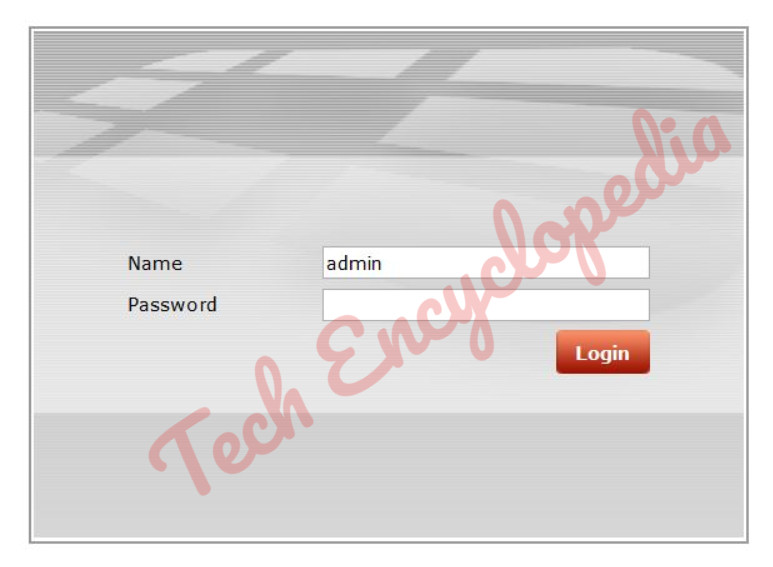
Login to the FortiGate’s web-based manager
Log in using an admin account. The default admin account has the username admin and no password.
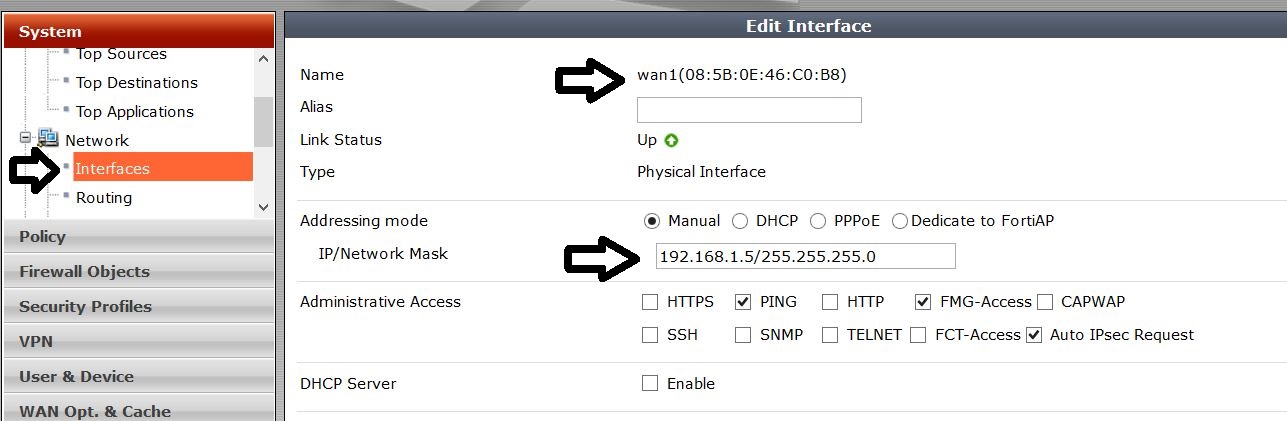
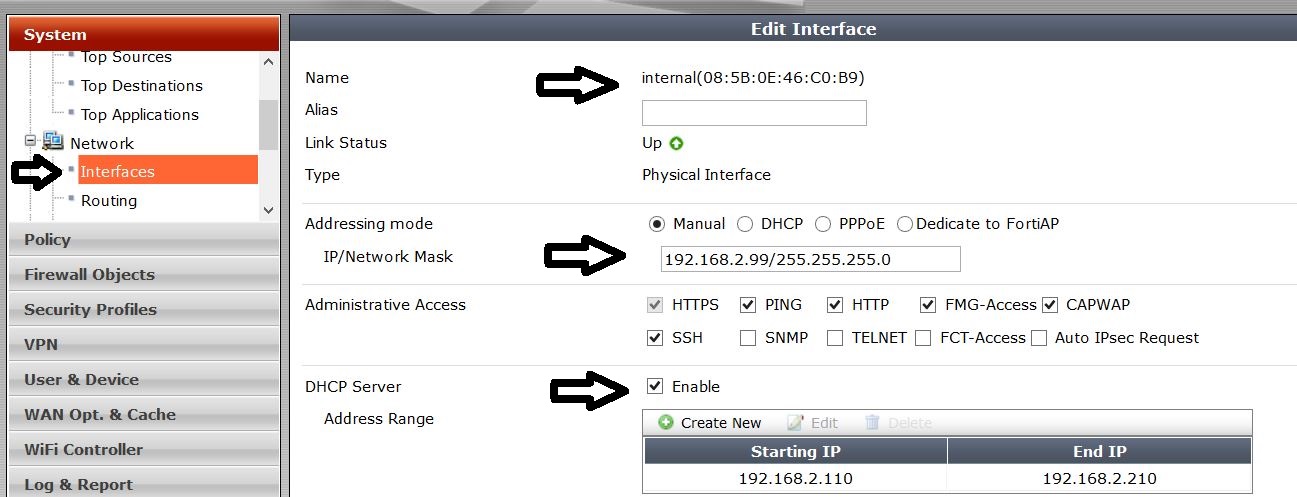
Configure the internal and WAN interfaces
Go to system –> Network –> Interfaces
Configure the WAN interface
Configure the internal interface
In this case DHCP is enabled
In the MAC Address Access Control List, assign the mac address and IP address of the administrator PC

Review the Configuration

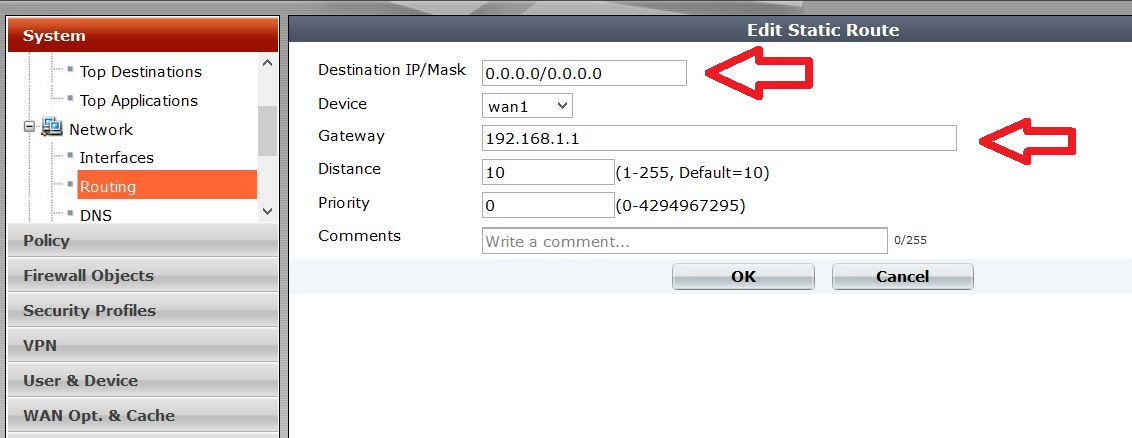
Configure default route at
Router –> Static –> Static Routes
Set the Destination IP/Mask to 0.0.0.0/0.0.0.0, the Device to the Internet-facing interface, and the Gateway to the gateway (or default route) provided by your ISP or to the next hop router, depending on your network requirements.
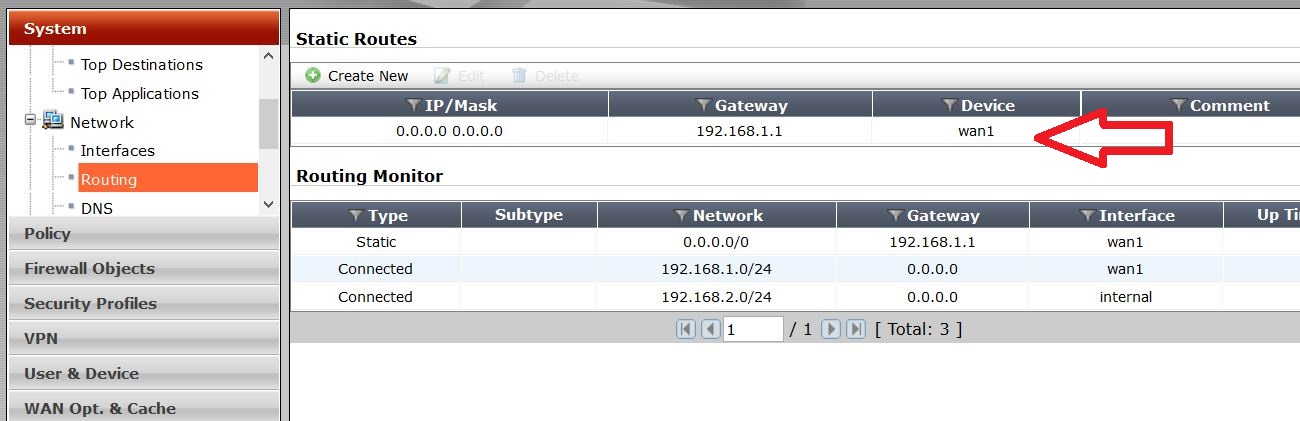
Review configuration
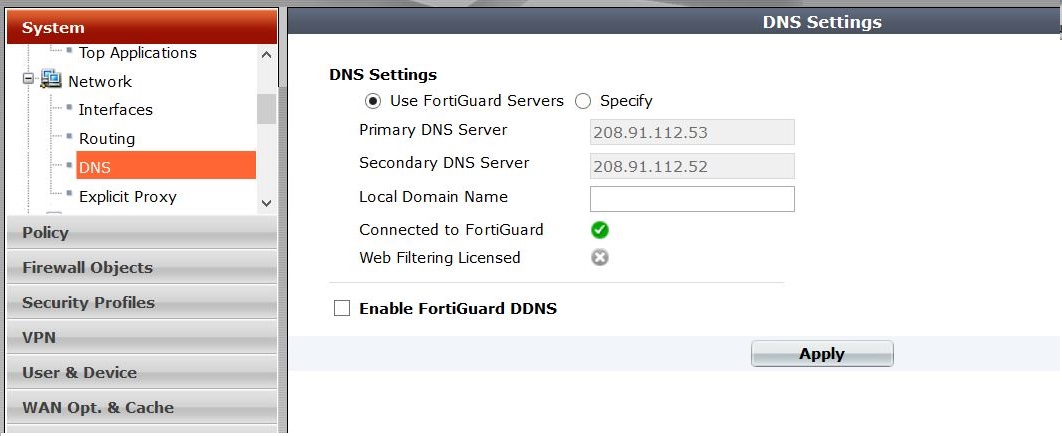
Configure DNS Setting
you can keep the default if you want to
Configure Policies
Two policies are created in this scenario
- General policy – restricted internet access
- Administrator PC policy – unrestricted internet access can be given
General Policy
Only HTTP, HTTPS, DNS services are allowed
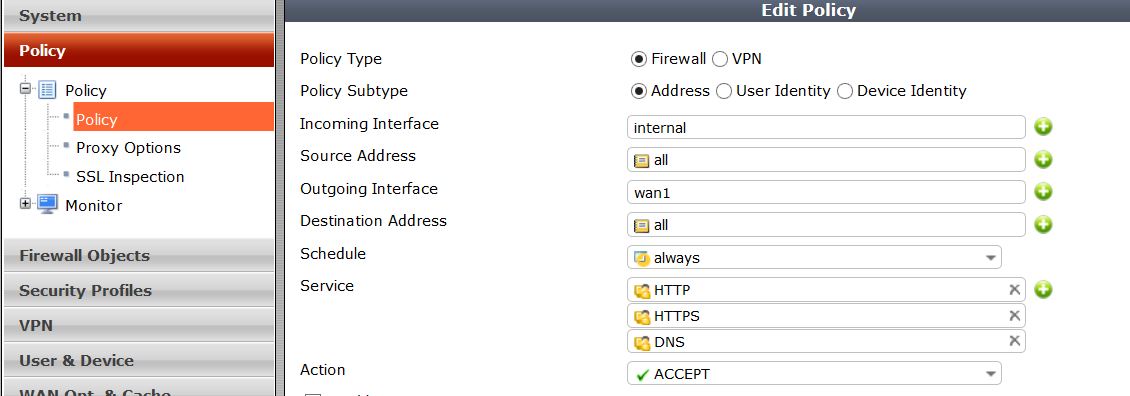
Enable NAT and session logging

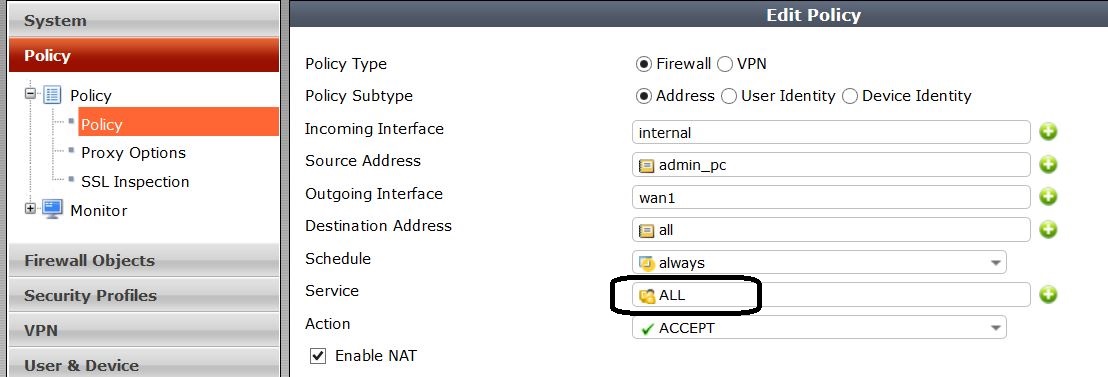
Administrator PC policy
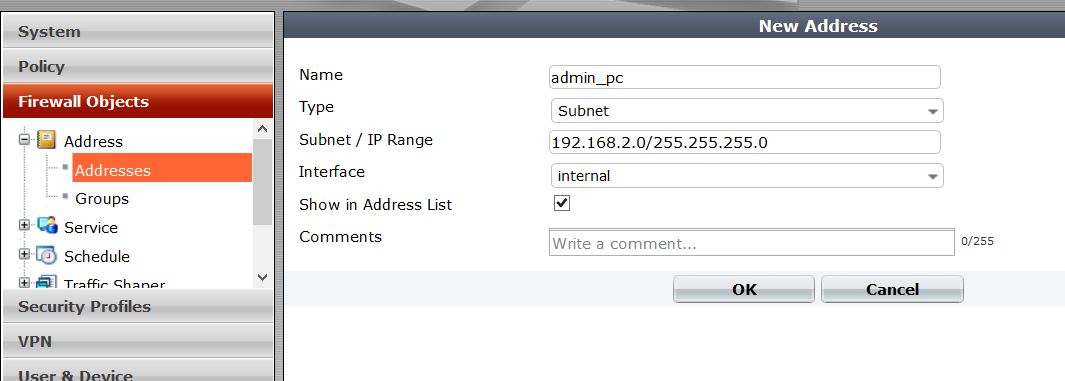
Firstly you have to create a new address for admin PC at Firewall Objects –> Address
appropriate subnet number and the interface is configured
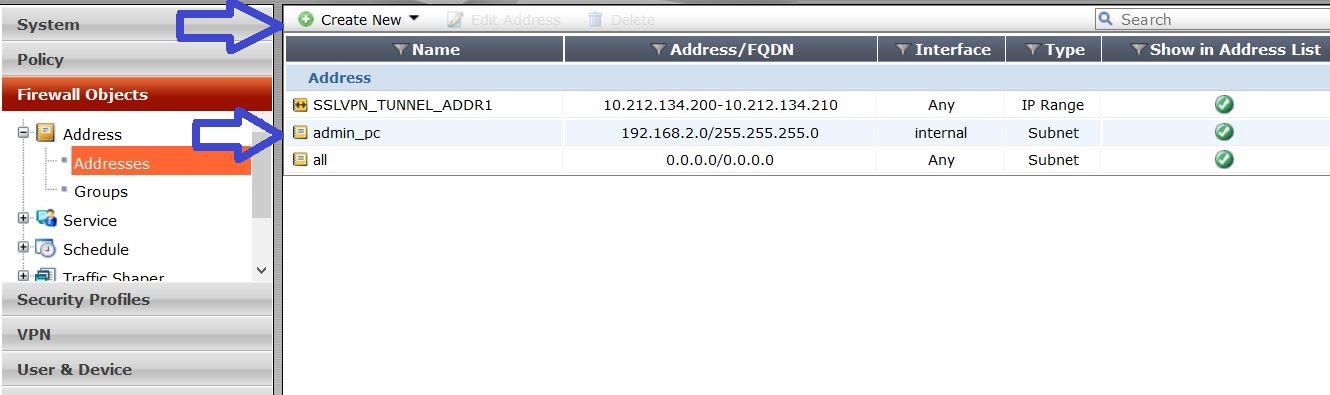
Review created address
Then create the policy for admin PC. All the services are allowed in this case
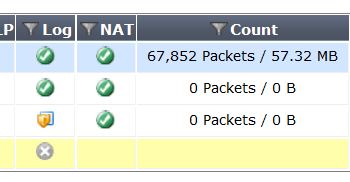
Test the policy configuration by accessing internet using the admin PC and another PC in the network. Monitor the counter changes in policies

Keep this going please, great job!
LikeLiked by 1 person
Hi there, all tthe time i used to check blog posts here
in the early hours in the break of day, as i love to find out more and more.
LikeLike