VMware vSphere 7.0 Series
PART 01: How To Install and Configure VMware ESXi 7.0
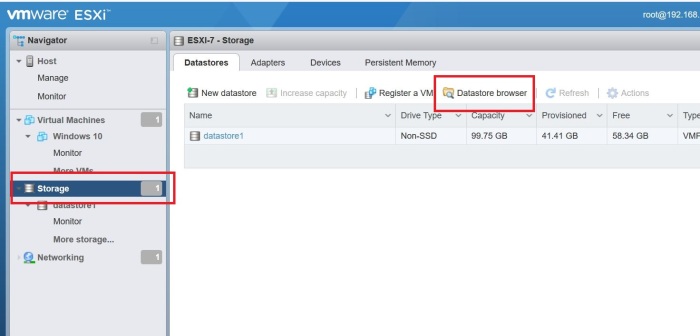
PART 02: Install Virtual Machines Using ESXi Web Client
PART 03: Install vCSA 7.0 (vCenter Server Appliance)
KEEP IN MIND
- For this tutorial, vCSA 7.0 installer is downloaded and run in a Windows 10 machine (supported Operating systems options are given below).
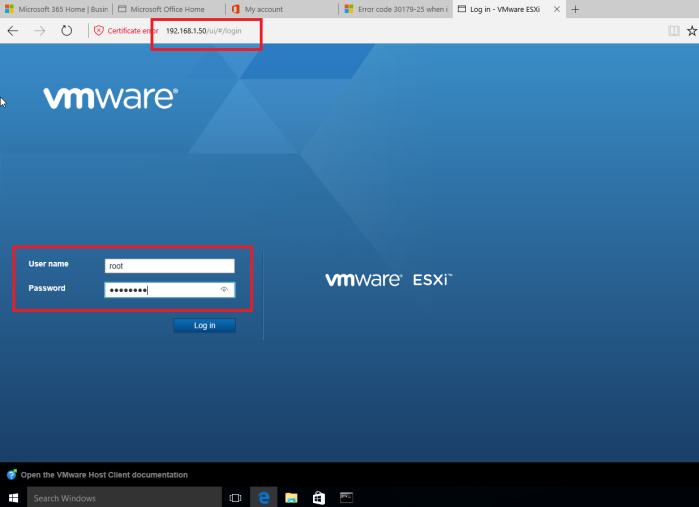
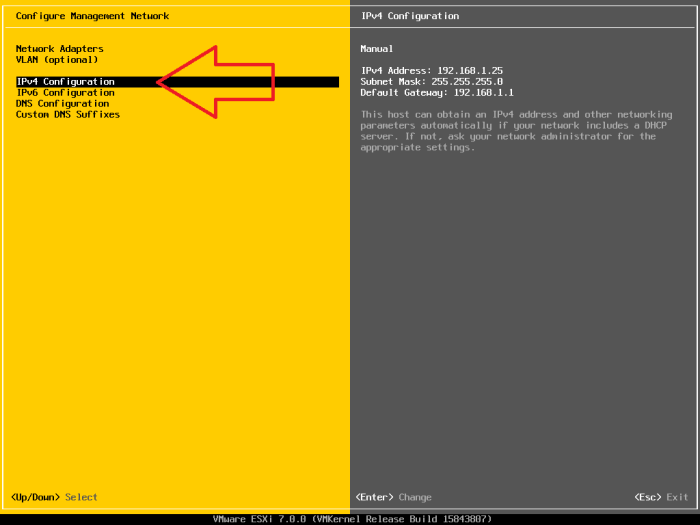
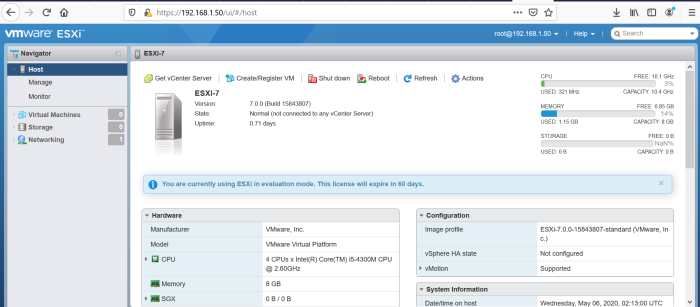
- The vCSA 7.0 is installed to ESXi host at 192.168.1.50 which was already installed previously (Link: https://techencyclopedia.wordpress.com/2020/05/06/how-to-install-and-configure-vmware-esxi-7-0-part-1-of-vsphere-7-0/).
- The vCSA 7.0 installer and the running ESXi host should be reachable via the network. In addition to that hardware and storage requirement should be supported to install vCSA 7.0.
- The vCSA 7.0 installation mainly comprised of two stages
- Stage 01 – Deploy vCenter Server
- Stage 02 – Setup vCenter Server
- vCenter Server appliance package contains Photon OS 3.0, The vSphere authentication services, PostgreSQL, VMware vSphere Lifecycle Manager Extension, VMware vCenter Lifecycle Manager
INTRODUCTION
vCenter Server
There are two vCenter Server versions you can deploy
- Windows vCenter Server (not included in vSphere 7.0)
- vCenter Server Appliance (vCSA) (What we are going to install now)
Windows vCenter Server
vCenter Server is the centralized management utility for VMware, and is used to manage virtual machines, multiple ESXi hosts, and all dependent components from a single centralized location. In vSphere 7.0, vCenter Server for Windows has been removed and support is not available.
vCenter Server Appliance (vCSA)
vCenter Server Appliance is introduced with the release of vSphere 5.0. With vSphere 6.5 and subsequently vSphere 6.5 Update 1, the vCSA has become the fundamental building block of a vSphere environment.
https://blogs.vmware.com/vsphere/2017/08/farewell-vcenter-server-windows.html
https://kb.vmware.com/s/article/2091273
vCenter Server vs vCenter Server Appliance (vCSA)
This is an excellent article which is focused about the difference between vCenter Server and vCenter Server Appliance (Please note that this is focused on VSphere 6.5)
https://www.definetomorrow.co.uk/blog/2018/4/23/why-use-the-vmware-vcenter-server-appliance-vcsa
vCenter Server
“Installing vCenter server has come a long way since the early days of building and configuring a Windows server. Most of the issues I recall were around databases, either running out of space when using SQL express or remembering to configure the ODBC settings before installing vCenter.
vCenter Server Appliance
This is a pre-configured virtual appliance running Linux (Project Photon OS) that has been optimised specifically for vCenter services. The appliance can be deployed in several different sizes (depending on the number of hosts or virtual machines you need to support) and uses an embedded vpostgres database. In terms of scale it can support anything up to 2000 hosts or 35000 virtual machines per appliance
This is another article that focus vSphere 5.5
http://www.vmwarearena.com/difference-between-vcenter-server/
Thin Provisioning vs Thick Provisioning
Thin Provisioning
A thin-provisioned virtual disk consumes only the space that it needs initially, and grows with time according to demand.
Thick Provisioning
Thick provisioning is a type of storage pre-allocation. With thick provisioning, the complete amount of virtual disk storage capacity is pre-allocated on the physical storage when the virtual disk is created. A thick-provisioned virtual disk consumes all the space allocated to it in the Datastore right from the start, so the space is unavailable for use by other virtual machines.
vCenter Server 7.0 installation and setup
Refer the full vCenter Server 7.0 Installation and Setup PDF guide from VMware
Click to access vsphere-vcenter-server-70-installation-guide.pdf
Services Installed with vCenter Server
These additional components are installed silently when you install vCenter Server. The components cannot be installed separately as they do not have their own installers.
PostgreSQL
A bundled version of the VMware distribution of PostgreSQL database for vSphere and vCloud Hybrid Services.
vSphere Client
The HTML5-based user interface that lets you connect to vCenter Server instances by using a Web browser. This vSphere Client replaces the Flexbased vSphere Web Client in vSphere 7.0.
vSphere ESXi Dump Collector
The vCenter Server support tool. You can configure ESXi to save the VMkernel memory to a network server, rather than to a disk, when the system encounters a critical failure. The vSphere ESXi Dump Collector collects such memory dumps over the network.
vSphere Auto Deploy
The vCenter Server support tool that can provision hundreds of physical hosts with ESXi software. You can specify the image to deploy and the hosts to provision with the image. Optionally, you can specify host profiles to apply to the hosts, and a vCenter Server location (folder or cluster) for each host.
VMware vSphere Lifecycle Manager Extension
vSphere Lifecycle Manager enables centralized, automated patch and version management for VMware vSphere and offers support for VMware ESXi hosts, virtual machines, and virtual appliances. The VMware vSphere Lifecycle Manager Extension is an optional service of the vCenter Server appliance
VMware vCenter Lifecycle Manager
The vCenter Lifecycle Manager automates the process of virtual machines and removing them from service at the appropriate time. vCenter Lifecycle Manger automatically places servers based on their location, organization, environment, service level, or performance levels. When a solution is found found for a set of criteria, the machine is automatically deployed.
Overview of the vCenter Server Appliance
The vCenter Server appliance is a pre-configured virtual machine that is optimized for running vCenter Server and the associated services.
The vCenter Server appliance package contains the following software:
- Photon OS 3.0
- The vSphere authentication services
- PostgreSQL
- VMware vSphere Lifecycle Manager Extension
- VMware vCenter Lifecycle Manager
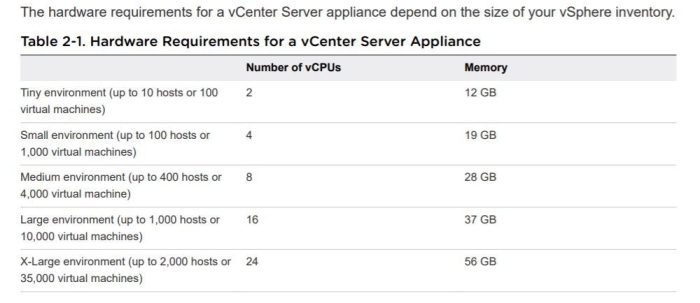
Hardware requirements for vCSA 7.0
Storage requirements for vCSA 7.0


System requirements for vCSA 7.0

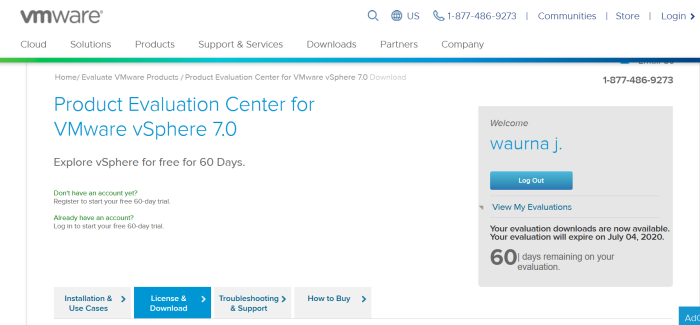
DOWNLOAD
Download vCSA 7.0 from https://www.vmware.com/

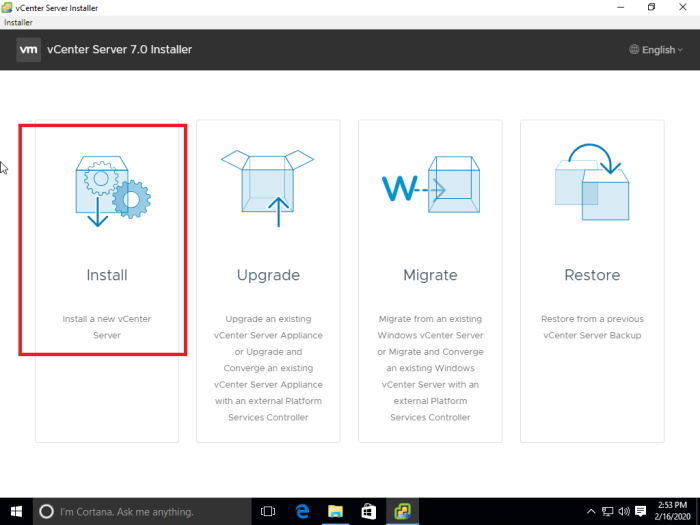
Double click on the downloaded installer to proceed

Four main options are available to choose from
- Install: Install a new vCenter server
- Upgrade: Upgrade the existing vCenter Server Appliance
- Migrate: Migrate from Windows vCenter Server to vCenter Server Appliance
- Restore: Restore vCenter Server from a backup
Choose the ‘install’ option
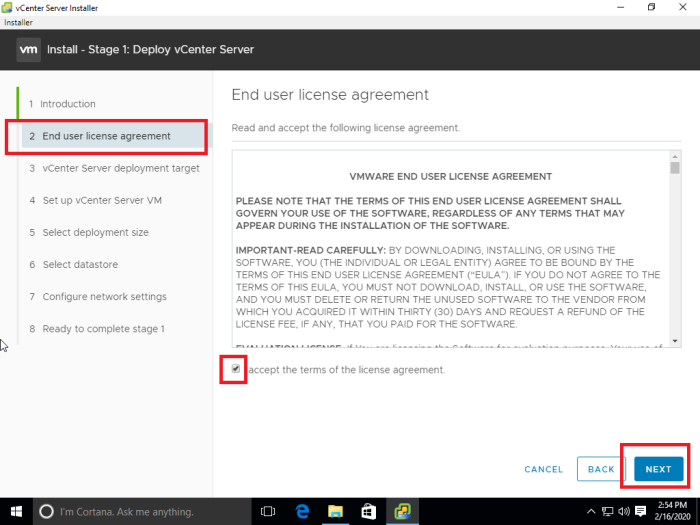
STAGE 01 – Deploy vCenter Server
Introduction will tell you about the process of 2 stages to deploy and setup vCenter Server.
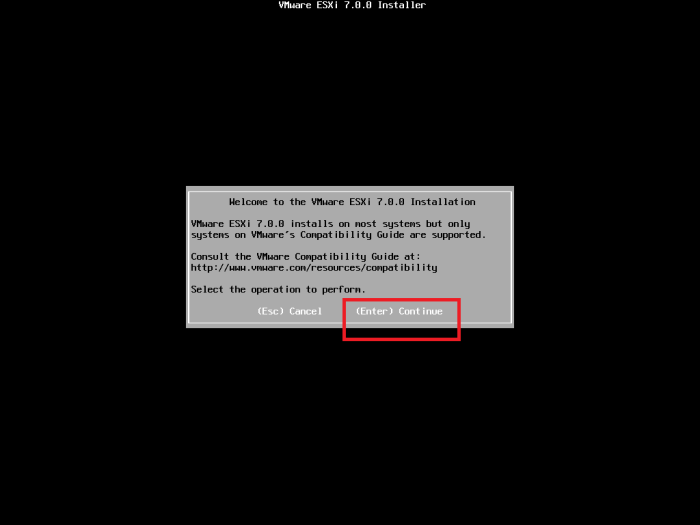
Press ‘Next’ to continue with the stage 1 of Deploy vCenter Server

Read the License Agreement and accept it
Specify the vCenter deployment target settings

Accept and continue

Set up the vCenter server virtual machine

Select the deployment size. Pay attention to the RAM needed for the variety of deployment sizes available.

Select the Datastore to install the vCenter Server 7.0
In this scenario thin provisioning is enabled

Configure the network setting for vCenter Server 7.0

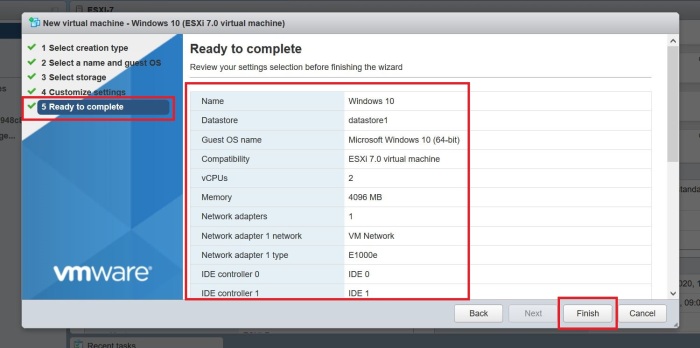
Review the settings and click ‘Finish’ to complete the installation

Wait until the stage 1 is completed

Stage 1 is completed and press ‘Continue’ to proceed to the stage 2.
If you exit, you can go to the link shown to setup the vCenter Server
https://192.168.1.100:5480

STAGE 02 – Setup vCenter Server
Configuration URL
https://192.168.1.100:5480
Press ‘Next’ to proceed to the stage 2: setup vCenter Server

You may log in if your session is expired using the username and password

For the time synchronization mode NTP servers should be given and this needs to be working and accurate or setup might not complete

New SSO domain is created

Configure the VMware’s Customer Experience Improvement Program (CEIP) that collects and analyzes information to improve products and services.

Review the settings and press ‘Finish’ to proceed

Wait until the set up finishes

Setup is completed and use the given link to log in to vCenter Server web client

Login to vCenter Server
login to the vCenter Server via vCSA Web Client
https://192.168.1.100:443

The vCenter Server Management summary will look like this

TROUBLESHOOT
- Make sure NTP server addresses are working properly when setting up the vCenter server. Else it might give errors during installation.