INTRODUCTION
System Center Configuration Manager (SCCM, also known as ConfigMgr), formerly Systems Management Server (SMS) is a systems management software product developed by Microsoft for managing large groups of computers running Windows NT, Windows Embedded, macOS (OS X), Linux or UNIX, as well as Windows Phone, Symbian, iOS and Android mobile operating systems. Configuration Manager provides remote control, patch management, software distribution, operating system deployment, network access protection and hardware and software inventory. -WIKI
Please Note That,
- In this scenario the domain controller is running on Server 2012 R2
- In this tutorial SQL server 2012 is installed locally (If you prefer you can do it on a remote server)
- SQL server 2012 should be updated to cumulative update 2 or higher to install SCCM
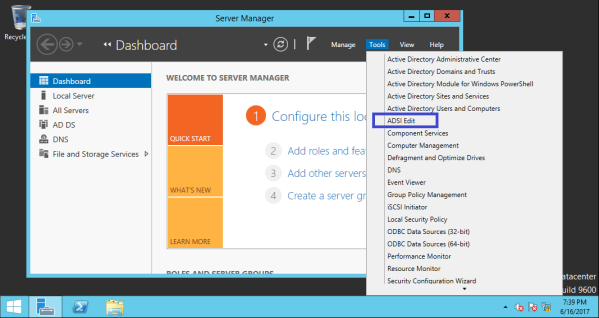
Firstly Create the System Management Container in Active Directory Domain Services
In the Domain controller click on Server Manager –> Tools –> ADSI Edit
Right Click and select Connect to…
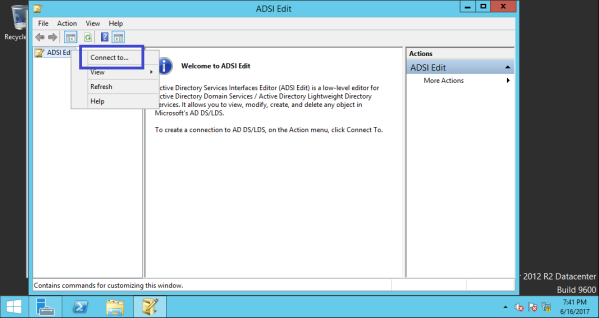
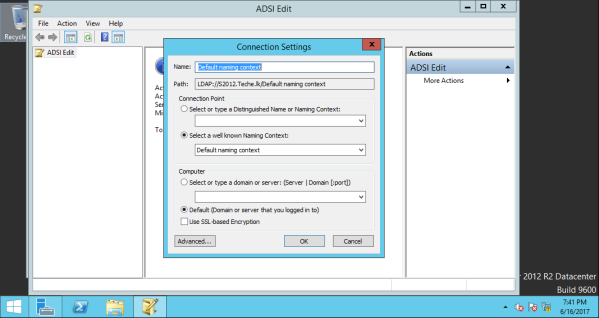
Keep the default
Expand Default Naming Context right click CN=System –> New –> Object

Select Container

Insert System Management as the value
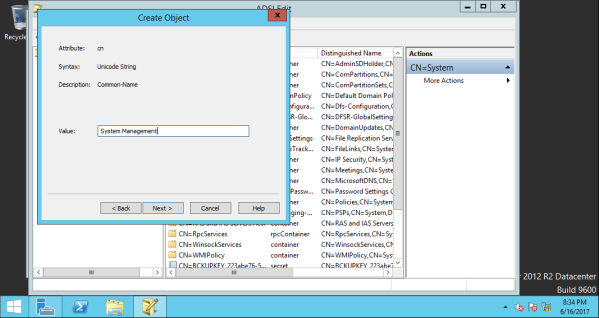
Click Finish

Give Permission to the System Management Container
After creating the system management container, we must grant the site server’s computer account the permissions that are required to publish site information to the container. The primary site server computer account must be granted Full Control permissions to the System Management container and all its child objects.
Go to Server Manager –>Tools –> Active Directory Users and Computers –> View — Advanced features
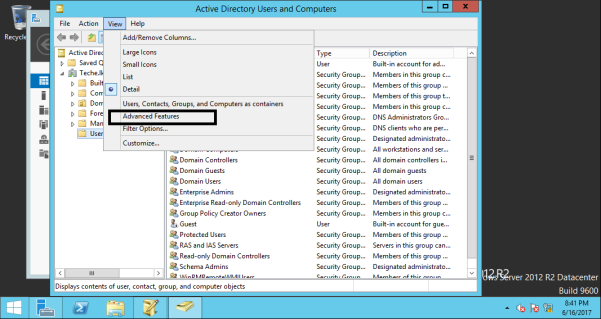
Expand System, right click System Management and click on Delegate Control.

Click Next

In the Delegation of Control Wizard dialog box Click on Add
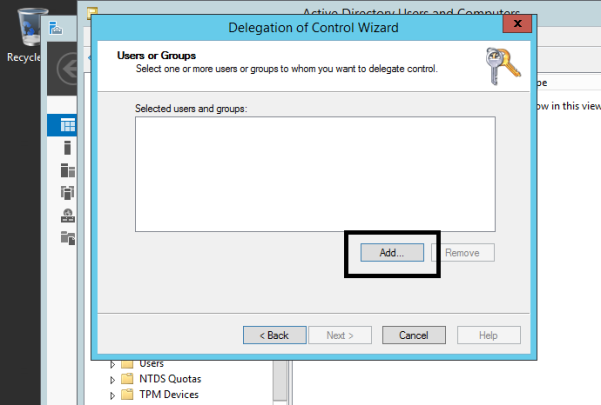
In the Select Users,Computers or Groups dialog box click on Object Types

Check for Computers as object types and click on OK

Insert the name of the primary site server computer account and click on OK.

Primary site server computer account name should be included in the Delegation of Control Wizard dialog box. Click Next

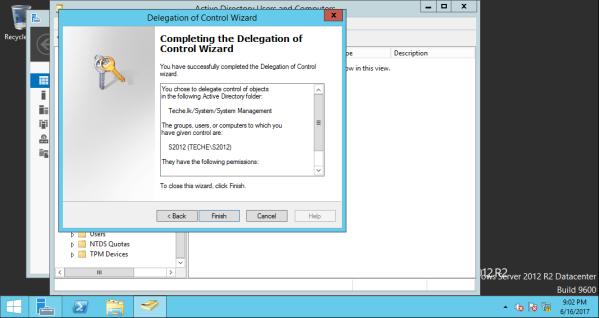
In the next window click on Create a custom task to delegate and click Next

Select This folder, existing objects in this folder and creation of new objects in this folder and click Next

Provide Full permission and Click Next

Finish
Extend the Active Directory schema for Configuration Manager
Download a copy of Microsoft System Center 2012 R2 Configuration Manager and Endpoint Protection.
https://www.microsoft.com/en-us/evalcenter/evaluate-system-center-2012-r2-configuration-manager-and-endpoint-protection
Find the file extadsch.exe and run as administrator

Open c:\ExtADSch.txt and verify schema is extended or not. You will notice a line stating “Successfully extended the Active Directory Schema”.

Install Pre-requisits For SCCM 2012 R2 |Microsoft System Center 2012 R2 Configuration Manager
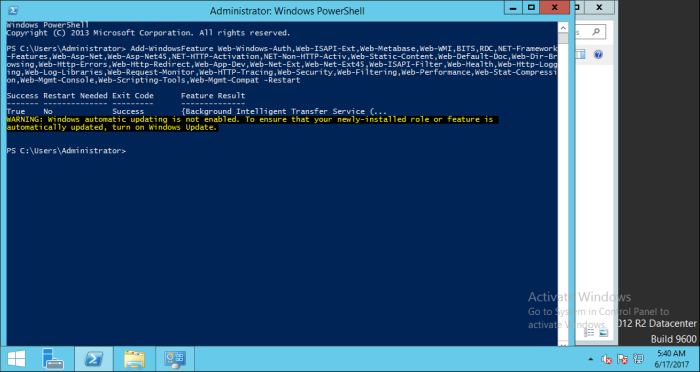
Run the PowerShell command
Add-WindowsFeature Web-Windows-Auth,Web-ISAPI-Ext,Web-Metabase,Web-WMI,BITS,RDC,NET-Framework-Features,Web-Asp-Net,Web-Asp-Net45,NET-HTTP-Activation,NET-Non-HTTP-Activ,Web-Static-Content,Web-Default-Doc,Web-Dir-Browsing,Web-Http-Errors,Web-Http-Redirect,Web-App-Dev,Web-Net-Ext,Web-Net-Ext45,Web-ISAPI-Filter,Web-Health,Web-Http-Logging,Web-Log-Libraries,Web-Request-Monitor,Web-HTTP-Tracing,Web-Security,Web-Filtering,Web-Performance,Web-Stat-Compression,Web-Mgmt-Console,Web-Scripting-Tools,Web-Mgmt-Compat -Restart
Execute following
C:\Windows\Microsoft.NET\Framework64\v4.0.30319\aspnet_regiis.exe -r

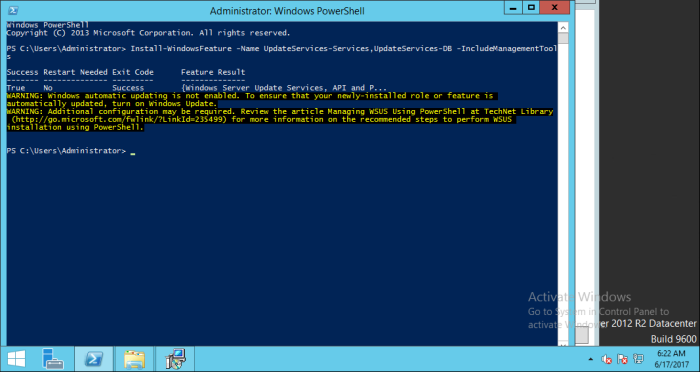
Install Windows Server Update Services
Install-WindowsFeature -Name UpdateServices-Services,UpdateServices-DB -IncludeManagementTools
Change the locations accordingly
cd “c:\Program Files\Update Services\Tools”

./wsusutil.exe postinstall CONTENT_DIR=C:\WSUS sql_instance_name=SQLSERVERNAME

[sql_instance_name=S2012 in this case]
Install User State Migration Tool (USMT)
Download: https://www.microsoft.com/en-us/download/confirmation.aspx?id=39982
Run as administrator
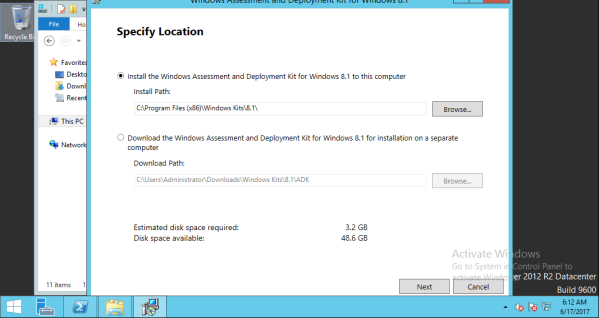
Specify Location
Accept License Agreement

Select the features to install. Make sure User State Migration Tool (USMT) is selected

Wait till the Installation finishes


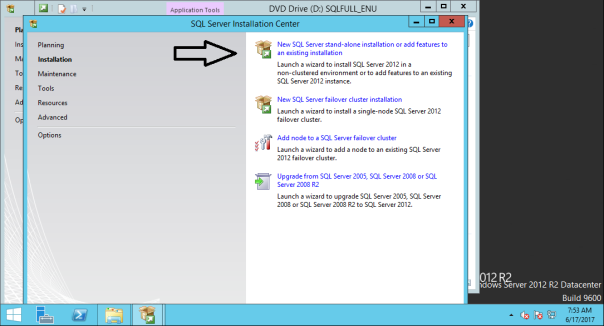
Install and Configure SQL Server
- In this tutorial SQL server 2012 is installed locally.
Run the Stand-alone Installation
Press OK

Accept the License Terms

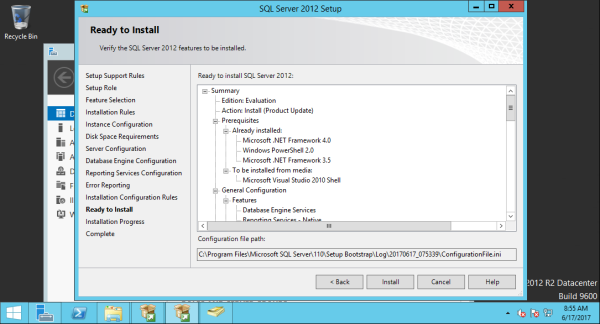
Update the product


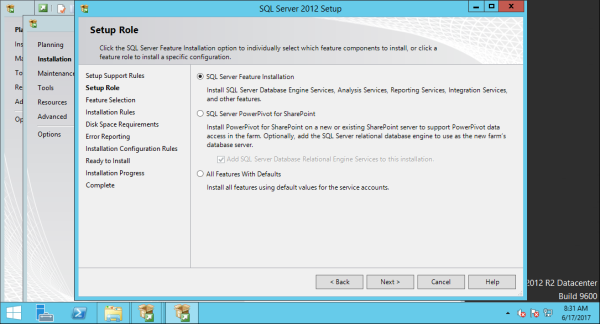
On the Feature Selection window, select
- Database Engine Services
- Reporting Services-Native
- Management Tools – Complete.

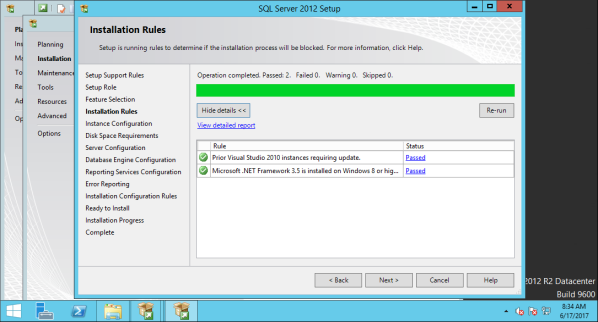
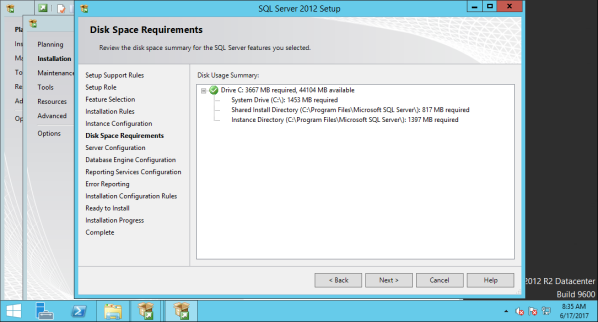
Press Next
Default Instance is selected

Press Next
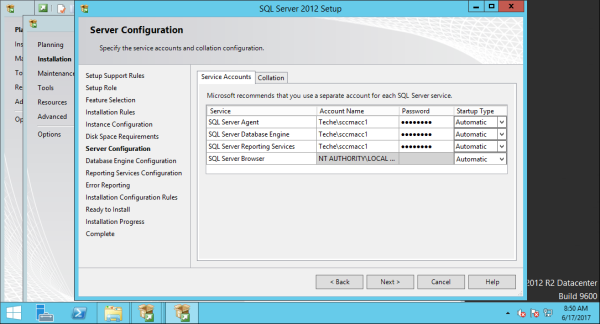
New Account is created Teche\sccmacc1
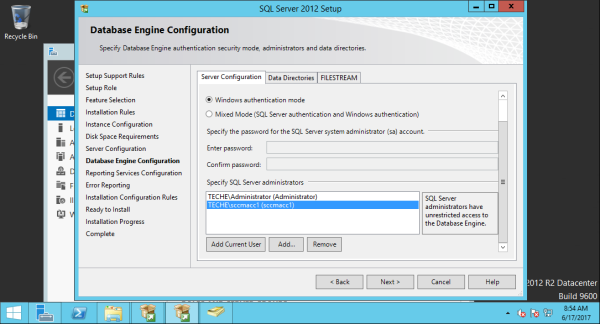
Windows Authentication mode is selected
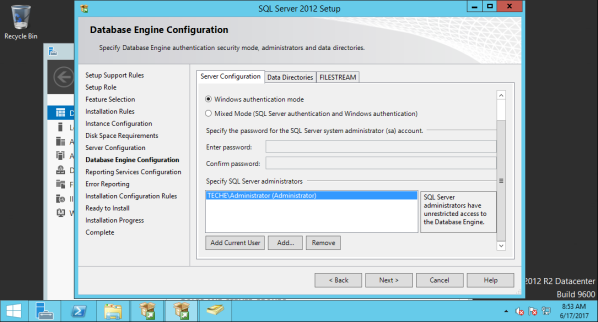
Add user Teche\sccmacc1
Install
Close

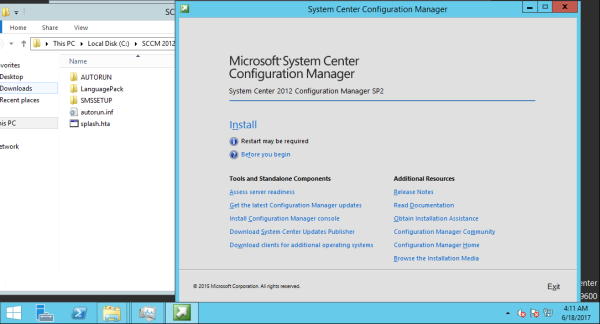
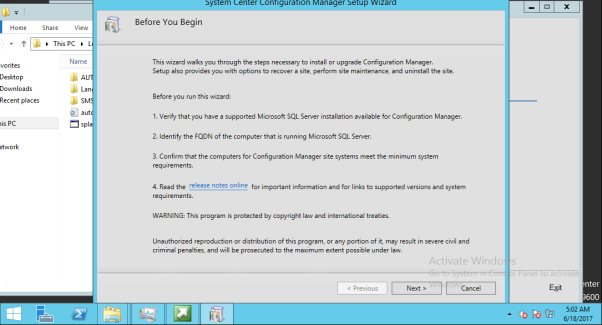
Install Microsoft System Center 2012 R2 Configuration Manager
Run splash.hta file in the installation folder
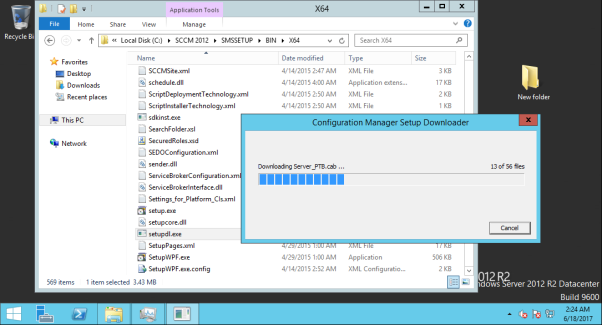
IF it is offline installation run setupdl.exe at SMSSETUP\BIN\X64\setupdl.exe instead to download the files.

Next
Select Install a Configuration Manager primary site

In this scenario Evaluation edition is installed
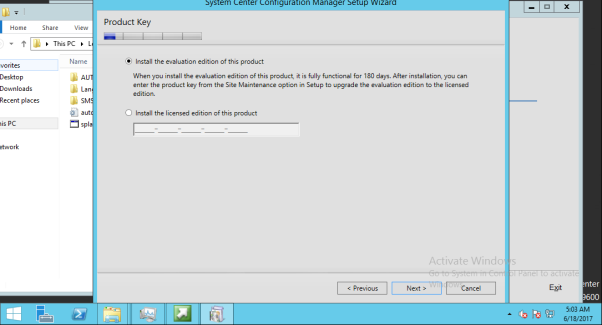
Accept the License terms

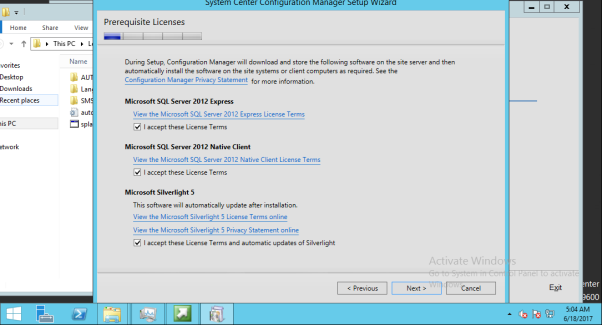
Accept Licenses for prerequisites
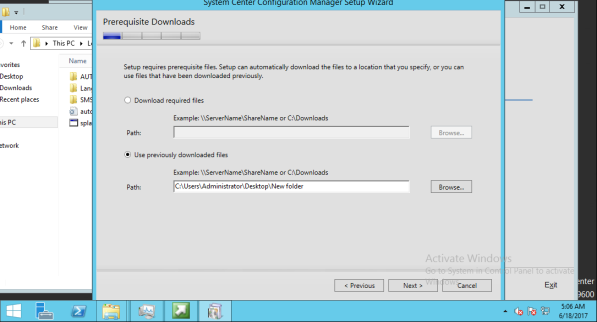
Since I have downloaded the files previously, path for the downloaded folder is given
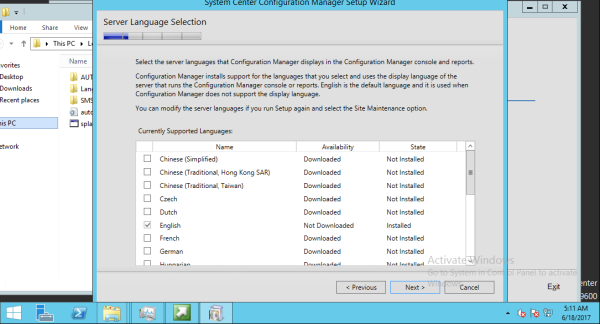
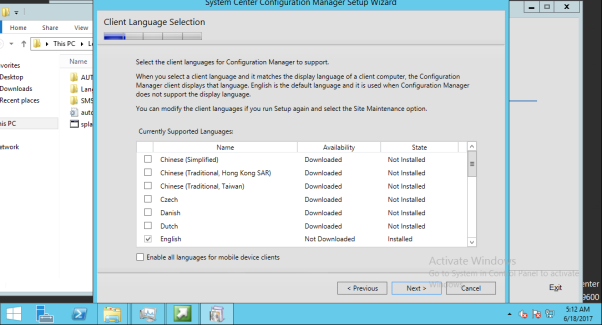
Select the appropriate Language
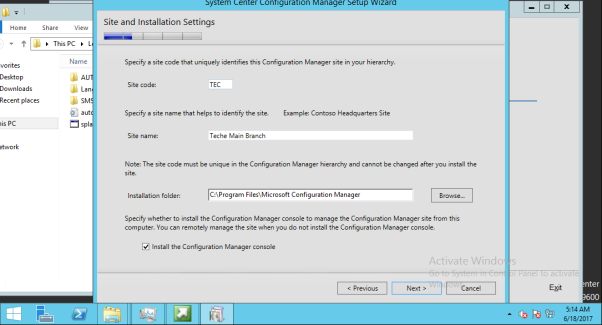
Insert the Site code and Site name
Install the primary site as a Stand-alone Site
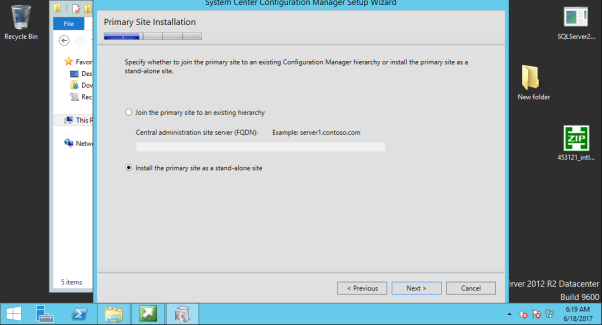
select YES to support to expand this site into hierarchy later

Include FQDN of the Database Server

Include the path to SQL Server data and log files

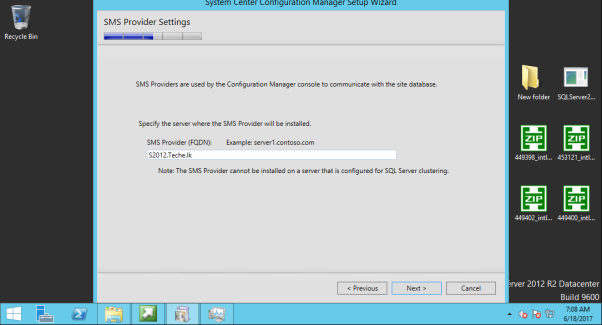
Insert SMS provider settings
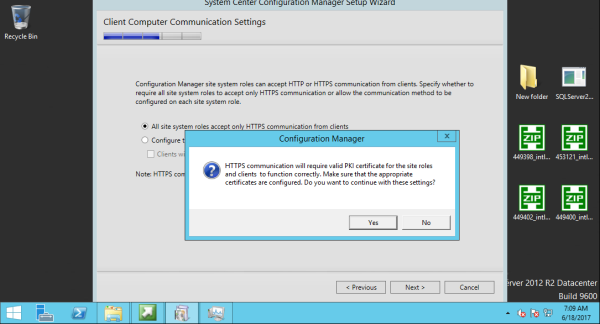
Client Computer Communication Settings

Press Yes to continue with the settings
Site system Roles should be selected for installation

If you want you can join the Customer Experience Program

Review the Settings Summary

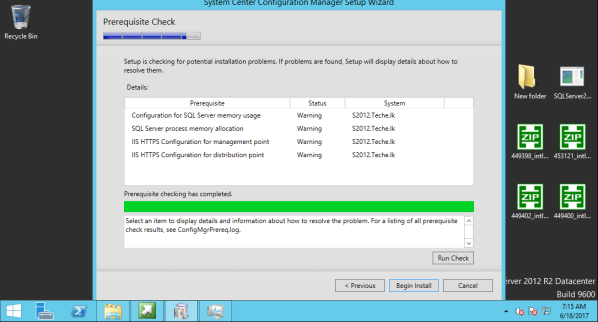
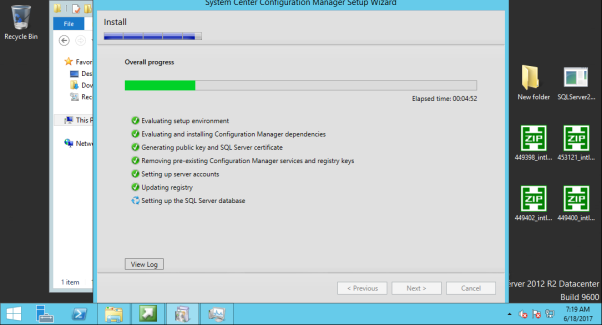
After reviewing Prerequisites press Begin Install
Close the system center configuration manager wizard

ERRORS
Update the Microsoft SQL server 2012

Open System Center Configuration Manager

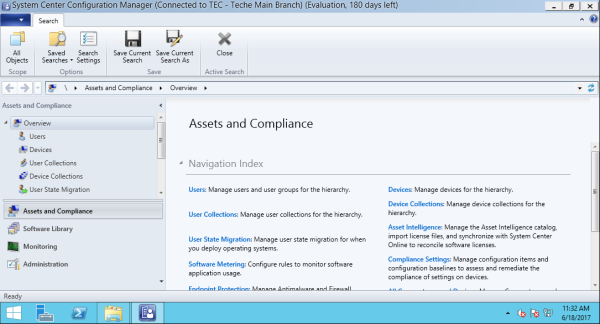
CONGRATULATIONS! YOU HAVE INSTALLED SCCM 2012
What do you possess?
Constructive criticism? Thoughtful comment? Derogatory remarks? Contradictory tutorials?
Please don’t be shy to contribute and be part of this wonderful journey. Remember always the adage “knowledge is ammunition”.